Installation is a breeze, after you’ve opened your headlight assembly. I used a Dermel tool to cut my lenses open. After trying the oven heating method (20 min @ 225*) for over 3 hours, I gave up. Only opening half of one lense. Damage to the H/L housing was becoming extensive. Lucky for me all of the damaged part of the housing is hidden under the fender. The “Permaseal” was as tough as nails, the housing was melting faster then the sealant. The Dermel method took about 20 min to complete the second lense. Cutting slowly and carefully, made a nice clean opening.
After that assembly is pretty easy. My H/L required no modification to install projector. Remove the halogen bulb shield, and bulb retainer clip. Install the projector. BEFORE sealing lense, mount H/L on car to check alignment. Install the wiring harness and ballast on car. I mounted my ballast underneath the H/L housing with “Locktite” double sided tape. (see edit below) Seal your lenses. I used 100% silicon sealant, it needs 24hrs to set and cure. Reinstall your H/Ls and adjust the aim.
Plan at least two days of work start to finish.
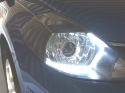
This mod was well worth the time and effort. The change in lighting is absolutely amazing. All car should have proper HID projectors.


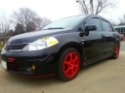
Before

After


Edit 3/22/2013 Found one of my ballast had come lose. Used metal strap as bracket.