*Meet07* 450-500 whp build!! Finally is here!!

Discuss the RB20, RB25 and RB26 series engines.
User avatar
Shocker
Posts: 2082
Joined: Sun Aug 01, 2004 2:40 pm
Car: 89 240sxHB rb26/30

Post

meet07 wrote:
walbro>40>044>100>rail.....

or could I do away ith the 100 micron filter??
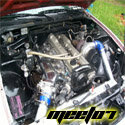
I ran into the same issue when installing my 040.. what I decided was to run them in parallel rather than series.. I was too worried that the 040 would just overwhelm the 255 and cause fuel pressure issues.. I opted to run a seperate line for the 040 and run dual feeds to my rail. My old setup was dual feeds into a Y fitting then single line into the stock rail. (I've got the rail still with a -6 fitting welded to it as well as the -6 adapter where the stock FPR goes if your interested)

Old setup in parallel is as follows:

tank >100 filter > 040 > Y >
(2 lines now 1) 40 filter > rail
tank> 255 > Y >

The 040 outside of the tank is loud as s*** (mines mounted in front of the rear wheel by the frame rail)... makes your car sound like a race car.. if you don't mind its not terrible but it is very loud and it surely lets you know its working,.


User avatar
meet07
Posts: 1189
Joined: Tue May 08, 2007 5:48 am
Car: 89 180sx rb25det
Location: North Carolina
Contact:

Post

Yeah i wont be using the stock rail b/c I wanna run top feeds. Never understood why nissan even made side feeds. guess they wanted to be difficult!

Parts are starting to arive in the mail!!

User avatar
Carl H
Posts: 5985
Joined: Mon Aug 04, 2003 4:09 am
Car: 1995 Nissan 240SX SE RB30DET

Post

most likely moved to side feeds as many (if not all) of their cars during that time period were on sidefeeds...purchase in bulk!

User avatar
meet07
Posts: 1189
Joined: Tue May 08, 2007 5:48 am
Car: 89 180sx rb25det
Location: North Carolina
Contact:

Post

This are the few parts that I got in the mail last week. 1st are the eagle rods from a fellow nico member:
Image
A friend came over to help me wire up this compressor. That was a learning experience. Also mounted the hose reel:
Image
Image
The 30 amp breaker wired into the box:
Image
Image

About to make a phone call tomorrow to trace other parts like my pistons...Process is slow but coming along

User avatar
yotik
Posts: 777
Joined: Sun Jul 08, 2007 5:14 pm
Car: 240sx Hatch

Post

This is somen else. Watching this thread... :yesnod

User avatar
meet07
Posts: 1189
Joined: Tue May 08, 2007 5:48 am
Car: 89 180sx rb25det
Location: North Carolina
Contact:

Post

Darius wrote:
meet07 wrote:Ahh eh? I already ordered the restrictors........I just hold on to them and install them when I do upgrade to the solid lifters which will hopefully be next year. Im only looking for 500whp this year. Ill probably upgrade the fuel system again when its needed. I think a single 044 and 80lb injectors will do justice this season.

Im looking for a inline fuel filter. Do I need to look for one thats above 40 microns??
I've been running a restrictor and blocked oil passage for several years and haven't had any ill effects. I'm not revving the crap out of it or tracking it either, so who knows?

Like I said before regarding the fuel system for E85, if you want to keep it in tank, your best option is the DW300. Otherwise the 044 will be tough to get in there. OR simply mount it externally.

I've seen guys run a coarser 40 micron stainless filter in front of a 100 micron paper filter because of the debris the ethanol can release from the inside of the tank. Check the filters every 3,000 miles or so to make sure they are clean.
Darius: do they make a 100 micron fuel filter that has a -6an inlet and outlet? And if so where can I find them?

Thanks

Pistons wont be here for like 2 weeks. Wiseco ran out of there 87mm piston sets for the RB's My running time has now been pushed back. Guess I need to start the fabricating.....

User avatar
meet07
Posts: 1189
Joined: Tue May 08, 2007 5:48 am
Car: 89 180sx rb25det
Location: North Carolina
Contact:

Post

Update:

Still waiting on my pistons to get here from Z1. Im a little aggravated. If the pistons where in stock my motor would have probably already been put back together by now.....but oh well. Since then I have purchased a few none fast mods. Ran across a pretty good deal locally that I couldnt pass up.

Aftermarket front bumper and some supermade head lights:
Image
Image
Right now I have my eyes set on a pair of HID fog lights from my favorite store in the world:

Havnt really had time to mess with the car since ive been so busy. I brought home the tools need to hack up the front bumper and this is what I came up with:
Image
Image
Image

custom fabing the radiator support is gonna have to wait till next week end. Sanding tomorrow.

User avatar
meet07
Posts: 1189
Joined: Tue May 08, 2007 5:48 am
Car: 89 180sx rb25det
Location: North Carolina
Contact:

Post

My piston kit finally arrived from the factory and all parts where dropped off at the machine shop on Tuesday. I went decided to go ahead and get a 5 angle valve job. The guys over at z1 told me that they see pretty good gains from a radius job but didnt feel like dishing out hte extra 100 bucks to get that done. Plus the machine shop I took the parts to dont do a radius. Im sure ill be happy with the 5 angle :-)

Piston kit:
Image
Image
Image
Image

Also found a pretty decent deal on some MT-90 so I scooped it up:
Image

Im pretty sure it hard to read but here is the drawings for the fabricated front end:
Image

And I started on the front end:
Image
Image
Image
Image

Had to do a little bit of triming of the front bumper to her the headlights squared up. There still not mounted yet but you get the idea. Still searching for some fogs:
Image
Image
Image

These are the lights I had my eyes on. Think ill probably do a set of angel eyes and a regular set of projectors/fogs, both sets with HID's:
Image
Image
Image

Ive missed a few days this week due to my daughter having a seizure on Monday so im not sure if Ill be making up hours on my day off(Saturday) or not but hopefully ill be bringing home the miller from work this weekend and finishing up the front end. Motor should be finished up at the machine shop on friday.

My clutch disc looks like it needs to be replaced after 3 years so im debating on wether to get a ACT 6 puck sprung or unsprung. Or maybe even a 4 puck but its undecided. I am also considering doing some extensive head work like port matching and polishing.....we will see.

But I have a few questions for people that have assembled a engines in the past....Do I need to file fit the compression rings for the pistons since the bore is bigger??

Coming along slowly but moving still!!

Darius
Posts: 4820
Joined: Sun Mar 02, 2003 9:48 am
Car: RB25DET S14 - 665 WHP (SOLD)
Location: Chicagoland

Post

Yes, you will need to file the compression rings on any motor you assemble to ensure the rings meet the gap specified by the ring manufacturer.

User avatar
meet07
Posts: 1189
Joined: Tue May 08, 2007 5:48 am
Car: 89 180sx rb25det
Location: North Carolina
Contact:

Post

I got alot accomplished over the weekend. Still not done yet but almost!

Getting everything squared up:
Image
Image
Image

Boxed in what ever you call this:
Image
Image
Had to even it out a bit:
Image
Image

Finally cut out the lower radiator support and braced the thing in the pic(wtf):
Image

Modded up the lower radiator support. Noticed what I did for the intercooler mounts:
Image
Image
Image
Image

User avatar
meet07
Posts: 1189
Joined: Tue May 08, 2007 5:48 am
Car: 89 180sx rb25det
Location: North Carolina
Contact:

Post

Intercooler bracket and front bumper bracket fabbed up:
Image
Image
Image
Image

With the bumper on:
Image
Image

Radiator sitting in place. Had to modify the hood a bit:
Image
Image

Modifyed the upper radiator support so it would be easier to remove. Will help when pulling this big engine from the s-chassis:
Image

Have to drop off a few thing to the machine shop tomorrow. May pick up the block and start it sometime this week. Still need to order:

-clutch disc
-injectors
-rail
-fuel pressure regulator(fuel lab or the a1000-6)
-fog lights
-paint job

pretty sure im missing a few things but its still coming along.

bmxarmy
Posts: 254
Joined: Tue Oct 12, 2010 7:27 pm
Car: 1961 AMC Rambler

Post

Nice build man, Its looking like it will be a handful to drive! keep having fun and keep up the updates!

nolan

l0nestar
Posts: 2251
Joined: Fri Mar 10, 2006 5:24 am
Car: 1993 Nissan 250SX
2004 Toyota Altezza
1963 Chevy Impala SS
Contact:

Post

Looking Good 'Meet!

Billspec
Posts: 10
Joined: Mon Apr 25, 2011 10:39 am
Car: Evo 9, RB25 S14, Few others
Location: FL

Post

You will need to file thering gap based on how much boost u plan on running, and the use ofthe engine. Since its not a daily, gap will be a bit loose.

Machine the block and head properly for the mls gasked, and diamond cut the cylinders, use a brushing bit also so the rings dont have to clean up the bore post honing to extend ring life. My .02

E85 for the win. I run an intank walboro and inline 044 and it works beautifully on my evo and s14. You are fine.

Goodluck!

User avatar
meet07
Posts: 1189
Joined: Tue May 08, 2007 5:48 am
Car: 89 180sx rb25det
Location: North Carolina
Contact:

Post

Billspec wrote:You will need to file thering gap based on how much boost u plan on running, and the use ofthe engine. Since its not a daily, gap will be a bit loose.

Machine the block and head properly for the mls gasked, and diamond cut the cylinders, use a brushing bit also so the rings dont have to clean up the bore post honing to extend ring life. My .02

E85 for the win. I run an intank walboro and inline 044 and it works beautifully on my evo and s14. You are fine.

Goodluck!
So if I file fit the rings loose that will free up some horsepower right? I've heard that serious racers do the same thing. And how do I figure out exactly what loose is? Right now my turbo is smaller than what I want but next year ill be upgrading to something bigger. I plan on running around 30psi or so in the future

Darius
Posts: 4820
Joined: Sun Mar 02, 2003 9:48 am
Car: RB25DET S14 - 665 WHP (SOLD)
Location: Chicagoland

Post

Take CP's installation instructions for instance:

http://www.cp-carrillo.com/LinkClick.as ... d&tabid=74

User avatar
S13_RB25
Posts: 556
Joined: Thu Jan 14, 2010 5:20 am
Car: A 240 but no RB yet!
Location: Burlington, NJ

Post

This thread is worth :fap: off to, lol. Coming along nicely bro!

User avatar
meet07
Posts: 1189
Joined: Tue May 08, 2007 5:48 am
Car: 89 180sx rb25det
Location: North Carolina
Contact:

Post

I went buy the machine shop today to drop off some valve stem seals and the crank collar that I almost forgot about. They will be done with all the machine work Tomorrow but I probably wont pick everything up until Friday. Guess Ill have something else to do this weekend.

Ordered a new clutch release bearing and ACT 6-puck sprung disc. Wanted a sprung 4 but wanted a little bit more life out of the setup.

Machine shop gave me some plastigauge and assembly lube for free. Also gave me a few pointers but Im curious about one thing. The 2.5 is now bored .040 over.......what is the displacement now?? And im getting a 1.1mm head gasket ,How big of a diffrence in compression will there be??

User avatar
meet07
Posts: 1189
Joined: Tue May 08, 2007 5:48 am
Car: 89 180sx rb25det
Location: North Carolina
Contact:

Post

Im looking for a alternative for the exhaust manifold hardware. I want to keep the factory studs but was curious about running some stainless steel lock washers and lock nuts?? I beleive a few of my washers and hardware is cracked or missing.

Any ideas?

l0nestar
Posts: 2251
Joined: Fri Mar 10, 2006 5:24 am
Car: 1993 Nissan 250SX
2004 Toyota Altezza
1963 Chevy Impala SS
Contact:

Post

ARP makes a set of studs and nuts that work. I would avoid running SS nuts on OE steel studs.

Either way, make sure to use high-temp (gold / copper coloured) anti-seize on the studs.

User avatar
meet07
Posts: 1189
Joined: Tue May 08, 2007 5:48 am
Car: 89 180sx rb25det
Location: North Carolina
Contact:

Post

Its been a while but I got the block and head back from the machine shop. They couldnt modify the crank to fit the crank collar but I found anouther machine shop that took care of me. Ill be picking up the crank this afternoon after picking up the little one. I primed and painted the block on mothers day before seeing Fast % with my moms and sister. Great Movie!!

Block:
Image
Image

Painted the block a gunmetal grey color. Didnt want it to be to dark, but I think it turned out great!
Image
Image

Also fabbed up my headlight brackets. Its coming along!
Image
Image
Image

does anyone know the plastigauge specs for the rod bearings and main bearings?
This is what I think is right according to the FSM:

Main: 0.028-0.046 and the limit: 0.090
Rods: 0.020-0.040 and the limit: 0.090

Then also wiseco has a application chart for the file fitting of the compression rings for the pistons. Im not sure which ones I should go with?

The chart shows:

-high performance street/strip: topring(.0045) 2nd ring(.0055)
-Street Moderate turbo/nitrous: top ring(.0050) 2nd ring(.0055)

Im suppose to take the bore size which is 87mm and multiply it by 25.4 to convert to inches which is 3.4 then im suppose to take that number and multiply it by the numbers on the chart depending on which application im building the motor for.

So if I was building it for high performance street/strip that would set the top ring gap at 0.017, 2nd ring gap at 0.018 and so on for the street turbo/nitrous

Ive heard of building a motor loose and didnt know if someone could shine some light on my build.

I havnt looked yet but whats the ARP rod bolt torque specs? Im gonna call them today but figured ill ask. Keeping it alive!!

User avatar
meet07
Posts: 1189
Joined: Tue May 08, 2007 5:48 am
Car: 89 180sx rb25det
Location: North Carolina
Contact:

Post

ACT 6 puck clutch disc ready for instal:
Image

User avatar
meet07
Posts: 1189
Joined: Tue May 08, 2007 5:48 am
Car: 89 180sx rb25det
Location: North Carolina
Contact:

Post

Picked up my crank yesterday morning from the machine shop. They milled down the old collar and slide the new one on. Drilled 2 holes, taped them and threaded the allen bolts in flush with some green lock-tite.

Got home last night and installed the bearings, plastigauged the crank and everything was with in limits :-)

I attempted to file fit the piston rings and was having a tough time. Filing was taking way to long so I was looking around the garage for something that would get the job done quicker. I attempted to use my 3 inch cuting wheel but the material that the ring is made of is a little to strong for the wheel. Then I decided to try one of my grinding stones( the round one on the sides and flat on the top) Well that pretty much did the job to well. I took off to much material...boooo!! Ive priced anouther ring set kit(8700XX) at $30 bucks which ill be ordering today.


Figured ok, I can at least install the 5 pistons/rods into the block and do the last one when I get the ring set. Opened up my ring compressing clamp that I purchased from Autozone and wrapped the band around the rings after positioning the rings according to the Wiseco installation manual. About 45 minutes later still cant get the freaking piston into cylinder number 1.........Then what do you know...the clamp breaks!! Im not sure if the clamp is junk or if my frustration caused me to break the clamp but this junk sure is aggravating!!

hopefully the head gasket arrives today like I was told...

93slicktoptt
Posts: 217
Joined: Sun Jan 18, 2009 3:58 pm
Car: 93 300zx slicktop tt, 91 240SX COUPE, 95 hardbody slammed daily

Post

hey this is jack, your build is looking good! we will have to keep in touch on our builds man. GOODLUCK! Glad the crank collar worked out good for you.

User avatar
meet07
Posts: 1189
Joined: Tue May 08, 2007 5:48 am
Car: 89 180sx rb25det
Location: North Carolina
Contact:

Post

I have a few more parts thanks to Coolwhip!
Image
Image

Decided to tamper with the engine bay over the week end. I took some scotch brite to her and filled in all the un used holes with some liquid metal stuff that I got from good old Advanced....
Image
Image
Image
Image
Image

Got a little bored so I decided to start adding things to the engine like the oil and water pumps and fittings:
Image

Some how this stud came up missing. You know how it is.....you take yourstuff to the machine shop, they remove something and forget to give them back to ya. this always happen to me. Im gonna have to take this stud and get a little bit longer stud.....bummer!!
Image

Since I only mocked up on piston ring the right way I decided to go ahead and install it into the block. Ive already plastigaged the rod bearings so im good:
Image

Found that the oil pickup had a tear in the screen. dont know how that happens but looks like im gonna have to spend $40 bucks on a new one......
Image

Wont be using this anymore to file fit the compression rings. My boy is gonna loan me the right tool!! YES!!
Image

And look at what I found at the local junk yard on Sunday!
Image
Image
Image
Image

I have twins! Should I replace them with the cheap ebay turbo...lol
Image

the replacement rings should be here today. Also went ahead and ordered my fuel setup. Looks like ill be sticking with 93 for now since the injectors im getting wont be large enough =(

User avatar
meet07
Posts: 1189
Joined: Tue May 08, 2007 5:48 am
Car: 89 180sx rb25det
Location: North Carolina
Contact:

Post

93slicktoptt wrote:hey this is jack, your build is looking good! we will have to keep in touch on our builds man. GOODLUCK! Glad the crank collar worked out good for you.

Yeah thanks again. You always pick up the phone when I call....lol Hope to be rolling soon!

User avatar
meet07
Posts: 1189
Joined: Tue May 08, 2007 5:48 am
Car: 89 180sx rb25det
Location: North Carolina
Contact:

Post

Carl H wrote:the weird abrasion on the pistons and cracked ringlands scream detonation to me...you may want to find a reputable tuner for this next go around.
Out of all honesty....who do you recomend? I was considering TDC but not wanting to drive a long distance everytime I have a little hick up.....

Have you heard anything about James over at DG Performance??

User avatar
meet07
Posts: 1189
Joined: Tue May 08, 2007 5:48 am
Car: 89 180sx rb25det
Location: North Carolina
Contact:

Post

Darius wrote:
meet07 wrote:Ahh eh? I already ordered the restrictors........I just hold on to them and install them when I do upgrade to the solid lifters which will hopefully be next year. Im only looking for 500whp this year. Ill probably upgrade the fuel system again when its needed. I think a single 044 and 80lb injectors will do justice this season.

Im looking for a inline fuel filter. Do I need to look for one thats above 40 microns??
I've been running a restrictor and blocked oil passage for several years and haven't had any ill effects. I'm not revving the crap out of it or tracking it either, so who knows?

Like I said before regarding the fuel system for E85, if you want to keep it in tank, your best option is the DW300. Otherwise the 044 will be tough to get in there. OR simply mount it externally.

I've seen guys run a coarser 40 micron stainless filter in front of a 100 micron paper filter because of the debris the ethanol can release from the inside of the tank. Check the filters every 3,000 miles or so to make sure they are clean.
Hey Darius....my 2 packs of tomei orfices arrived and I noticed that there is 3 restrictors in the block. What should I do with them? Ive heard that I wont need them, That I can use 2 and block one off, Use 2 and leave the last alone.....what is the true facts on this oil collecting in the head story? I really dont want to much blow by....

julio
Posts: 374
Joined: Fri Oct 06, 2006 1:18 pm
Car: RB26 AWD converted S14

Post

meet07 wrote:Some how this stud came up missing. You know how it is.....you take yourstuff to the machine shop, they remove something and forget to give them back to ya. this always happen to me. Im gonna have to take this stud and get a little bit longer stud.....bummer!!
Image
Have you researched anything about that stud? I've read too many horror stories about them breaking and resultant carnage from both old ones and new ones alike. I replaced both the stud and bolt with class 12.9 units. Many people opt to buy the Z31 one stud as they are easy to order from a dealer, but I'm still weary after online stories.

User avatar
meet07
Posts: 1189
Joined: Tue May 08, 2007 5:48 am
Car: 89 180sx rb25det
Location: North Carolina
Contact:

Post

julio wrote:
meet07 wrote:Some how this stud came up missing. You know how it is.....you take yourstuff to the machine shop, they remove something and forget to give them back to ya. this always happen to me. Im gonna have to take this stud and get a little bit longer stud.....bummer!!
Image
Have you researched anything about that stud? I've read too many horror stories about them breaking and resultant carnage from both old ones and new ones alike. I replaced both the stud and bolt with class 12.9 units. Many people opt to buy the Z31 one stud as they are easy to order from a dealer, but I'm still weary after online stories.
I havnt heard anything like that?? I mean does it really have that much tension on it?? The studs is pretty thick and im sure it would take alot of pressure for that thing to break. But I did consider replacing it with a stainless stud and lock washer.... What you think?


Return to “RB20DET / RB25DET / RB26DETT Forum”