G50 Rear Strut Replacement - Job Pictures

A Q45 forum / Cima forum for the President of Infiniti's lineup. Brought to you by Infiniti Parts USA, your OEM source for Q45 parts!
OwnerCS
Posts: 1771
Joined: Thu May 27, 2010 4:34 am

Post

This past weekend, in spite of all of the storms and torrential rain, I was able to replace the 20 year old rear OEM struts with some Tokico Blues. During the first strut replacement, I learned about removing the upper link. Pictures from the job are provided below. Also refer to FSM section RA.PDF pages 15 through 17 before starting this job.

1) The rear strut towers are located behind the trunk back panel. Black rubber caps cover the strut bolts as shown below.
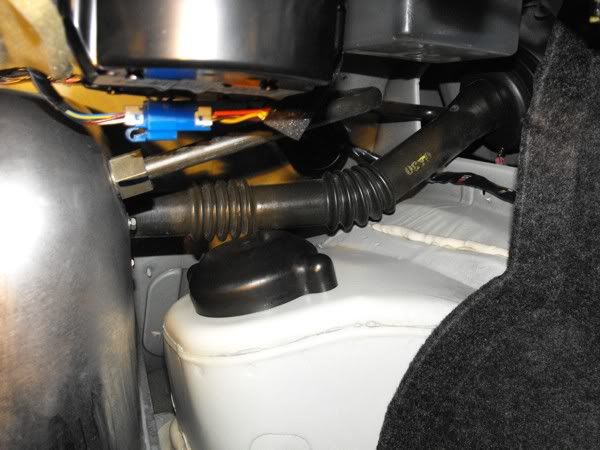
Image

2) Remove the cap and bolts so the strut can be lowered for removal.
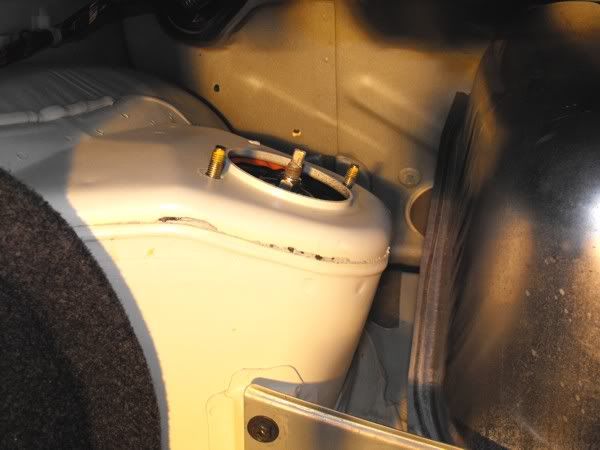
Image

3) Removing the upper link, as shown removed (below) with the yellow > pointers, will allow the lower arm to swing down and out of the way -- so the complete strut/spring assembly can be lowered for removal.
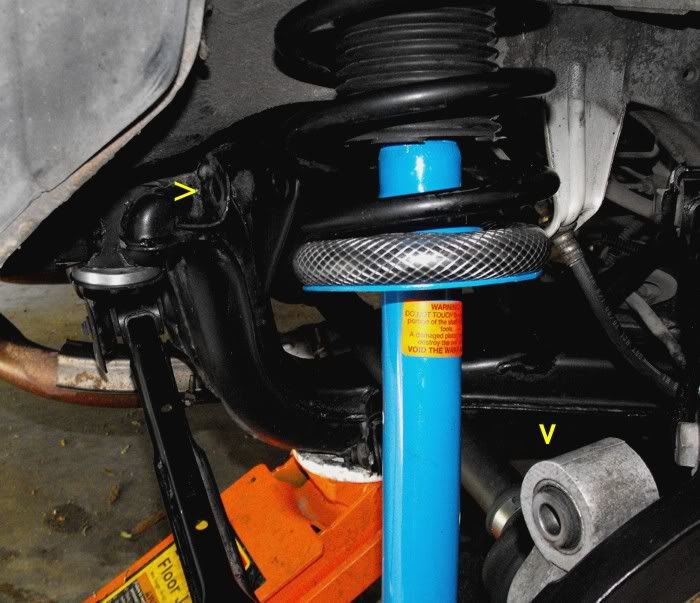
Image

4) With the upper link removed, the new strut can be set into position. It was good to have a helper inside the trunk to guide the strut bolts into the strut tower holes and start the nuts. I didn’t completely torque the struts to the towers until after I had the strut and upper link fully tightened. See FSM section RA.PDF (page 15 of 22) for a diagram and torque spec references. Note: a full wheel alignment will occur after the front struts and other suspension bushings are replaced.
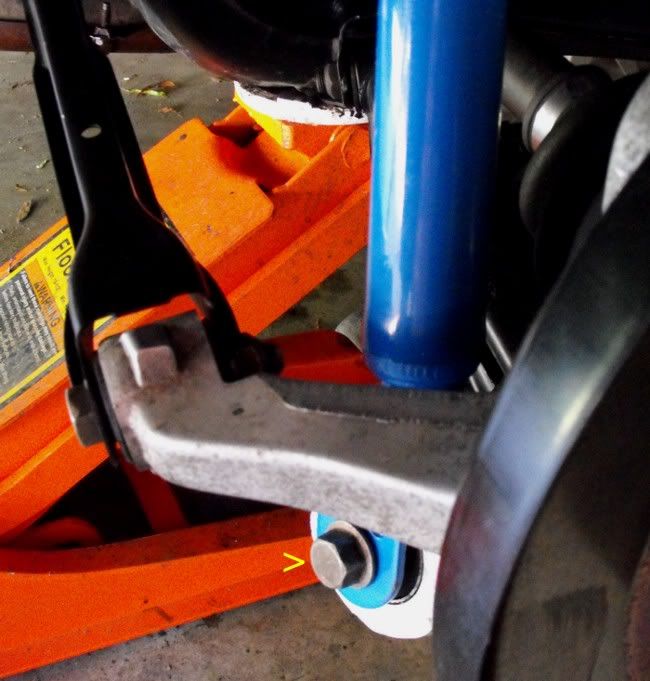
Image

5) The plastic spring to strut insulator tubes had become brittle and started crumbling when I removed the springs. Since I didn’t want to put the spring directly against the strut metal, I decided to try some poly-braded ½ inch I.D. hose to use for an insulator. While not as hard as the original plastic insulator material, the poly-braded tubing seems to be significantly harder than the upper rubber spring seat. Time will tell how this poly-braded tubing will hold up between the spring and the strut.

The yellow > pointers show the upper link installed with bolts.
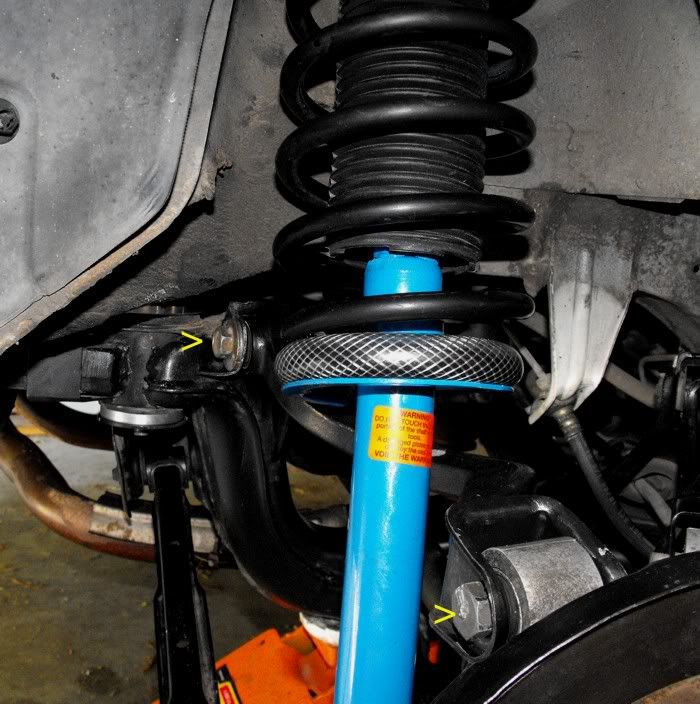
Image

6) Strut boots, bumpers, bushings, and spring seats (all rubber items) were replaced with new OEM parts.
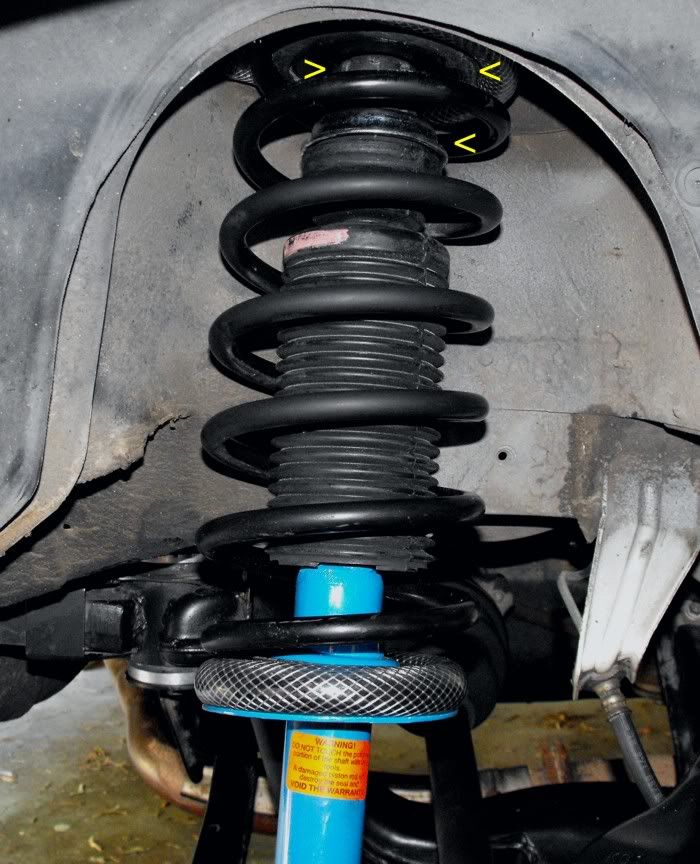
Image

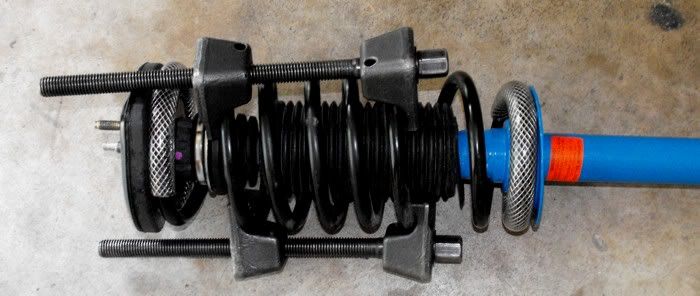
7) The spring compression tool was borrowed (deposit refund option) from Advance Auto Parts. Many auto parts stores provide coil spring compression kits as a rental or a loaner with security deposit.
Image

A posting for front strut replacement is at the following link.

g50-front-strut-replacement-job-pictures-t532093.html


OwnerCS
Posts: 1771
Joined: Thu May 27, 2010 4:34 am

Post

Updated pictures with the strut tails now pointing inward and a picture of the spring compression tool. Tornadoes were circling aloft on the original installation weekend, so that caused me to rush through the initial job and pictures.

As part of the sub-frame spacer installation job, I changed the strut direction to follow the FSM example.

dssturbo1
Posts: 2
Joined: Sat Mar 26, 2011 10:57 am
Car: 1993 Infiniti Q45

Post

nice job cs.

did you replace the lower strut mount bushings. if so do they come out easy or need to be pressed out?

can you be more specific in what other suspension bushings you replaced in the rear/front.

thanks.

OwnerCS
Posts: 1771
Joined: Thu May 27, 2010 4:34 am

Post

The only actual bushings that I replaced (installed) are for the sway bar upgrade. I installed the 20mm sway bar from a Q45a on the rear. I plan to do the front 28mm upgrade in the next couple of weekends. I used a combination of OEM bar bushings with Energy Suspension end links.

I may need to shorten the collars to adjust slightly.. I used two floor jacks (under lower arms) to raise up each side to simulate having the wheels on.. I saw some members refer to these end links in other posts.

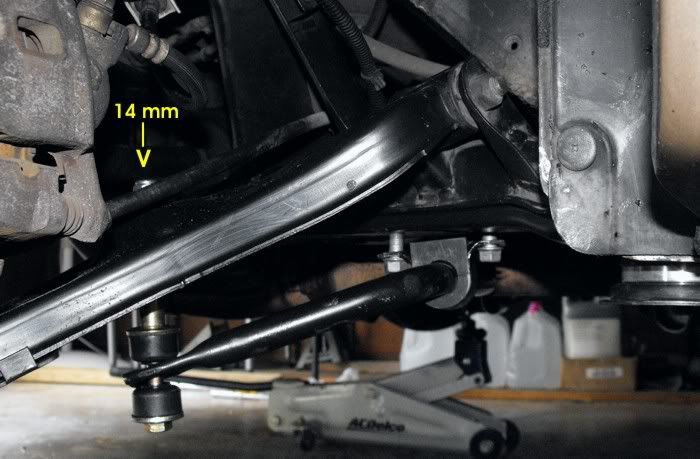
Here's an installation trick to get the end links started. I installed the bar and link without the top bushing and washer to get everything lined up into position. I used the 14mm nut to hold the link into position.

Image

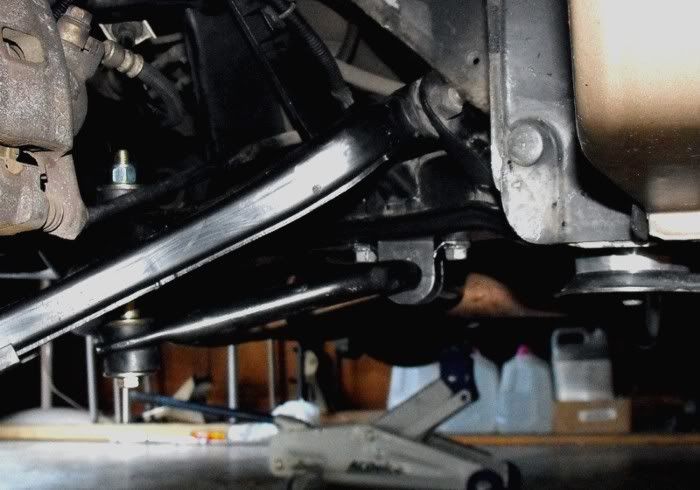
Next I used two floor jacks to push up the bushing bolt from the bottom to clear the control arm. Once I had enough clearance, I removed the nut, then installed the top bushing, washer, and nut as shown in the picture (below) and tightened it up. The bar bushings were tightened before I did the end link tightening.

I will check everything again next weekend with wheels on for a second fit adjustment.

The only poly sway bar bushings that I used are for the rear end links. Though I do have poly bushings for the power steering rack.

You can see the other floor jack in the picture under the driver side end link to keep both sides balanced during the installation. By the time I made the picture below, I had already removed the jack from the passenger side.

Image
Last edited by OwnerCS on Sat May 21, 2011 4:38 pm, edited 2 times in total.

User avatar
Q451990
Moderator
Posts: 11513
Joined: Tue Jul 23, 2002 8:21 am
Car: 1990 Q45 - 118K, 2022 Toyota 4 Runner, 2004 Frontier M/T - 108K, 2012 Xterra (Mom's), 2023 Rogue (Inlaws)
Location: Columbia, SC
Contact:

Post

Wow that bar looks a lot cleaner than when I boxed it up - did you paint it?
:D

It's scary that I recognize the three gallon jugs of distilled water from WalMart in the background as "normal" garage accessories.

Heath

OwnerCS
Posts: 1771
Joined: Thu May 27, 2010 4:34 am

Post

Q451990 wrote:Wow that bar looks a lot cleaner than when I boxed it up - did you paint it?
:D

It's scary that I recognize the three gallon jugs of distilled water from WalMart in the background as "normal" garage accessories.

Heath
Howdy Heath! I appreciate your help finding that Q45a bar. It made it all possible.

I followed some recommendations from Q45Tech and sanded the bushing surface areas until smooth like new. Then I took forum recommendations and used a self-etching primer followed by three coats of Rust Oleum black 500 degree engine paint as it is supposed to be oil and fuel resistant.

After the paint dried for handling, I put the bars in the workshop to let them cure for a couple of weeks before installation. The paint needs to be fully cured (depends on paint) before installation so it will hold up next to the bushing.

Ahh you see my distilled water stash. I think it did come from WM. I learned about distilled water from Qship96.

Now you see how smart I’m getting since I started hanging with you guys here on NICO? I never learned anything like this from the Honda clubs.. LOL :gapteeth:


Return to “Q45 Forum / Cima Forum”