What Broadfield Has Been Up To......

General discussion forum about the 240sx, and a great place to introduce yourself to the board!
User avatar
Broadfield
Posts: 2681
Joined: Tue Sep 05, 2006 2:57 pm
Car: 1992 240sx
Location: Normal, IL
Contact:

Post

I apologize for not getting on here more. My life is just too busy lately... which means I'm also too busy to get much done on my car. But I'm chewing away at it an hour at a time it seems. This update is from early July that I forgot to post here. Then I'll post another update that will get us up-to-date.

UPDATE PART 1:

I had two large cutouts that needed sheet metal welded in. One on the driver's side where metal was cut out long ago from the previous owner and one on the passenger side where there were several medium-sized holes that I simply cut into one large one. The passenger side had a large hole from the intercooler piping, windshield washer reservoir filler neck and smaller holes from where I removed the battery tray. So I figured it would be easier to just weld up one large piece of sheet metal. Now keep in mind I have never welded in my life before all of this, so this is obviously my first attempt at welding in sheet metal or working with shaping sheet metal whatsoever. So hopefully no expert welders come in here and bash my work. Although I appreciate constructive criticism. I taped down a chunk of poster board so I could make quick templates.

Image

Image

I then traced the backside to get the shape I needed:

Image

Image

I cut those out then simply traced them onto some 22ga sheet metal:

Image

I made short work of cutting those out with an air nibbler, then test fit them in the bay:

Image

Image

Tacked it up as I hammered it into place, then welded each one up:

Image

Image

I already got most of the grinding done so it's about time for some filler.


UPDATE PART 2:

I never run vanity plates, but I thought I would run some this time around. I feel like such a Damon(Greg) Young for posting a new set of license plates as an "update", but what the heck:):

Image

UPDATE PART 3:

I'm also struggling coming up with the dough to finish this project as far as the parts I need, but have come to the realization that it's most likely not going to be done before the end of this year. Time and money are both factors. It doesn't help that I keep buying tools and whatnot, but it's an addiction for me. My tools were overflowing in my garage, so I broke down and bought a small Snap-On 2-bay. It now makes it much more desirable to go out in the hot garage and work. I'm way to spoiled at work with my massive amount of tools there, so I'm trying to build a collection at home... it never hurts to have tools:

Image

Image

Image
Image

Image

Image

Image


User avatar
Broadfield
Posts: 2681
Joined: Tue Sep 05, 2006 2:57 pm
Car: 1992 240sx
Location: Normal, IL
Contact:

Post

svairman wrote:You can't use a relay, or is that just a pioneer thing?
You have three choices:

1) Use a TR-7
2) Wire the foot brake and hand brake like they are meant to be... but you will not be able to watch video in motion.
3) Wire the foot brake, then use a toggle switch as the e-brake. In this configuration, every time you turn the radio on you would need to depress the foot brake and flip the toggle switch on-off-on... then release your foot from the brake.

User avatar
badbob2121
Posts: 1989
Joined: Sat Jan 16, 2010 9:23 am
Car: 92 S13 Hatch ELLIS JUAN, 12 Mustang GT RTR
Location: St. Louis

Post

that snap on chest is sweet, im the same way about my tools being organized...

User avatar
Broadfield
Posts: 2681
Joined: Tue Sep 05, 2006 2:57 pm
Car: 1992 240sx
Location: Normal, IL
Contact:

Post

Getting close to paint time on the bay. A good friend of mine and I are going to paint it around the end of September. So at least I have a timeline that I'm working with. He's the painter at the body shop that several of my friends work at and that I always take my car to for paint work. He's kind enough to paint it there on the side, so I'm only in it for materials.

As for an update, I decided to fiberglass the front areas behind the headlight buckets. It was pretty wavy and this would allow me to avoid having really thick filler in those areas.

Image

All of the welds are ground down, body filled, sanded and then etch primed on the bare metal left over.

Image

Image

Image

Image

I have kind of been doing an area at a time then etch priming it so it wouldn't start to get surface rust. Since I don't get much time to work on it, the bare metal was barely getting surface rust after sitting untouched for a week. So this method was a decent solution. The only thing left is to block the filler in the areas in front of the wheel tubs, then skim coat that... block it down to 320 grit, then etch primer the bare metal in that area. Then it will be primer time.

Image

User avatar
Razi
Posts: 28681
Joined: Sun Dec 31, 2006 9:52 am
Car: Moo

Post

Looking awesome.

User avatar
240sxcl50
Posts: 351
Joined: Sun Jul 18, 2010 8:50 pm
Car: 95 s14
Location: pensylvania

Post

Looks soo good. You truly are an inspiration to all sir.

User avatar
homeslicej2
Posts: 5450
Joined: Mon Jan 15, 2007 5:46 pm
Car: 1990 S13 SR'd hatch

Post

Looks good. I enjoy updates on this thing and can't wait to see the engine install and finished product.

User avatar
240TKE128
Posts: 230
Joined: Fri Feb 06, 2009 9:05 am
Car: 1990 240sx HB

2011 subaru outback 2.5i limited
Location: Asheville, NC
Contact:

Post

Lots of Detail and time taking on this. Great Job man

User avatar
OM3GA
Posts: 3041
Joined: Fri Apr 14, 2006 11:41 pm
Car: A Sexy Mobile, 1993 Nissan 240sx 180sx Hatcher

Post

SWEET :naughty:

the a3k
Posts: 1198
Joined: Fri Apr 20, 2007 10:09 am
Car: 1996 Black S14 RB25
Location: North Jersey

Post

i want all your tools. a lot of mine are broken, missing, who knows.

User avatar
Broadfield
Posts: 2681
Joined: Tue Sep 05, 2006 2:57 pm
Car: 1992 240sx
Location: Normal, IL
Contact:

Post

I have a couple updates this time around.

Part 1:

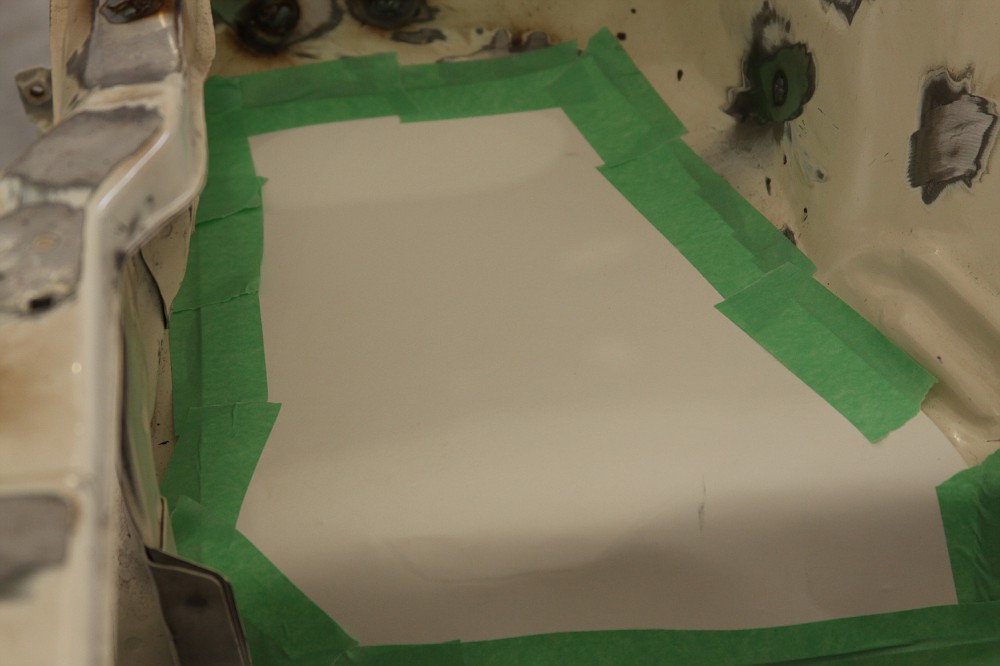
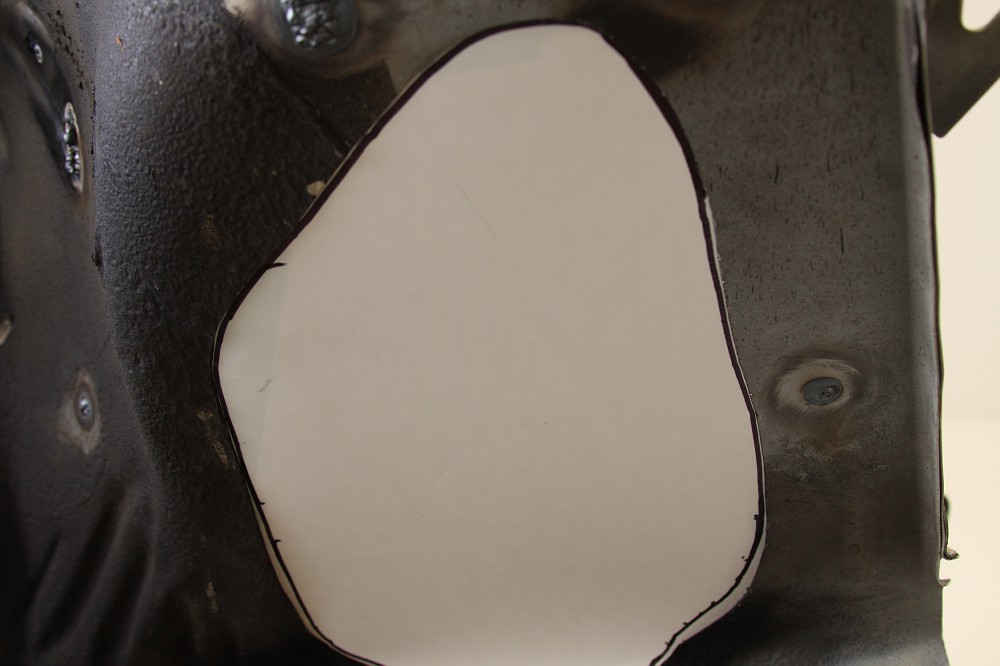
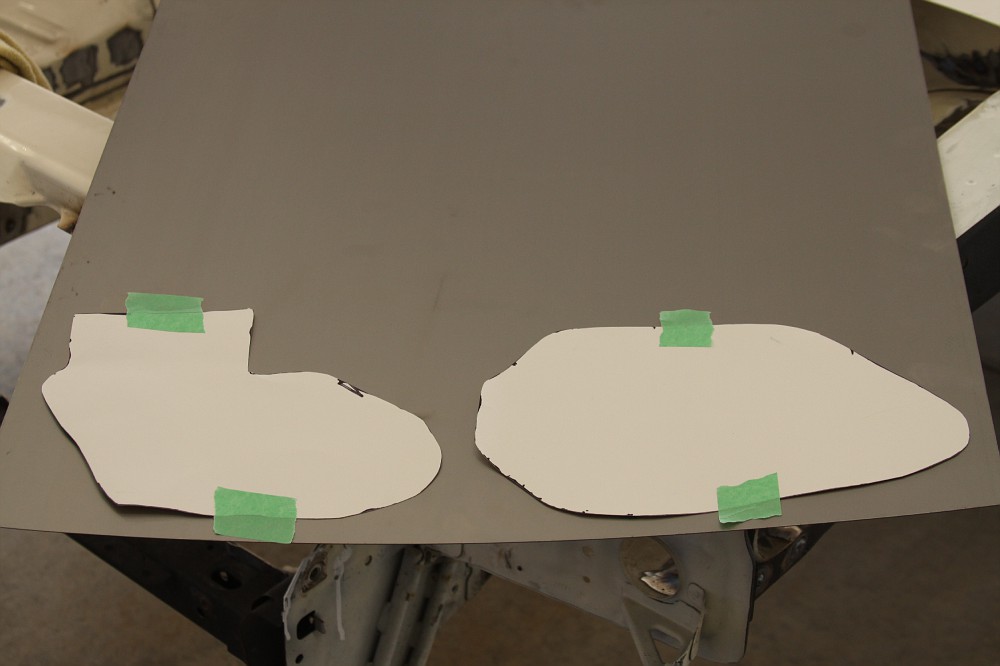
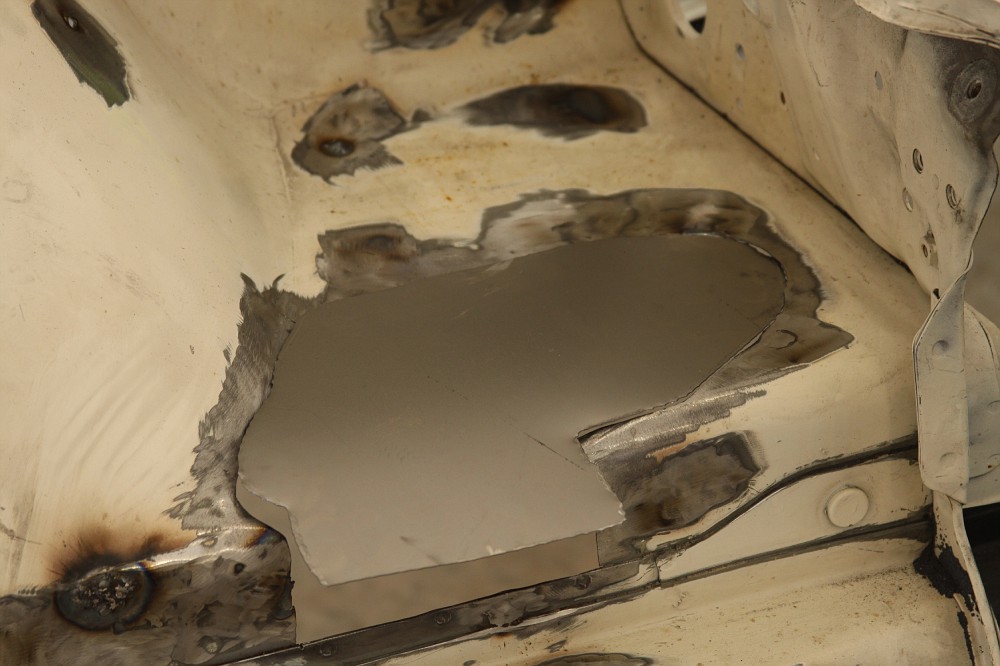
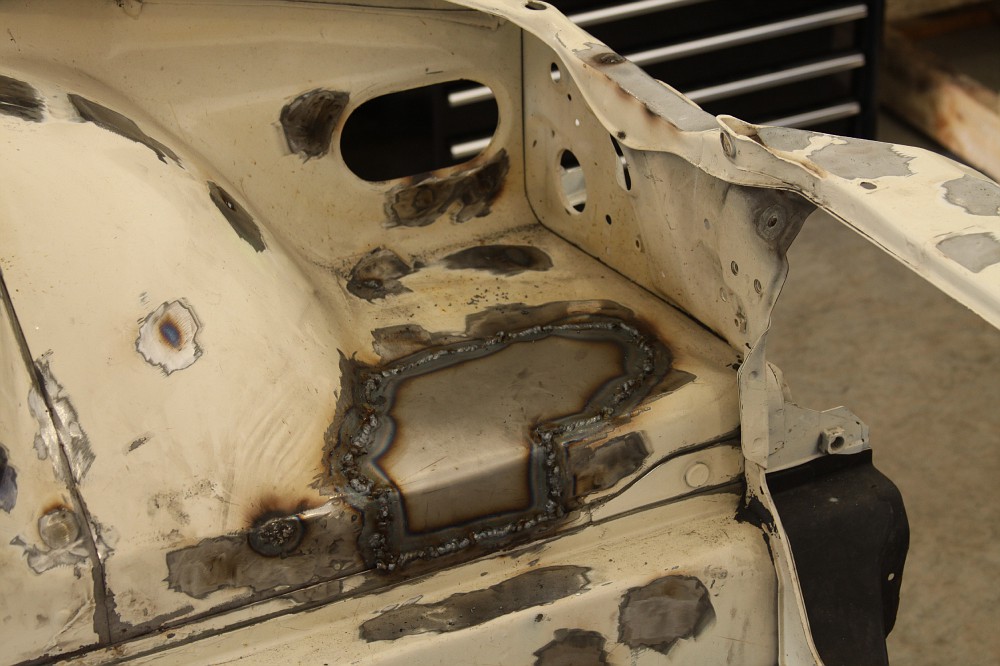
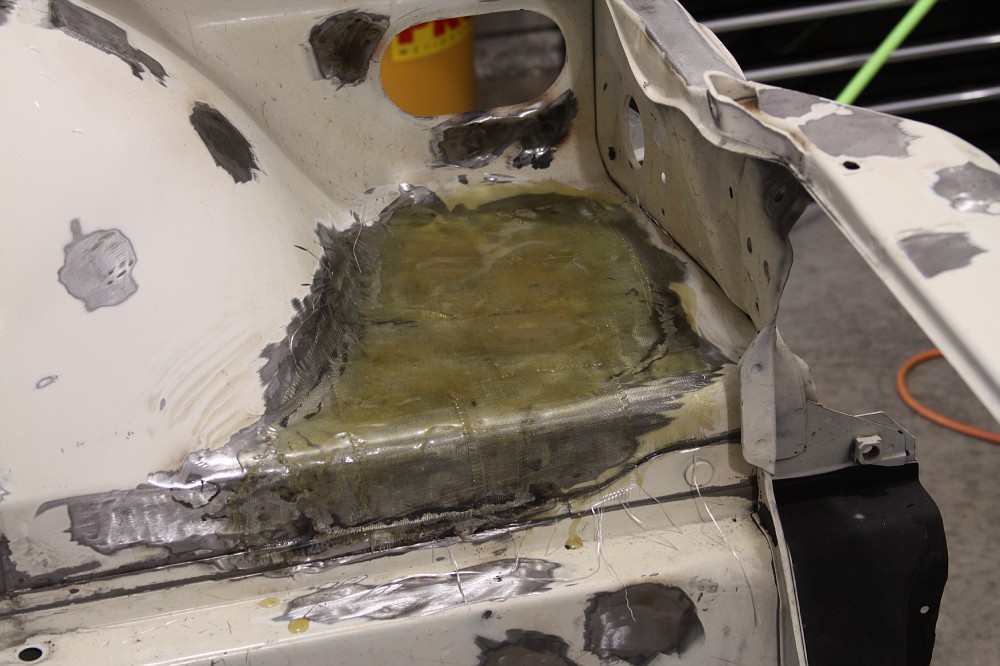
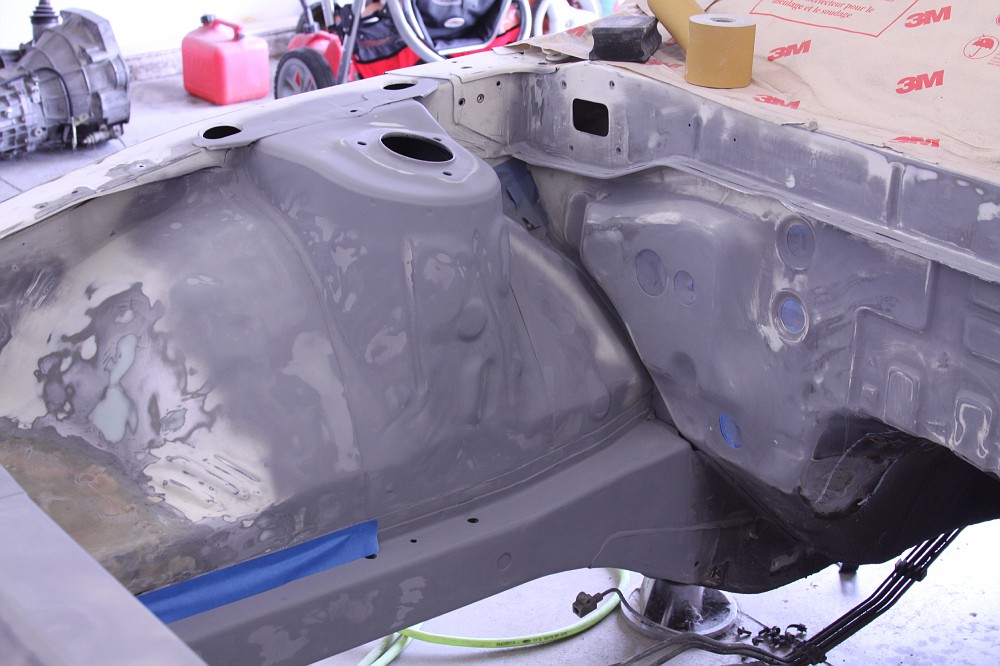
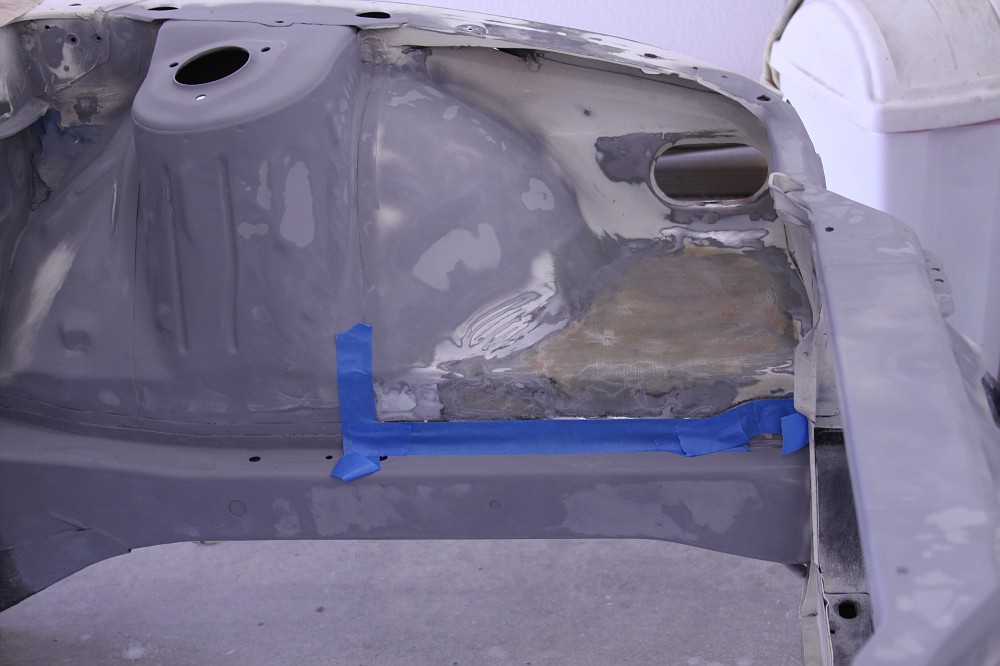
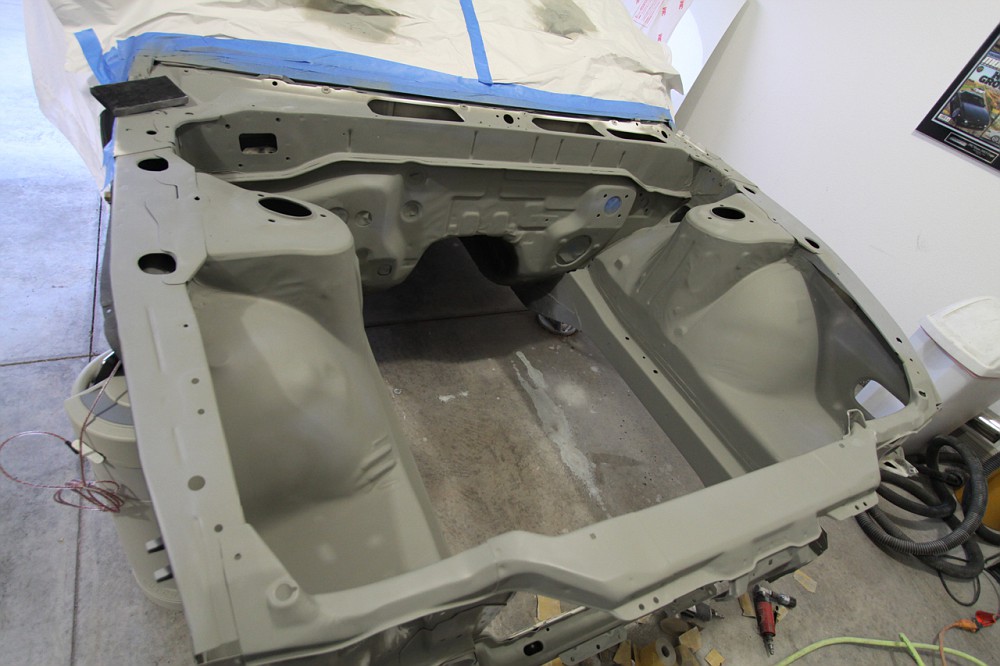
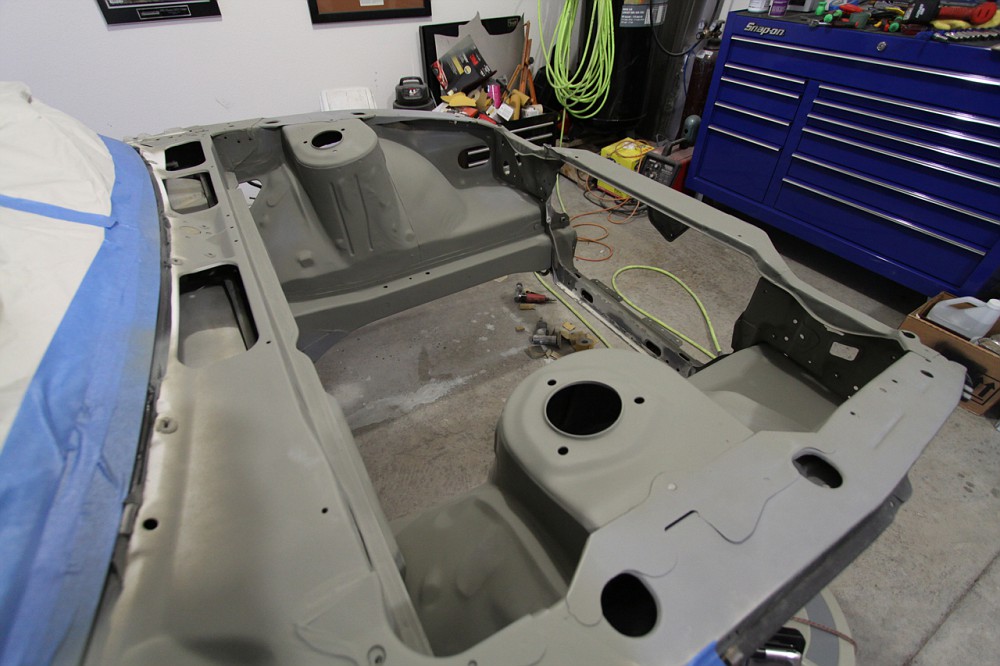
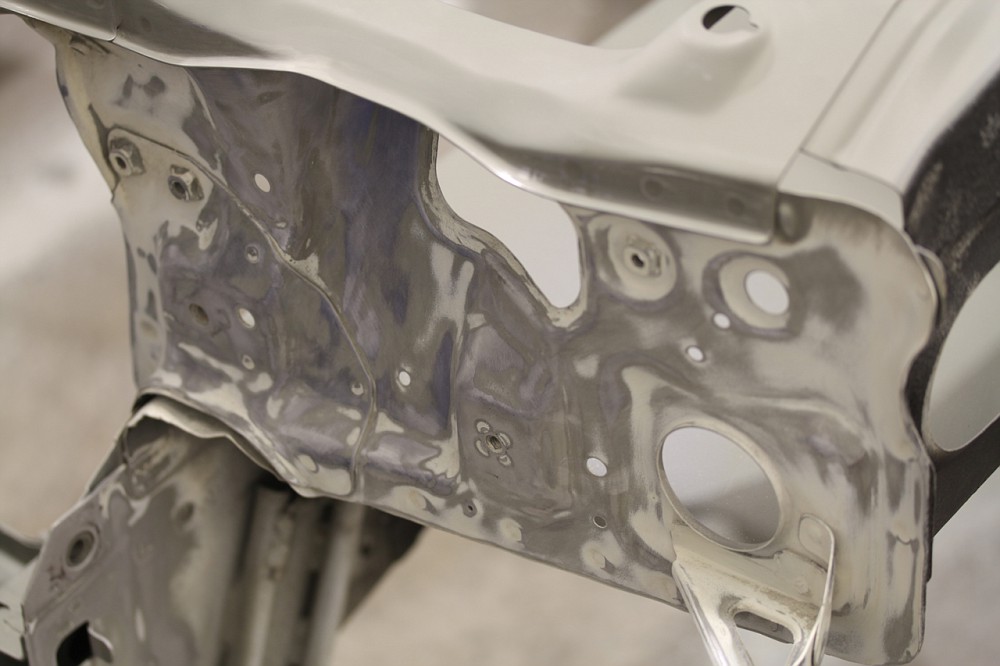
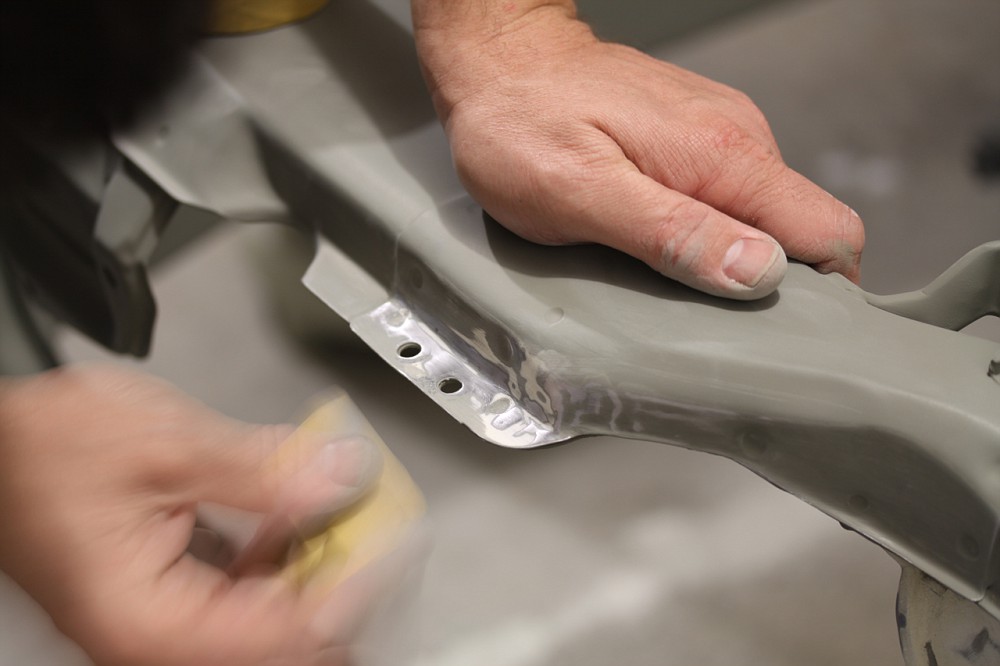
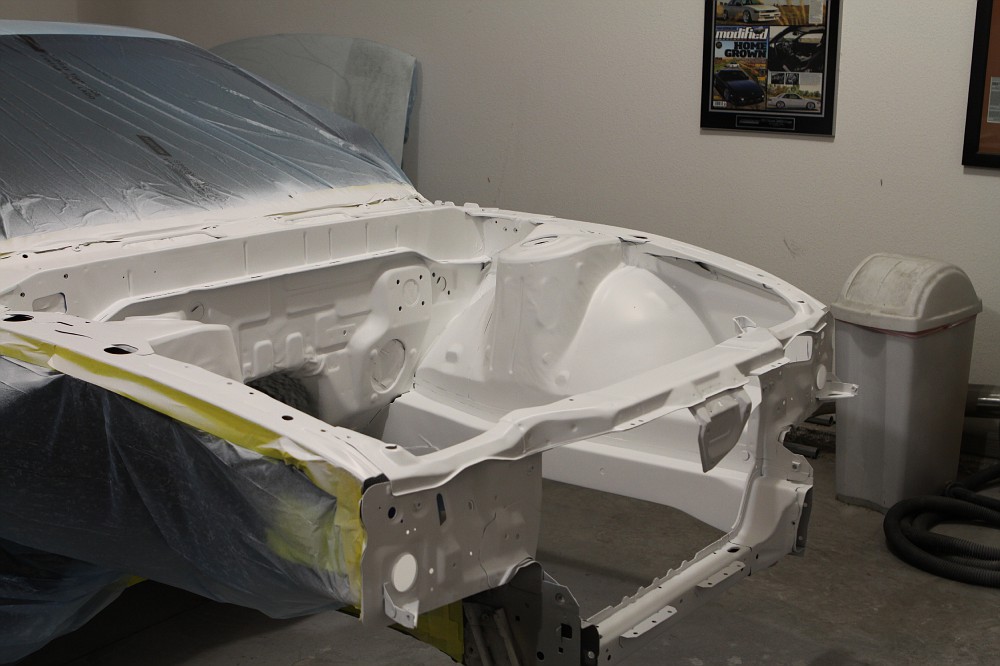
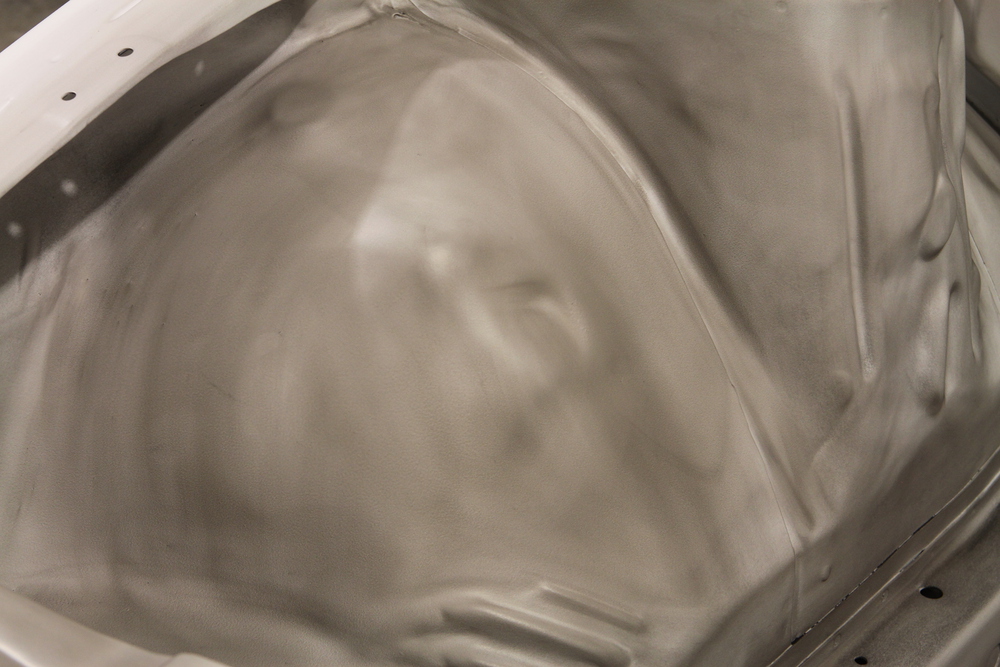
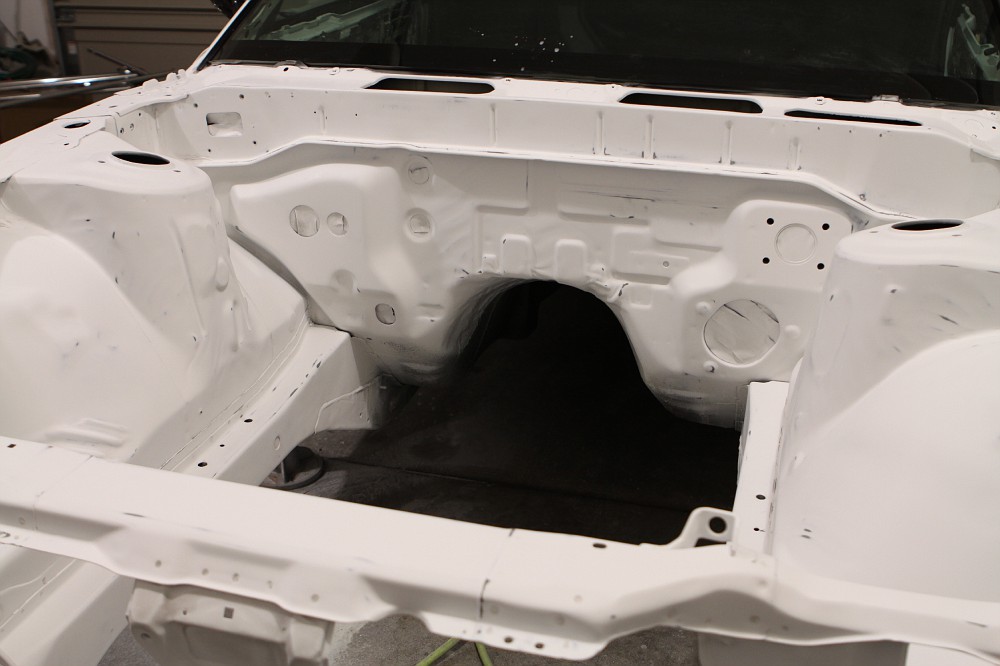
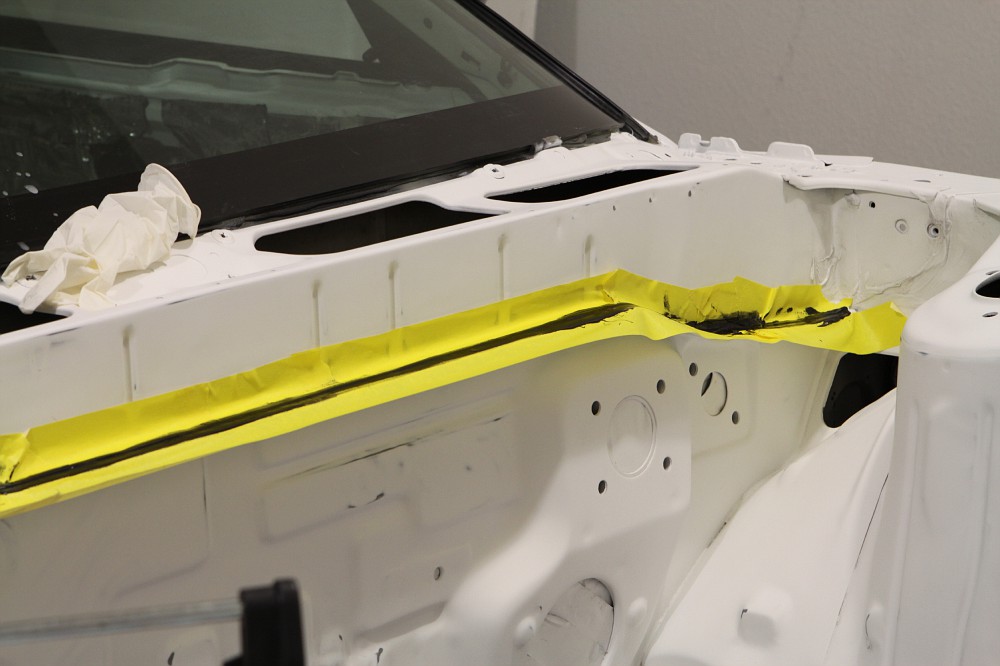
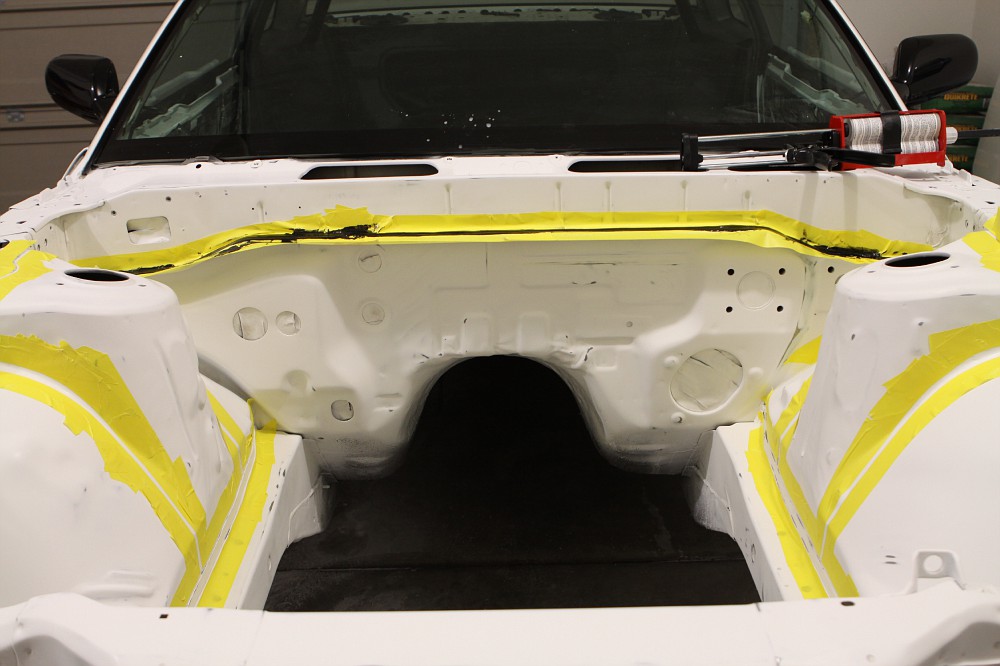
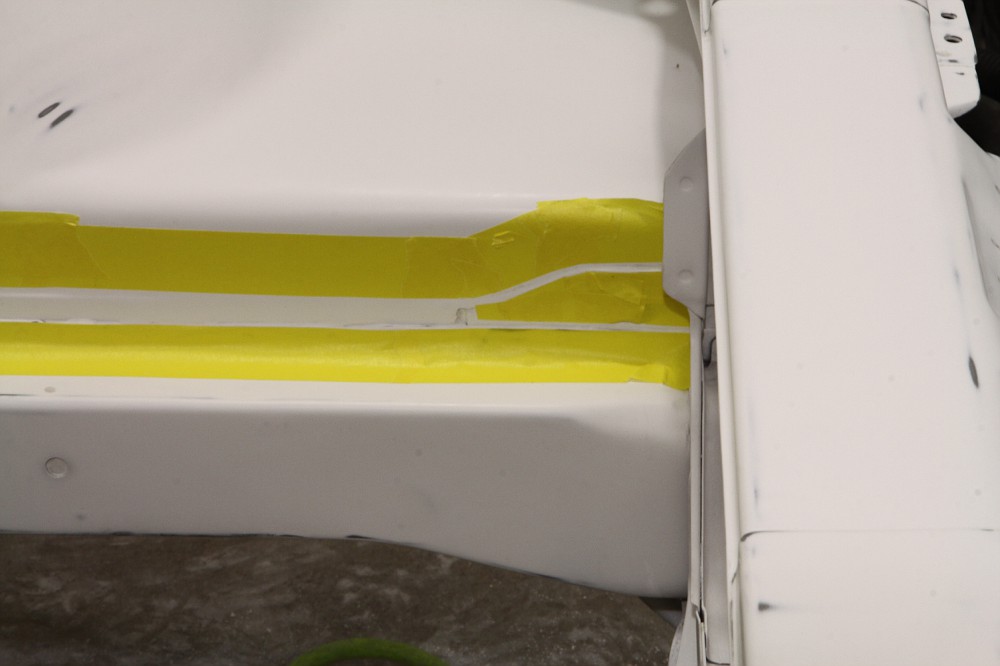
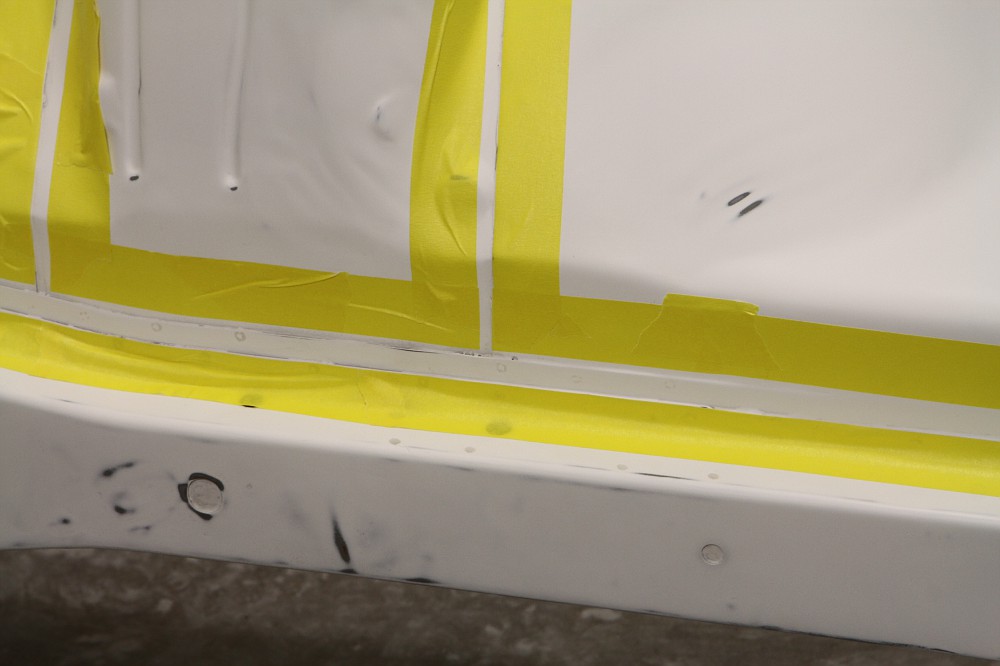
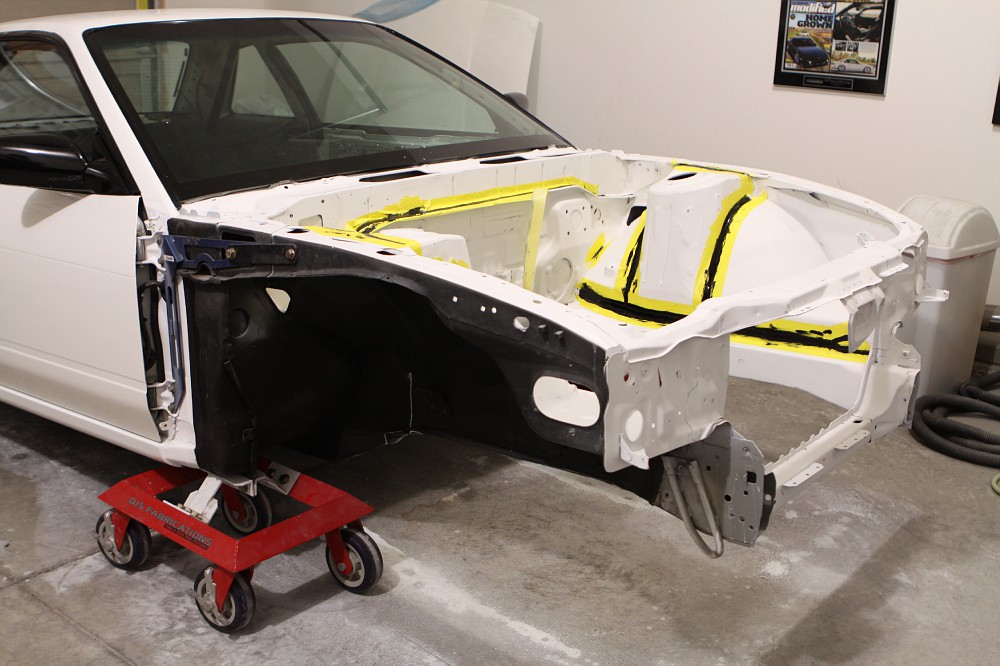
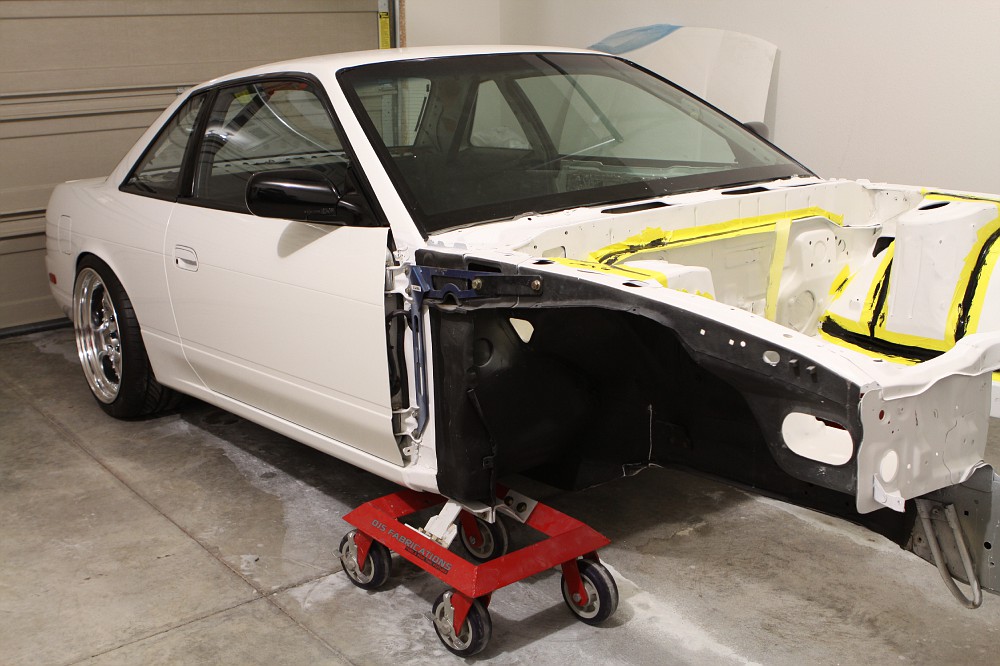
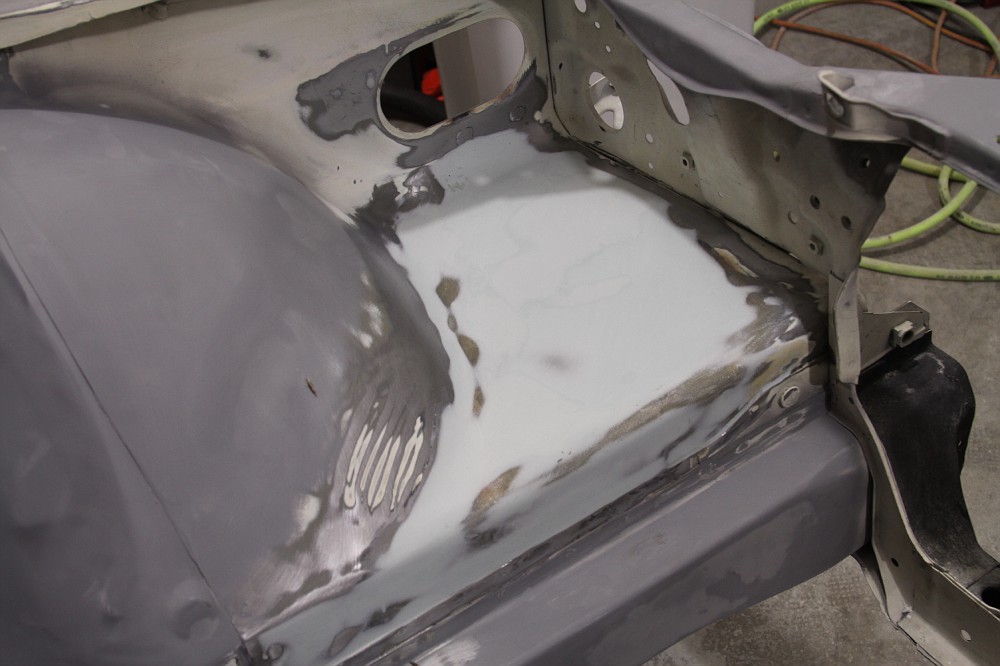
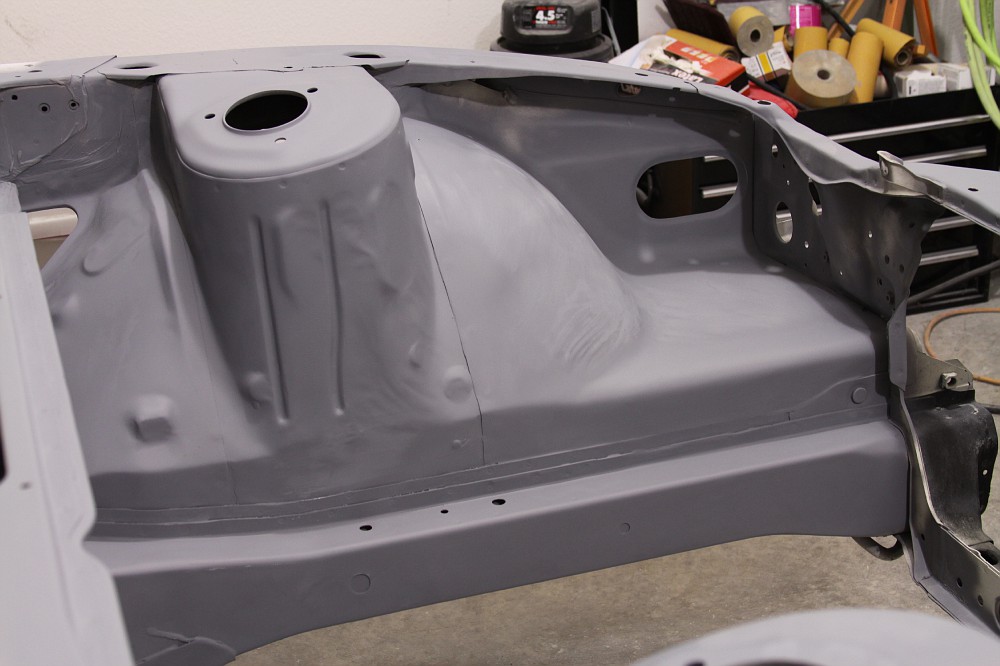
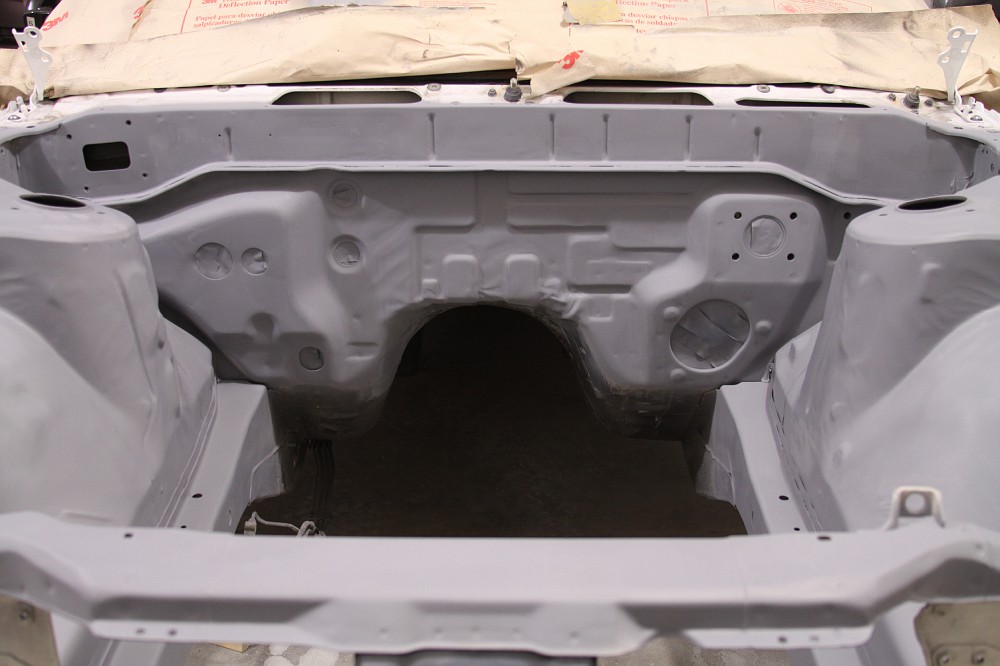
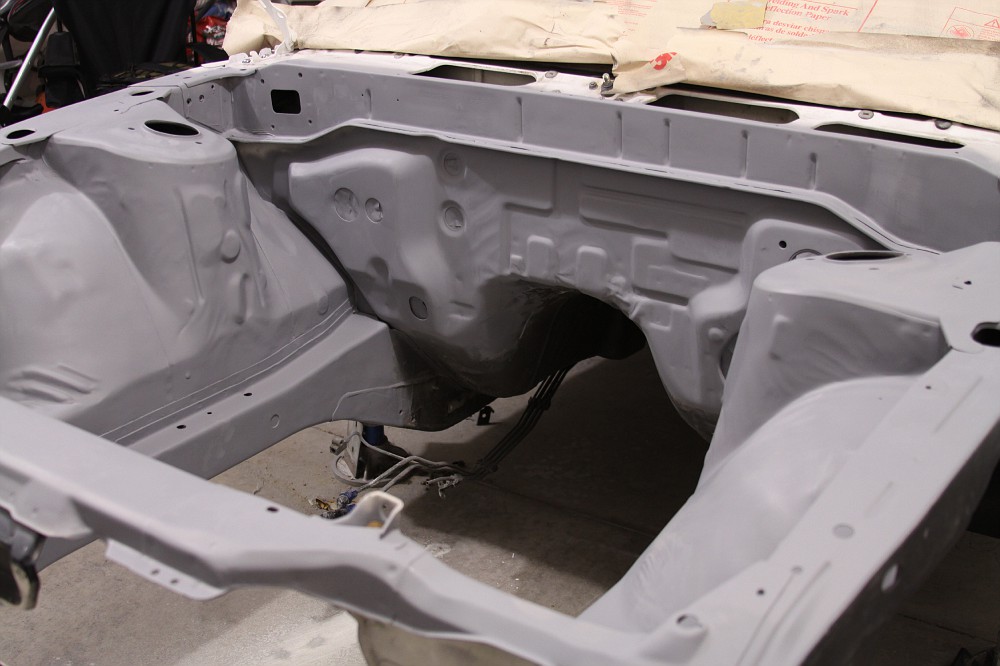
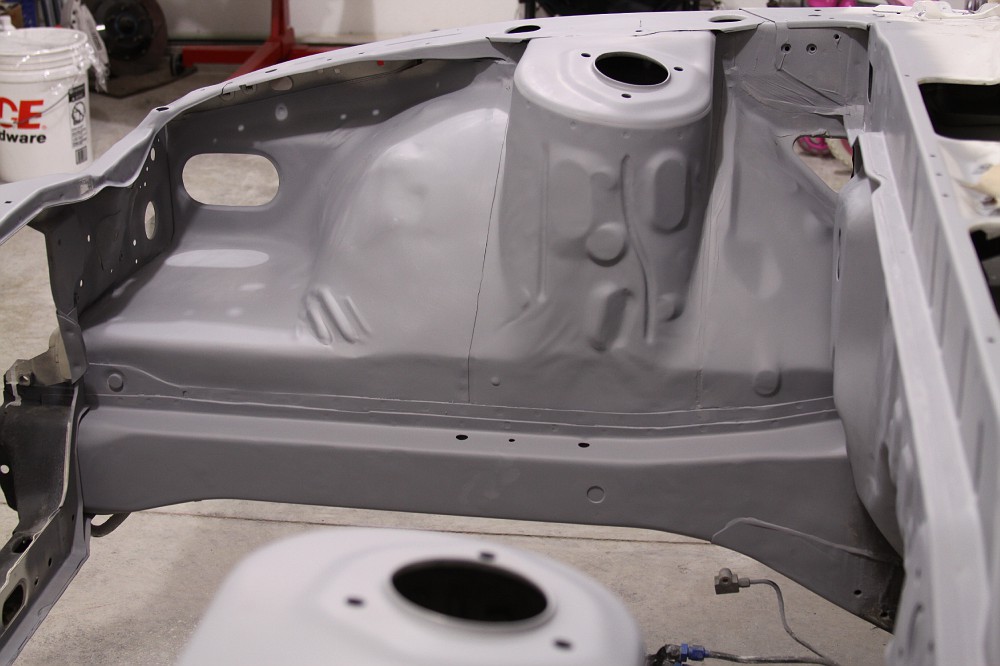
Continuing on the bay, I blocked down the body filler in front of the tubs on each side:

Image

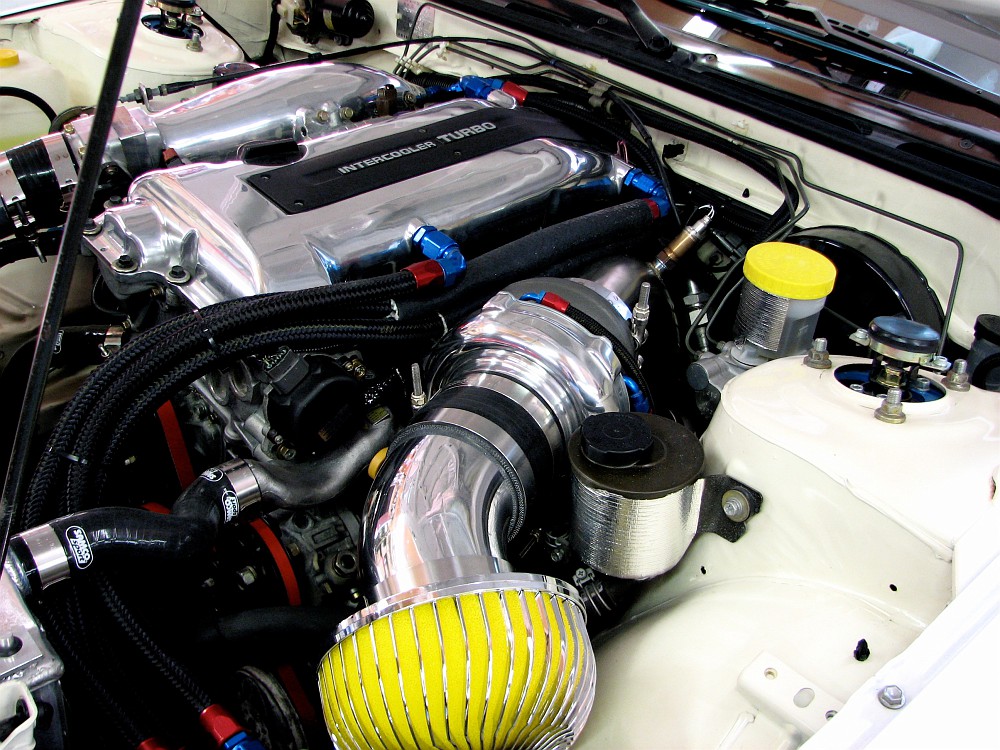
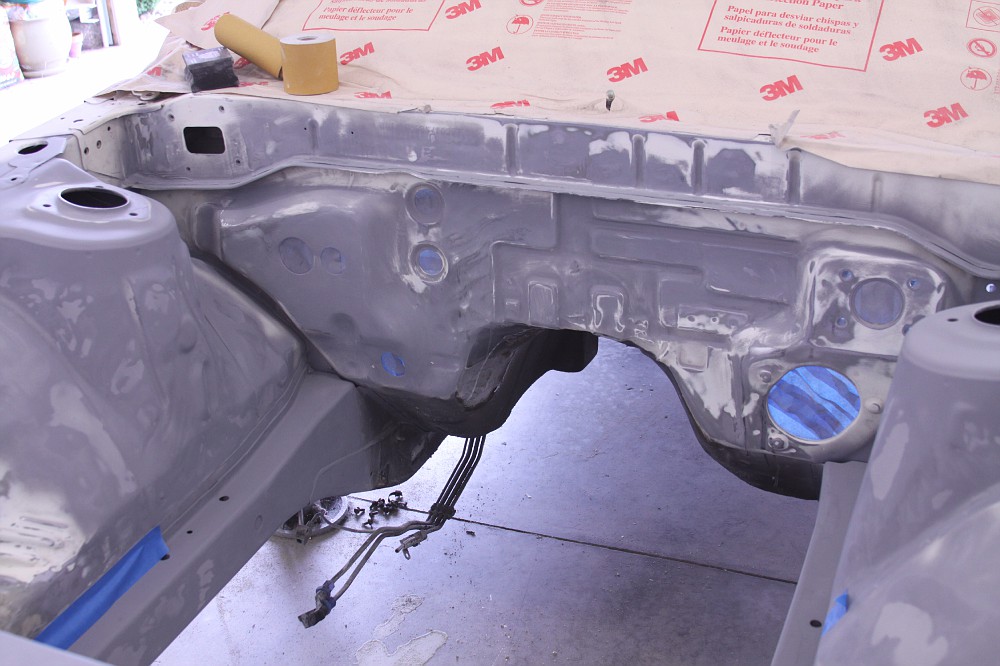
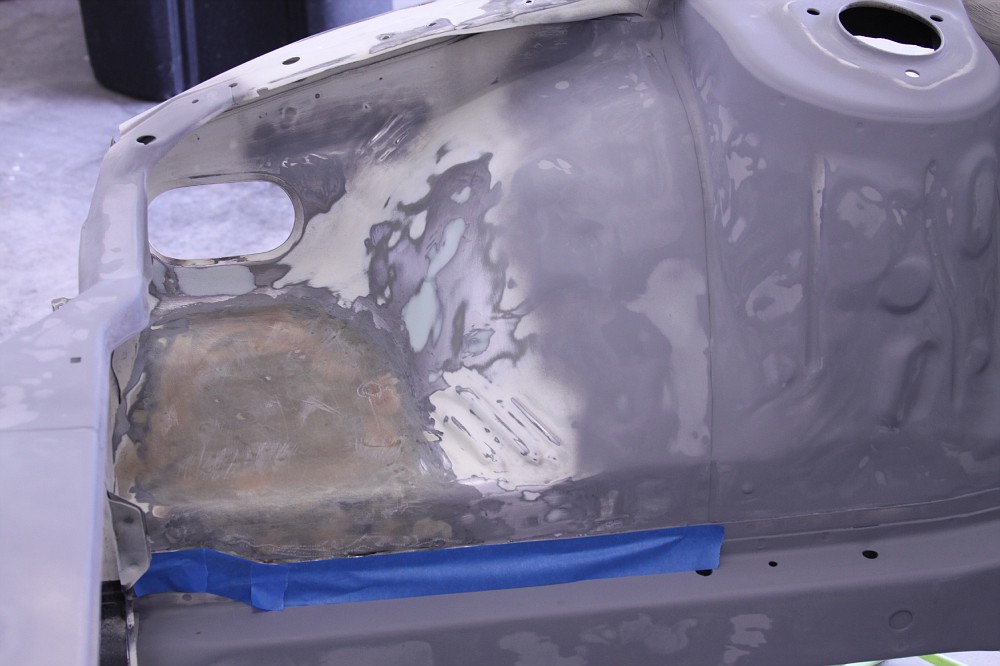
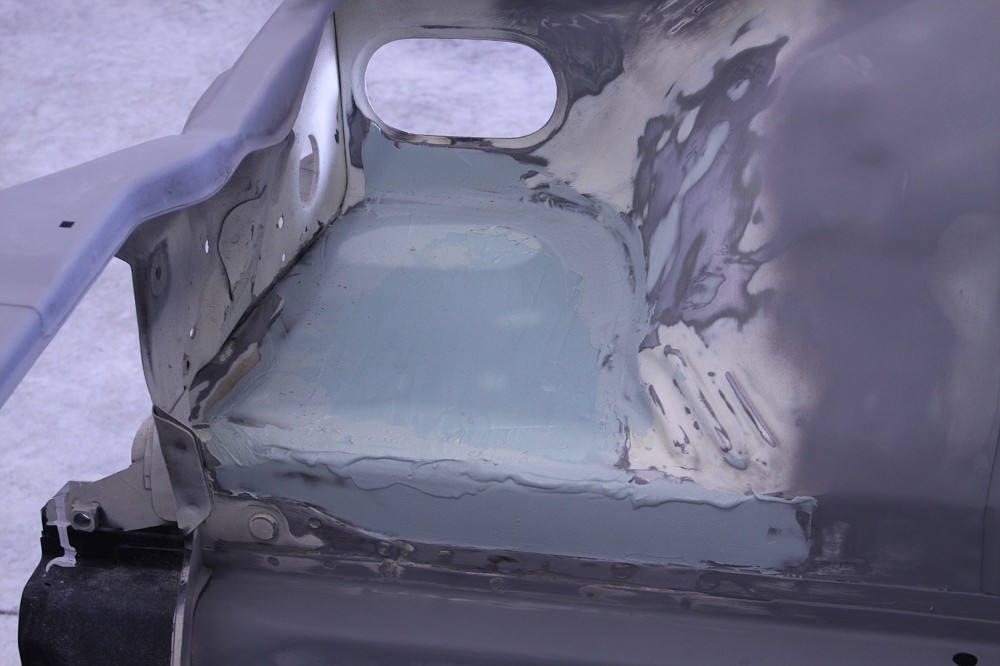
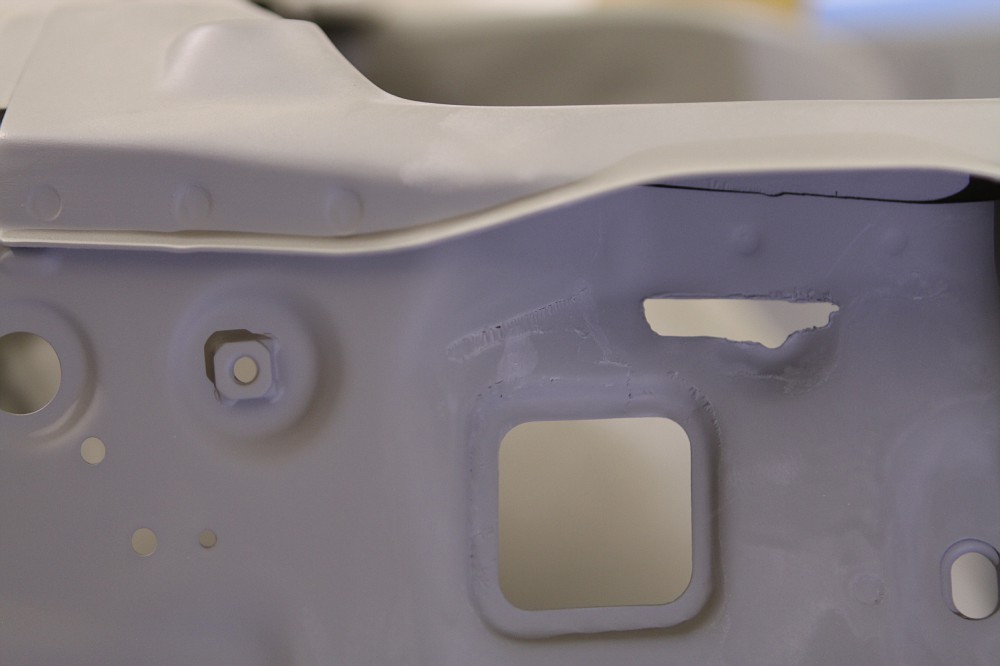
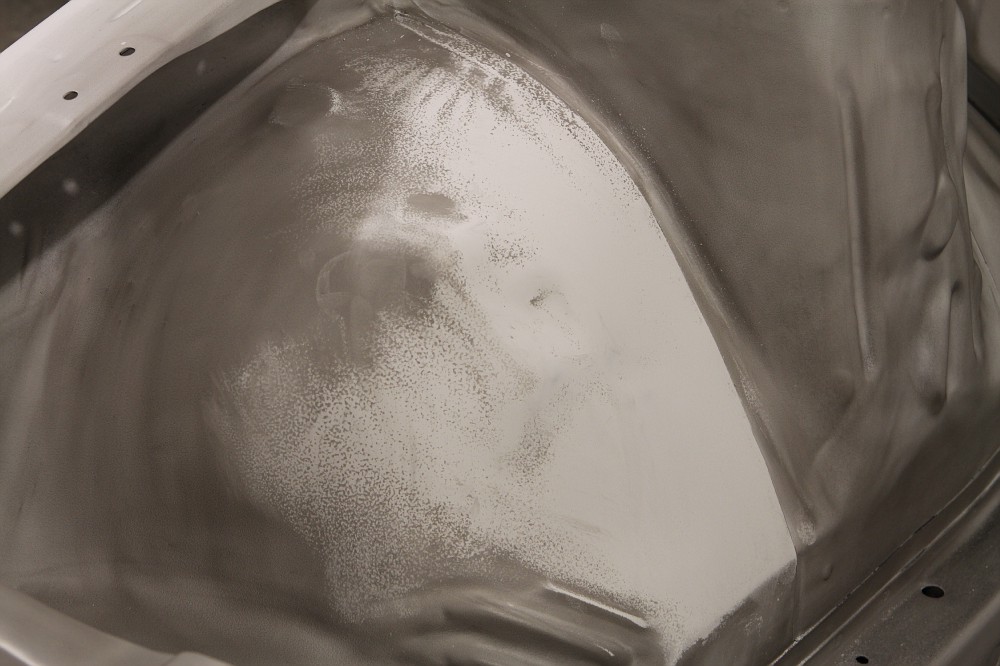
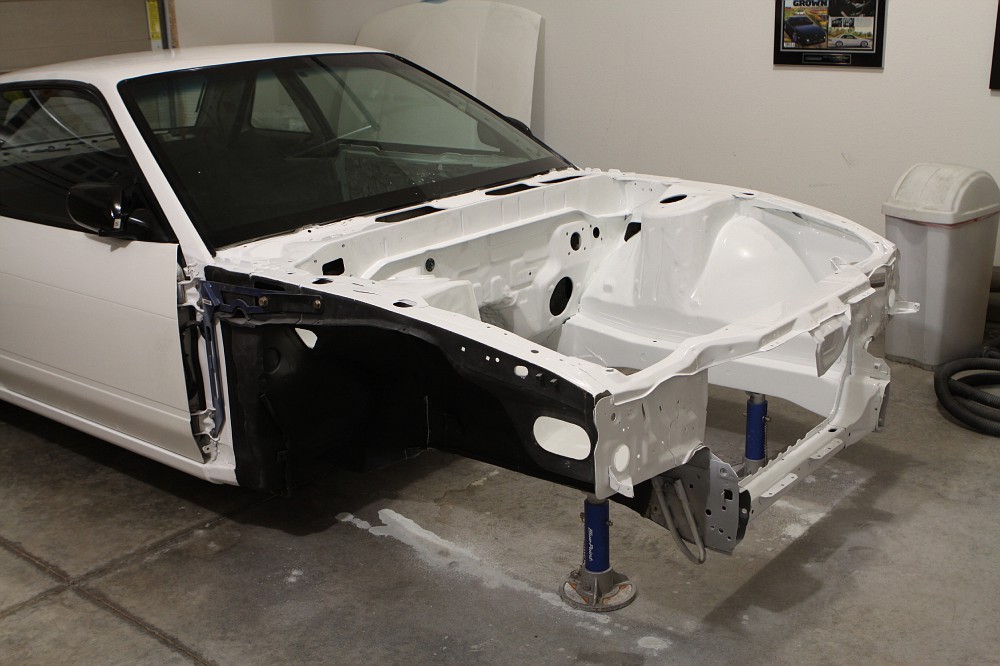
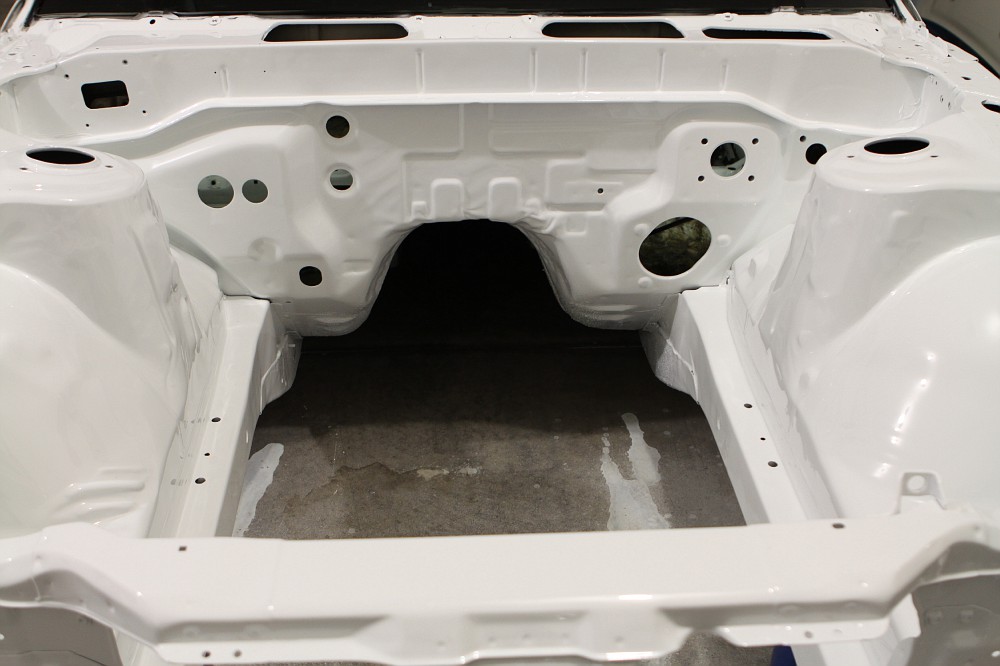
I then skim coated that area with some Evercoat Metal Glaze to fill in any remaining imperfections, pinholes and the like. Blocked that down then sprayed the area with etch primer to properly seal all of the bare metal. It's nice to finally be able to get an idea of what the bay is going to look like. Keep in mind, my goal was never to make this a completely smoothed/shaved bay. I simply wanted to fill all of the holes and remove any brackets etc. I absolutely want it to still look like an engine bay with all of the weird metal undulations etc. I just didn't want it to look like a motor sitting in a perfectly smoothed bathtub... it's not a show car.


Image

Image

Image

Image

Image

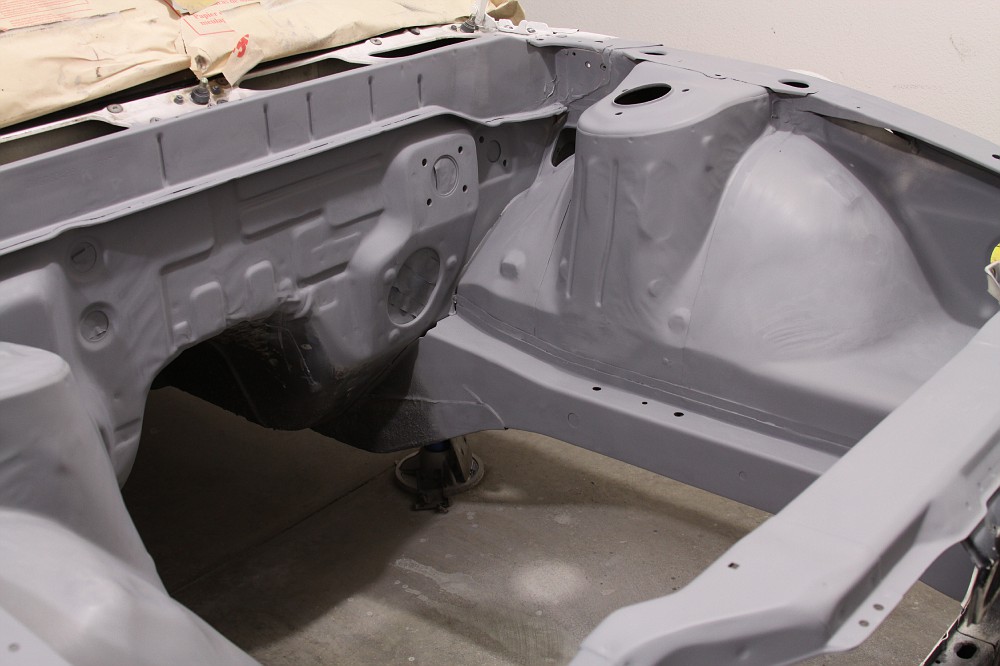
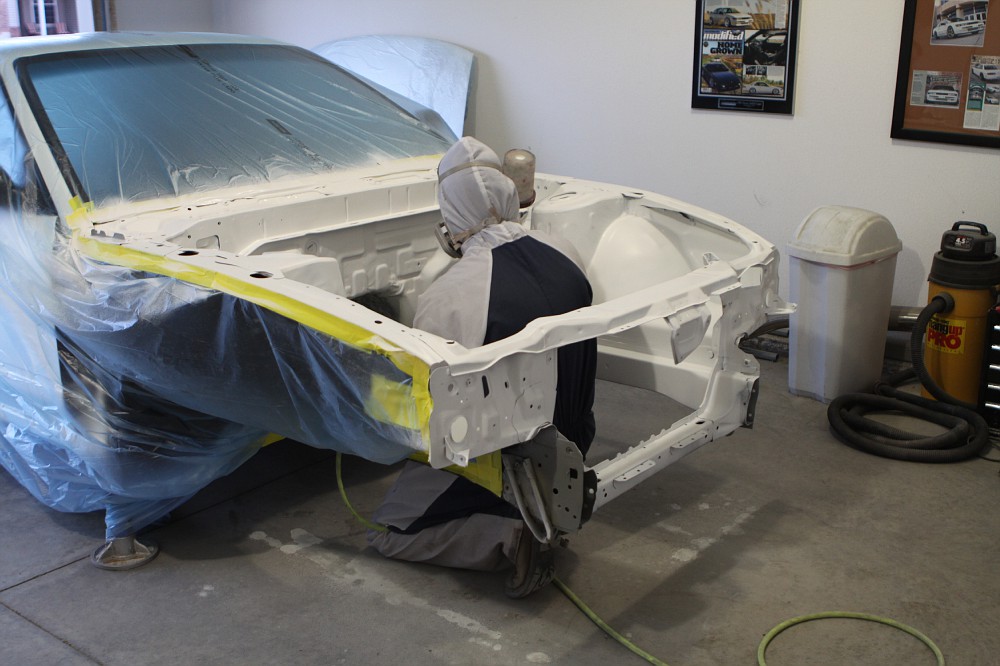
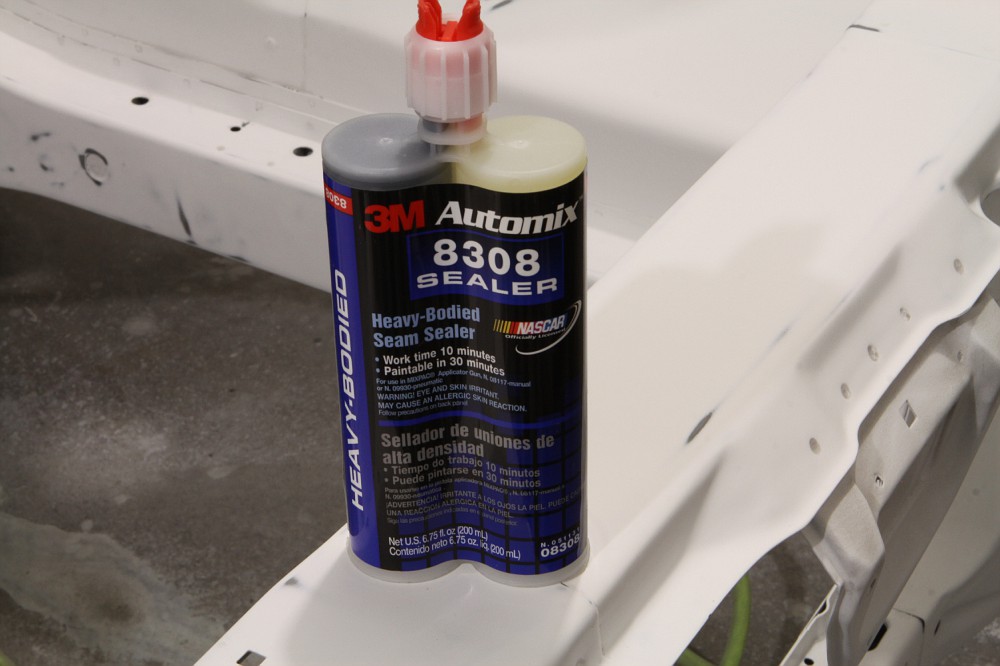
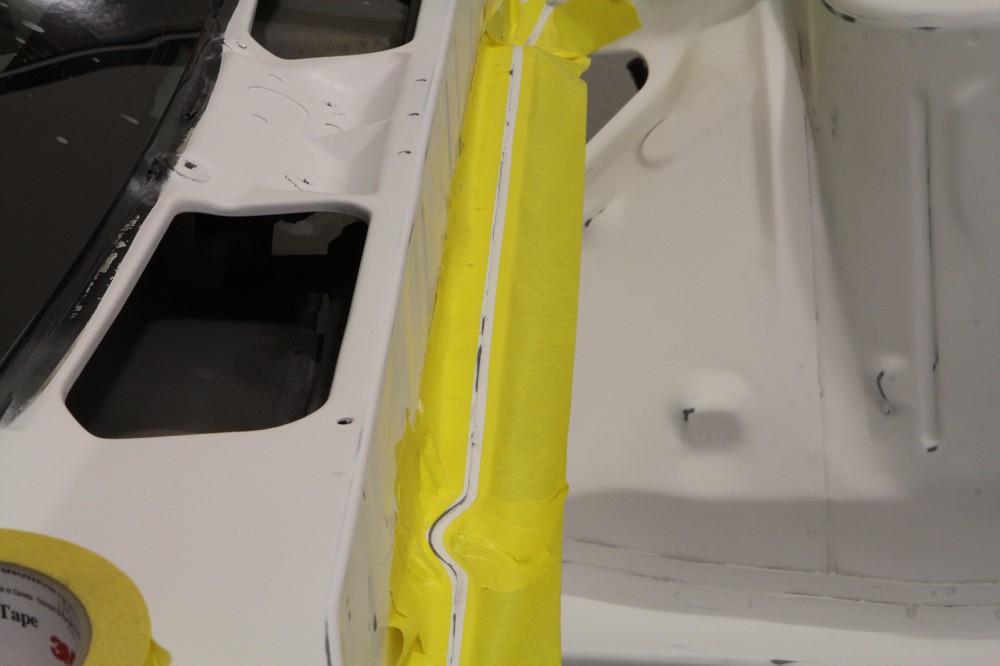
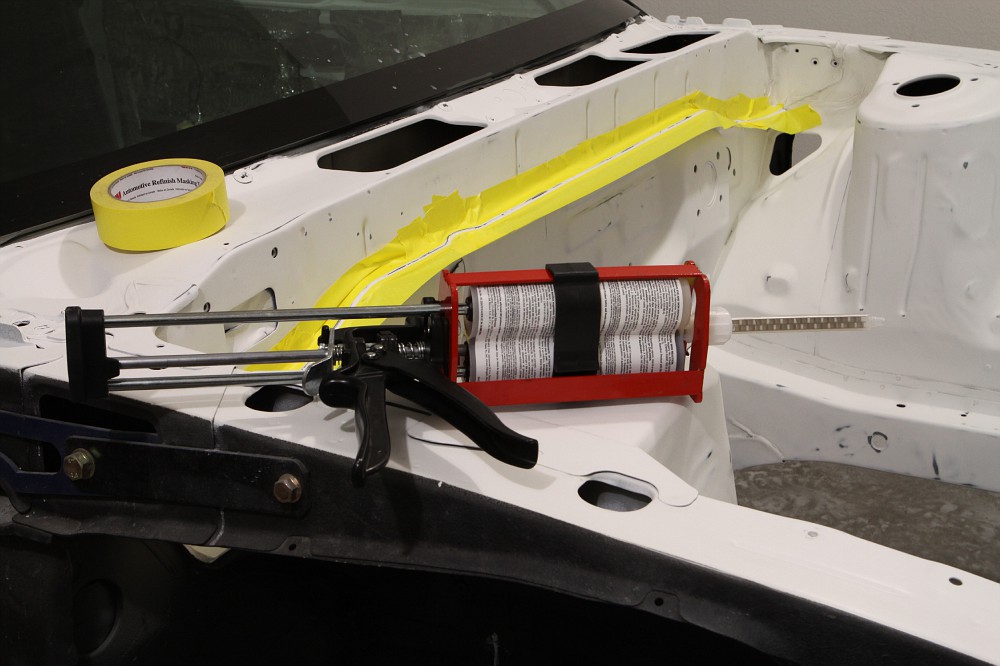
Now I'm at the point of going back and addressing little areas... making sure everything is up to standards before I primer it. I will be using 4 coats of white primer on this. I also need to reapply seam sealer to all of the OEM locations that originally had it before I primer it.

Part 2:

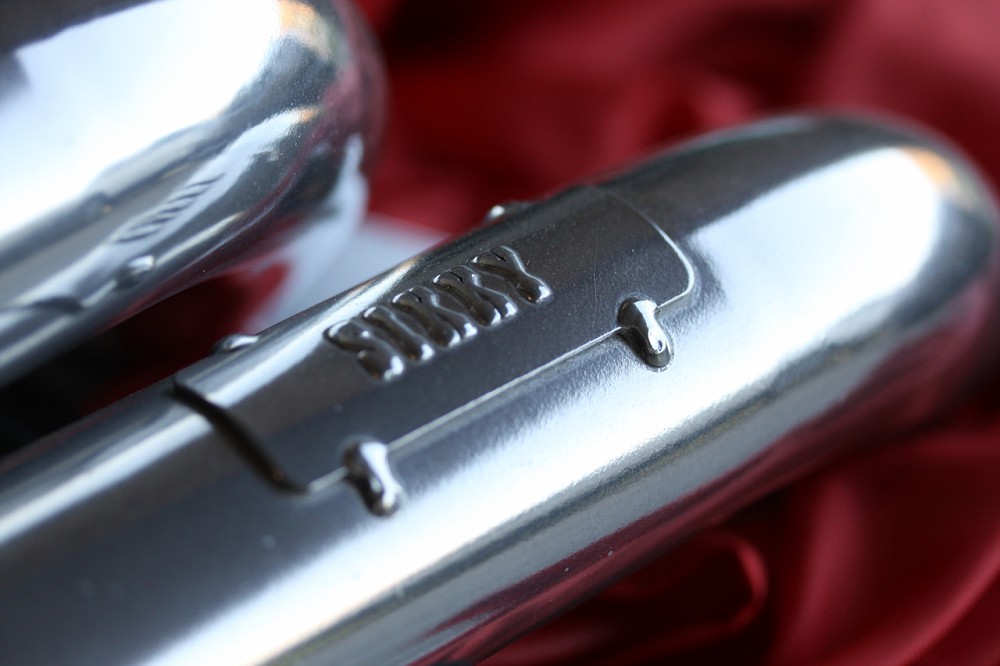
I finally received all of my Sikky product yesterday. As mentioned earlier in this thread, Sikky was nice enough to give me a partial sponsorship. Even with that, it took me a few months to save up the dough to get it here. In trade for the hook up, I agreed to give my honest opinion on the product and dole out several write-ups on installation, performance and so on. I will start off by saying that they have been nothing short of perfection in the customer service area. I have been dealing with Justin over there and have had zero complaints!

Onto the product... I want to post a couple pictures of each product to start off with. I'm sure most have seen this stuff several times, but this will be a good thread to see multiple pictures of the product, on and off the vehicle/motor.

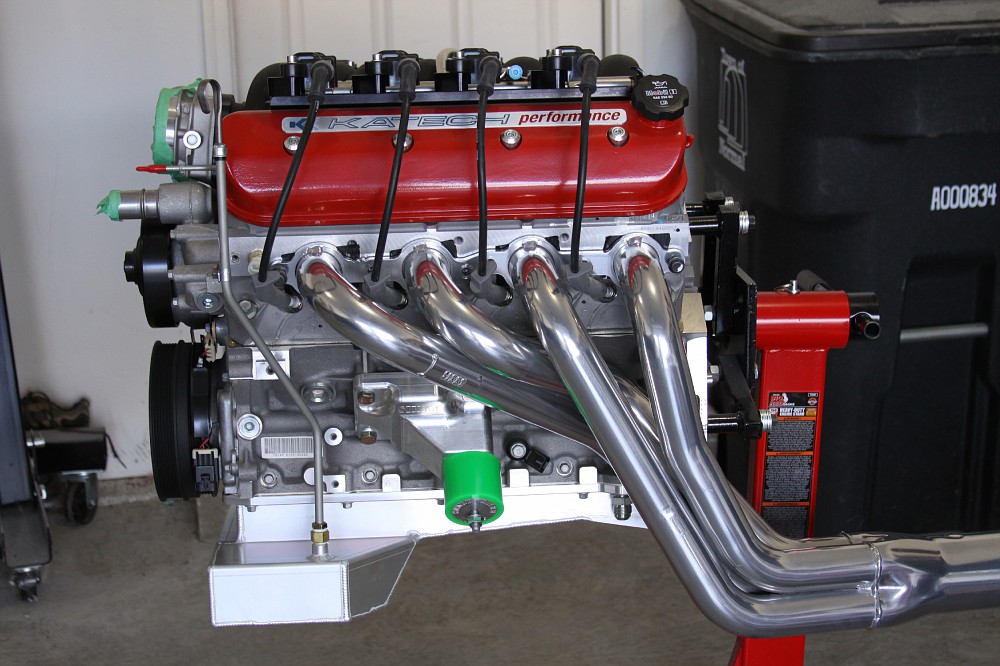
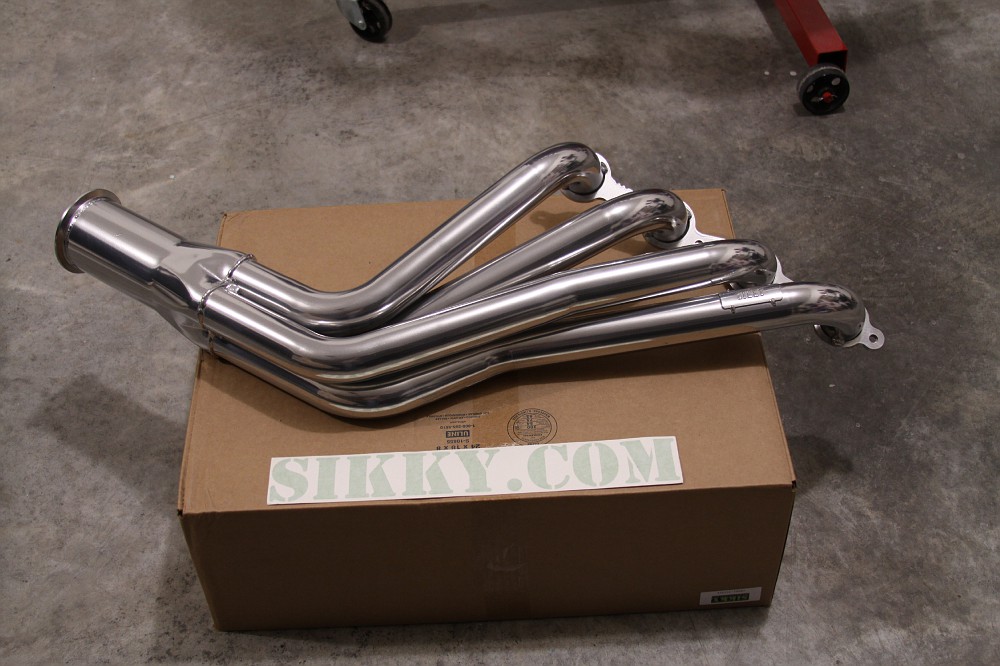
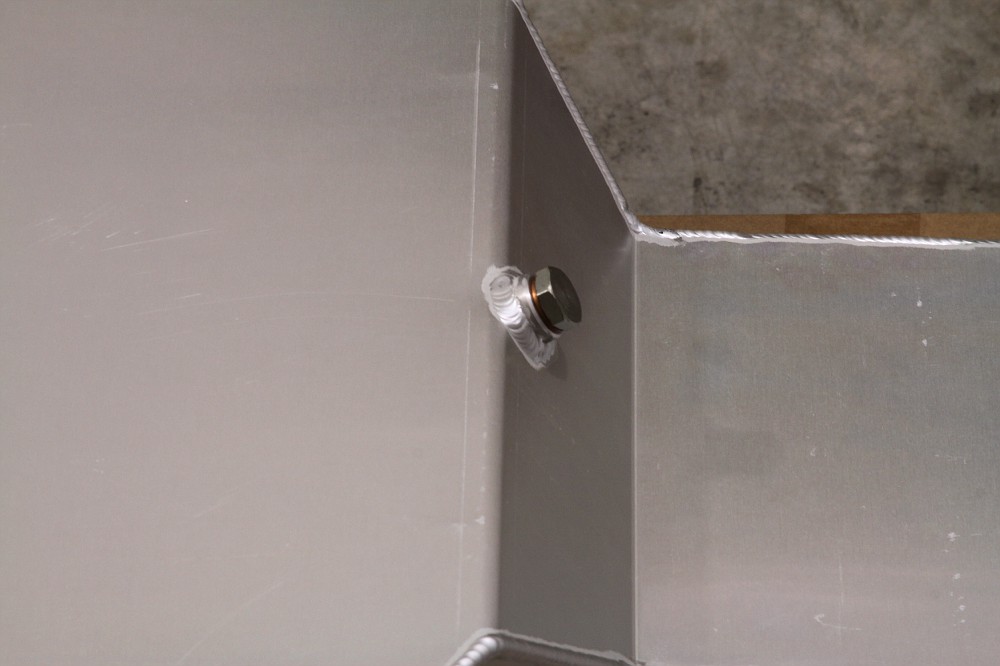
Sikky Headers: I went with the 1-7/8" primaries since I plan on over 500whp and eventually more down the road. I opted for the coated ones. I went ahead and mounted one up because I wanted to check for fitment and clearance issues... all is good!

Image

Image

Image

Image

Image

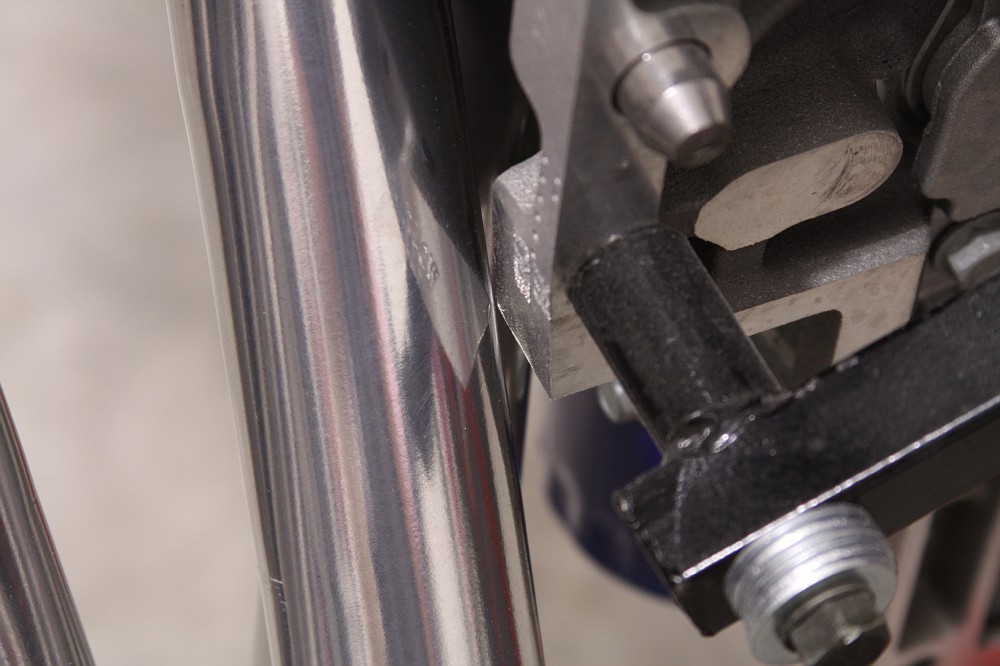
I knew it would be VERY tight at the bottom back of the motor where the bell housing bolts up. I just assumed I would have to shave that corner of the block just to get them to fit, but they actually fit. There is about 2mm of clearance... which I will be shaving that corner off just to make sure there is no rubbing issues at any point.
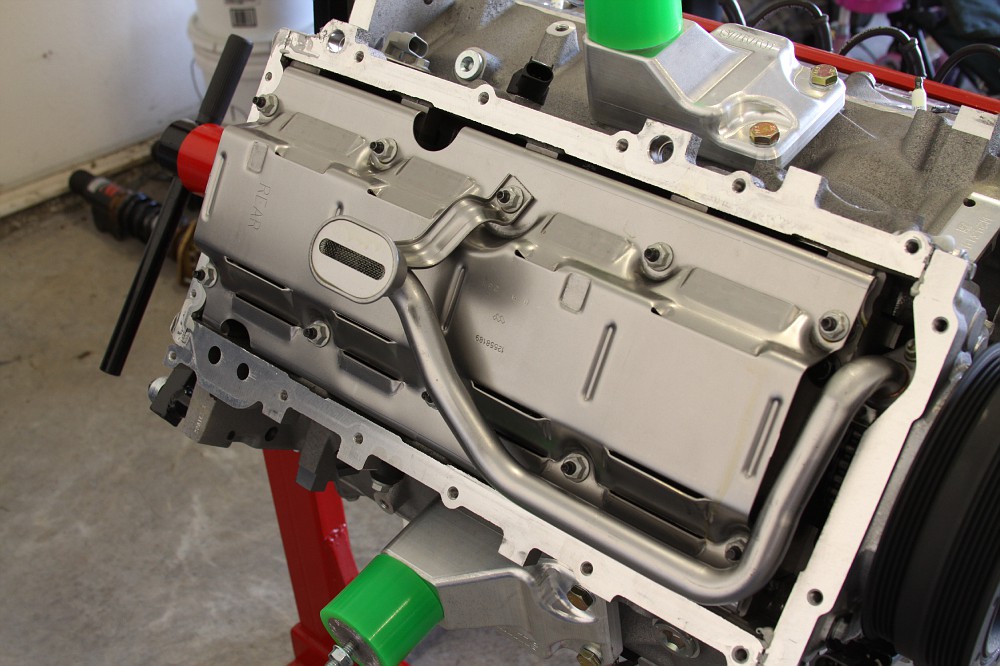
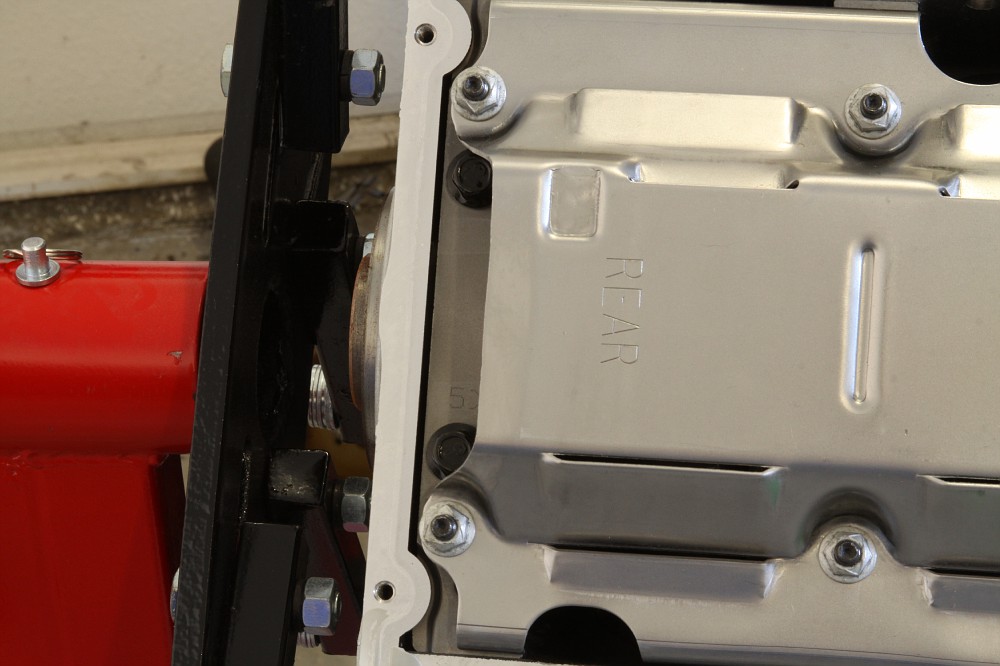
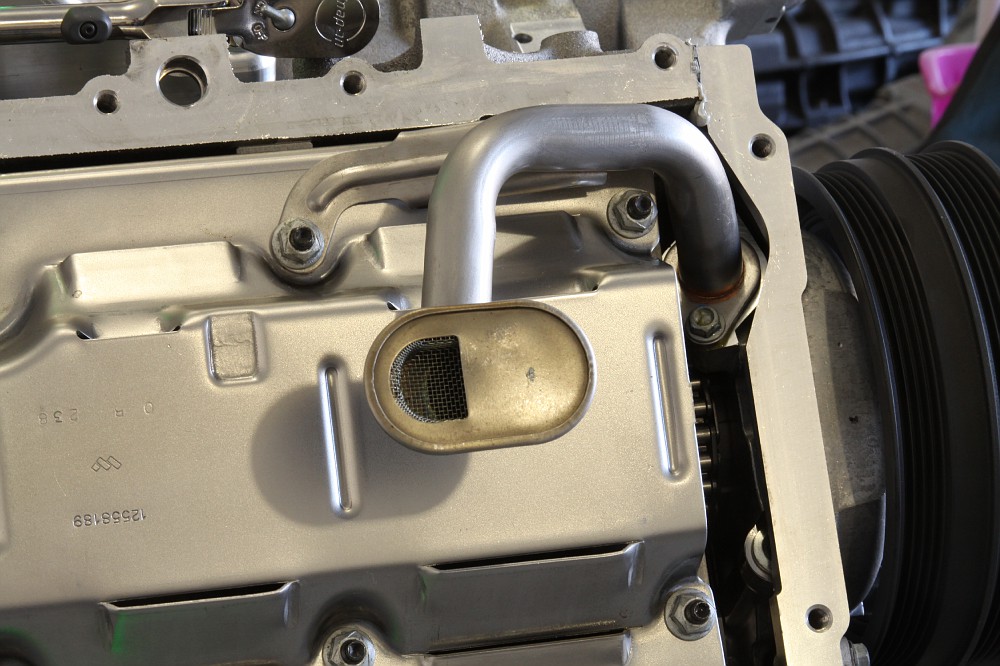
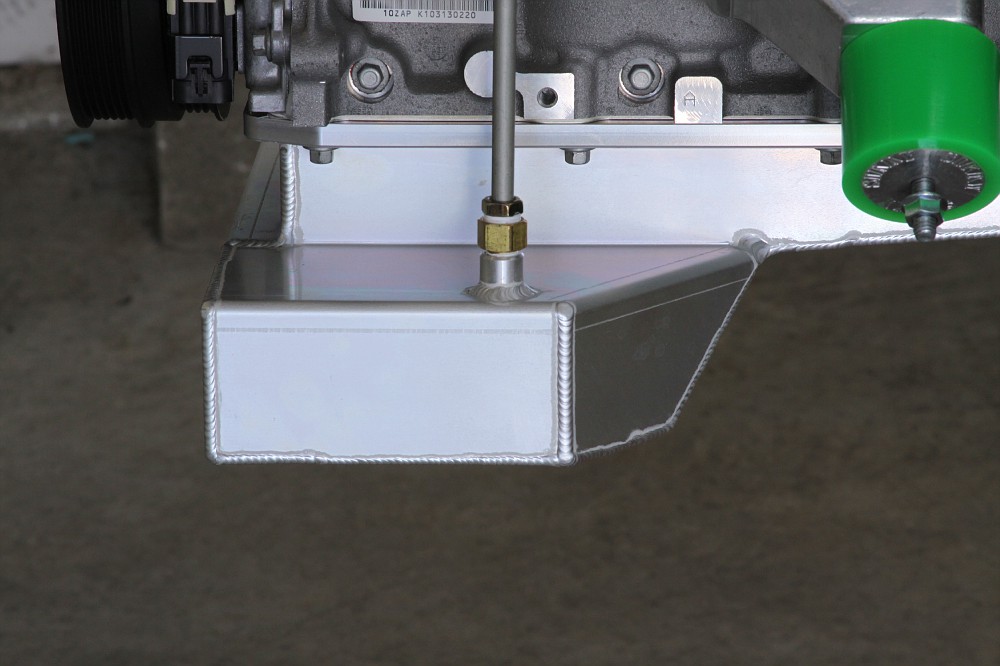
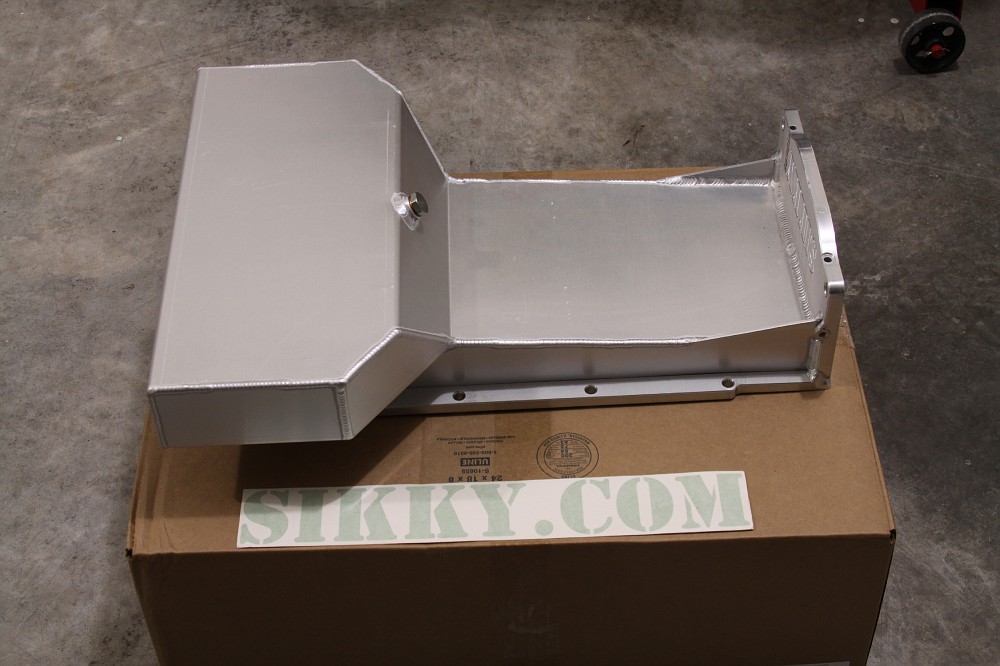
Image

Sikky Oil Pan Kit: Very nice craftsmanship! The kit includes a new oil pickup, new oil dip stick, tube and bung, new OEM gasket and new oil filter relocation setup. Everything seems to be really well thought out. The new location for the oil dip stick is also baffled on the inside... little things like that were not overlooked.

Image

Image

Image

Image

Image

Image

Image

Image

Image

Image

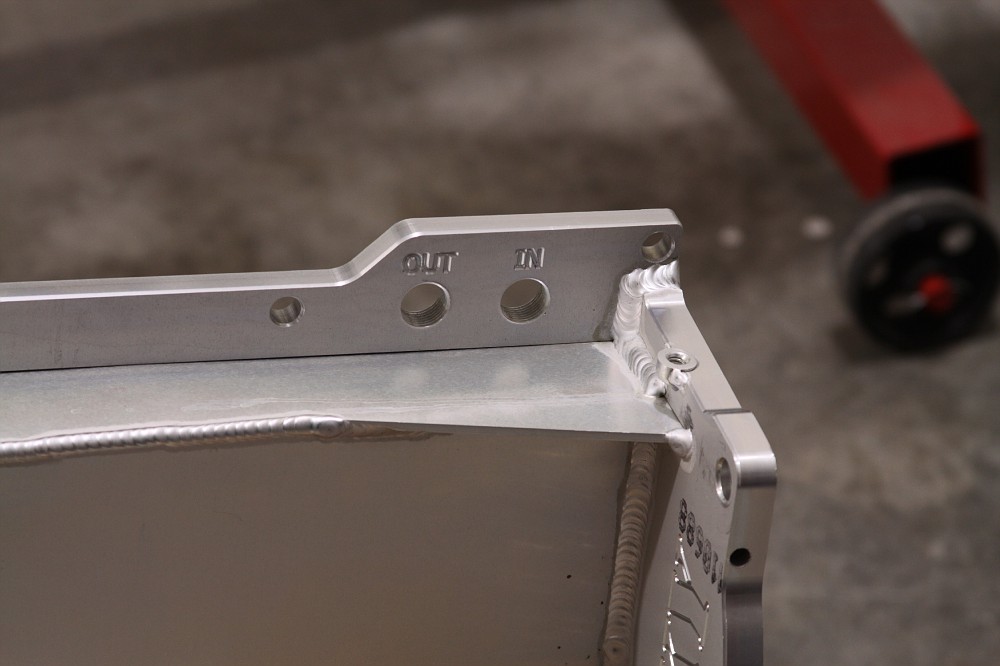
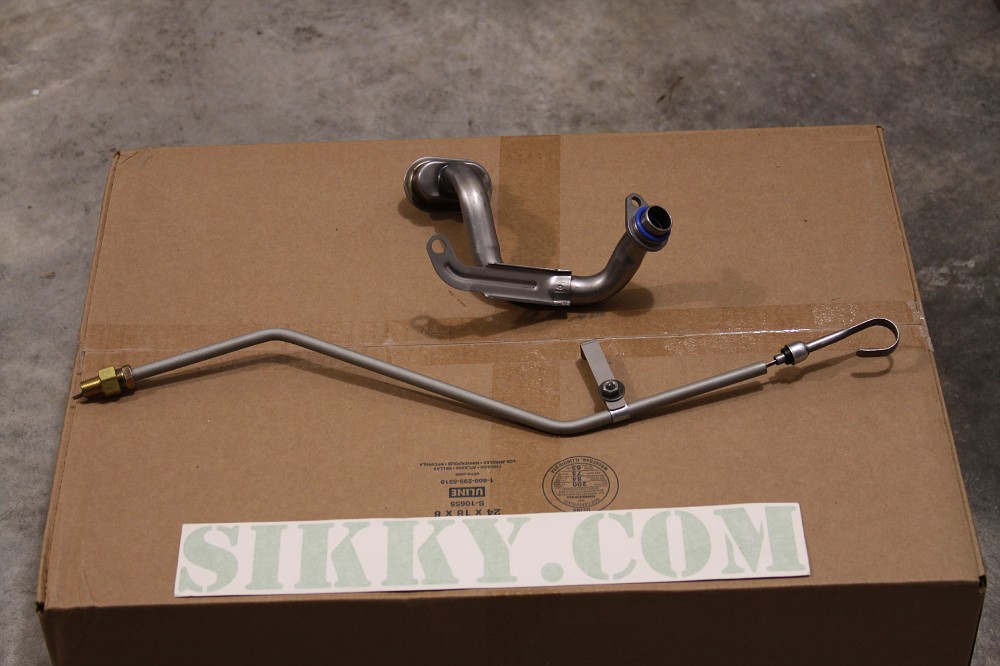
I probably won't be utilizing the Sikky oil filter relocation. While I'm sure it will work just fine, I will want something a little more "baller" for this setup... something similar to what I had on my SR. Everything in the bay will be braided nylon AN lines anyway, so I would hate to have some stainless lines just chill'n in the bay all by themselves. You never know though, I may use it temporarily just to get it fired up.

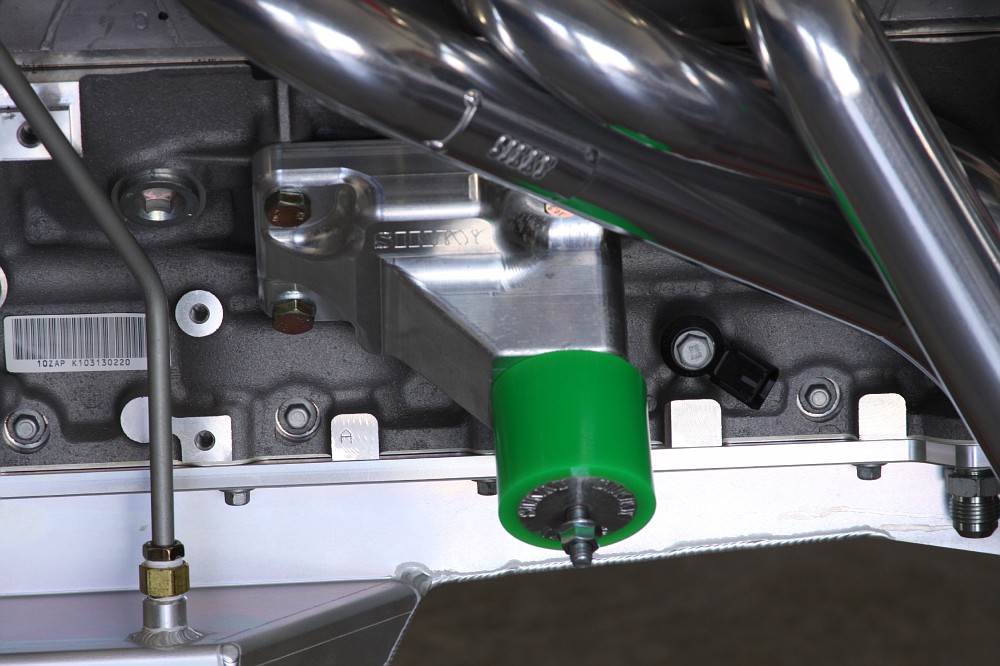
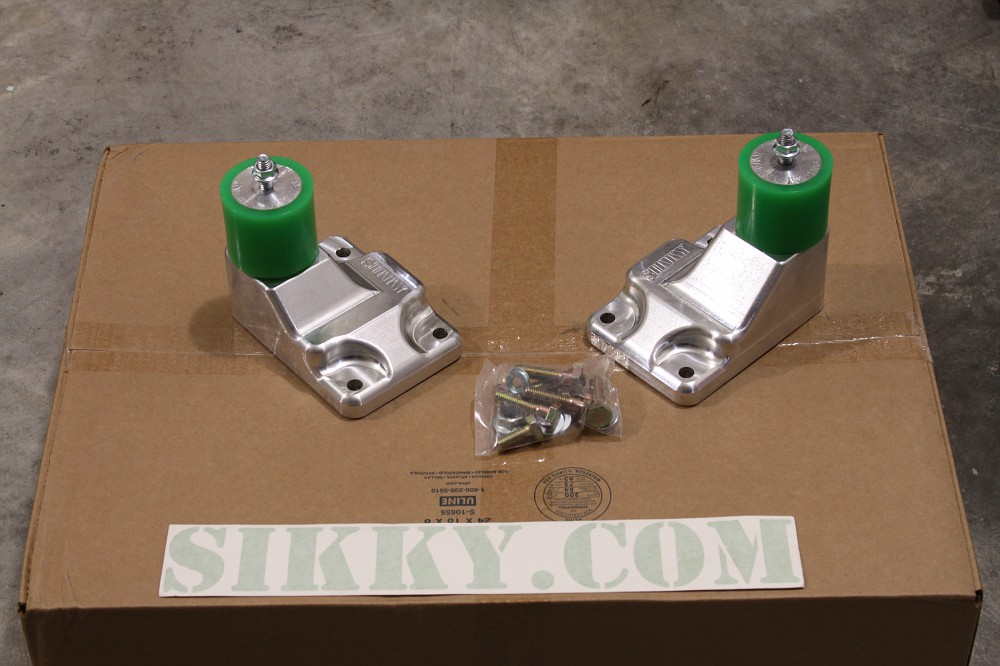
Sikky LS Motor Mounts: Not much to say, they are a solid hunk of metal that looks tits. As long as they line up and don't break down the road then I guess they'll work just fine. They also make a solid mount option, which I obviously opted not to go with.

Image

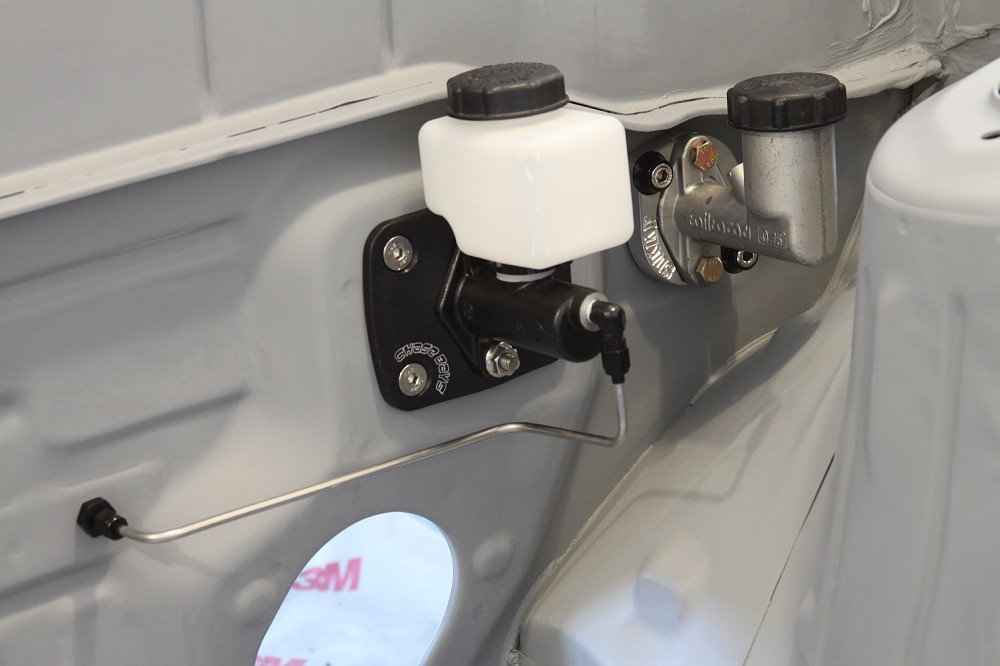
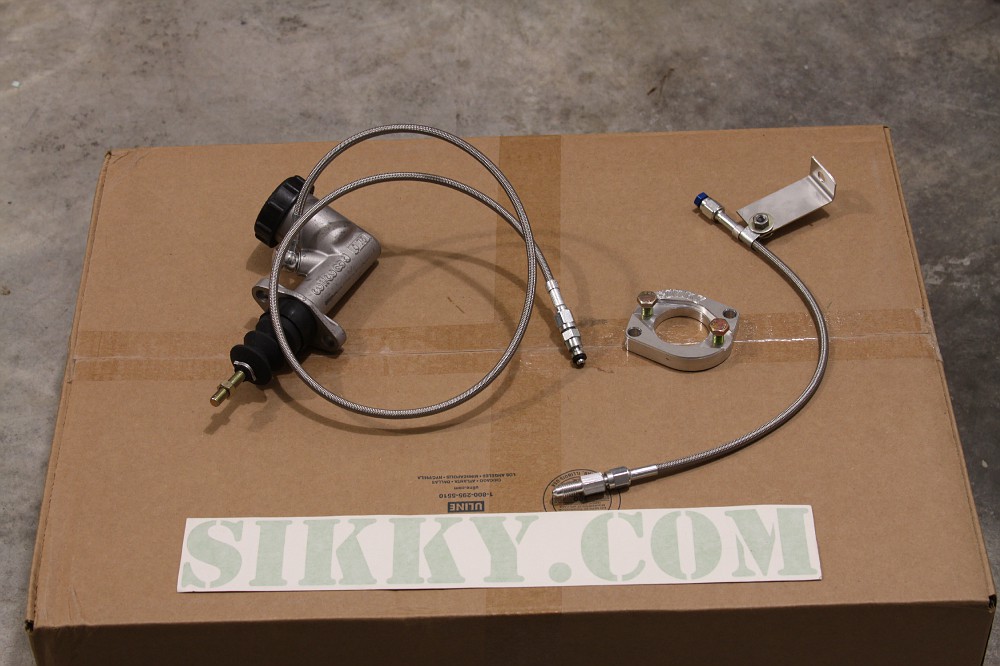
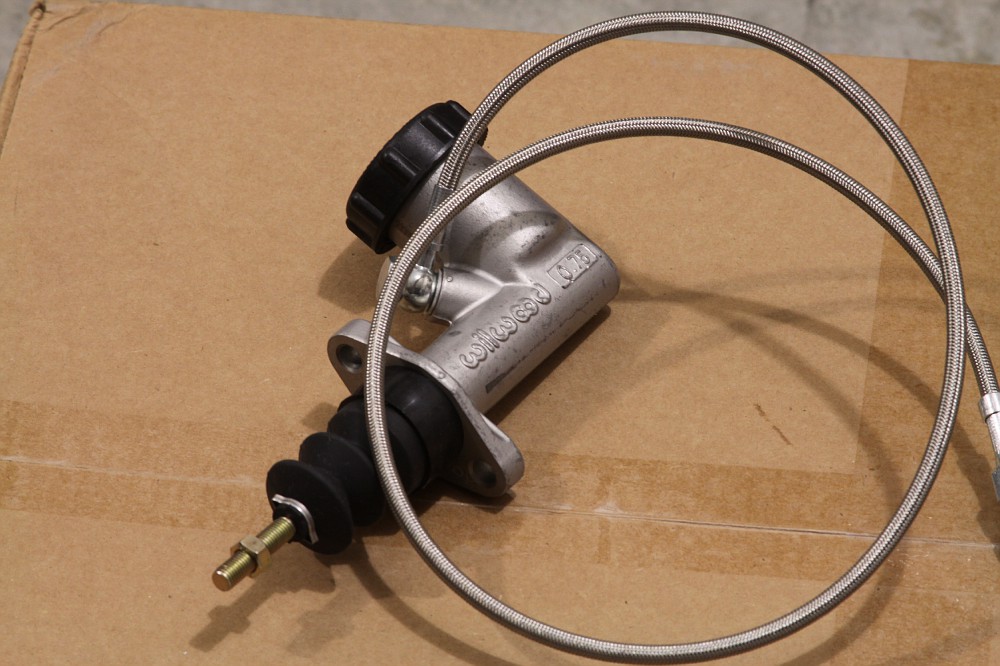
Sikky Master Cylinder Conversion Kit: Utilizes a Wilwood master cylinder(which I'll be coating black to match my Wilwood brake master cylinder) and Sikky's CNC'd mount for an effortless install onto the firewall. Lines are also included.

Image

Image

Image

Sikky Driveshaft: I went with the aluminum option... they also make a steal version. They have them for S13, S14, with or without ABS.

Image

Sikky Subframe Bushings:

Image

The transmission subframe is also included in this kit, but it is on backorder... should have that sooner than later. With the extended weekend, I'm hoping to get the pan on and work on the bay a little more. I promised a lot of my time to the family though, so we'll see how it goes. It is a 2-day weekend for me though, so I should have enough time to please everyone:D

User avatar
Razi
Posts: 28681
Joined: Sun Dec 31, 2006 9:52 am
Car: Moo

Post

Very nice stuff, Broadfield!

Did you also order a Sikky front swaybar?
I don't think the stock swaybar clears the Sikky oilpan, unless they have revised some stuff on the current pans.

User avatar
Broadfield
Posts: 2681
Joined: Tue Sep 05, 2006 2:57 pm
Car: 1992 240sx
Location: Normal, IL
Contact:

Post

Razi wrote:Very nice stuff, Broadfield!

Did you also order a Sikky front swaybar?
I don't think the stock swaybar clears the Sikky oilpan, unless they have revised some stuff on the current pans.
I will be! Sikky said once I post up how all this stuff works out, then I will get an additional discount on anything else I order. I may even be able to beta test stuff for them.

User avatar
240TKE128
Posts: 230
Joined: Fri Feb 06, 2009 9:05 am
Car: 1990 240sx HB

2011 subaru outback 2.5i limited
Location: Asheville, NC
Contact:

Post

Broadfield, Thats a sweet deal man, Congrats and much luck, this is amazing cant wait to see all the parts working togther.

User avatar
Razi
Posts: 28681
Joined: Sun Dec 31, 2006 9:52 am
Car: Moo

Post

Broadfield wrote:
Razi wrote:Very nice stuff, Broadfield!

Did you also order a Sikky front swaybar?
I don't think the stock swaybar clears the Sikky oilpan, unless they have revised some stuff on the current pans.
I will be! Sikky said once I post up how all this stuff works out, then I will get an additional discount on anything else I order. I may even be able to beta test stuff for them.
Right on! :mike

User avatar
Broadfield
Posts: 2681
Joined: Tue Sep 05, 2006 2:57 pm
Car: 1992 240sx
Location: Normal, IL
Contact:

Post

I got a tad done over the weekend. Mounted up the Sikky pan. Had to first modify the windage tray so the back of the Sikky pan would clear.

Image

Modified rear section:

Image

New front pickup in place:

Image

Image

Also needed to tap out the OEM dip stick port to an 1/8" NPT. Sikky provides an 1/8" NPT brass plug to fill the opening since the dip stick gets relocated to a new location on the Sikky pan:

Image

New dipstick location:

Image

Pan and mounts on:

Image

Image


I also wanted to mock up the Chase Bays booster delete/brake line tuck. That way I could figure out where I wanted all of the fittings and drill the holes in the bay before primer:

Image

The 90 degree bulkhead location for the rear hardline:

Image

Then the inner fender bulkhead for each of the front brakes:

Image

Image

Also contemplating whether I want my battery in the bay with some nice bulkhead fittings or just simply hide it in the spare tire well. I need to be 100% sure before I go drilling big holes for those bulkheads:

Image

User avatar
Gabes13
Posts: 2385
Joined: Mon Mar 17, 2008 11:59 am
Car: rb20det s13
Location: St. Pete, Fl.

Post

Your battery setup is awesome, but relocate for cleanliness!!!

User avatar
Dittoz7
Posts: 17695
Joined: Thu Sep 07, 2006 4:08 pm
Car: 1997 2f0WtY SE!
Location: Miami, FL

Post

Gabes13 wrote:Your battery setup is awesome, but relocate for cleanliness!!!
x2

User avatar
homeslicej2
Posts: 5450
Joined: Mon Jan 15, 2007 5:46 pm
Car: 1990 S13 SR'd hatch

Post

I think relocated battery is a good bet. Plus, if you decide to add A/C later on and run into any of the cooling issues some have with the LSx swaps, you'd have a spot cleared out for a water cooler set-up.

User avatar
Broadfield
Posts: 2681
Joined: Tue Sep 05, 2006 2:57 pm
Car: 1992 240sx
Location: Normal, IL
Contact:

Post

I have been so busy with life and trying to get this bay done, that my good friend Kyle took the liberty of posting an update for me last week on our local car forum. I'll just quote his post since that's the easiest:
Kyle Smith wrote:Took some pictures for Tob while I was over there the other night. Just thought you guys would like to know he's still alive and kicking a** on this thing. I always agreed Toby paid some pretty wild attention to details, but hanging out a lot these last few weeks has really given me a new appreciation for the level of attention to detail that is going into this thing. We're talking spending days sanding the front of the radiator support (you know, that area you won't see bc it's behind his headlights and under the cooling panel). stuff like that. There are a lot of cars that look good in pictures. This thing will look dope in pictures, in person, and under a god damn microscope (but still pretty much get daily'd). Blows my mind.

Image
Image
Image
Image
Image
Image
Image
Image
Image
Image
Image


Now this post will catch us up to date:

Well, the time is near.... PAINT! I have been sanding on this thing forever simply because the previous owner painted the bay improperly.:mad: Remember kids, it's all about the prep! Whomever painted the bay before I owned it didn't prep it correctly. So feathering in the edge between the original white paint and the off-white paint that he had it painted in was a real chore. Since it was not scuffed before the off-white paint, it would just flake off when trying to sand it. Some places where ok, so I would just keep sanding until it feathered in correctly. Once I thought it was good enough I would etch primer it. And guess what, the primer would still lift along the edge as seen in the picture below.

Image

So I would have to let the primer dry then sand that area again and try to feather it out further. Total pain in the a**. The bad part is that the areas that were the worst are the areas that are really hard to get to and sand... so I had like 30 hours into just feathering everything out and redoing it several times until it was correct. Had I known it was going to be this way I would of stripped the entire bay down to bare metal before I even welded anything up. However, it's actually best to not strip if you don't have to because the OEM E-coat is better than anything you can buy to put on there. So leaving that intact in as many areas as possible is the best solution.

Image

So I officially finished it without any lifting primer and scuffed it all down with a red 3M scuff pad as of 12:30PM yesterday. Which is good because I needed to have it done by 5:00PM yesterday... which is when my good friend Dave came over and shot primer on it for me. He's the painter at the body shop that I have all of my paint work done at. So he brought some baller Spies Hecker primer with him and shot it for me:

Image

Image

Image

Image

Tonight I will apply a 3M guide coat and block the entire thing down with 500 grit. Then apply the seam sealer later this week. We are trailering it over to his body shop this Saturday morning for paint... so it will be done this weekend. FINALLY!

User avatar
The_caveman
Posts: 283
Joined: Sat Aug 20, 2011 7:05 am
Car: 93 nissan 240sx hatch(daily build)
1992 Coupe (drift build)
1990 240sx hatch(wrecked slut)
2008 hyundai sonota - girls car/reliable! i drive it better tho ;)

Post

That so sick, makes my engine bay paint look like s*** lol

the a3k
Posts: 1198
Joined: Fri Apr 20, 2007 10:09 am
Car: 1996 Black S14 RB25
Location: North Jersey

Post

The_caveman wrote:That so sick, makes my engine bay paint look like s*** lol
yea........

Hoffman5982
Posts: 1805
Joined: Sat Sep 29, 2007 7:20 pm
Car: '95 sr20det 240sx

Post

Broadfield's bay makes everyones bay look like sh**. His entire car makes everyone's look like sh**.

User avatar
terry_240sx
Posts: 205
Joined: Mon Dec 14, 2009 5:24 pm
Car: '93 240sx hatch
Location: so cal

Post

^
unfortunately, this man speaks the truth...

93240guy
Posts: 88
Joined: Sun Feb 03, 2008 1:52 pm
Car: 93 240SX SE

Post

very nice!!! my inspiration.

User avatar
Broadfield
Posts: 2681
Joined: Tue Sep 05, 2006 2:57 pm
Car: 1992 240sx
Location: Normal, IL
Contact:

Post

Wednesday night I applied the guide coat. Now in the past I have always just "peppered" the surface with a black aerosol paint to create a guide coat... actually works pretty darn well. But Dave had me try a product from 3M that is specifically a guide coat. I'm not sure what the composition of it is, but it's basically a powder that you apply with a round wax applicator pad. Just wipe it on with a little pressure over the areas you want to block down and you get the results below:

Image

Image

Image

Now you will be able to tell how this stuff works. First picture is after a couple passes with 500 grit:

Image

The next picture you can see where there is an area where it's just white... that area does not need to be sanded anymore. If you can see guide coat, then it's not perfectly sanded yet... even if it's just a speck:

Image

After some more sanding and now I'm starting to make a little progress:

Image

So this is why the guide coat is so great. Shows you where you need to sand and keeps you from sanding too much where you might create a minute low spot.

After 9-10 hours of straight sanding with 500 grit and a grey 3M scuff pad, the bay is blocked:

Image

Next up is the seam sealer to replace the OEM sealer I removed:

Image

I have never used a seam sealer before, so I taped off the upper fire wall to give it a shot:

Image

Image

Applicator gun, which is same gun I use for the other 3M product I use for my custom interior work:

Image

Image

I applied a small bead then smoothed/forced it in with my finger... wearing a latex glove of course:

Image

Now this is when I should of removed the tape, but I didn't know that. I'm use to removing tape once paint, resin, glue etc. is dry. But this stuff you need to remove it before it dries.... it has about a 10 minute working time. So apply then remove the tape within a few minutes.

The rest of the bay masked off:

Image

Image

Image

Image

Image

Seam sealer finished. Like I said, this tape should of been removed, but I let it dry until the next morning before I removed it. You live and learn I guess... it just made it more difficult to remove:

Image

Dave let me borrow some bad-a** dollies from his shop. They have several mounting options... I chose to clamp them to the pinch welds for this application:

Image

Image

It's time!

Image

Image

Dave painted it for me on Saturday and we are bringing it back to my house here in a few hours. I can't wait to get some finished pics.

User avatar
originalyunique95
Posts: 68
Joined: Sun Aug 14, 2011 4:53 pm
Car: 1995 Nissan 240sx
Location: Normal, IL

Post

I can not wait to see this in person. The 16th needs to be here now!

the a3k
Posts: 1198
Joined: Fri Apr 20, 2007 10:09 am
Car: 1996 Black S14 RB25
Location: North Jersey

Post

dear broadfield,

move to NJ and work on my s14 :)

love,
andrew

User avatar
Broadfield
Posts: 2681
Joined: Tue Sep 05, 2006 2:57 pm
Car: 1992 240sx
Location: Normal, IL
Contact:

Post

It's like it never left... well, except for the fact that it has really glossy white paint in the engine bay now:

Image

Image

I didn't really get a chance to work on it much yesterday... got it on the jack stands so I could get the dollies back to my friend Dave's body shop and cleaned up some rubber grommets. It's gonna be go time now though on getting it back together!

Image

User avatar
badbob2121
Posts: 1989
Joined: Sat Jan 16, 2010 9:23 am
Car: 92 S13 Hatch ELLIS JUAN, 12 Mustang GT RTR
Location: St. Louis

Post

:drool:


Return to “240sx General Discussion”