Your right it doesn't have a motor.TTkickedin wrote:400th post! WOOO WOOO!!
1999 dont work at work...not even HLJ..
Who makes it? Aoshima? (if they do, they tend to make curbside models, meaning no engine, youd have to buy your own from tamiya if they sell the vg separately, or just buy the z32 kit they sell like i did and just get the engine from there.

UPDATED!!! Tamiya 300zx Twin Turbo Build Thread!
-
300ZXttZMAN

- Posts: 7807
- Joined: Mon Nov 22, 2010 4:07 pm
- Car: 1990 300zx Twin Turbo 5 spd pearl white.
My Daily: 2008 Frontier NISMO package, 4x4 Crew Cab. - Location: Sulphur, LA 70665
- Contact:
Re: (Finally started my) Tamiya 300zx Twin Turbo Build Threa
-
TTkickedin

- Posts: 1658
- Joined: Tue Jul 19, 2011 5:51 am
- Car: 1991 Nissan 300zx TT 5 speed, t-tops, < currently in intensive care unit!
2011 MBTA BUS - Location: Braintree, MA
- Contact:
Re: (Finally started my) Tamiya 300zx Twin Turbo Build Threa
Aoshima has more detail than the tamiya does.
If you want ttops and engine detail: go with the tamiya kit
if you want slicktop and no engine detail: Aoshima
if you want ttops, full engine detail, and better interior/chassis detail: go with both kits and swap parts where necessary
if you want slicktop, full engine detail, and rhd/lhd dash option: go with both kits and swap parts as necessary.
Re: (Finally started my) Tamiya 300zx Twin Turbo Build Threa
its Fujimi. lol. so it comes with the engine and everything. i just need to get an aftermarket or custom exhaust going on.
-
TTkickedin
- Posts: 1658
- Joined: Tue Jul 19, 2011 5:51 am
- Car: 1991 Nissan 300zx TT 5 speed, t-tops, < currently in intensive care unit!
2011 MBTA BUS - Location: Braintree, MA
- Contact:
Re: (Finally started my) Tamiya 300zx Twin Turbo Build Threa
Do what i did! you cut a little bit of the casting off that the parts are connected to, shape into exhaust tips, and just like, cut the old tips off and glue it in place, such a great idea. speakign of which, sitll havent went for black paint yet, I keep forgetting. I need to finish the 560sec by christmas too!
Re: (Finally started my) Tamiya 300zx Twin Turbo Build Threa
good idea on the exhaust. im gonna try that. haha. my buddy is finishing up his "Herrafrush" AP2 S2000 model as we speak. thing is sick.
-
TTkickedin
- Posts: 1658
- Joined: Tue Jul 19, 2011 5:51 am
- Car: 1991 Nissan 300zx TT 5 speed, t-tops, < currently in intensive care unit!
2011 MBTA BUS - Location: Braintree, MA
- Contact:
Re: (Finally started my) Tamiya 300zx Twin Turbo Build Threa
Quick Update!
Got some black paint, but turned out to be the wrong color, will be getting some more black gloss and black satin acrylic over the weekend. But I did the first coat of paint on the shell
3mp blackberry camera is the best I can do with my funding as of now. Anyone want to trade an ipod for a better digital cam?


First coat, came out with a lot more metallic than I want.. Can't tell but it's a little too much.
I'll be doing a few more thinner coats. Oh, and the hood will be clear to show off the detailing to the engine bay
Now, here's the little napkin rug mod I was talking about. This will prevent you from having to buy and learn how to use 'flocking' powder. I mentioned earlier that you shouldn't use glue, so I tried it anyway and it actually looks more like a rug with some work. You can also use toilet paper too, (it's thinner and can be shaped easier than a napkin.)

First step: Separate the napkin or toiler paper piece into a small strip roughly the shape of the area youd like to apply carpet to. I'm doing the passenger side of the model interior first, so the little piece on the right is my first layer. (only need one layer with a thick napkin ply, but whereas this is thin toilet paper, you don't need to separate the ply's, it's already very thin.)

Second: Apply glue, (or paint. This glue or paint will be used as adhesive for your layer of paper.)

Third: Apply the paper to the glue or painted area. Lightly press down if using glue, you don't want the paper to lose it's texture. If you're using paint, you can press down as much as needed. You will have to apply another layer of paint over the paper, as shown in the next step:

Fourth: If you're using glue, let the glue dry for ONE minute (not completely, i'll tell you why), then apply a thick layer of paint over the glued down paper. If you're using paint, make sure this layer of paint is thick as well over that paper. Chances are that the paper didn't fully absorb the base paint you just laid down, so another layer of paint will do the trick in firmly placing the paper down.
Now, if you're using paint, the texture is fine the way it is. But, if you use glue like I did for this example, you'll notice that when you're painting the paper it will start to drag with the brush a little bit...this is where you create your texture. What you want to do is, clean the brush first, (must be using a flat tip brush), position the bristles on the paper, angle the brush handle at about a 45 degree angle, and lightly push the paper. When you do this, it will create waves, do this enough and you'll get the texture of flocking, or an actual looped thread carpet look.
Do this as much as you want for added effect: Cut/tear another piece of paper and lay it onto the DRIED area. Then, paint that layer again and move it around like we just did in this step to cover a larger area.

Fifth: Now that I added two layers of paper and pushed it around for more texture, you can easily see the texture coming out. (Too bad it's the wrong color, I bought the wrong black. I might do a few more layers.)
The reason I painted around the entire interior was that I was being lazy and didn't want to go back to the store and get the correct paint necessary. I was trying to make it work, but it didn't.
What's left to do:
Put together the front suspension, glue the exhaust on (painted gunmetal metallic, with black on the tips to look like it's hollow like a real exhaust,) carpet the drivers side and trunk, put the rest of the interior together and paint exactly as I have my interior, get the intake plenum on, wire up the engine bay, and repaint the body a few more times.
More to come
Got some black paint, but turned out to be the wrong color, will be getting some more black gloss and black satin acrylic over the weekend. But I did the first coat of paint on the shell
3mp blackberry camera is the best I can do with my funding as of now. Anyone want to trade an ipod for a better digital cam?
First coat, came out with a lot more metallic than I want.. Can't tell but it's a little too much.
I'll be doing a few more thinner coats. Oh, and the hood will be clear to show off the detailing to the engine bay
Now, here's the little napkin rug mod I was talking about. This will prevent you from having to buy and learn how to use 'flocking' powder. I mentioned earlier that you shouldn't use glue, so I tried it anyway and it actually looks more like a rug with some work. You can also use toilet paper too, (it's thinner and can be shaped easier than a napkin.)
First step: Separate the napkin or toiler paper piece into a small strip roughly the shape of the area youd like to apply carpet to. I'm doing the passenger side of the model interior first, so the little piece on the right is my first layer. (only need one layer with a thick napkin ply, but whereas this is thin toilet paper, you don't need to separate the ply's, it's already very thin.)
Second: Apply glue, (or paint. This glue or paint will be used as adhesive for your layer of paper.)
Third: Apply the paper to the glue or painted area. Lightly press down if using glue, you don't want the paper to lose it's texture. If you're using paint, you can press down as much as needed. You will have to apply another layer of paint over the paper, as shown in the next step:
Fourth: If you're using glue, let the glue dry for ONE minute (not completely, i'll tell you why), then apply a thick layer of paint over the glued down paper. If you're using paint, make sure this layer of paint is thick as well over that paper. Chances are that the paper didn't fully absorb the base paint you just laid down, so another layer of paint will do the trick in firmly placing the paper down.
Now, if you're using paint, the texture is fine the way it is. But, if you use glue like I did for this example, you'll notice that when you're painting the paper it will start to drag with the brush a little bit...this is where you create your texture.
Do this as much as you want for added effect: Cut/tear another piece of paper and lay it onto the DRIED area. Then, paint that layer again and move it around like we just did in this step to cover a larger area.
Fifth: Now that I added two layers of paper and pushed it around for more texture, you can easily see the texture coming out. (Too bad it's the wrong color, I bought the wrong black. I might do a few more layers.)
The reason I painted around the entire interior was that I was being lazy and didn't want to go back to the store and get the correct paint necessary. I was trying to make it work, but it didn't.
What's left to do:
Put together the front suspension, glue the exhaust on (painted gunmetal metallic, with black on the tips to look like it's hollow like a real exhaust,) carpet the drivers side and trunk, put the rest of the interior together and paint exactly as I have my interior, get the intake plenum on, wire up the engine bay, and repaint the body a few more times.
More to come
-
300ZXttZMAN
- Posts: 7807
- Joined: Mon Nov 22, 2010 4:07 pm
- Car: 1990 300zx Twin Turbo 5 spd pearl white.
My Daily: 2008 Frontier NISMO package, 4x4 Crew Cab. - Location: Sulphur, LA 70665
- Contact:
-
TTkickedin
- Posts: 1658
- Joined: Tue Jul 19, 2011 5:51 am
- Car: 1991 Nissan 300zx TT 5 speed, t-tops, < currently in intensive care unit!
2011 MBTA BUS - Location: Braintree, MA
- Contact:
Re: UPDATED!!! Tamiya 300zx Twin Turbo Build Thread!
Thanks! Now you can finally tell how I did the napkin mod?
Wait till I wire the engine bay up. I even have a diy mod for that in my head involving various gauges of electrical wire.
Searched a bit more, and I foudn a 1/12 scale 300zx kit... good luck trying to find it for sale, and less than 600 bucks though.
http://www.spc.org.uk/nissan/1-12_300zx ... /index.htm
Oh, and theres a Convertible model in the 1/24 size so now all of the z32 body styles are covered...except 2+2 

That's a Fujimi 18857
Wait till I wire the engine bay up. I even have a diy mod for that in my head involving various gauges of electrical wire.
Searched a bit more, and I foudn a 1/12 scale 300zx kit... good luck trying to find it for sale, and less than 600 bucks though.
http://www.spc.org.uk/nissan/1-12_300zx ... /index.htm
Oh, and theres a Convertible model in the 1/24 size
That's a Fujimi 18857
-
300ZXttZMAN
- Posts: 7807
- Joined: Mon Nov 22, 2010 4:07 pm
- Car: 1990 300zx Twin Turbo 5 spd pearl white.
My Daily: 2008 Frontier NISMO package, 4x4 Crew Cab. - Location: Sulphur, LA 70665
- Contact:
Re: UPDATED!!! Tamiya 300zx Twin Turbo Build Thread!
OMG I must have! I would pay $600 for an unopened 1:12 Z32 Hasagawa kit if you find one for sale you must let me know I will give you a reward.
Yea I see what you mean by the napkin mod.
Yea I see what you mean by the napkin mod.
-
TTkickedin
- Posts: 1658
- Joined: Tue Jul 19, 2011 5:51 am
- Car: 1991 Nissan 300zx TT 5 speed, t-tops, < currently in intensive care unit!
2011 MBTA BUS - Location: Braintree, MA
- Contact:
Re: UPDATED!!! Tamiya 300zx Twin Turbo Build Thread!
^ http://www.ebay.com/itm/HASEGAWA-1-12-s ... 0821506920
Ready for that reward whenever you are
Dunno if it's 600 but it's definitely for sale!
Dunno if it's 600 but it's definitely for sale!
-
300ZXttZMAN
- Posts: 7807
- Joined: Mon Nov 22, 2010 4:07 pm
- Car: 1990 300zx Twin Turbo 5 spd pearl white.
My Daily: 2008 Frontier NISMO package, 4x4 Crew Cab. - Location: Sulphur, LA 70665
- Contact:
Re: UPDATED!!! Tamiya 300zx Twin Turbo Build Thread!
I would so buy it up if I was already driving my car again that car would be an awesome thing to put in my hatch at car shows.
It may still be for sale when I am ready... Its a very select market haha. If its still for sale (when I am ready) and I buy it i'll give you a reward!
It may still be for sale when I am ready... Its a very select market haha. If its still for sale (when I am ready) and I buy it i'll give you a reward!
-
TTkickedin
- Posts: 1658
- Joined: Tue Jul 19, 2011 5:51 am
- Car: 1991 Nissan 300zx TT 5 speed, t-tops, < currently in intensive care unit!
2011 MBTA BUS - Location: Braintree, MA
- Contact:
Re: UPDATED!!! Tamiya 300zx Twin Turbo Build Thread!
No bacon this time? hahah
To anyone following this thread, make sure to check the first page for updated 300zx scale model product numbers!!! You'd be suprised how many there are!
To anyone following this thread, make sure to check the first page for updated 300zx scale model product numbers!!! You'd be suprised how many there are!
-
300ZXttZMAN
- Posts: 7807
- Joined: Mon Nov 22, 2010 4:07 pm
- Car: 1990 300zx Twin Turbo 5 spd pearl white.
My Daily: 2008 Frontier NISMO package, 4x4 Crew Cab. - Location: Sulphur, LA 70665
- Contact:
Re: UPDATED!!! Tamiya 300zx Twin Turbo Build Thread!
No bacon haha.
-
TTkickedin
- Posts: 1658
- Joined: Tue Jul 19, 2011 5:51 am
- Car: 1991 Nissan 300zx TT 5 speed, t-tops, < currently in intensive care unit!
2011 MBTA BUS - Location: Braintree, MA
- Contact:
Re: UPDATED!!! Tamiya 300zx Twin Turbo Build Thread!
yay or nay on modeling the bay after this?

non-wired would be like this, kind of like a wire tuck

Oh, the strut bar can be made with a soda can and some manuevering.
non-wired would be like this, kind of like a wire tuck
Oh, the strut bar can be made with a soda can and some manuevering.
-
UberBricky
- Posts: 56
- Joined: Fri Dec 16, 2011 10:22 pm
- Car: 1990 300ZX TT
- Location: Edmonton, Alberta
Re: UPDATED!!! Tamiya 300zx Twin Turbo Build Thread!
Sweet build! I'd go with the aluminum plenum, but thats just me. Looking good!
-
TTkickedin
- Posts: 1658
- Joined: Tue Jul 19, 2011 5:51 am
- Car: 1991 Nissan 300zx TT 5 speed, t-tops, < currently in intensive care unit!
2011 MBTA BUS - Location: Braintree, MA
- Contact:
Re: UPDATED!!! Tamiya 300zx Twin Turbo Build Thread!
Hey thanks man!
As for the carpet, I finished up the interior! Disregard what I said about the toilet paper being ok because it's NOT. It's waaay too hard after it dries. It would however, be a great bedliner for a pik ahp truck.
I used this napkin that was really thick and used every layer, (didn't separate the ply's or anything,) and it came out looking fantastic. I'll try to borrow somebody's camera because it came out just absolutely way above my expectations and I'd like for everyone to see the details of it.
New method (will be showing this with pictures.)
get a thick, soft napkin. You've seen and used these things before, they might be the same fabric as those white automotive wipes. THOSE will get you a good carpet. lay down a thin coat of paint the same color you want that carpet to be. Don't use glue and dont let that paint dry. Then, lay that napkin piece you cut out to fit the shape of the area you want to cover with carpet. Paint over that. Dont le tit dry yet, take the rounded end of the brush (with no hair on it,) and just keep poking at the wet paint, it will raise some of the fabric hairs out of the paint, resulting in an awesome texture later when it dries.
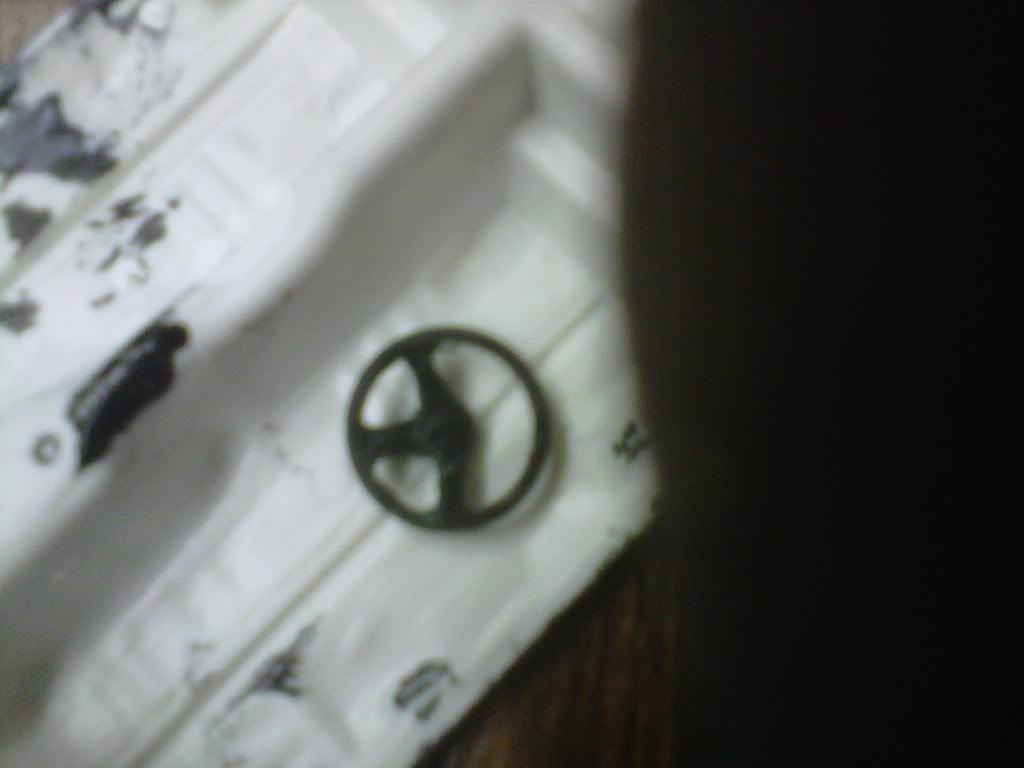
I also transformed with some cutting and sanding, the stock 300zx steering wheel in the package into a racing wheel like I have!! i'll be giving it the MOMO treatment.
So guys, I've painted the suspension and drivetrain and i'm in the process of getting the wheels decaled and the tires sanded for realism. That's all gonna be in the next update.
And I have a little suprise for you as well....
I'll be making the T-Tops FUNCTIONAL. I'll be making a front AND rear strut bar from scratch, and I'll be going over how to LOWER IT. it's gonna sit with a similar stance as mine has when it's completed. Big brembo rotors up front, stockers in back.
YES, FUNCTIONAL T-TOPS! There's some cutting, gluing, and DIY clamping necessary to do this but I can handle it. Pics are coming :p
As for the carpet, I finished up the interior! Disregard what I said about the toilet paper being ok because it's NOT. It's waaay too hard after it dries. It would however, be a great bedliner for a pik ahp truck.
I used this napkin that was really thick and used every layer, (didn't separate the ply's or anything,) and it came out looking fantastic. I'll try to borrow somebody's camera because it came out just absolutely way above my expectations and I'd like for everyone to see the details of it.
New method (will be showing this with pictures.)
get a thick, soft napkin. You've seen and used these things before, they might be the same fabric as those white automotive wipes. THOSE will get you a good carpet. lay down a thin coat of paint the same color you want that carpet to be. Don't use glue and dont let that paint dry. Then, lay that napkin piece you cut out to fit the shape of the area you want to cover with carpet. Paint over that. Dont le tit dry yet, take the rounded end of the brush (with no hair on it,) and just keep poking at the wet paint, it will raise some of the fabric hairs out of the paint, resulting in an awesome texture later when it dries.
I also transformed with some cutting and sanding, the stock 300zx steering wheel in the package into a racing wheel like I have!! i'll be giving it the MOMO treatment.
So guys, I've painted the suspension and drivetrain and i'm in the process of getting the wheels decaled and the tires sanded for realism. That's all gonna be in the next update.
And I have a little suprise for you as well....
I'll be making the T-Tops FUNCTIONAL. I'll be making a front AND rear strut bar from scratch, and I'll be going over how to LOWER IT. it's gonna sit with a similar stance as mine has when it's completed. Big brembo rotors up front, stockers in back.
YES, FUNCTIONAL T-TOPS! There's some cutting, gluing, and DIY clamping necessary to do this but I can handle it. Pics are coming :p
-
TTkickedin
- Posts: 1658
- Joined: Tue Jul 19, 2011 5:51 am
- Car: 1991 Nissan 300zx TT 5 speed, t-tops, < currently in intensive care unit!
2011 MBTA BUS - Location: Braintree, MA
- Contact:
Re: UPDATED!!! Tamiya 300zx Twin Turbo Build Thread!
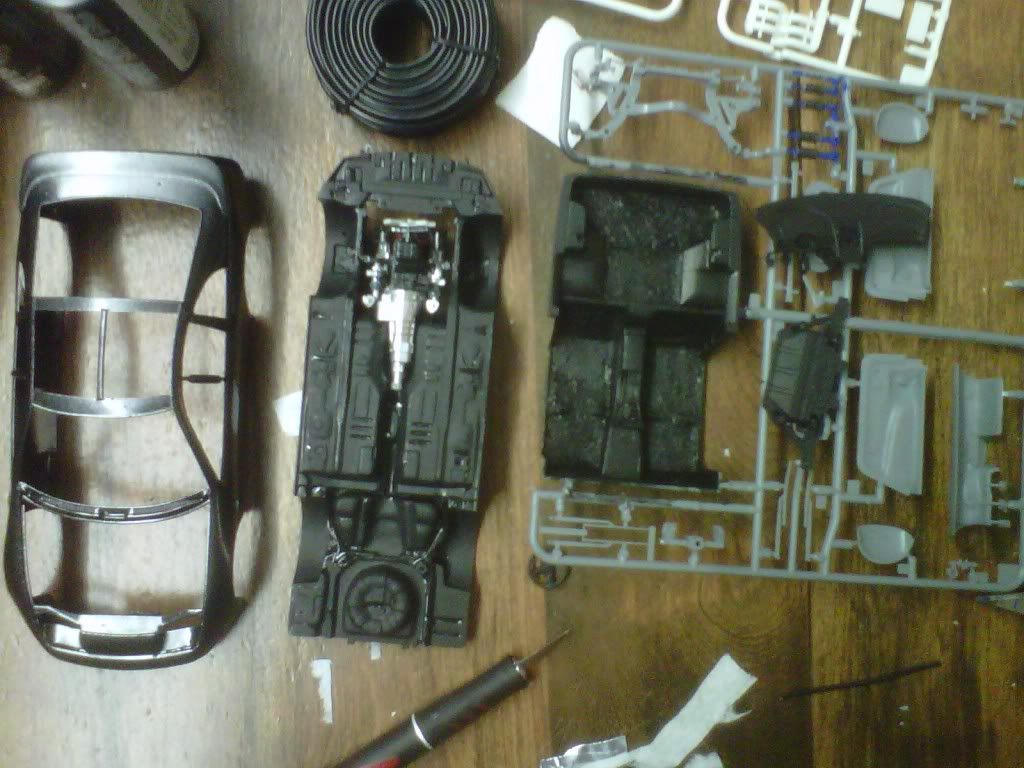
Just a few pics of the content I explained above, more to come the next few days!

-
300ZXttZMAN
- Posts: 7807
- Joined: Mon Nov 22, 2010 4:07 pm
- Car: 1990 300zx Twin Turbo 5 spd pearl white.
My Daily: 2008 Frontier NISMO package, 4x4 Crew Cab. - Location: Sulphur, LA 70665
- Contact:
Re: UPDATED!!! Tamiya 300zx Twin Turbo Build Thread!
Nice I love build pics!!!
-
TTkickedin
- Posts: 1658
- Joined: Tue Jul 19, 2011 5:51 am
- Car: 1991 Nissan 300zx TT 5 speed, t-tops, < currently in intensive care unit!
2011 MBTA BUS - Location: Braintree, MA
- Contact:
Re: UPDATED!!! Tamiya 300zx Twin Turbo Build Thread!
Then you're gonna love these pics more!!


Some cutting, F*ck ups and some sanding made me functional T-TOPS. OH YEAH.


The seats in my car don't have the dated ripples on the seat cushion or on the back, so i sanded my seats down and totally forgot to take a pic of them painted...

Routed 'fuel' lines from the gas tank to the front of the engine. Now remembering which side those are on, and how wrong I installed it
Anyway, this is a bit of insulated wire, which will be making most of the wiring and hoses i'll need. To make sturdy wires, pull out two or three gauges inside the plastic sheathing. Twist them. when twisted, They can be cut to shape, glued, painted and mounted anywhere and will stay where you put it. I'm gonna make a firewall harness with what's left of the sheathing and some strategically placed wires.


Scale negative camber ftw.

Decals on the centercaps kept coming off sooo...IDK what to do with the wheels. and SPEAKING OF THOSE DAMN WHEELS. omg. those were such a PITA to install on a non Aoshima model. I had to do significant modifications to the wheels to make them work with those brakes, and I couldn't get the smaller rotors to work with these either. how these wheels in the front are exactly the same in the back. Due to that fact, I might have to pull the rear fenders because the tires are just monstrous. The rear has negative camber as well, and on purpose.
Basically, I took the stock tamiya wheels, snapped the inside mounting rod off, inserted tiny / little plastic cylinders into the wheels, stuck those rods inside that cylinder, and just glued the wheel to the hubs and the brakes to the actual wheel. If I didn't do that, the wheels in the front and back would stick out 5 solid inches like some ghetto kid VW driver.

Rear subframe came out retardedly awesome.

AAAnd the finished chassis portion of this build. Now, my focus is the interior crocodile alligator, and I've already made progress.
Some cutting, F*ck ups and some sanding made me functional T-TOPS. OH YEAH.
The seats in my car don't have the dated ripples on the seat cushion or on the back, so i sanded my seats down and totally forgot to take a pic of them painted...
Routed 'fuel' lines from the gas tank to the front of the engine. Now remembering which side those are on, and how wrong I installed it
Anyway, this is a bit of insulated wire, which will be making most of the wiring and hoses i'll need. To make sturdy wires, pull out two or three gauges inside the plastic sheathing. Twist them. when twisted, They can be cut to shape, glued, painted and mounted anywhere and will stay where you put it. I'm gonna make a firewall harness with what's left of the sheathing and some strategically placed wires.
Scale negative camber ftw.
Decals on the centercaps kept coming off sooo...IDK what to do with the wheels. and SPEAKING OF THOSE DAMN WHEELS. omg. those were such a PITA to install on a non Aoshima model. I had to do significant modifications to the wheels to make them work with those brakes, and I couldn't get the smaller rotors to work with these either. how these wheels in the front are exactly the same in the back. Due to that fact, I might have to pull the rear fenders because the tires are just monstrous. The rear has negative camber as well, and on purpose.
Basically, I took the stock tamiya wheels, snapped the inside mounting rod off, inserted tiny / little plastic cylinders into the wheels, stuck those rods inside that cylinder, and just glued the wheel to the hubs and the brakes to the actual wheel. If I didn't do that, the wheels in the front and back would stick out 5 solid inches like some ghetto kid VW driver.
Rear subframe came out retardedly awesome.
AAAnd the finished chassis portion of this build. Now, my focus is the interior crocodile alligator, and I've already made progress.
-
300ZXttZMAN
- Posts: 7807
- Joined: Mon Nov 22, 2010 4:07 pm
- Car: 1990 300zx Twin Turbo 5 spd pearl white.
My Daily: 2008 Frontier NISMO package, 4x4 Crew Cab. - Location: Sulphur, LA 70665
- Contact:
Re: UPDATED!!! Tamiya 300zx Twin Turbo Build Thread!
Looking good its nice to see some steady progress!
-
TTkickedin
- Posts: 1658
- Joined: Tue Jul 19, 2011 5:51 am
- Car: 1991 Nissan 300zx TT 5 speed, t-tops, < currently in intensive care unit!
2011 MBTA BUS - Location: Braintree, MA
- Contact:
Re: UPDATED!!! Tamiya 300zx Twin Turbo Build Thread!
Totally a good feeling for me too! I've been getting bored of xbox, so I've been working on this model for quite some time now.
After I'm done with the z, should I continue with any model i'm building? Such as the 560sec I'm building for my dad?
I have this dodge Charger drag car I was partially in the milddle of building too. I might wire it up as well. We'll see.
After I'm done with the z, should I continue with any model i'm building? Such as the 560sec I'm building for my dad?
I have this dodge Charger drag car I was partially in the milddle of building too. I might wire it up as well. We'll see.
-
Nizzan300zx
- Posts: 1
- Joined: Thu Feb 16, 2012 11:27 pm
- Car: Altima
Re: UPDATED!!! Tamiya 300zx Twin Turbo Build Thread!
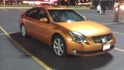
You may need to update your list of models. BTW that photo is of my 345 and I don't have that slicktop but I have another slicktop (edit I think the one with the girl with the skirt blown by the wind like Marylin Monroe). If you check the pictures the yellow one is a NA.
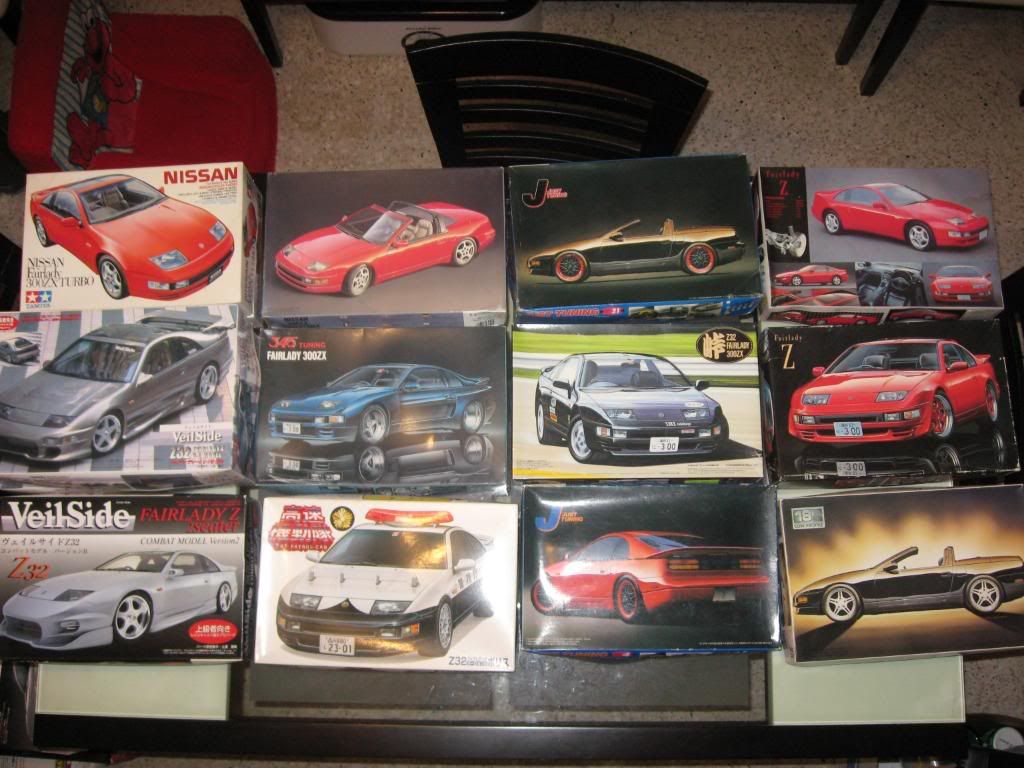
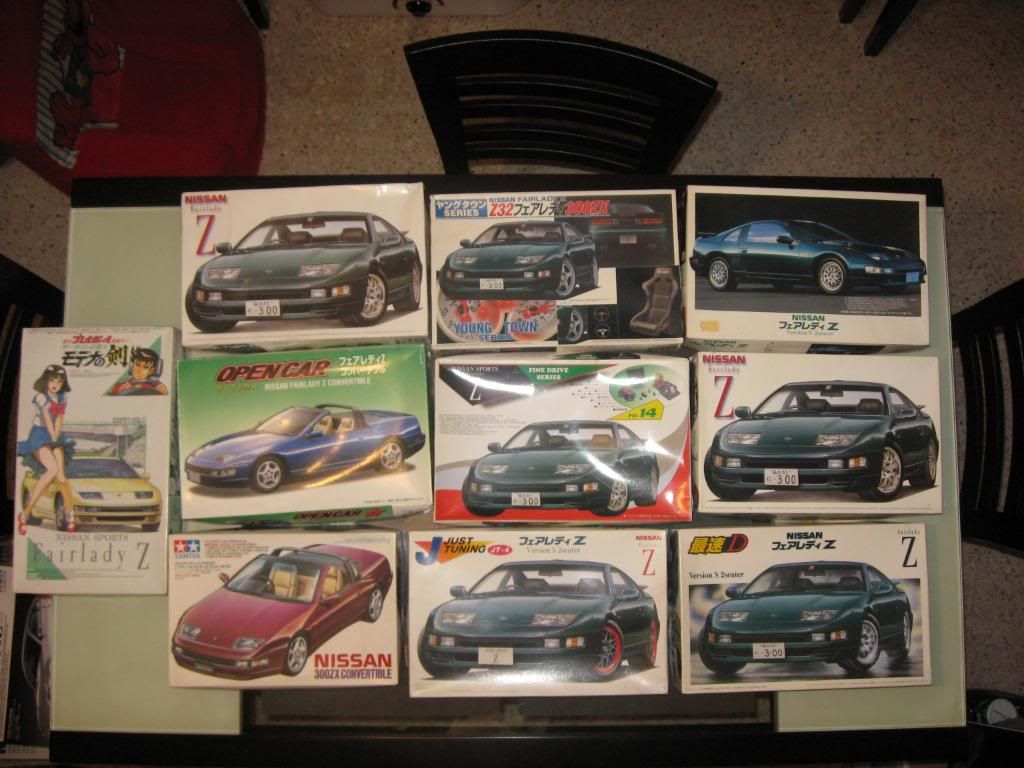
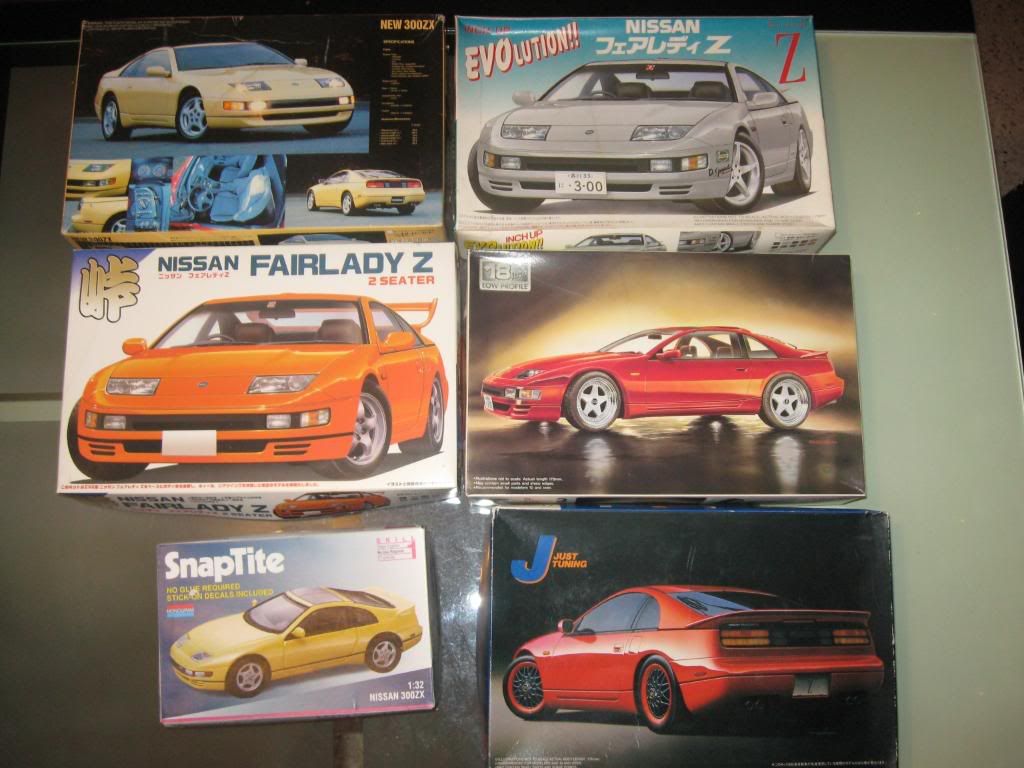
If you follow the URL of the pictures you can see the photobucket album of my updated collection. I stopped using and updating webshots account because of their photo limmits.
If you like any NON Z32 model but no the Subaru Legacy, the Isuzu Impulse they are all for sale.
Shoot me an email to [email protected] for some additional information. I found your post looking for information in the web about the rarity of my 345 Tunning 300ZXs (hint that s after the 300zx is not a typo).
-
Muhib
- Posts: 147
- Joined: Wed Mar 02, 2011 9:36 pm
- Car: 04 Nissan Maxima SE 6MT Elite Package
90 Nissan Pearl Yellow 300ZX TT
Re: UPDATED!!! Tamiya 300zx Twin Turbo Build Thread!
I am going to look into this. Really want one that would look like my wife's Z.
-
TTkickedin
- Posts: 1658
- Joined: Tue Jul 19, 2011 5:51 am
- Car: 1991 Nissan 300zx TT 5 speed, t-tops, < currently in intensive care unit!
2011 MBTA BUS - Location: Braintree, MA
- Contact:
Re: UPDATED!!! Tamiya 300zx Twin Turbo Build Thread!
^ I have to get back to work on this. I stopped because all my paint dried up -> (F*CK Testors.)
-
Muhib
- Posts: 147
- Joined: Wed Mar 02, 2011 9:36 pm
- Car: 04 Nissan Maxima SE 6MT Elite Package
90 Nissan Pearl Yellow 300ZX TT
Re: UPDATED!!! Tamiya 300zx Twin Turbo Build Thread!
can it be LHD? The pic on the box shows RHD..... 
-
TTkickedin
- Posts: 1658
- Joined: Tue Jul 19, 2011 5:51 am
- Car: 1991 Nissan 300zx TT 5 speed, t-tops, < currently in intensive care unit!
2011 MBTA BUS - Location: Braintree, MA
- Contact:
Re: UPDATED!!! Tamiya 300zx Twin Turbo Build Thread!
Both! if you go with the tamiya kit, you get both sets..
I think aoshima/any other is RHD. i forgot though, the resources are here, however.
Tamiya deff is LHD though. mine is LHD
I think aoshima/any other is RHD. i forgot though, the resources are here, however.
Tamiya deff is LHD though. mine is LHD
-
Muhib
- Posts: 147
- Joined: Wed Mar 02, 2011 9:36 pm
- Car: 04 Nissan Maxima SE 6MT Elite Package
90 Nissan Pearl Yellow 300ZX TT
Re: UPDATED!!! Tamiya 300zx Twin Turbo Build Thread!
^^Thanks!!
i wish i could just buy a toy yellow Z to put it on the dash just for the show. Except Tamiya and Kyosho, other Zs dont look too good. How does one order from Kyosho? I no speak no japanese
i wish i could just buy a toy yellow Z to put it on the dash just for the show. Except Tamiya and Kyosho, other Zs dont look too good. How does one order from Kyosho? I no speak no japanese
-
TTkickedin
- Posts: 1658
- Joined: Tue Jul 19, 2011 5:51 am
- Car: 1991 Nissan 300zx TT 5 speed, t-tops, < currently in intensive care unit!
2011 MBTA BUS - Location: Braintree, MA
- Contact:
Re: UPDATED!!! Tamiya 300zx Twin Turbo Build Thread!
hiroboy/hobbylinc/hobbylinkjapan (hlj.com) might have it in stock one day. Otherwise, your best bet would be to scour ebay and google shopping.
And idk why you'd want a kyosho kit, Those are already put together.
http://www.hlj.com/scripts/hljlist?Word ... =All&Dis=2
HLJ is where you'll find the tuner stuff. the above link is what they got on the 300zx. please do keep in mind that theres two different types of wheel mounting 'apparatuses'. i had to custom 'fabricate' my wheel splines so it would fit in the hub permanently, simply because i didn't pay attention to that bit and just wanted OZ futuras. So, good luck! if you need help shopping, i'll keep a lookout for stuff 4u.
-
TTkickedin
- Posts: 1658
- Joined: Tue Jul 19, 2011 5:51 am
- Car: 1991 Nissan 300zx TT 5 speed, t-tops, < currently in intensive care unit!
2011 MBTA BUS - Location: Braintree, MA
- Contact:
Re: UPDATED!!! Tamiya 300zx Twin Turbo Build Thread!
P.s. a tamiya kit + a Fujimi 300zx kit would net you the best quality z @ 1/24th scale. Fujimi has no engine, but it's a very high quality build.. so you take the engine from the tamiya kit and drop it in there.
speaking from experience, the tamiya kit is good for beginners, it doesn't have that much of detail, but enough to get the job done.
speaking from experience, the tamiya kit is good for beginners, it doesn't have that much of detail, but enough to get the job done.
-
Rager
- Posts: 758
- Joined: Mon May 24, 2010 12:32 pm
- Car: 1992 charcoal gray 300zx 2+2
1999 sentra
2004 chevy silverado - Location: 860, the Z, 802, oh ive got area codes
Re: UPDATED!!! Tamiya 300zx Twin Turbo Build Thread!
Nizzan300zx wrote:You may need to update your list of models. BTW that photo is of my 345 and I don't have that slicktop but I have another slicktop (edit I think the one with the girl with the skirt blown by the wind like Marylin Monroe). If you check the pictures the yellow one is a NA.
If you follow the URL of the pictures you can see the photobucket album of my updated collection. I stopped using and updating webshots account because of their photo limmits.
If you like any NON Z32 model but no the Subaru Legacy, the Isuzu Impulse they are all for sale.
Shoot me an email to [email protected] for some additional information. I found your post looking for information in the web about the rarity of my 345 Tunning 300ZXs (hint that s after the 300zx is not a typo).
there are no words to express the awesomeness of these pictures!
Find Your Forum!