SuperDorifto's Overbuilt Kouki KA-T Build

Your premier source for information on the Turbo KA: KA24E-T and KA24DE-T (KA with aftermarket turbo kit)!
User avatar
superDorifto
Posts: 1306
Joined: Mon Jun 13, 2005 1:13 pm
Car: 1997 Eclipse Spyder - AWD/5spd swap in progress
1995 Q45 - 5spd swap in progress
1984 200sx hatch(KA-t swap) - 355WHP
1991/1993/1995/1997 240s - Dead
1982 200sx hatch - fixed/scrapped
Location: CT

Post

neverlift wrote:what crank damper forget the water pump pulley.
ATI Race Damper - official damper of Nascar, price just plummeted, damn reasonable if you ask me...

http://www.powerhouseracing.com/p-711-a ... 240sx.aspx


User avatar
neverlift
Posts: 3700
Joined: Mon Apr 24, 2006 6:26 am

Post

wow how much was it before? It has been years since I looked it up, but it was really high. IMHO great mod what rev limit you planning this should help get to 8k easy with the right head work.

User avatar
superDorifto
Posts: 1306
Joined: Mon Jun 13, 2005 1:13 pm
Car: 1997 Eclipse Spyder - AWD/5spd swap in progress
1995 Q45 - 5spd swap in progress
1984 200sx hatch(KA-t swap) - 355WHP
1991/1993/1995/1997 240s - Dead
1982 200sx hatch - fixed/scrapped
Location: CT

Post

It was around $650 when I picked it up, got it for what I thought was a steal off a ka-t.org member...it dropped in price literally the next day.

No head work, just a stock rebuild...really the only internal mods have been the forged pistons, rods, arp main studs, and AMS 11mm head studs. I'm fairly positive I'm not going to take it anywhere near 8K. I'm intentionally using a smaller turbo for better response down low...I'm not going to baby the motor, but the turbo runs out of puff well before I run out the stock limiter.

240hatchsx
Posts: 183
Joined: Fri Jan 07, 2011 7:17 pm
Car: 93 s13 hatch

Post

Thanks for letting know where you got that pulley at. If it works out for you I'll look into getting a set myself when I start later this year

User avatar
superDorifto
Posts: 1306
Joined: Mon Jun 13, 2005 1:13 pm
Car: 1997 Eclipse Spyder - AWD/5spd swap in progress
1995 Q45 - 5spd swap in progress
1984 200sx hatch(KA-t swap) - 355WHP
1991/1993/1995/1997 240s - Dead
1982 200sx hatch - fixed/scrapped
Location: CT

Post

Thats just the first link that came up on google, I bought mine from Summit Racing. A couple other 240sx specific places stock it...I think FR sport has it, and maybe Enjuku.

User avatar
Chris28
Posts: 3159
Joined: Sat Jul 14, 2007 11:18 am
Car: 92 s13 KA-T
Location: 757/919
Contact:

Post

Woah, first time reading through your build thread...I like, especially the wrinkle red block!

Did you have any issues with the front lower cover bolting on with the head torqued on?

Other than that, everything looks really good. I like your manifold choice, the newer t2 framed turbos can definitely flow enough to keep the KA happy.

User avatar
superDorifto
Posts: 1306
Joined: Mon Jun 13, 2005 1:13 pm
Car: 1997 Eclipse Spyder - AWD/5spd swap in progress
1995 Q45 - 5spd swap in progress
1984 200sx hatch(KA-t swap) - 355WHP
1991/1993/1995/1997 240s - Dead
1982 200sx hatch - fixed/scrapped
Location: CT

Post

Chris28 wrote:Woah, first time reading through your build thread...I like, especially the wrinkle red block!

Did you have any issues with the front lower cover bolting on with the head torqued on?

Other than that, everything looks really good. I like your manifold choice, the newer t2 framed turbos can definitely flow enough to keep the KA happy.
Not really, however, I've never done it this way. I've always put the cover on first...I might end up redoing it, I'll be running such low boost, that a single cycle in the head studs shouldn't really matter.

User avatar
Chris28
Posts: 3159
Joined: Sat Jul 14, 2007 11:18 am
Car: 92 s13 KA-T
Location: 757/919
Contact:

Post

Yeah I put the front cover on first too. I replaced my lower cover once with the engine still in the car and it was a pain to not pinch the head gasket, just wondering if you experienced any issues.

User avatar
superDorifto
Posts: 1306
Joined: Mon Jun 13, 2005 1:13 pm
Car: 1997 Eclipse Spyder - AWD/5spd swap in progress
1995 Q45 - 5spd swap in progress
1984 200sx hatch(KA-t swap) - 355WHP
1991/1993/1995/1997 240s - Dead
1982 200sx hatch - fixed/scrapped
Location: CT

Post

I'm thinking of cut off the forward part of the gasket and just sealing between the upper and lower overs with rtv. I really dont want to cycle the 11mm headstuds...and reusing the hg after its compressed is also a no no.

The lower edge pinched a little towards the back side of the block. I'm making every effort to get into the garage thei weekend to button up the timing set and the turbo. All of my thermal wrap came in, so I should be able to completely finish that side, assuming my gasket kit gets here from enjuku before Friday.

User avatar
Chris28
Posts: 3159
Joined: Sat Jul 14, 2007 11:18 am
Car: 92 s13 KA-T
Location: 757/919
Contact:

Post

I just finished putting my motor back together. The front cover wasn't decked with the block (my fault) so I had to take it off and have it cut down to match the block. After that it was easy to put the front cover back on with the head torqued down, so as long as your front cover is the same height as the block you'll be fine.

User avatar
superDorifto
Posts: 1306
Joined: Mon Jun 13, 2005 1:13 pm
Car: 1997 Eclipse Spyder - AWD/5spd swap in progress
1995 Q45 - 5spd swap in progress
1984 200sx hatch(KA-t swap) - 355WHP
1991/1993/1995/1997 240s - Dead
1982 200sx hatch - fixed/scrapped
Location: CT

Post

Another wasted day in the garage....

The stupid ****ing chinesy ebay timing kit fits like absolute ****. I have had to file/massage nearly every piece just to get things to fit properly.

I think the idler gear was not machined short enough...when the idler bolt is tightened down, the washer buts up against the idler gear rather than the shaft...the idler is supposed to spin freely...not be locker to the head.

luckily, local forum member has come through yet again - meeting him tomorrow to pick up an oem gear to let me finally time this abomination.

I should know better at this point regarding getting what you pay for, but what with Courtesy sending the wrong parts, and the price of OEM timing parts, I took a chance...never doing that again.

Now that I've gotten that off my chest - new pics.

Its going to be a mother ****er to get back off, but the lower cover is on...for now, it was the first thing I installed today before I ran into the timing issue.
Image

I know people are all about 3 bond, but that tube of garbage exploded in my hand...I love wasting $20 bucks worth of rtv, went back to my old stand by - perma black, the easiest to apply, and $5 bucks cheaper. Its been on all of my engines so far.
Image
Image
Image

I have to remove said lower cover to finish the timing, but that is a problem for future Will to worry about...for now I get to enjoy how it looks with my fancy nickle plated 12 pt bolts...

I also picked up a partially shaved/professionally painted valve cover - I like it, but its not what i had originally planned, so its getting the same wrinkle treatment..I snapped some picks just to enjoy a veiw of the motor that did not have timing **** exposed.

Image
Image
Image
Image
Image

And the final shot of the night, complete with a sun flare from the setting sun.
Image

Took the turbo stuff off to start applying the wrap and silicone - its drying right now, pics in the morning hopefully.

User avatar
superDorifto
Posts: 1306
Joined: Mon Jun 13, 2005 1:13 pm
Car: 1997 Eclipse Spyder - AWD/5spd swap in progress
1995 Q45 - 5spd swap in progress
1984 200sx hatch(KA-t swap) - 355WHP
1991/1993/1995/1997 240s - Dead
1982 200sx hatch - fixed/scrapped
Location: CT

Post

Took the turbo stuff off to start applying the wrap and silicone

Image
Image
Image
Image

wrapping that beast was a chore, not that hard, but it took a bit of hand strength to balance and keep the wrap tight against the casting. Whatever is in that silicone, it def causes cancer, even outside it was making me dizzy.

This wrap along with the heat shield will have to due until I get it ceramic coated next year.

User avatar
superDorifto
Posts: 1306
Joined: Mon Jun 13, 2005 1:13 pm
Car: 1997 Eclipse Spyder - AWD/5spd swap in progress
1995 Q45 - 5spd swap in progress
1984 200sx hatch(KA-t swap) - 355WHP
1991/1993/1995/1997 240s - Dead
1982 200sx hatch - fixed/scrapped
Location: CT

Post

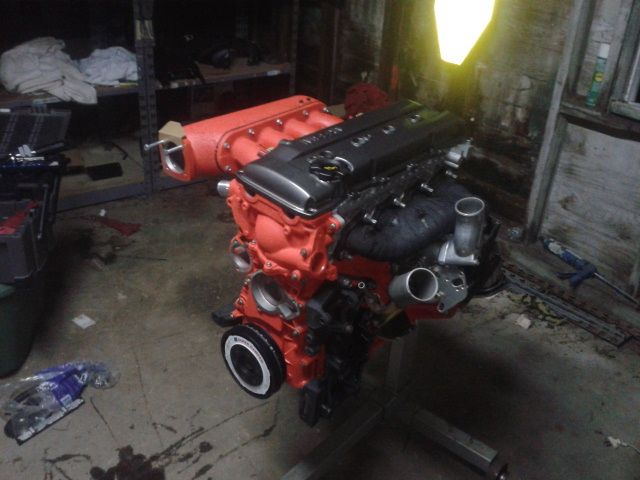
worked on the small stuff today:

fuel rail - great success
intake - f*** godspeed
turbo blanket - sorta success...but now I'm all itchy from the fiberglass

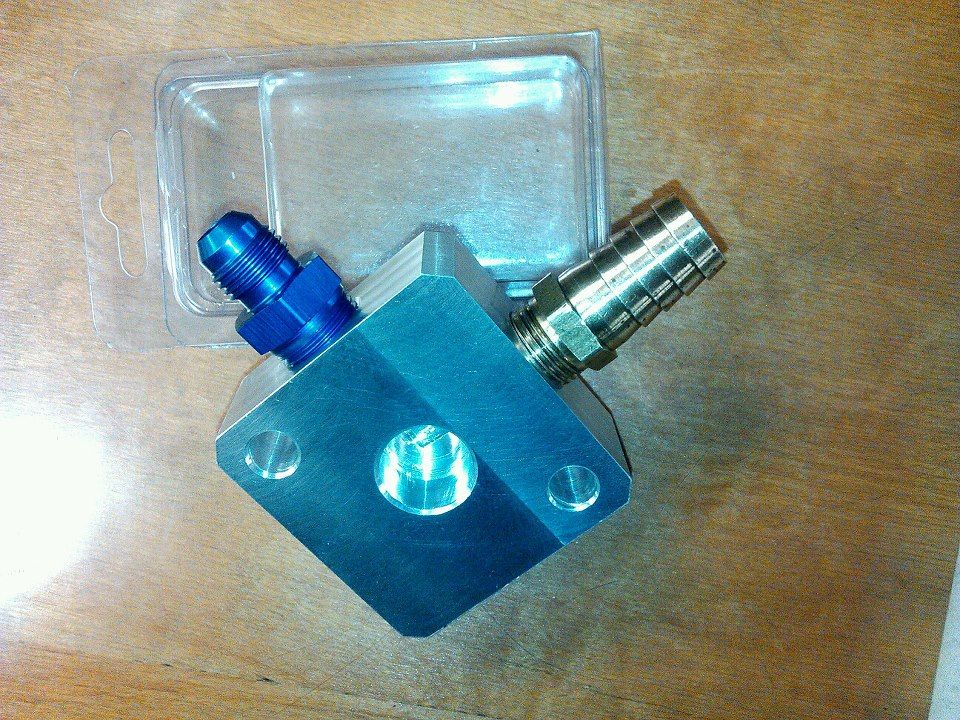
First off, fuel rail.

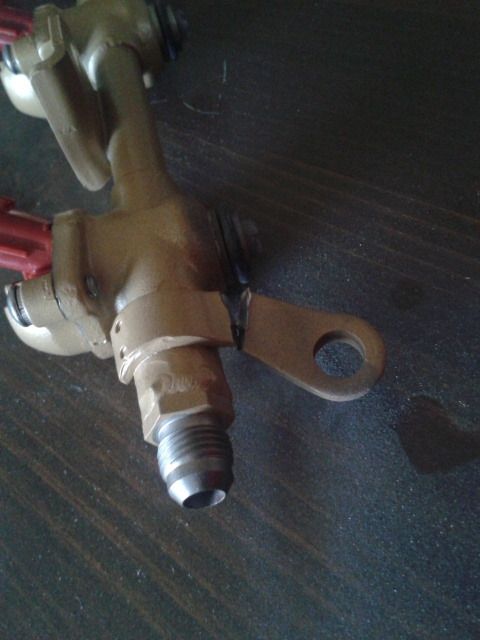
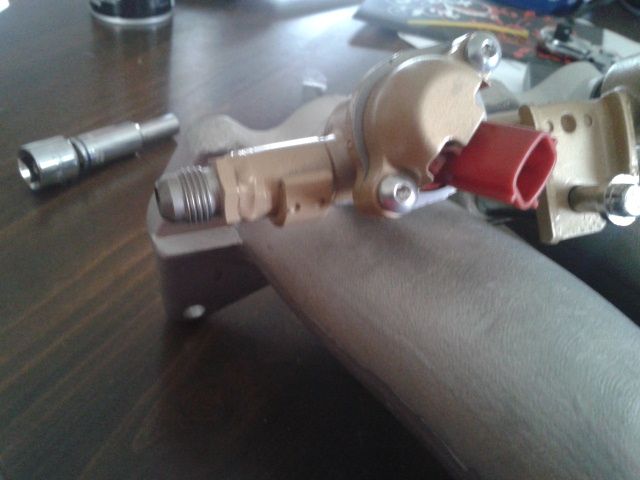
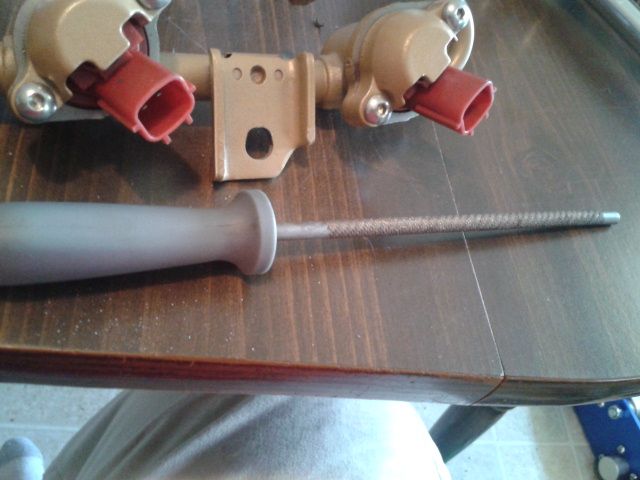
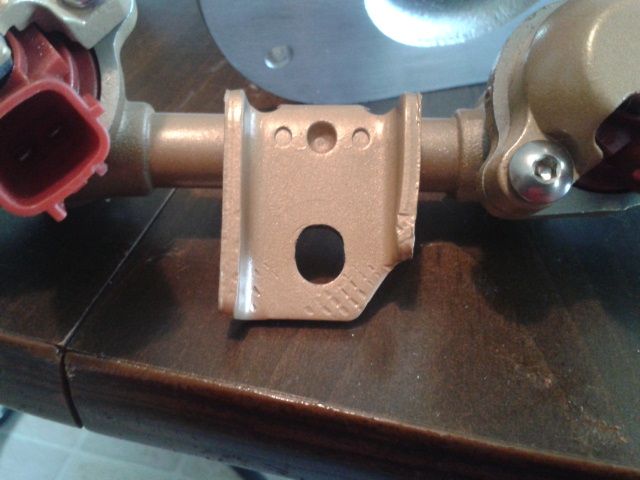
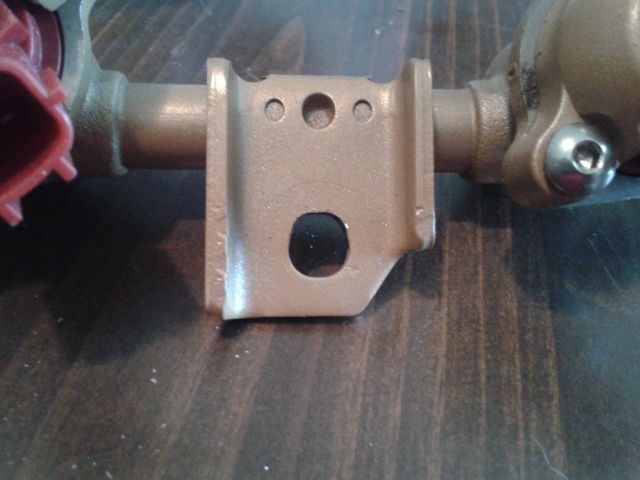
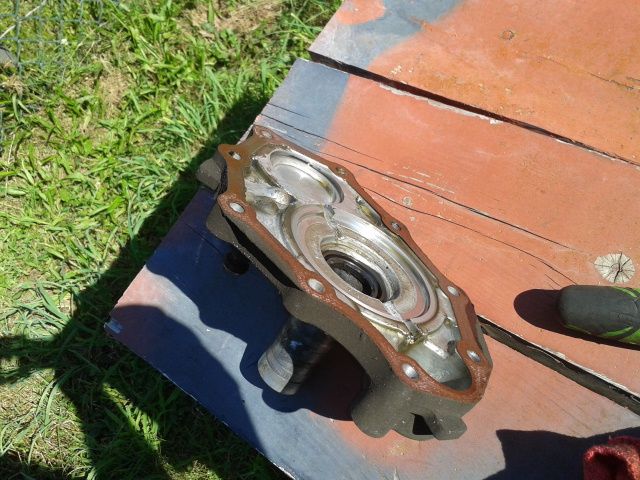
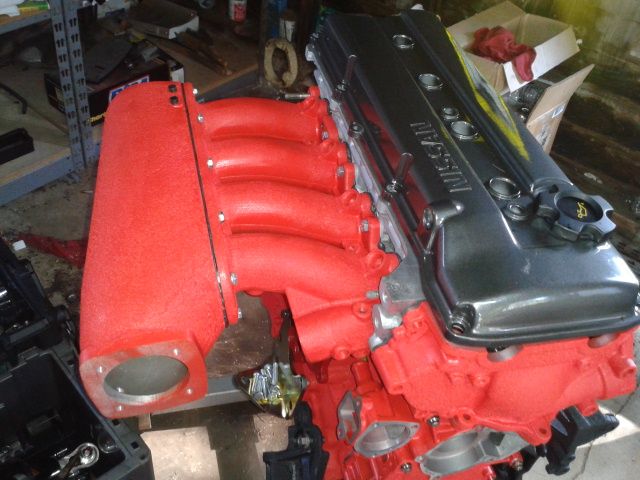
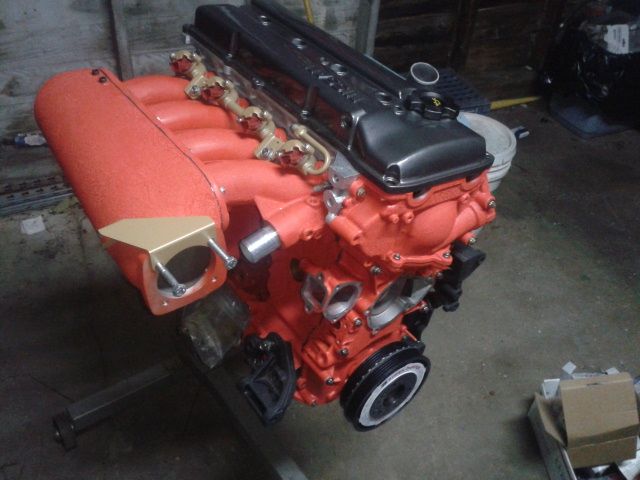
I was always planning to run the side feeds in a modified stock fuel rail. I hacked off the mounts for the wiring harness, as that will be tucked neatly under the intake. I had -6 An couplings welded to the stock inlet and outlet, and had the whole piece including the caps powdercoated gold.

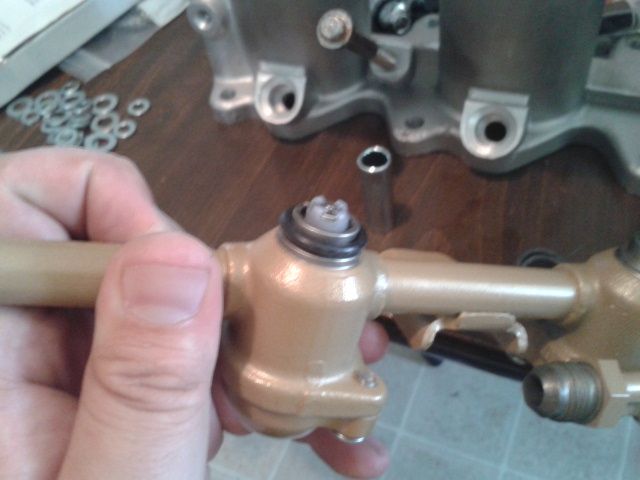
Today I installed the drilled injectors (yeah, I know about potential flow issues, but I got them for a steal they are still under warranty, and I have 2 extras in case one of the drops out.)

Image
Image
Image

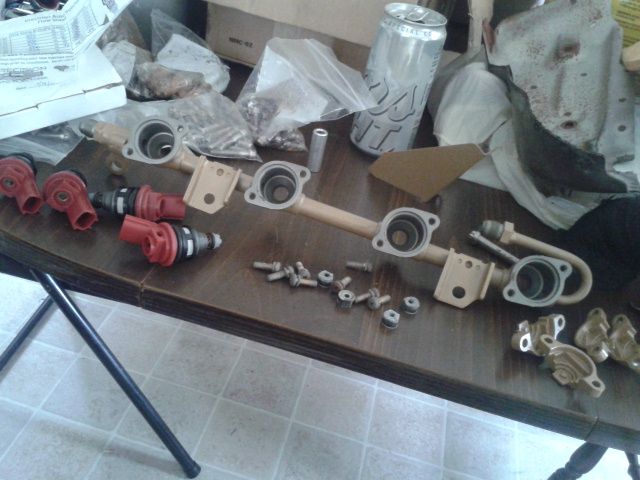
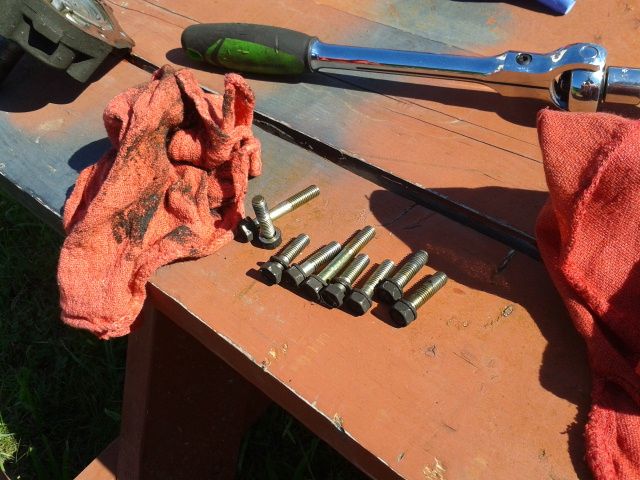
I feel like the stainless cap screws look great, and should be a hel of a lot easier to remove than the rust o matic stock machine screws.

Image
Image

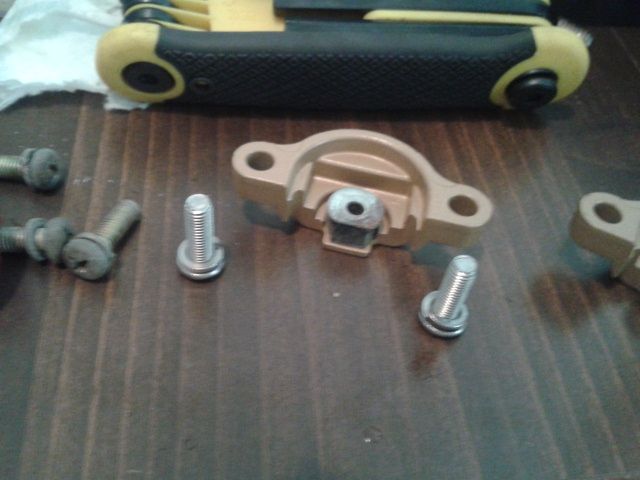
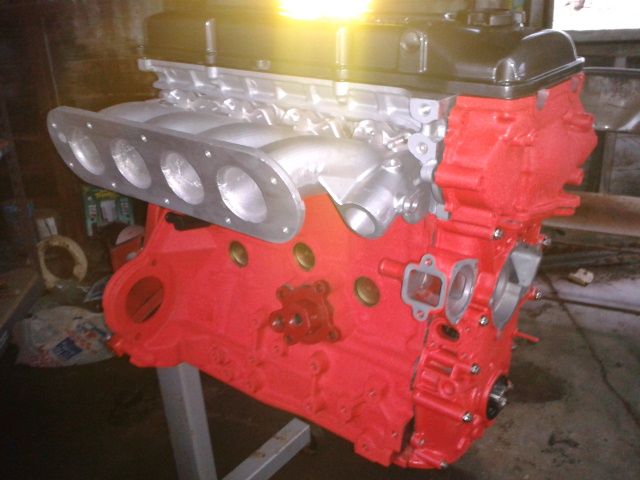
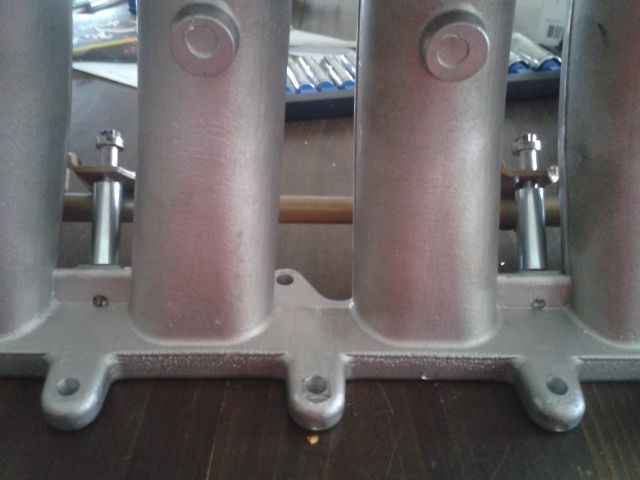
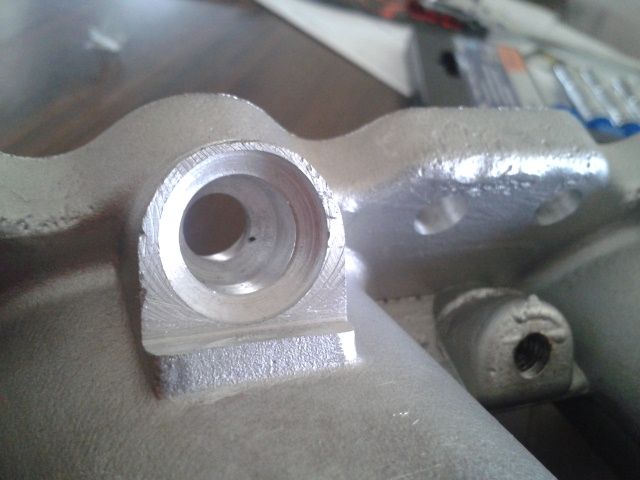
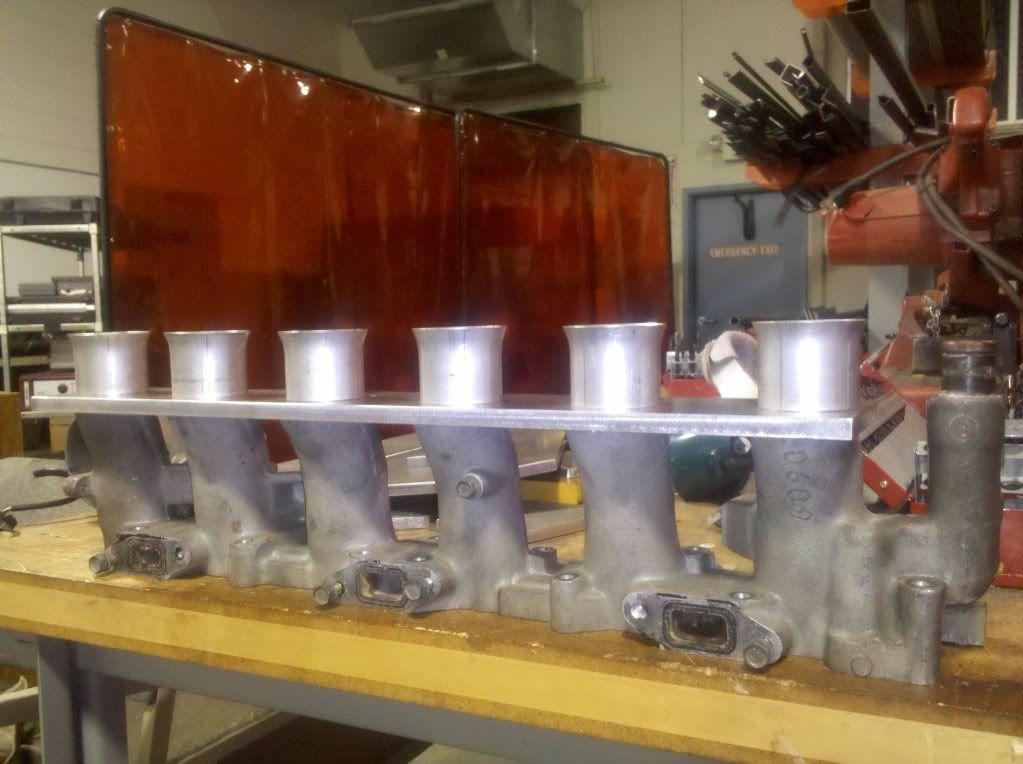
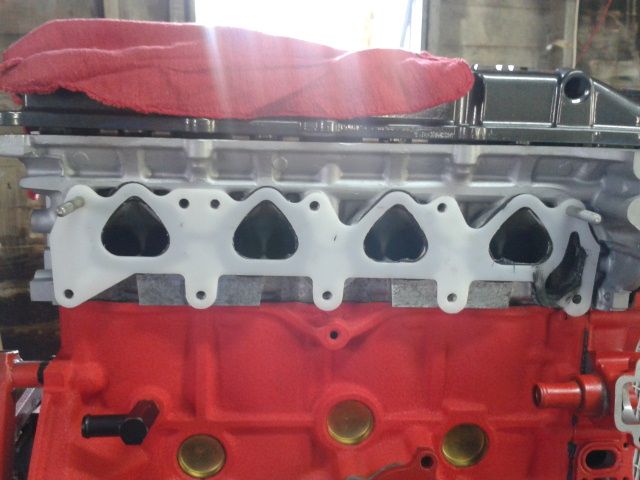
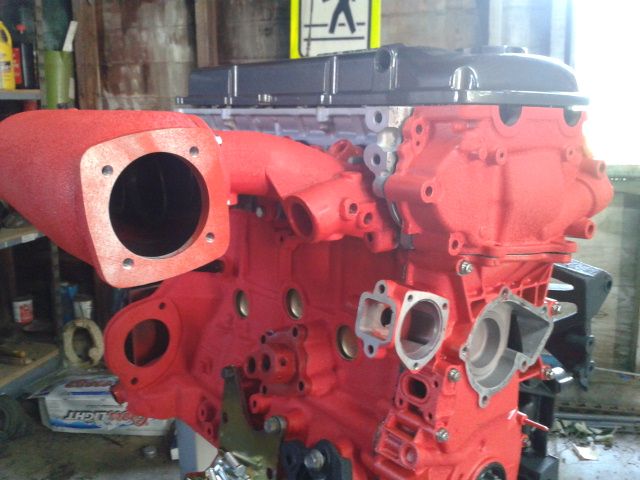
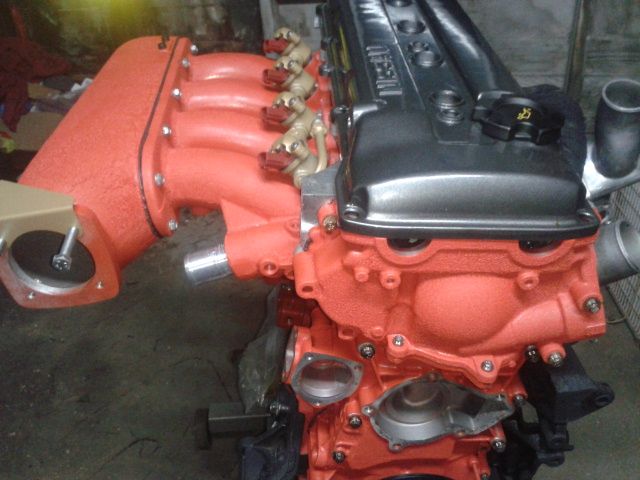
Feather in the cap, on to the intake. I've already spent a few hours getting rid of the flashing. I had the underside of the manifold modified to take the stock IACV, but once again the s*** engineering at godspeed comes through...The supplied spacers do not have the correct ID for the mounting bolts for the rail.

Image

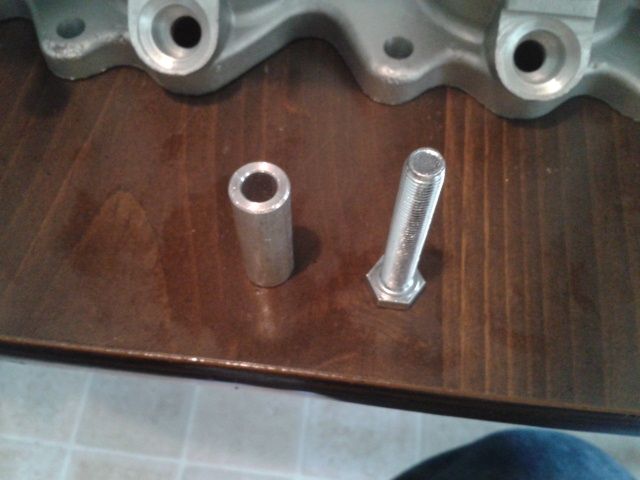
It ain't gonna fit....

Image

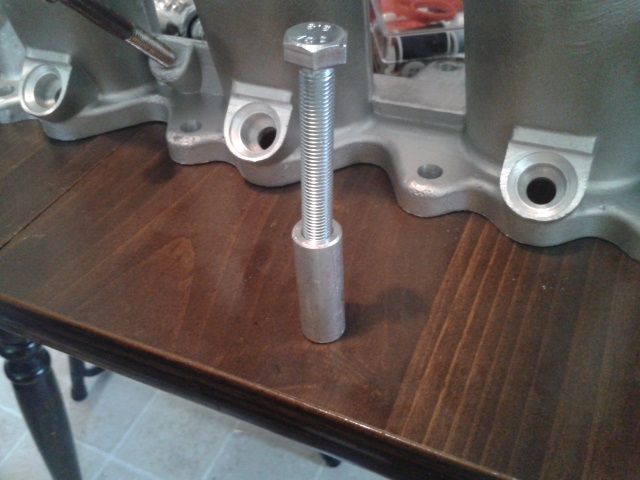
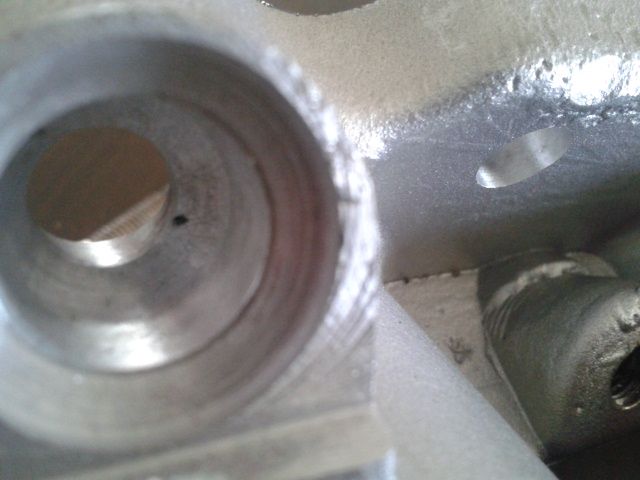
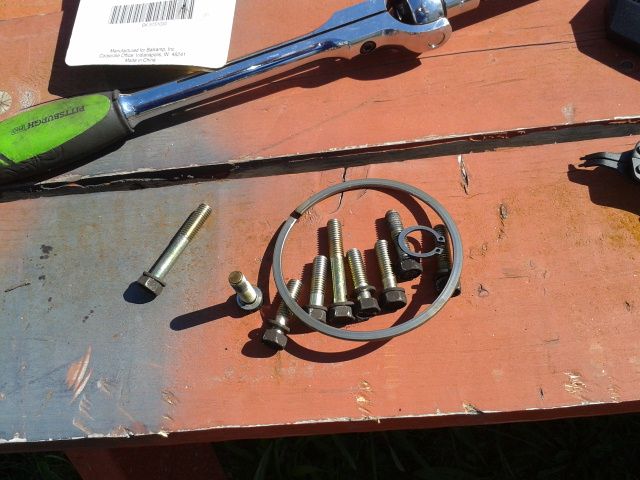
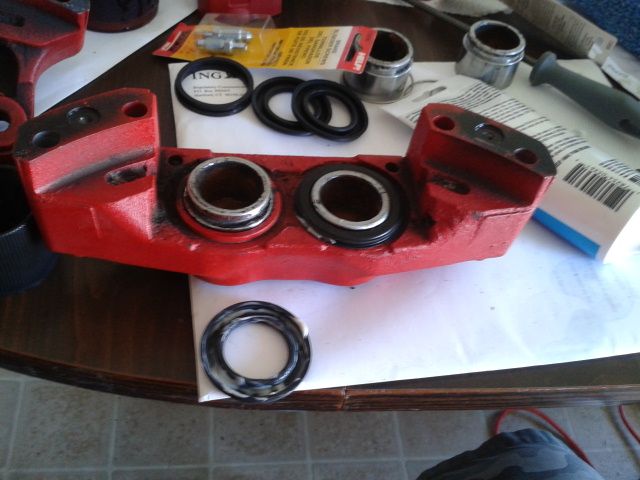
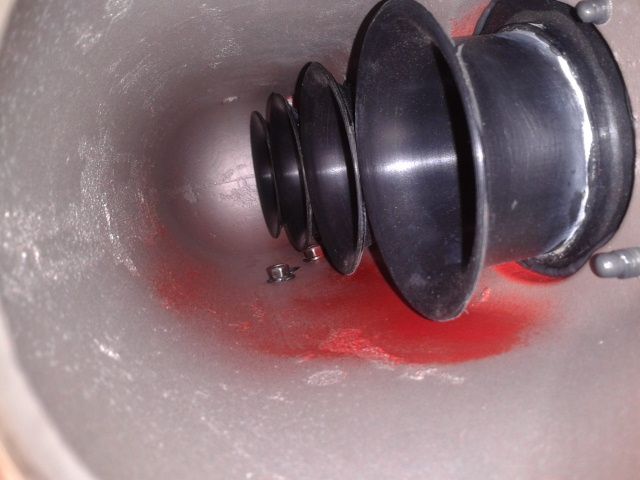
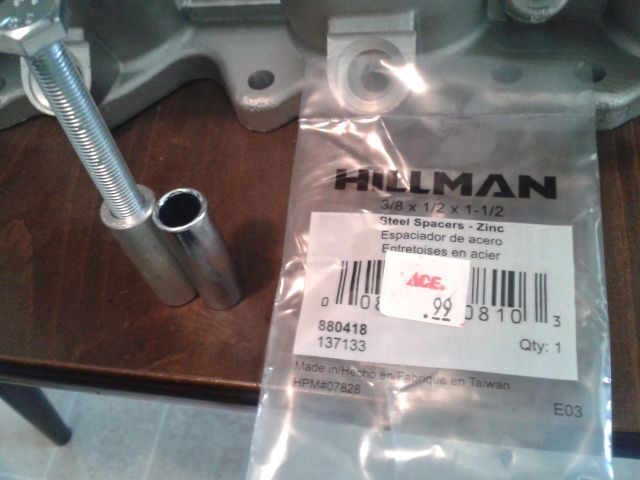
Luckily I found a $.99 solution - same measurements, bigger ID

Image

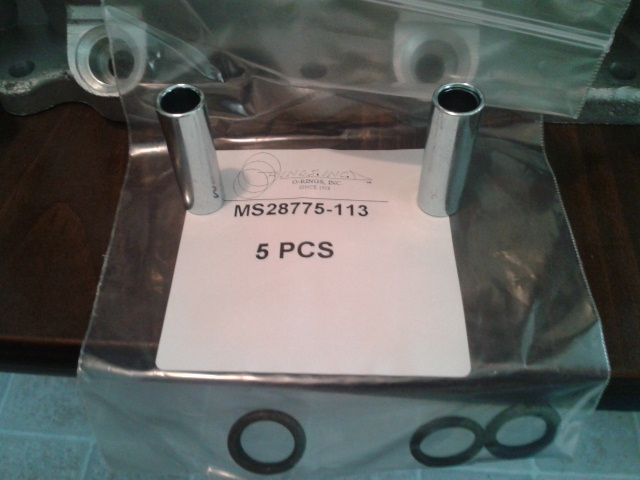
Also if any of you bought the intake without the right o-rings...

Image
Image

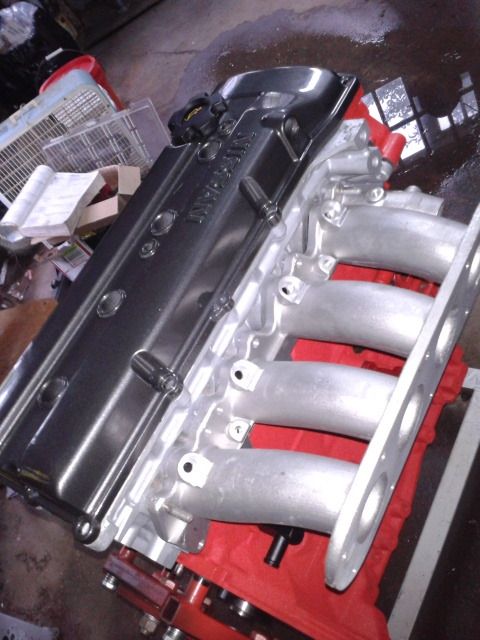
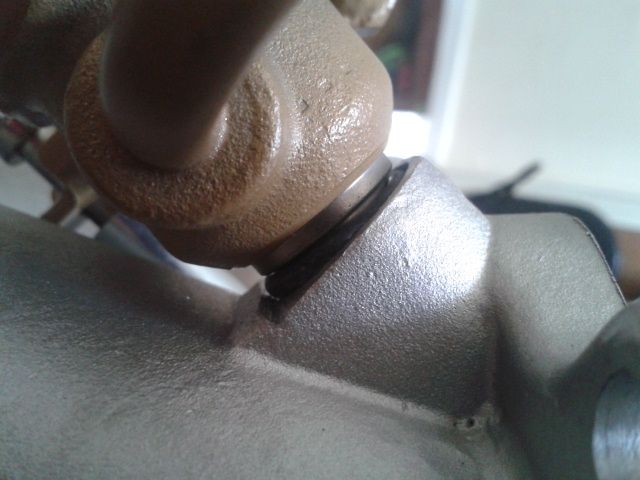
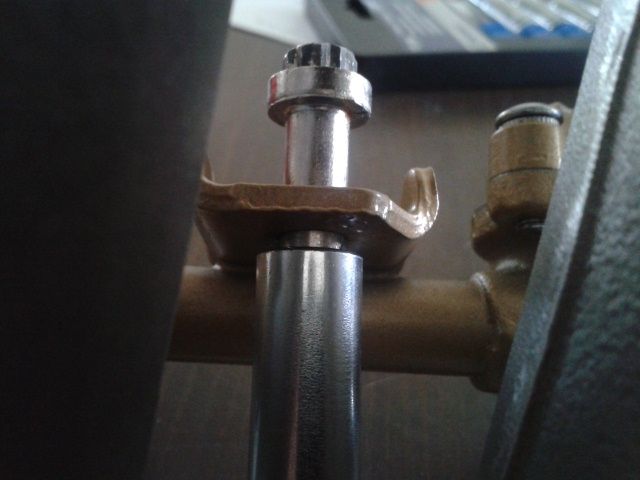
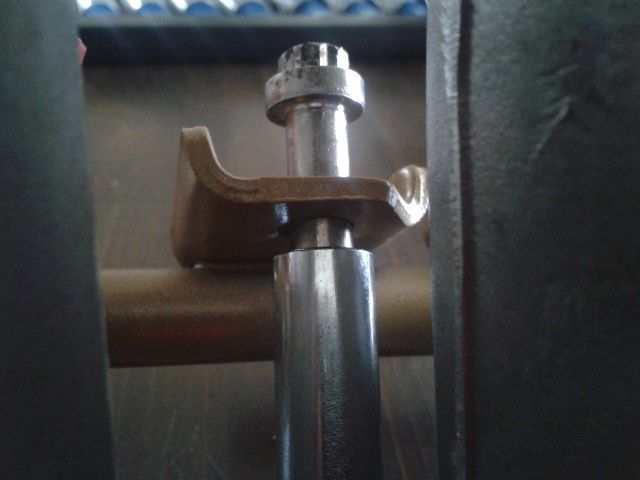
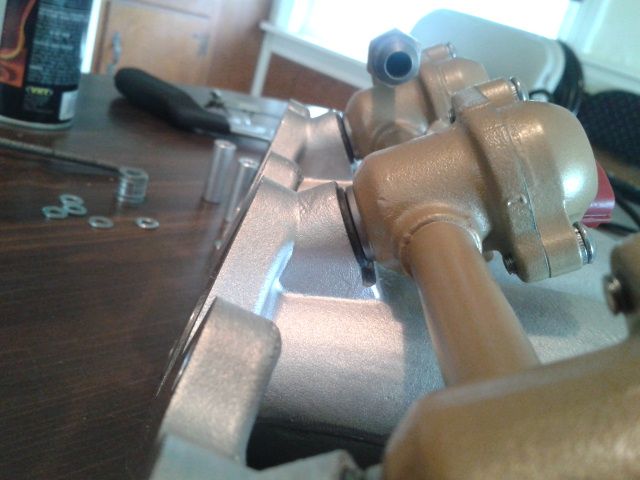
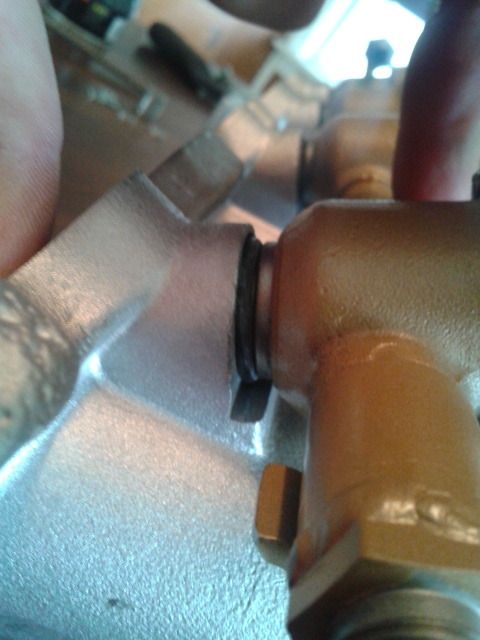
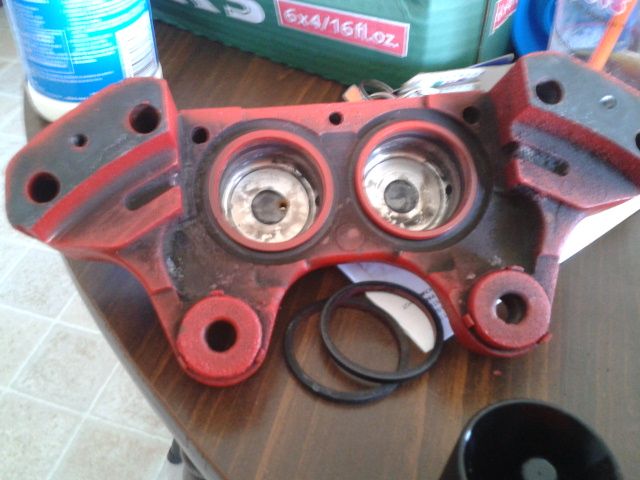
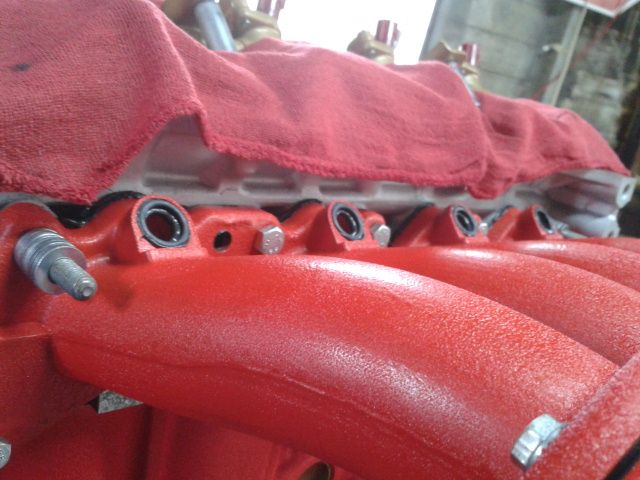
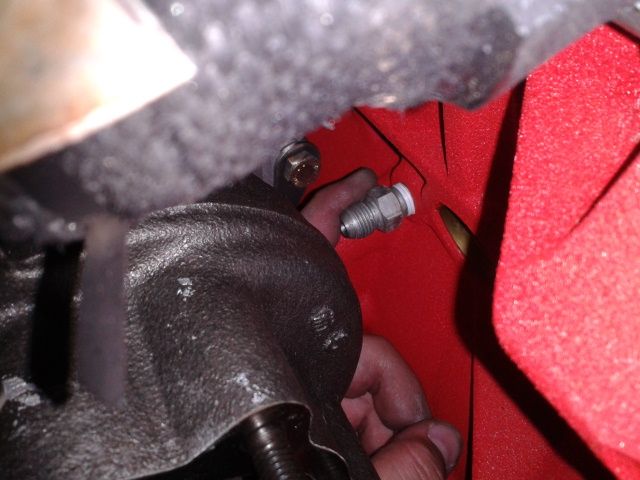
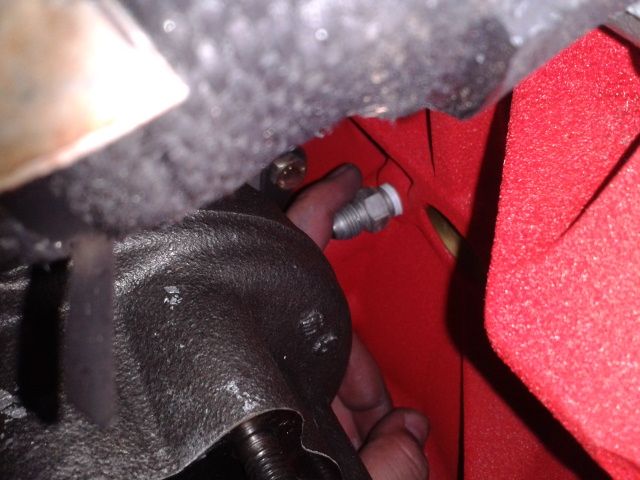
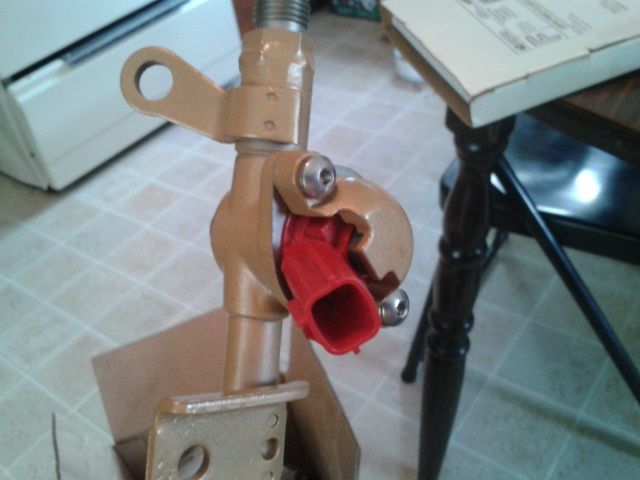
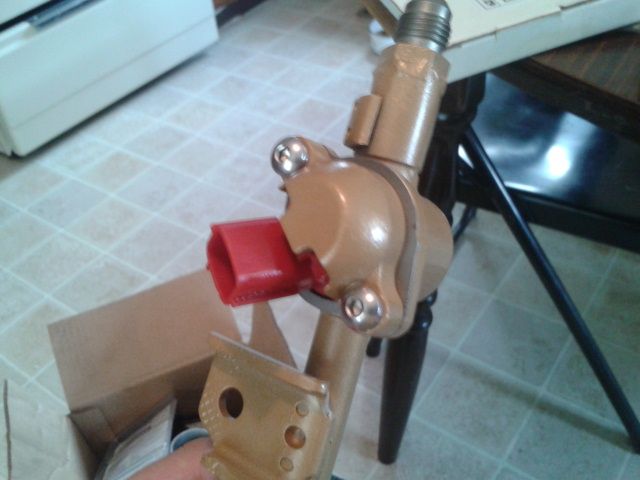
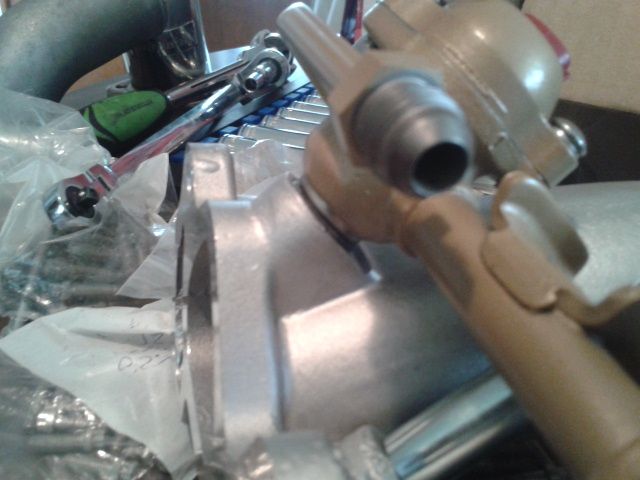
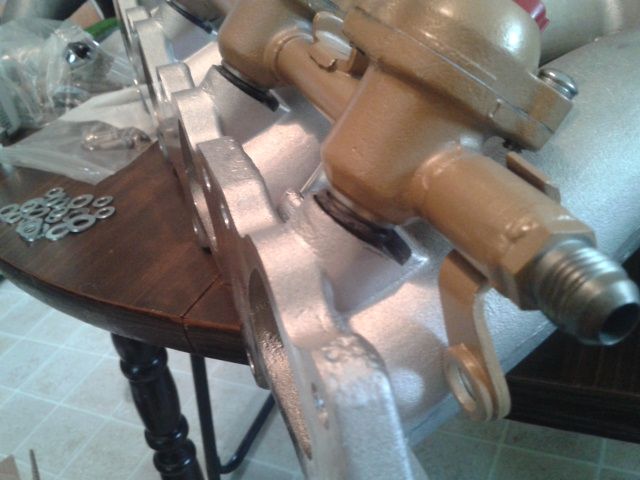
New problem tho...the sock rail, has a tang that fits over the intake mounting stud, as you can see it no longer lines up with the manifold...I blame this on xcessive lowering the rail height...

Image

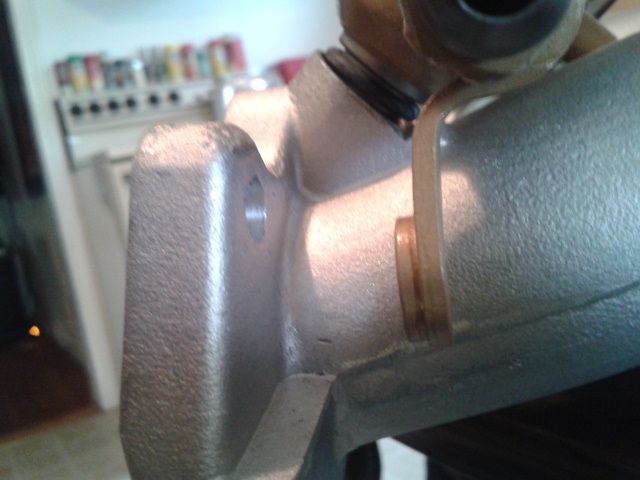
Also the tang clashes with number 4 runner, not allowing the o-rings to seat as shown. This week I am goign to lop off the tang on my freshly powdercoated rail, and post some better pics of the fitment. It looks like the spacers will allow the o-rings to seat perfectly with only the 2 center mounts on the rail. I'll post pics when I'm done.

Image
Image
Image

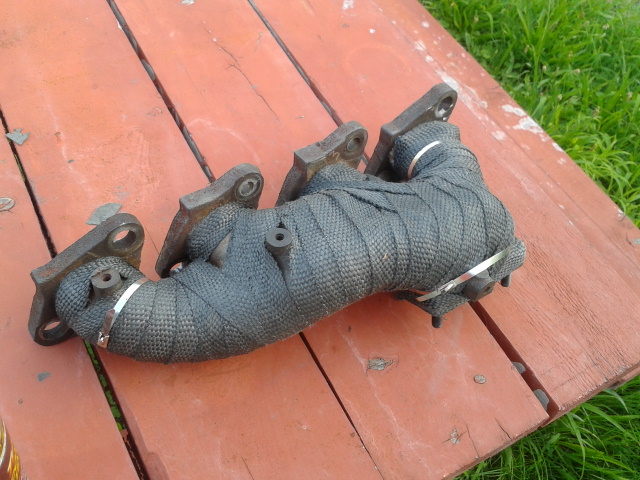
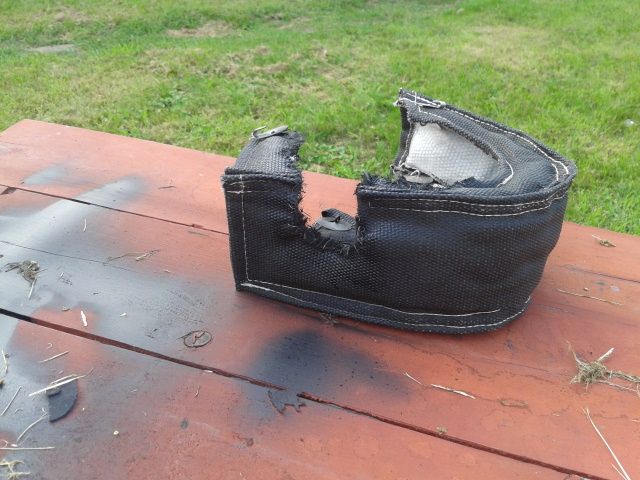
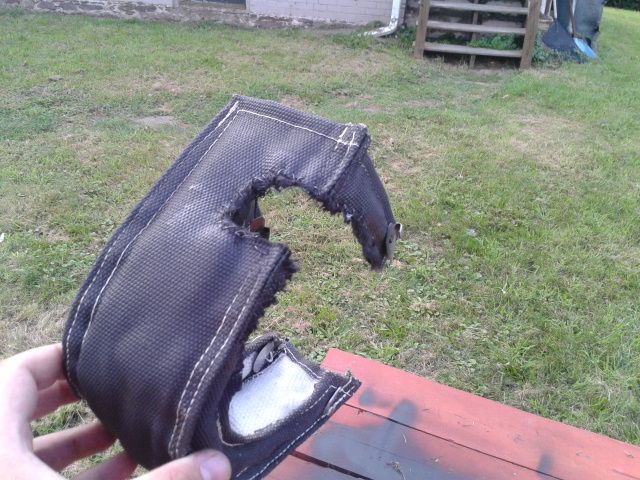
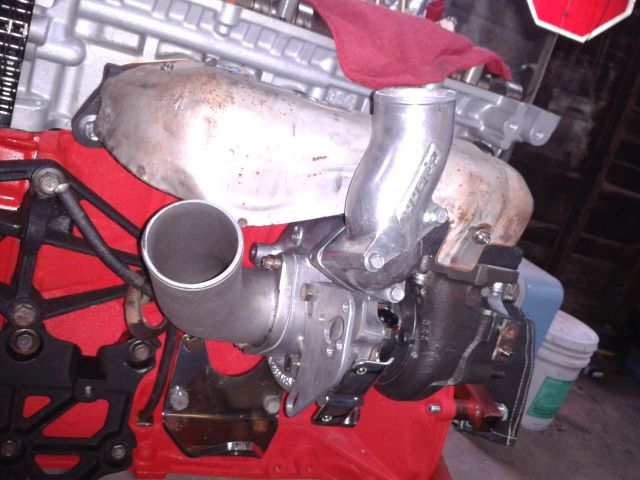
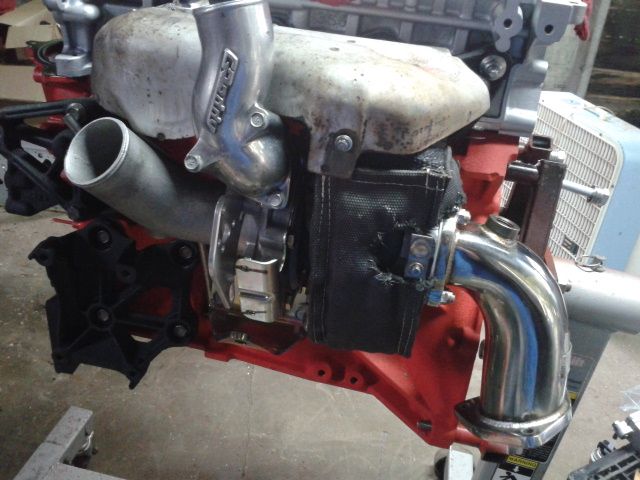
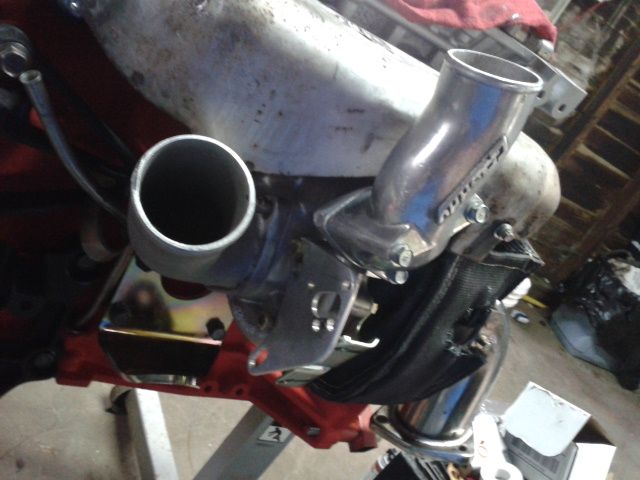
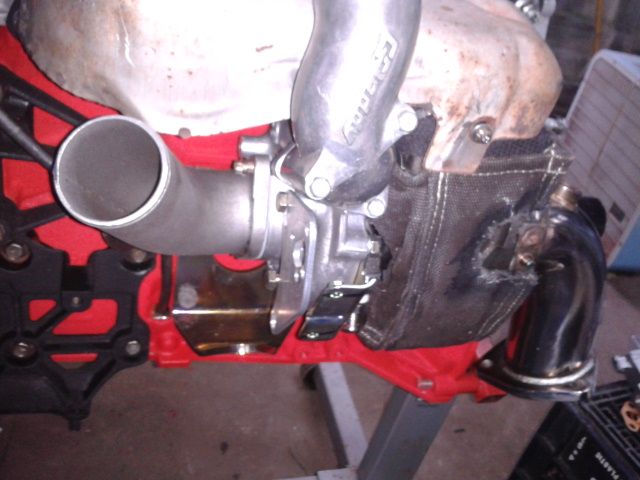
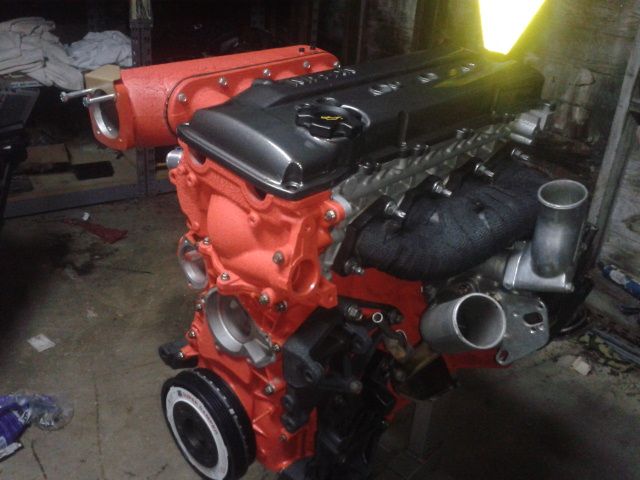
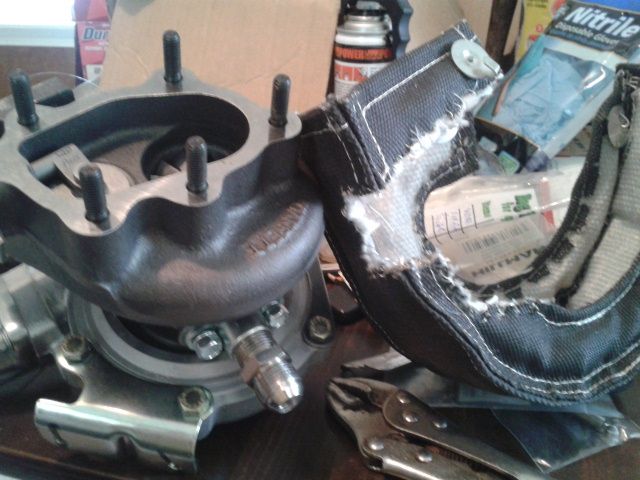
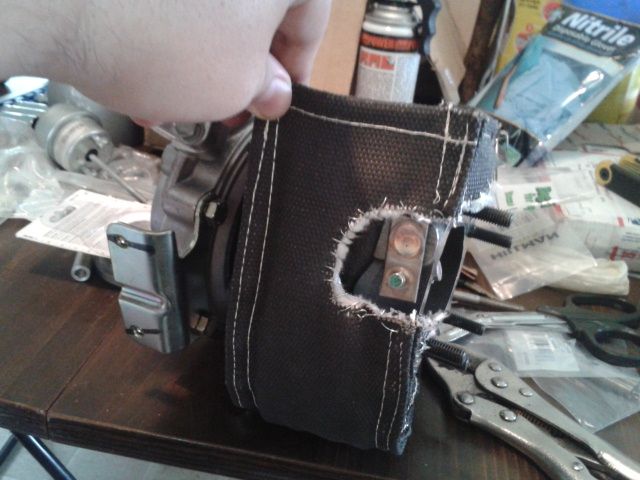
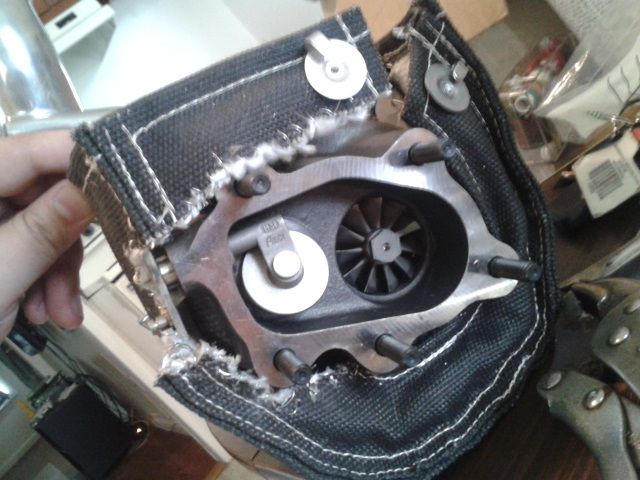
Turbo Blanket - once again another Godspeed special, but for $55 off Amazon I took the gamble. The blanket was much higher quality than their pictures conveyed....however I needed to cut it to make room for the internal WG and flapper arm.

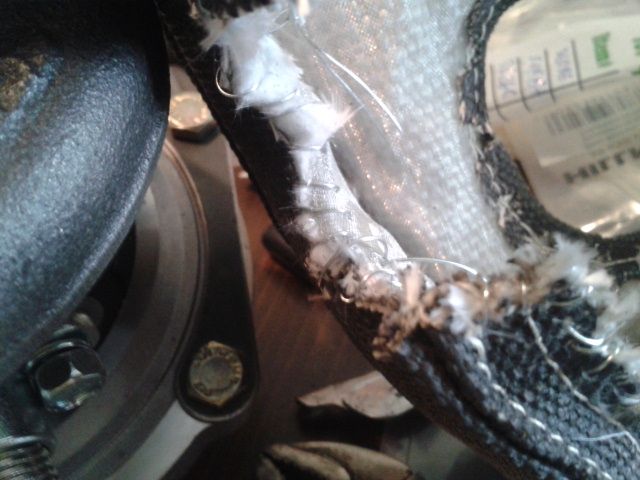
I did this sorta quickly and I was wearing gloves, so there are no in process pics...I cut the necessary material out, and used stainless steel wire and my home ec. training from middle school to sew the blanket back together. The overhand stitch is a bit ugly, but it keeps the wire from kinking, I finished off the seam with the same silicone spray I used on the turbo manifold...so it looks a lot better than these pics suggest.


Image

Despite my best efforts, I still got some of that nasty insulation on my fore arms...awful s***. I'll post pics of the blanket again once I cure the silicone on Thursday or Friday.

Image
Image
Image

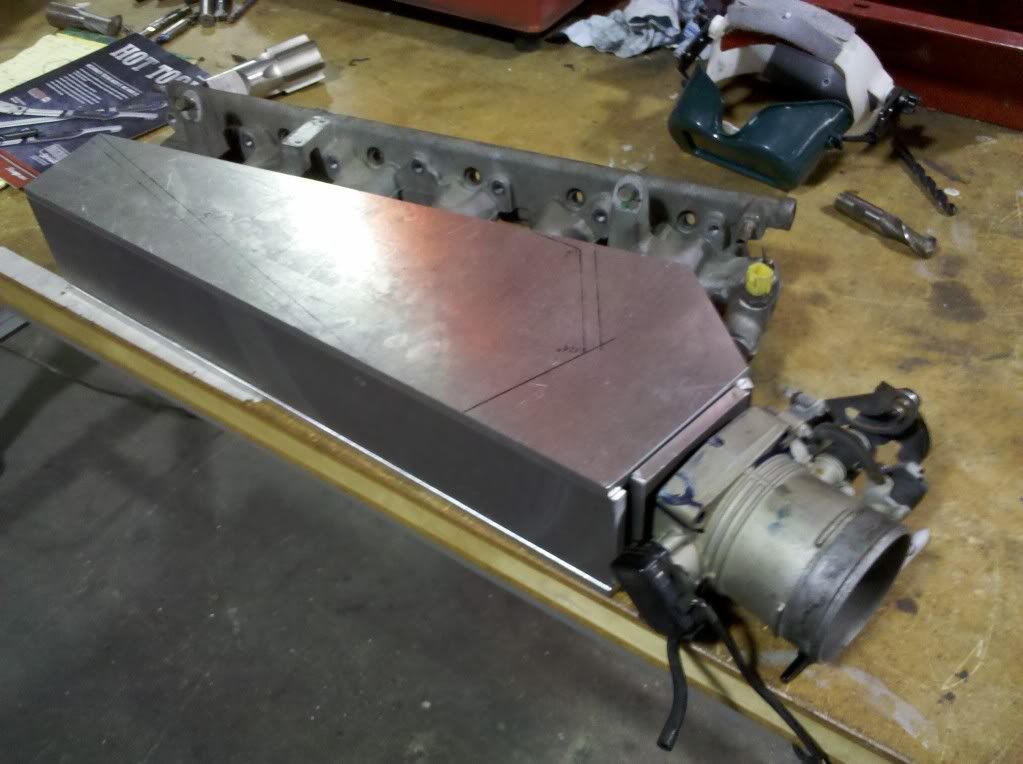
I also test fit the heat shield, it still looks like pooh becasue it still needs to get polished and plated. more updates to come.

User avatar
Chris28
Posts: 3159
Joined: Sat Jul 14, 2007 11:18 am
Car: 92 s13 KA-T
Location: 757/919
Contact:

Post

Sucks about the manifold, rail looks good though! I'm using a Godspeed blanket as well, it's held up fine for the ~4 months I've been running it. Slight discoloration around the 4 bolt turbine outlet flange, but only where it actually comes in contact with the flange.

User avatar
Razi
Posts: 28681
Joined: Sun Dec 31, 2006 9:52 am
Car: Moo

Post

Damn, that manifold is being a pain in the butt huh?
Good call on replacing the injector cap screws, I'll be doing that as well.
The philips screws that Nissan used suck.

User avatar
superDorifto
Posts: 1306
Joined: Mon Jun 13, 2005 1:13 pm
Car: 1997 Eclipse Spyder - AWD/5spd swap in progress
1995 Q45 - 5spd swap in progress
1984 200sx hatch(KA-t swap) - 355WHP
1991/1993/1995/1997 240s - Dead
1982 200sx hatch - fixed/scrapped
Location: CT

Post

With the downtime from the busted alternator, I spent some quality time trying to get this ****ty godspeed manifold to fit...

say goodbye to the stud tang...heres a pic after resorting to a Dremel.
Image
Image

Even without the clash at the tang, the injectors do not seat flush...also there is a gap at the spacer...not because the spacer is too short, but because the angle is wrong.
Image
Image
Image
Image

The bolt holes on the stock manifold need to be ovalized, by about 1/2D (half the diameter of the M8 bolt)
Image
Image
Image

After this ovalization, the stock rail just about fits....#1-3 fit great, as shown..
Image

After a bit of filing the orings almost seat...it feels like the # 4 injector is hitting on the counterbore past the o-ring seat.
Image

I'm going to play around with it a bit more to get it to seat correctly...ALSO PAY VERY CLOSE ATTENTION TO THE ORING SEATS FOR THE MS O-RINGS...
Image
Image

This is a very ****ty casting, and they did just as poor of a job machining it...my o-ring bosses were very sharp, you wan the lead in groove to be free of sharp edges and burrs...its very easy to nick or cut an o-ring.

a little sanding goes a long way.

I'll post more pics once I get it to fit top my liking.

I also sprayed and baked the turbo blanket after its alterations:
Image
Image

The plan is to get the timing knocked off this coming weekend, as well as the turbo install, and the hardlines for coolant and oil.

User avatar
superDorifto
Posts: 1306
Joined: Mon Jun 13, 2005 1:13 pm
Car: 1997 Eclipse Spyder - AWD/5spd swap in progress
1995 Q45 - 5spd swap in progress
1984 200sx hatch(KA-t swap) - 355WHP
1991/1993/1995/1997 240s - Dead
1982 200sx hatch - fixed/scrapped
Location: CT

Post

Alternator got fixed...

Spent some quality time with the z32 tranny last weekend.


Removed all of the 12mm bolts on the front cover
Image

and the cover...
Image

View of the businessy bits...
Image

Next come a snap ring and a circlip...
Image

Also the front shift ball dent needs to come out...
Image

Removed the 14mm bolts at the adapter plate, and with a few well placed hammer strikes:
Image

Which needs to get shipped to Mazzworx for machining - and the scary insides...
Image
Image

While its apart, I'm going to replace the syncros and anything else that needs it...updates when I have some time to work on it again.

User avatar
PapaSmurf2k3
Site Admin
Posts: 24000
Joined: Thu Nov 21, 2002 3:20 pm
Car: 2017 Corvette, 2018 Focus ST, 1993 240sx truck KA Turbo.
Location: Merrimack, NH

Post

Damn dude, the rabbit hole goes quite deep!

That casting is junk. Did you open up those holes with that little file? You need to get something like this to blast through that s***.
http://www.homedepot.com/buy/dremel-hig ... Dw8c9ZlTWo

User avatar
superDorifto
Posts: 1306
Joined: Mon Jun 13, 2005 1:13 pm
Car: 1997 Eclipse Spyder - AWD/5spd swap in progress
1995 Q45 - 5spd swap in progress
1984 200sx hatch(KA-t swap) - 355WHP
1991/1993/1995/1997 240s - Dead
1982 200sx hatch - fixed/scrapped
Location: CT

Post

I didn't post pics yet, but yeah all of the injector bosses were undersized...I bought a straight carbide end mill for my dremel and spent some quality time with it on Saturday.

I'll just summarize for anyone whos interested:

Xcessive Manifold ~$460 plus $90 bucks for the velocity stack insert.

Codspeed copy I paid $250 shipped
+ $98 bucks to true all the flanges
+ $90 bucks to add a flange for IACV (granted the xcessive would have needed this too, but still)
+ $90 bucks for the same Velocity stack insert from xcessive

Then you add my time

2 hours knocking off all of the casting flash
2 hours massaging the injector bosses to get them to fit
3 trips to the hardware store so far (for spacers and what not)
2 hours fiddling with the fuel rail trying to get the o-rings to seat right..

Not saying that I wouldn't have had the same issue with the Xcessive unit, but I am def tired of working with this peice of crap - and if you notice, none of that time is spent proting or gasket matching / polishing or painting.

By the time its all said and done, this manifold is gonna eat 20-30 hours of time and run over $550 bucks.

User avatar
WDRacing
Moderator
Posts: 23925
Joined: Mon Nov 25, 2002 2:00 am
Car: 95 240SX, 99 BMW 540i, 01 Chevy Express, 14 Ford Escape
Location: MFFO
Contact:

Post

This thread is inspiring.

User avatar
s13drifter88
Posts: 1111
Joined: Wed Jun 23, 2010 7:40 am
Car: 93 S13 Coupe CA18DET (Money pit)
1996 D21 Hardbody (Work truck/daily)
!993 Del Sol (Daily)
1987 Pontiac GTA (Drag project, other money pit)
1989 SOHC S13 Buzz Car
Location: Huntsville, AL

Post

I built an intake for an RB20 in the machine shop at school one day that was better than that thing and it was my first one!
I cut and milled every piece... turned, faced and pressed all the stacks with a steel cone I made myself as well!
Image
Image

This thread is really making me want to build another boosted KA, maybe a DE-R for my 96 Hardbody

User avatar
superDorifto
Posts: 1306
Joined: Mon Jun 13, 2005 1:13 pm
Car: 1997 Eclipse Spyder - AWD/5spd swap in progress
1995 Q45 - 5spd swap in progress
1984 200sx hatch(KA-t swap) - 355WHP
1991/1993/1995/1997 240s - Dead
1982 200sx hatch - fixed/scrapped
Location: CT

Post

Do it. We need more decent KA builds...

User avatar
s13drifter88
Posts: 1111
Joined: Wed Jun 23, 2010 7:40 am
Car: 93 S13 Coupe CA18DET (Money pit)
1996 D21 Hardbody (Work truck/daily)
!993 Del Sol (Daily)
1987 Pontiac GTA (Drag project, other money pit)
1989 SOHC S13 Buzz Car
Location: Huntsville, AL

Post

Attention: Now accepting donations for KADE-R build for 96 hardbody.

User avatar
superDorifto
Posts: 1306
Joined: Mon Jun 13, 2005 1:13 pm
Car: 1997 Eclipse Spyder - AWD/5spd swap in progress
1995 Q45 - 5spd swap in progress
1984 200sx hatch(KA-t swap) - 355WHP
1991/1993/1995/1997 240s - Dead
1982 200sx hatch - fixed/scrapped
Location: CT

Post

I way overbuilt, you could score a similar set up for less than 3K invested making the same power level safely.

User avatar
s13drifter88
Posts: 1111
Joined: Wed Jun 23, 2010 7:40 am
Car: 93 S13 Coupe CA18DET (Money pit)
1996 D21 Hardbody (Work truck/daily)
!993 Del Sol (Daily)
1987 Pontiac GTA (Drag project, other money pit)
1989 SOHC S13 Buzz Car
Location: Huntsville, AL

Post

So who out there wants to donate less than 3k lol. It'll be a while... I leave for bootcamp in march so Im not taking on any more projects for quite a while

User avatar
superDorifto
Posts: 1306
Joined: Mon Jun 13, 2005 1:13 pm
Car: 1997 Eclipse Spyder - AWD/5spd swap in progress
1995 Q45 - 5spd swap in progress
1984 200sx hatch(KA-t swap) - 355WHP
1991/1993/1995/1997 240s - Dead
1982 200sx hatch - fixed/scrapped
Location: CT

Post

I'm finally seeing progress, and have settled into a nice rhythm of 1 to 2 small projects a week...

Heres some pics of the Aluminium 26mm calipers when I brought them homw last year.

Image

Flash forward to today, and the fronts are finally powder coated and built. They were supposed to go along with the engine theme of flat wrinkle red. I'm happy with the result, but not thrilled with the execution. There are already a few chips due to the Powder Coater not prepping correctly.

Oh well, what can you expect for almost free...

Image
Image
Image
Image
Image
Image

The rears are together as well, but I need to pull them apart and clean them again....I put the wrong grease in the wrong location.

In my defense nothing in the raysbestos rebuild kit was labelled, I figured the red goop went on the pistons/seals.

User avatar
superDorifto
Posts: 1306
Joined: Mon Jun 13, 2005 1:13 pm
Car: 1997 Eclipse Spyder - AWD/5spd swap in progress
1995 Q45 - 5spd swap in progress
1984 200sx hatch(KA-t swap) - 355WHP
1991/1993/1995/1997 240s - Dead
1982 200sx hatch - fixed/scrapped
Location: CT

Post

Spent a full 8 hours in the garage on Saturday.

The motor is finally timed with proper OEM parts, thanks to a local Nissan enthusiast who basically gave me an OEM timing kit.

The intake is installed, but there are still a few issues:

- the bolt under the waterneck does not have enough space to be installed, also the stock studs are a bit too long. I'll run extra washers for now until I can source some shorter studs.

As for the Turbo, its installed, along with some pics to show clearance for the coolant/oil lines.

Next up is coolant/oil feed/return lines, oil pan, and hopefully install pics with the motor an z32 tranny sitting in the car.

Thermal gasket being installed
Image

View of the velocity stacks
Image

Some views of the manifold
Image
Image

The orings, finally seated with rtv
Image
Image

Turbo installed, test fitting heat shield and turbo blanket
Image
Image

Some views of the clearance to the water feed
Image
Image

My finger wedged between the compressor housing and the fitting, ther will be just enough room for the fittings
Image

Blanket fitted, waiting until the lines are finalized before I install
Image
Image
Image

Timing all buttoned up
Image

As it sits now - only needs the oil pan and lines...
Image
Image
Image
Image

User avatar
superDorifto
Posts: 1306
Joined: Mon Jun 13, 2005 1:13 pm
Car: 1997 Eclipse Spyder - AWD/5spd swap in progress
1995 Q45 - 5spd swap in progress
1984 200sx hatch(KA-t swap) - 355WHP
1991/1993/1995/1997 240s - Dead
1982 200sx hatch - fixed/scrapped
Location: CT

Post

super-excited...my machinist took a whack at some custom fittings for my motor.

Thermostat return from heater core - modified to accept the -06 return from the turbo as well. He just loaded this on facebook, but I cannot wait to see it in person.

Image

User avatar
WDRacing
Moderator
Posts: 23925
Joined: Mon Nov 25, 2002 2:00 am
Car: 95 240SX, 99 BMW 540i, 01 Chevy Express, 14 Ford Escape
Location: MFFO
Contact:

Post

Billet is just sexy, period.

User avatar
PapaSmurf2k3
Site Admin
Posts: 24000
Joined: Thu Nov 21, 2002 3:20 pm
Car: 2017 Corvette, 2018 Focus ST, 1993 240sx truck KA Turbo.
Location: Merrimack, NH

Post

Damn man, you're in the home stretch. You should be done in no time!


Return to “KA24ET / KA24DET Forum”