hmmm, so you are going to buy one of this?
http://www.autozone.com/engine-manageme ... 27851_0_0/
At $184~ seems like a good deal for a new item.
Frsport has USED nissan ones for $150, but those are sold as is. I could get "a claimed Working" one from ebay for around $90-100. Could it be possible Isis is rebranding chinese ones to be able to sell them in the $105-150 range.
Wonder how much better a Bosch unit would be.
Ninja Edit:
Old yet interesting discution regarding the subject at the nistune forums:
http://forum.nistune.com/viewtopic.php?f=12&t=1431

SJBsuperman1425's Upgrade Thread
-
sjbsuperman1425

- Posts: 2889
- Joined: Tue Nov 06, 2007 2:24 pm
- Car: 1989 Nissan 240sx
CA18DET - Location: Bay City, MI
- Contact:
Re: SJBsuperman1425's Upgrade Thread
I might just buy a brand new OEM one now...lol But I have a good hook up at the local AutoZone here so if it happens to not work or anything I can return it no questions asked.
-
Cams

- Posts: 307
- Joined: Sat Jan 27, 2007 3:42 am
- Car: 1993 Nissan 200sx CA18(DET) RS13
2002 Mitsubishi Airtrek JDM 4G63T (wife)
2013 Scion FR-S
2016 Infiniti QX50 - Location: Panama, Central America
Re: SJBsuperman1425's Upgrade Thread
Bought the Bosch one from Amazon for $115. I hope it is truly made in Japan.
I might be able to return it if I get any problems in Nistune.
I might be able to return it if I get any problems in Nistune.
-
sjbsuperman1425
- Posts: 2889
- Joined: Tue Nov 06, 2007 2:24 pm
- Car: 1989 Nissan 240sx
CA18DET - Location: Bay City, MI
- Contact:
Re: SJBsuperman1425's Upgrade Thread
when you get it, post up some pics in here of the sensing element. From what I researched, BOSCH/JECS are the manufacture's for the OEM units. So you would think they would be the same.
-
sjbsuperman1425
- Posts: 2889
- Joined: Tue Nov 06, 2007 2:24 pm
- Car: 1989 Nissan 240sx
CA18DET - Location: Bay City, MI
- Contact:
Re: SJBsuperman1425's Upgrade Thread
Just doing a quick update at work.
The Bosch Z32 MAF is a solid unit. Looks to have the same sensor element as the OEM Nissan units (which makes sense since Bosch makes them).
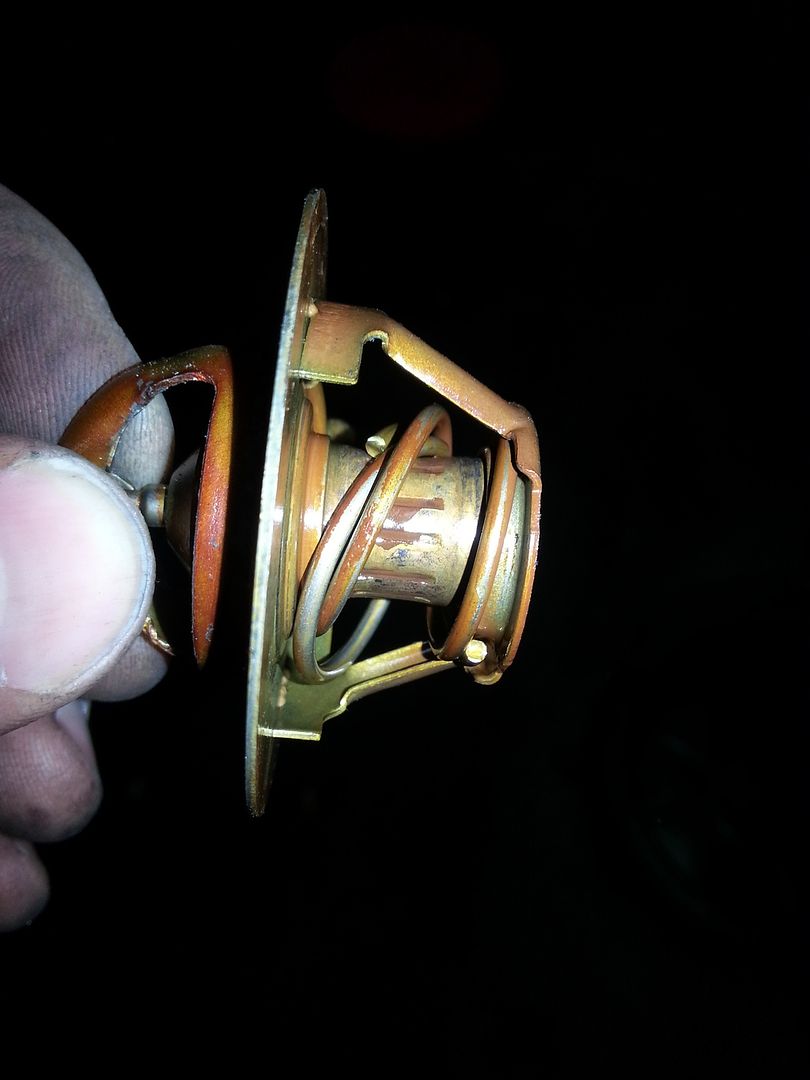
Also, I started to do some degreasing and cleaning the engine over the weekend. I have all the butterfly valve parts in proper function and when I went to transfer the thermostat over from the non-butterfly manifold to the butterfly manifold, this is what I found. Any ideas of what would cause this because I just do not know.
The Bosch Z32 MAF is a solid unit. Looks to have the same sensor element as the OEM Nissan units (which makes sense since Bosch makes them).
Also, I started to do some degreasing and cleaning the engine over the weekend. I have all the butterfly valve parts in proper function and when I went to transfer the thermostat over from the non-butterfly manifold to the butterfly manifold, this is what I found. Any ideas of what would cause this because I just do not know.

-
float_6969

- Moderator
- Posts: 19857
- Joined: Mon Aug 26, 2002 1:55 pm
- Car: CA18DET swapped 1995 Nissan 240sx (too many mods to list)
2015 SV Leaf w/QC & Bose (daily) - Location: Topeka, Kansas
- Contact:
Re: SJBsuperman1425's Upgrade Thread
It doesn't look corroded, so it was probably just defective.
-
sjbsuperman1425
- Posts: 2889
- Joined: Tue Nov 06, 2007 2:24 pm
- Car: 1989 Nissan 240sx
CA18DET - Location: Bay City, MI
- Contact:
Re: SJBsuperman1425's Upgrade Thread
I'm amazed it was still working. I ordered an OEM Nissan T-Stat yesterday for $15. Also, new OEM CA18DET water pump from local Nissan dealer wasn't that expensive either, so I wrapped that up as well. I didn't much like the idea of the Duralast water pump having a plastic impeller on it.
-
float_6969
- Moderator
- Posts: 19857
- Joined: Mon Aug 26, 2002 1:55 pm
- Car: CA18DET swapped 1995 Nissan 240sx (too many mods to list)
2015 SV Leaf w/QC & Bose (daily) - Location: Topeka, Kansas
- Contact:
Re: SJBsuperman1425's Upgrade Thread
A PLASTIC impeller?!!?!? Holy s***, cheap s*** is getting cheap.
-
sjbsuperman1425
- Posts: 2889
- Joined: Tue Nov 06, 2007 2:24 pm
- Car: 1989 Nissan 240sx
CA18DET - Location: Bay City, MI
- Contact:
Re: SJBsuperman1425's Upgrade Thread
Oh yea, PLASTIC. I had them order me 3 other ones to try and get a decent one with no luck. The OEM one was $58 from the local Nissan dealer.
Now I get to go home, replace my rack and pinion and then try and get the lower timing gear off the crank. Hopefully it isn't rusted on...
Now I get to go home, replace my rack and pinion and then try and get the lower timing gear off the crank. Hopefully it isn't rusted on...
-
sjbsuperman1425
- Posts: 2889
- Joined: Tue Nov 06, 2007 2:24 pm
- Car: 1989 Nissan 240sx
CA18DET - Location: Bay City, MI
- Contact:
Re: SJBsuperman1425's Upgrade Thread
This isn't really an update, but I just went through every page of this thread it my have I changed lol It's really strange looking back and reading my own thoughts. So glad I came to this community though and start this thread. Also, I think this is the first year where I didn't really "upgrade" anything haha.

Re: SJBsuperman1425's Upgrade Thread
It's always nice to go back and look at your thread every year, just to see all of what happened.
-
sjbsuperman1425
- Posts: 2889
- Joined: Tue Nov 06, 2007 2:24 pm
- Car: 1989 Nissan 240sx
CA18DET - Location: Bay City, MI
- Contact:
Re: SJBsuperman1425's Upgrade Thread
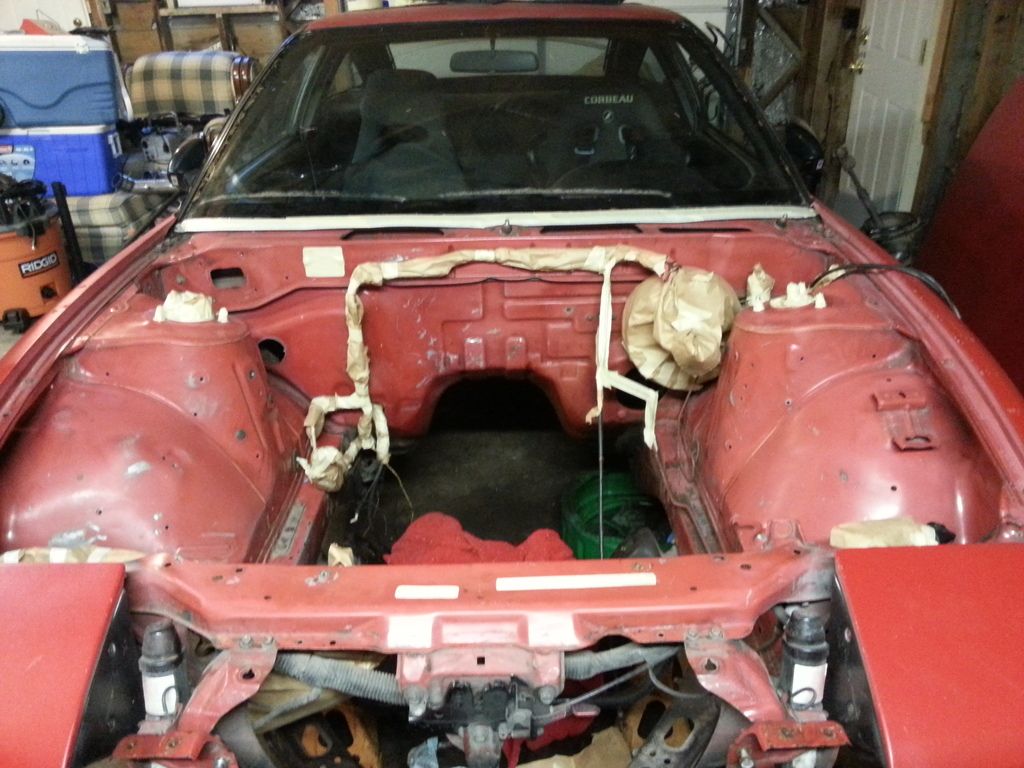
Well I mind as well give a pretty detailed update. Maybe tonight I will actually go out and take some pictures of everything.
I pulled the engine last November because it was time to do the clutch. I'm putting in Deatschwerks 550cc injectors, a Z32 MAF, POWER STEERING, and changing some seals (front and rear main). After I had it out I figured it would add in the butterfly valves to see what happens with that as well. Maybe I can pick up some torque down low (whatever it can muster) and get some better 1/4 times in the process. I pulled the clutch off and it was right down to the rivets, the OEM Nissan clutch. Pretty good for just getting the engine from Japan Star Motors and dropping it in without taking anything apart, and that was back in 2008 when I purchased it.
Now that I've acquired MOST of the parts I think I will need, I'm on the reassembly part of this winter/spring project. I'm getting ready to put the lower manifold back on the head, but I noticed the manifold I have has some corrosion or build up where the injector seal sits. So I'm going to have to clean that up with something. I'm hoping the front crank gear comes off nice and easy but I'm kind of doubting it.
So here are the questions I have:
-What can I use to clean the corrosion/build up from the injector seal "cups"? I was thinking a small dremel wire wheel but I think that might be too abrasive.
-Any recommendations on how to remove the crank gear if it will not just slide off? I've read on here that people have used heat and others have cut it off. Just looking for a little more insight.
-
float_6969
- Moderator
- Posts: 19857
- Joined: Mon Aug 26, 2002 1:55 pm
- Car: CA18DET swapped 1995 Nissan 240sx (too many mods to list)
2015 SV Leaf w/QC & Bose (daily) - Location: Topeka, Kansas
- Contact:
Re: SJBsuperman1425's Upgrade Thread
Dremel wire wheel works fine. It's not too abrasive at all. Use some vaseline on the lower seals and that will likely help seal up any leaks the pitting from the corrosion has caused.
I've never had to deal with a stuck front crank pulley. Mine was hard to take off the very first time, but nothing a good soaking with antiseize for a couple of days and a two screwdrivers didn't resolve. Since then I wire brushed it out REALLY well and then I've always used a good dose of anti-sieze an the gear, woodruff key, crank pulley and crank pulley bolt and never had a problem.
I've never had to deal with a stuck front crank pulley. Mine was hard to take off the very first time, but nothing a good soaking with antiseize for a couple of days and a two screwdrivers didn't resolve. Since then I wire brushed it out REALLY well and then I've always used a good dose of anti-sieze an the gear, woodruff key, crank pulley and crank pulley bolt and never had a problem.
-
sjbsuperman1425
- Posts: 2889
- Joined: Tue Nov 06, 2007 2:24 pm
- Car: 1989 Nissan 240sx
CA18DET - Location: Bay City, MI
- Contact:
Re: SJBsuperman1425's Upgrade Thread
Thanks Ryan, I will take those two tips and store them in my brain compartments.
-
sjbsuperman1425
- Posts: 2889
- Joined: Tue Nov 06, 2007 2:24 pm
- Car: 1989 Nissan 240sx
CA18DET - Location: Bay City, MI
- Contact:
Re: SJBsuperman1425's Upgrade Thread
Well I managed to get the crank gear off that the belt rides on. The only way I was able to get it off was to cut in the valley of the gear above the woodruff key. Then I pulled out the woodruff key by using a hammer and screw driving and "tapping" it upwards and raise it a bit, then I used vice grips to yank that sucker out. After that I used a pry bar and a hammer along with penetrating oil to finally loosen the rust in between the crank and the gear and it slowly started to come off. I was quite excited after finally getting that bugger off. Ordered new washers and a new gear from NissanPartsDeal.com yesterday along with a bunch of other OEM misc bolts/washers to hopefully have the engine back together relatively soon.
-
sjbsuperman1425
- Posts: 2889
- Joined: Tue Nov 06, 2007 2:24 pm
- Car: 1989 Nissan 240sx
CA18DET - Location: Bay City, MI
- Contact:
Re: SJBsuperman1425's Upgrade Thread
Well here is a little of what I've been up too lately:
Had a buddy of mine cut out the front bumper so the intercooler will fit better.
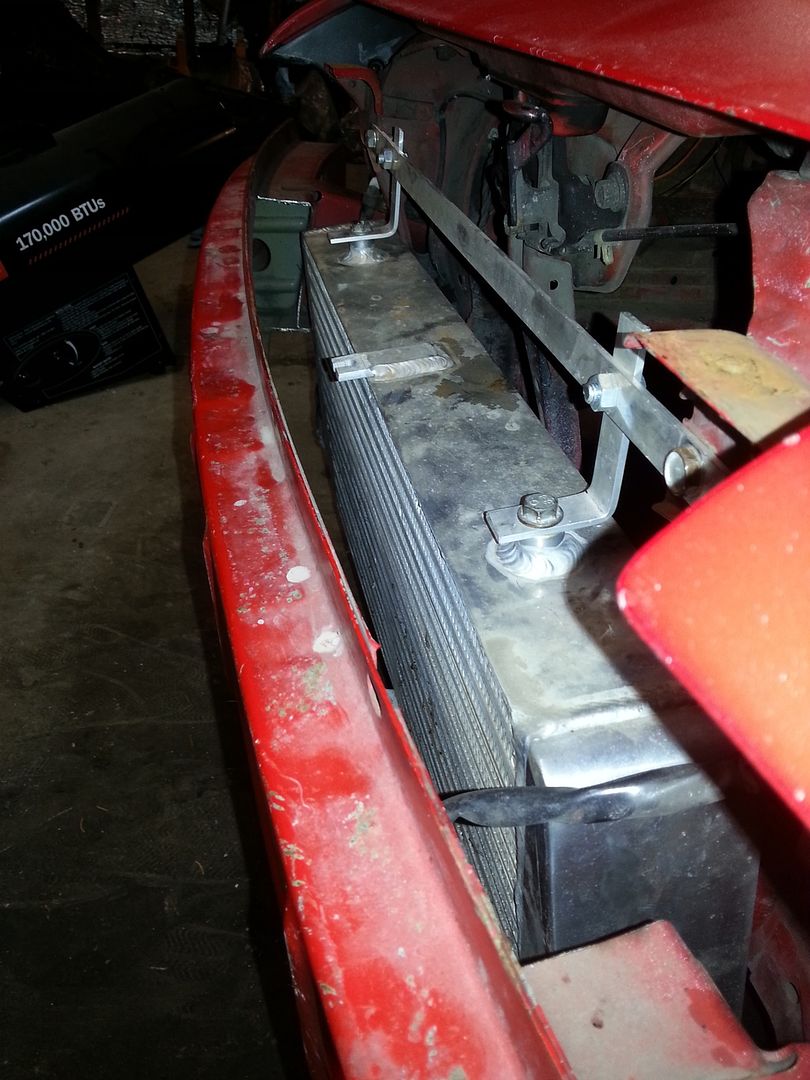
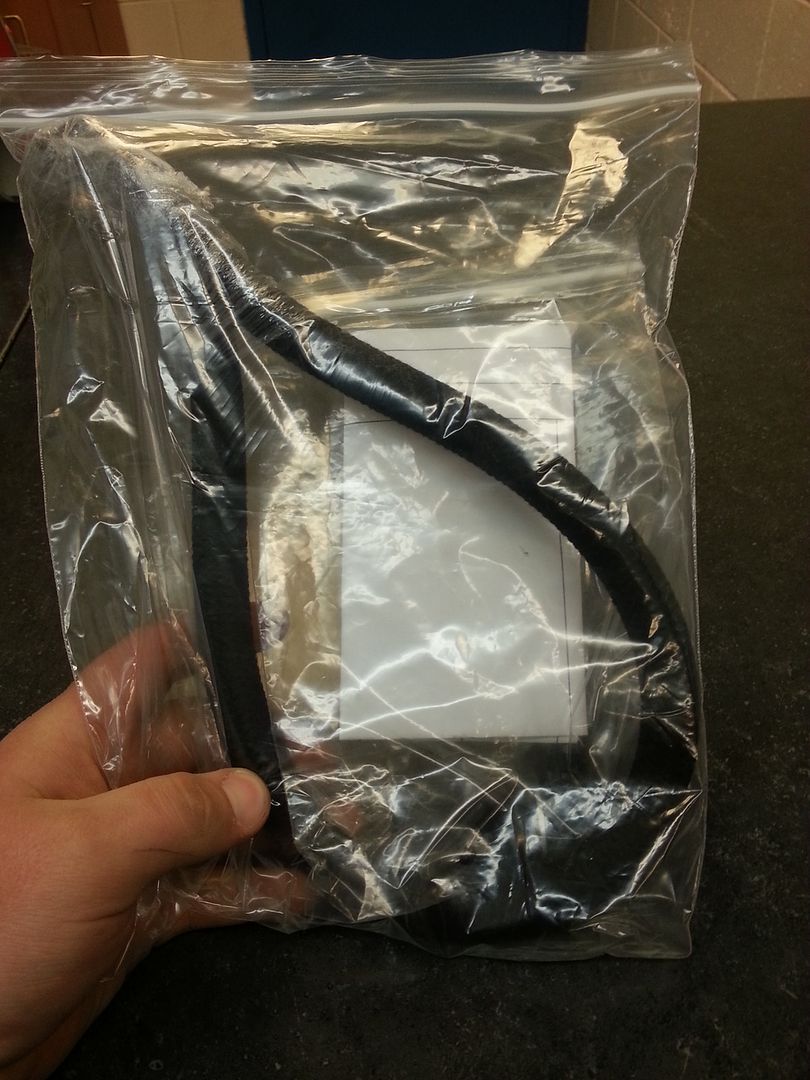
Bought some braided power steering lines to finally have power steering in this pig
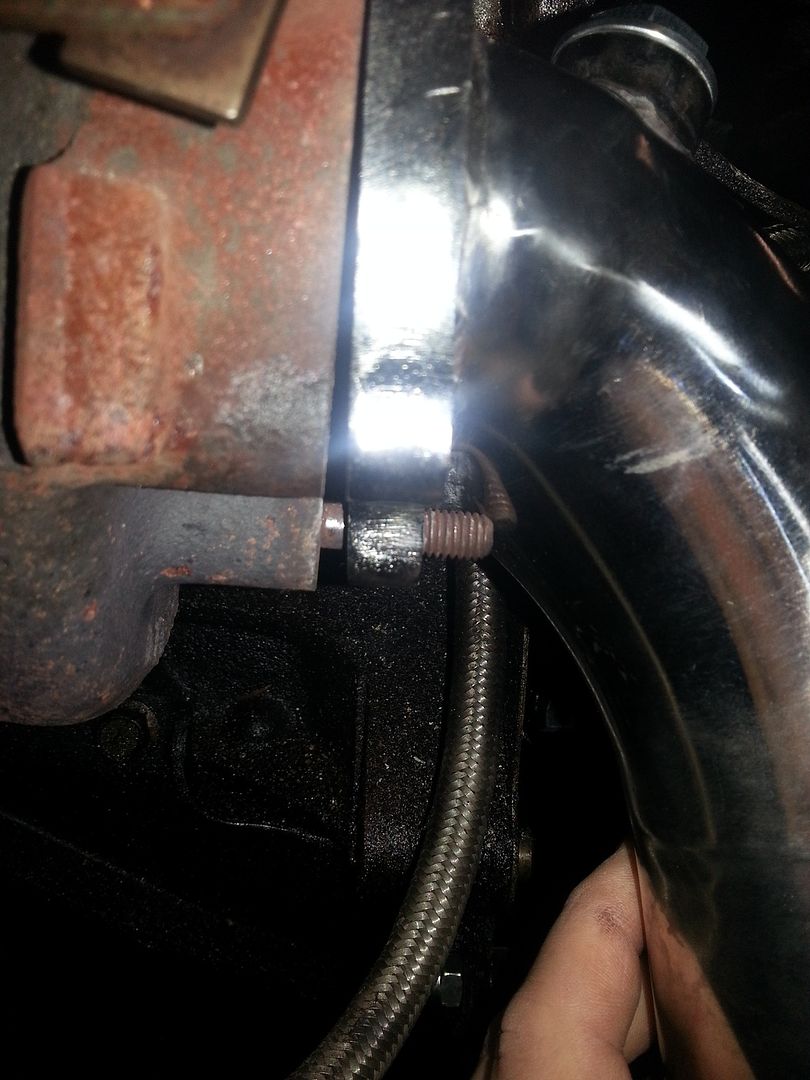
I did order a M2 Performance turbo elbow and it looked decent but did NOT fit. i would not recommend. This is a photo of it on a T28
Had a buddy of mine cut out the front bumper so the intercooler will fit better.

Bought some braided power steering lines to finally have power steering in this pig

I did order a M2 Performance turbo elbow and it looked decent but did NOT fit. i would not recommend. This is a photo of it on a T28


-
sjbsuperman1425
- Posts: 2889
- Joined: Tue Nov 06, 2007 2:24 pm
- Car: 1989 Nissan 240sx
CA18DET - Location: Bay City, MI
- Contact:
Re: SJBsuperman1425's Upgrade Thread
Here are a few more pic:
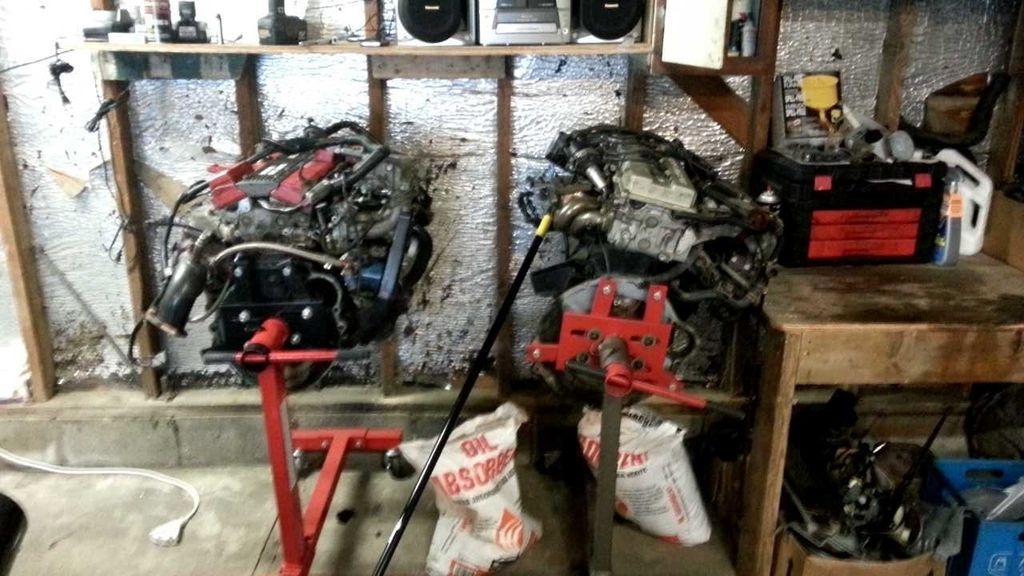
CA18DET vs KA24DE on engine stands
Back of the new "drift" car my buddy and I are building.
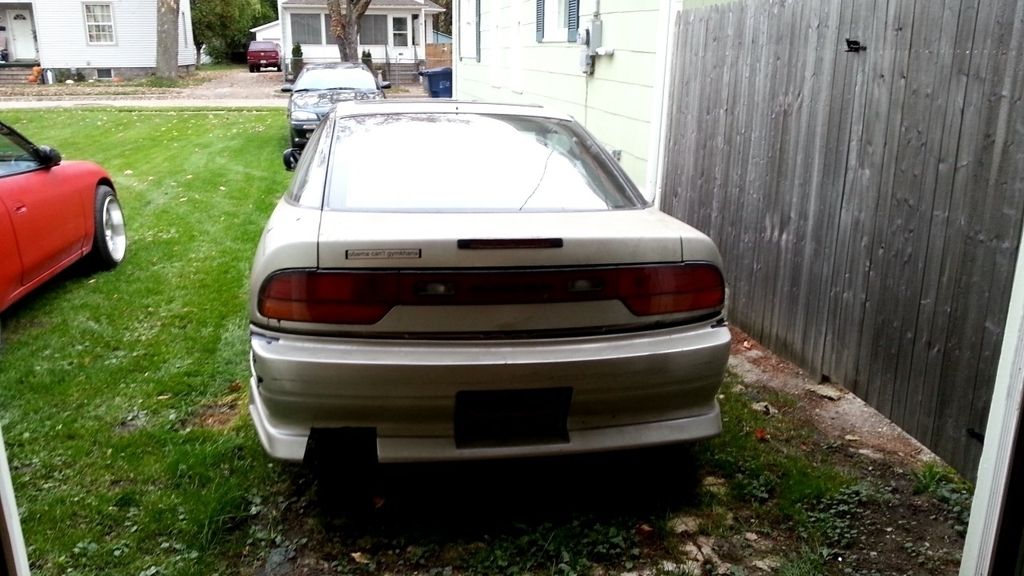
Front of the "drift car"
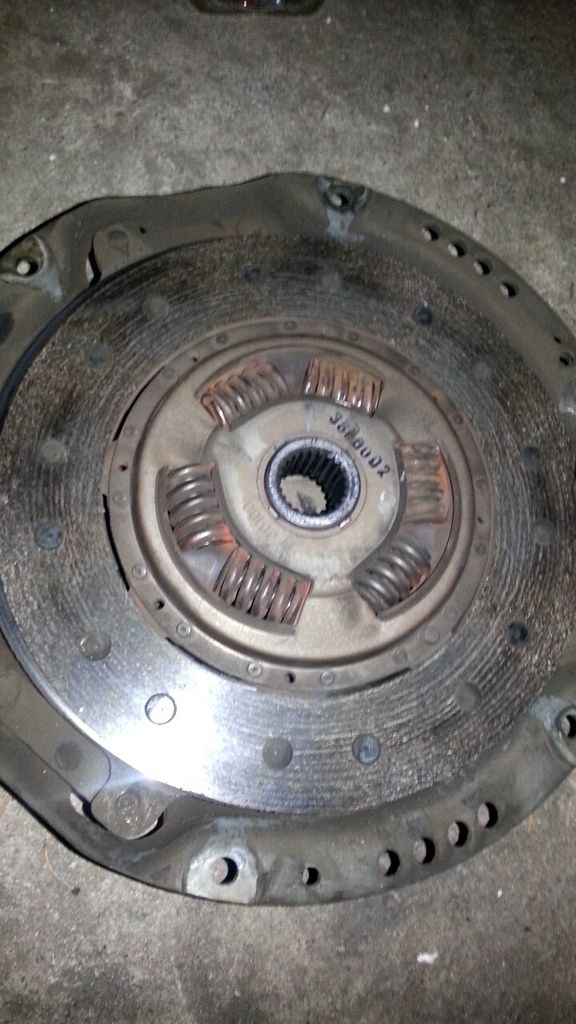
Here is the OEM CA18DET Clutch I pulled off late last fall. I'm thinking it is the culprit to why I cannot do mad skidz anymore
Just awaiting for more OEM parts to arrive from Nissan and it should be on the road in a month or so I'm hoping.
CA18DET vs KA24DE on engine stands

Back of the new "drift" car my buddy and I are building.

Front of the "drift car"

Here is the OEM CA18DET Clutch I pulled off late last fall. I'm thinking it is the culprit to why I cannot do mad skidz anymore

Just awaiting for more OEM parts to arrive from Nissan and it should be on the road in a month or so I'm hoping.
-
Cams
- Posts: 307
- Joined: Sat Jan 27, 2007 3:42 am
- Car: 1993 Nissan 200sx CA18(DET) RS13
2002 Mitsubishi Airtrek JDM 4G63T (wife)
2013 Scion FR-S
2016 Infiniti QX50 - Location: Panama, Central America
Re: SJBsuperman1425's Upgrade Thread
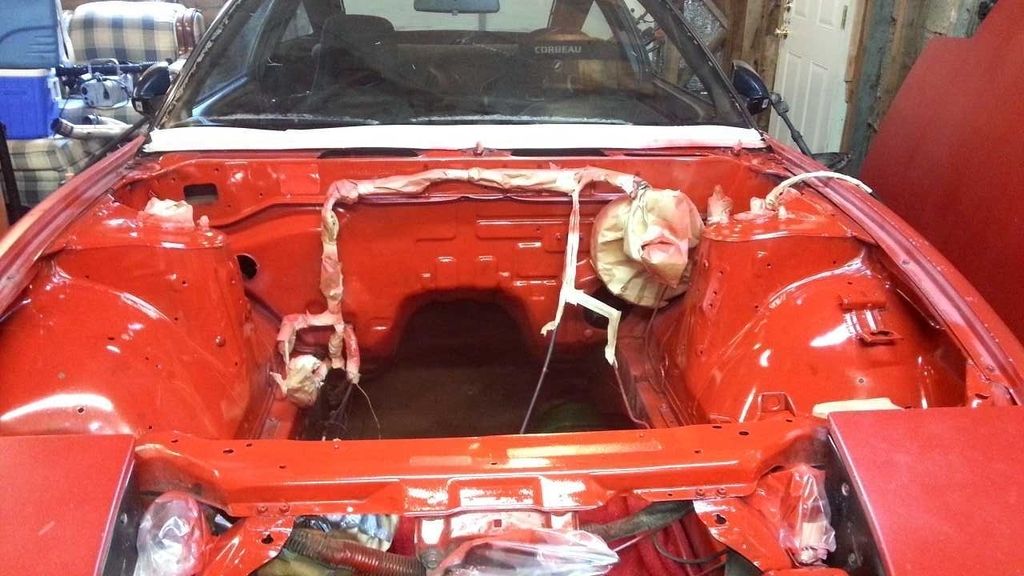
Nice job on the engine bay paint. No Tranny Mount? Why don't you stretch the hole on the turbo elbow a little bit to make it fit?
Do you have more details on the PS lines? I'm overhauling (or at least trying to) my Powersteering parts to try to reduce the annoying leaks that keep staining my engine.
Hurry! Spring is here!
Do you have more details on the PS lines? I'm overhauling (or at least trying to) my Powersteering parts to try to reduce the annoying leaks that keep staining my engine.
Hurry! Spring is here!
-
sjbsuperman1425
- Posts: 2889
- Joined: Tue Nov 06, 2007 2:24 pm
- Car: 1989 Nissan 240sx
CA18DET - Location: Bay City, MI
- Contact:
Re: SJBsuperman1425's Upgrade Thread
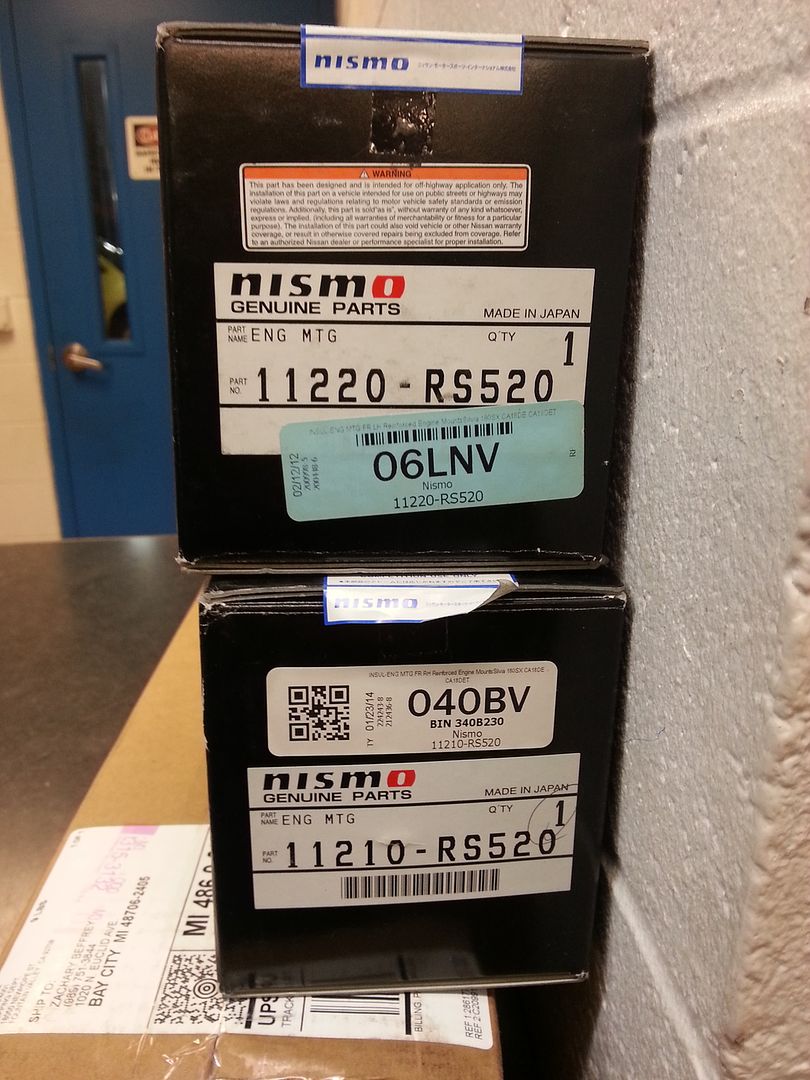
I already have a Peak Performance Red trans mount in the car. Makes shifting feel so much better! The driver side motor mount was torn also so I hope that these will make everything feel more responsive.
The power steering pressure line I purchased through a local company where I live. www.whalentuned.com is their website. For the return lines I bought -6AN fittings and hoses as well as a fluid cooler that I'm going to mount on the front lower tie bar. I'll take some pics within the next week of what I will have accomplished.
The power steering pressure line I purchased through a local company where I live. www.whalentuned.com is their website. For the return lines I bought -6AN fittings and hoses as well as a fluid cooler that I'm going to mount on the front lower tie bar. I'll take some pics within the next week of what I will have accomplished.
-
sjbsuperman1425
- Posts: 2889
- Joined: Tue Nov 06, 2007 2:24 pm
- Car: 1989 Nissan 240sx
CA18DET - Location: Bay City, MI
- Contact:
Re: SJBsuperman1425's Upgrade Thread
Well I've been working away. I have everything almost together on the engine. The intake side is all assembled and torqued. It's a nice feeling when you torque everything to spec let me tell you haha. I did find what was probably my main oil leak all these years.
Here is a picture of the valve covers tightened with the OEM screws looks like. I only used a screw driver and my hand all these years because the heads were already stripping out:
here is a picture with the new allen head bolts I purchased off of eBay and torqued to the OEM torque spec.
Obviously both the valve cover gasket and half moon seal is "squished" and probably will not leak anymore. I'm thinking this is the reason I always had a puddle on the ground and what not. I didn't help that my hose for the breather tube above the oil filter had collapsed and pinched itself off. So I'm pretty confident so far in the engine this year.
The question I do have though is this:
I have a T28 BB turbo and have been running an oil restrictor that has an opening of 0.120" . Going through a bunch of old parts I had found one that has a restrictor opening of about 0.052". Should I switch to the smaller restrictor? I've been running the car this way for a few years now, but I guess I'm just unsure.
Thanks!
Here is a picture of the valve covers tightened with the OEM screws looks like. I only used a screw driver and my hand all these years because the heads were already stripping out:

here is a picture with the new allen head bolts I purchased off of eBay and torqued to the OEM torque spec.

Obviously both the valve cover gasket and half moon seal is "squished" and probably will not leak anymore. I'm thinking this is the reason I always had a puddle on the ground and what not. I didn't help that my hose for the breather tube above the oil filter had collapsed and pinched itself off. So I'm pretty confident so far in the engine this year.
The question I do have though is this:
I have a T28 BB turbo and have been running an oil restrictor that has an opening of 0.120" . Going through a bunch of old parts I had found one that has a restrictor opening of about 0.052". Should I switch to the smaller restrictor? I've been running the car this way for a few years now, but I guess I'm just unsure.
Thanks!
-
float_6969
- Moderator
- Posts: 19857
- Joined: Mon Aug 26, 2002 1:55 pm
- Car: CA18DET swapped 1995 Nissan 240sx (too many mods to list)
2015 SV Leaf w/QC & Bose (daily) - Location: Topeka, Kansas
- Contact:
Re: SJBsuperman1425's Upgrade Thread
If you're not having any issues,I wouldn't mess with it.
-
sjbsuperman1425
- Posts: 2889
- Joined: Tue Nov 06, 2007 2:24 pm
- Car: 1989 Nissan 240sx
CA18DET - Location: Bay City, MI
- Contact:
Re: SJBsuperman1425's Upgrade Thread
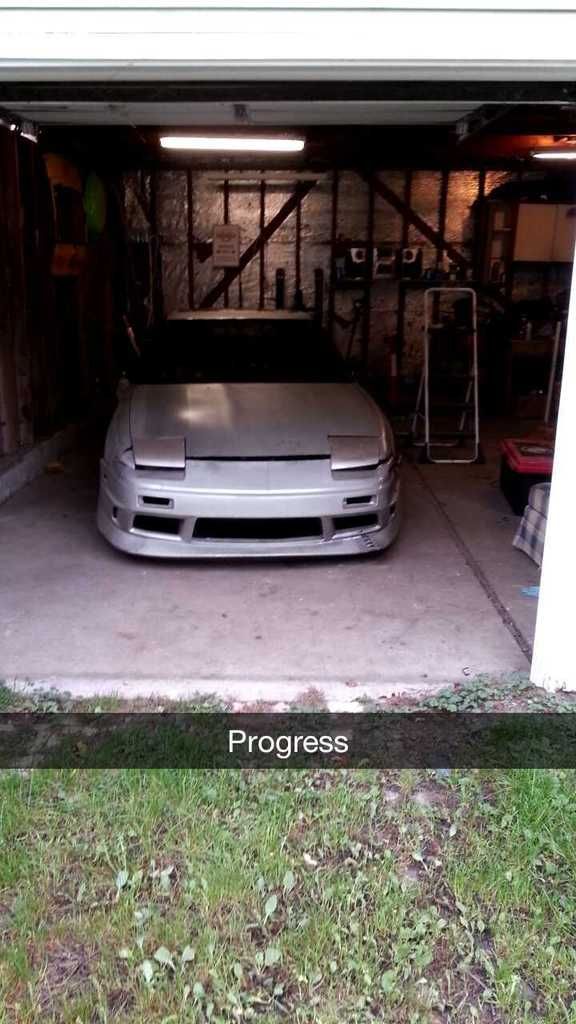
Been busy lately in the garage. Here is some progress:
The hose form the air regulator to the intake manifold was cracked so I needed to find a replacement. Went to autozone and found Dayco part number 87725 was a decent enough fit. The inside diameter is a little larger and you have to bend the hose a little in the opposite direction but it should do the job.
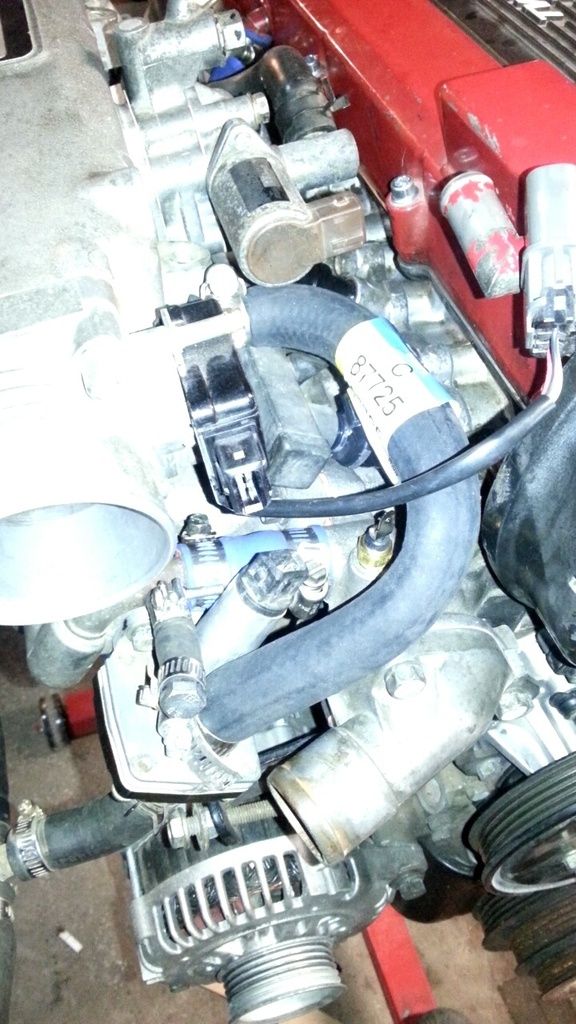
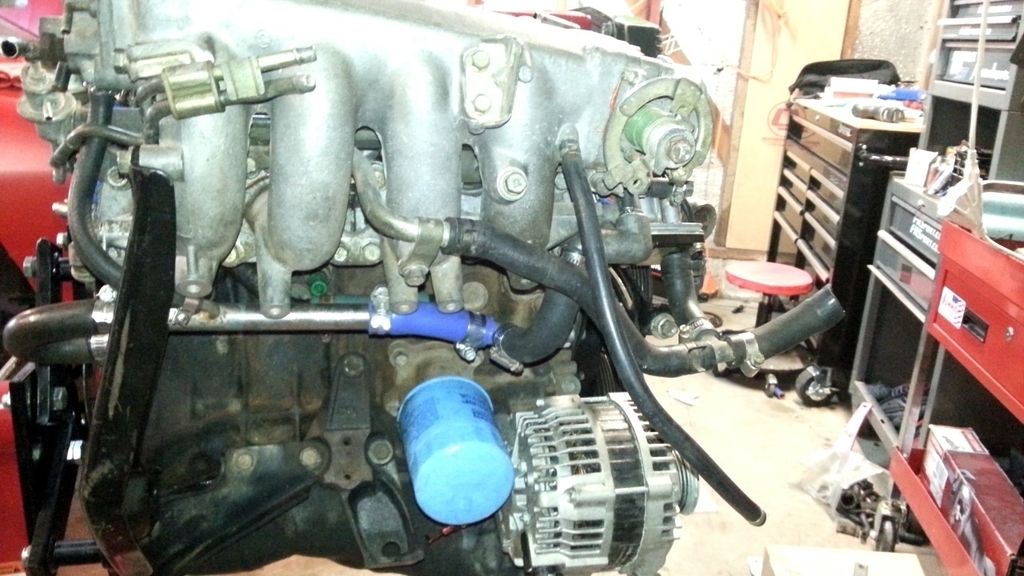
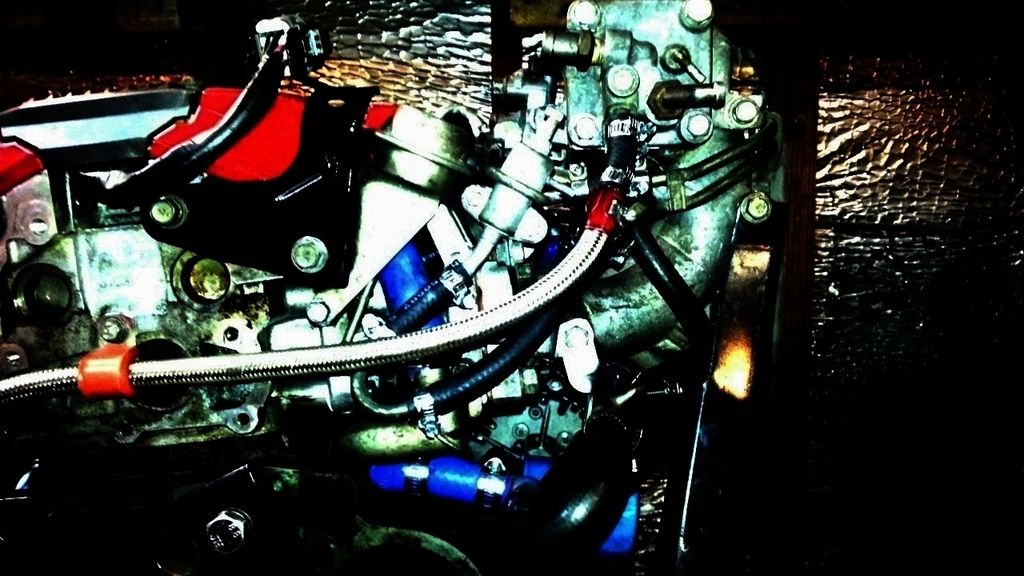
Here is a picture of how I simplified and routed the coolant lines.
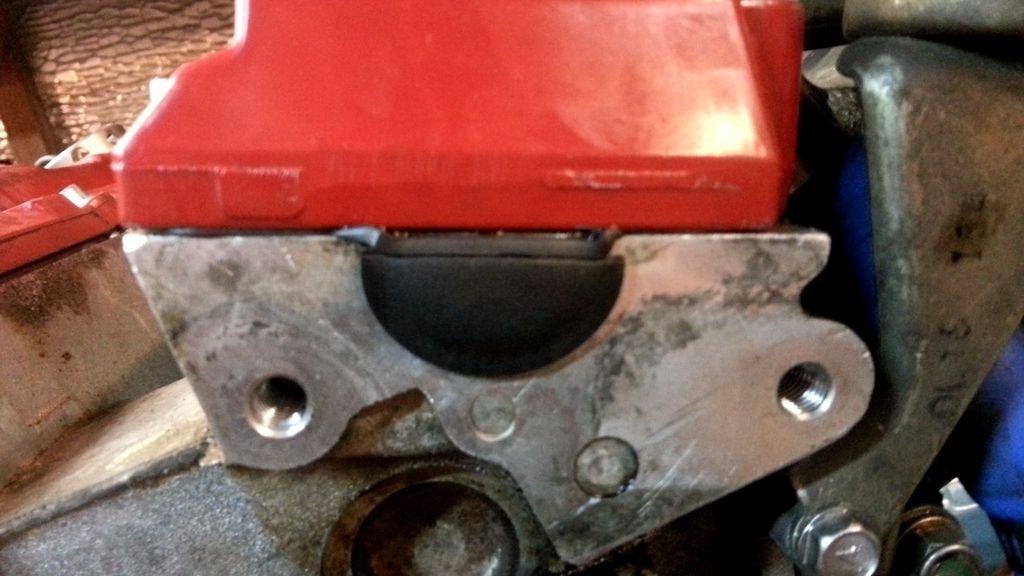
For all the people making brackets for their upgraded alternators, this may work for you. I'm running a Maxima Alternator on my car and had a spare OEM CA18DET power steering pump tensioner bracket laying around that actually worked great. I did have to use a smaller belt (Autozone part number 335K4), but it will work fine and do great.
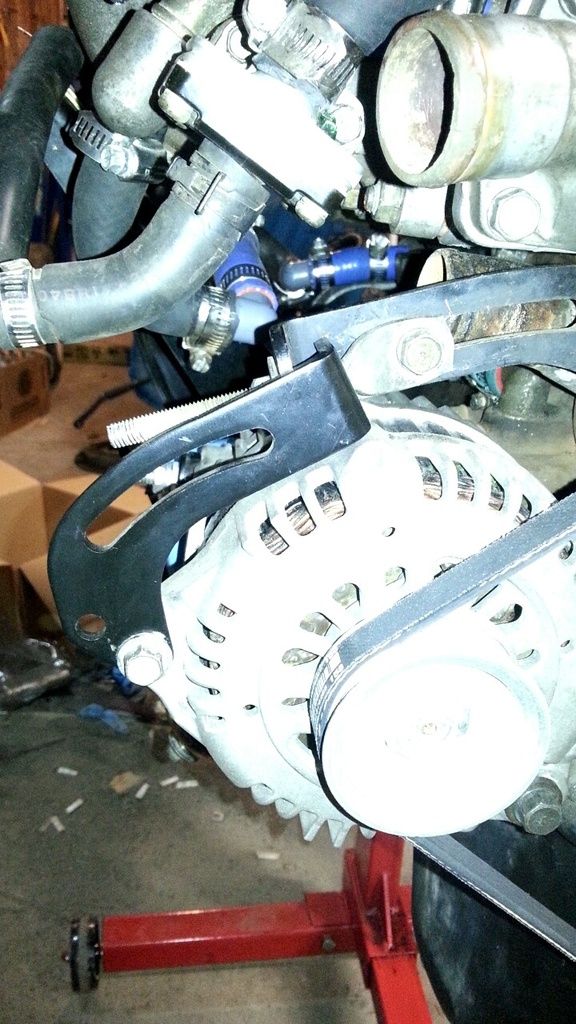
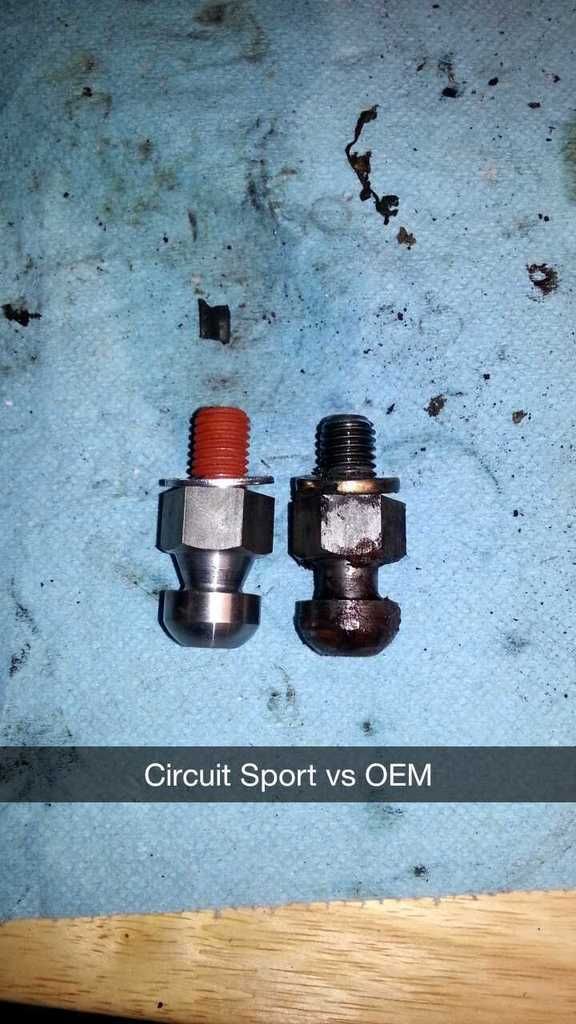
Here is the Circuit Sport Pivot Ball vs. the OEM pivot ball, just for comparison.
I'm really at the end of this thing now. Just going to replace the rear main seal this week sometime and I have to wait for an OEM throw out and pilot bearing and I'm good to go. Hoping to have it in the car by the end of the month.
The hose form the air regulator to the intake manifold was cracked so I needed to find a replacement. Went to autozone and found Dayco part number 87725 was a decent enough fit. The inside diameter is a little larger and you have to bend the hose a little in the opposite direction but it should do the job.

Here is a picture of how I simplified and routed the coolant lines.

For all the people making brackets for their upgraded alternators, this may work for you. I'm running a Maxima Alternator on my car and had a spare OEM CA18DET power steering pump tensioner bracket laying around that actually worked great. I did have to use a smaller belt (Autozone part number 335K4), but it will work fine and do great.

Here is the Circuit Sport Pivot Ball vs. the OEM pivot ball, just for comparison.

I'm really at the end of this thing now. Just going to replace the rear main seal this week sometime and I have to wait for an OEM throw out and pilot bearing and I'm good to go. Hoping to have it in the car by the end of the month.
-
sjbsuperman1425
- Posts: 2889
- Joined: Tue Nov 06, 2007 2:24 pm
- Car: 1989 Nissan 240sx
CA18DET - Location: Bay City, MI
- Contact:
Re: SJBsuperman1425's Upgrade Thread
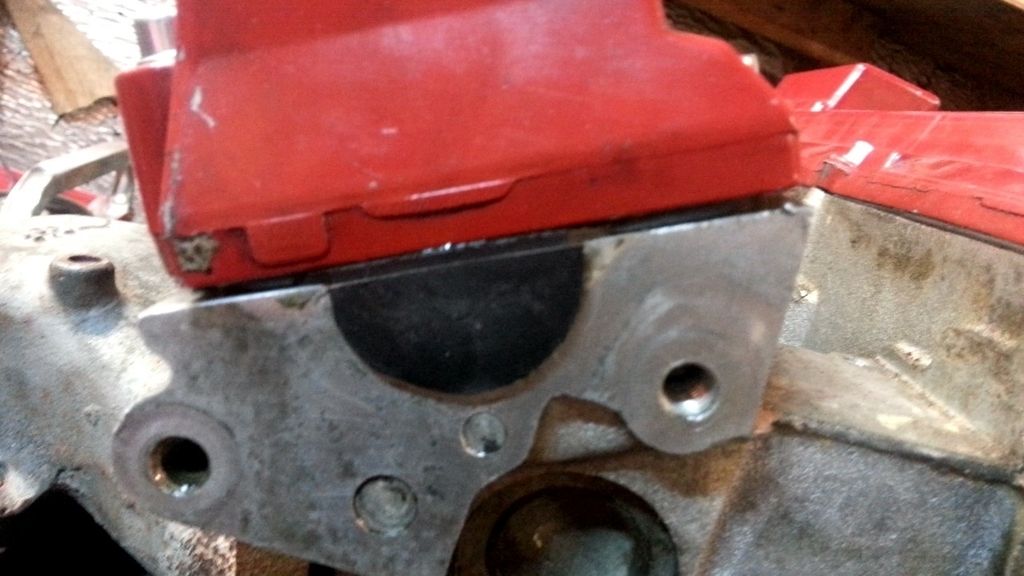
For those of us here running the Nismo Type-A adjustable fuel pressure regulator, you know that the tube on the bottom of the regulator does not bend in the correct direction for the CA18DET. Some people will bend the tube, in my previous application I just had the fuel pressure hose a little longer and let it loop itself around. Since I have the engine out and I could really look at that area, I had pondered for awhile and finally had an epiphany! Here is what I did:
Took the stock CA18DET fuel pressure regulator
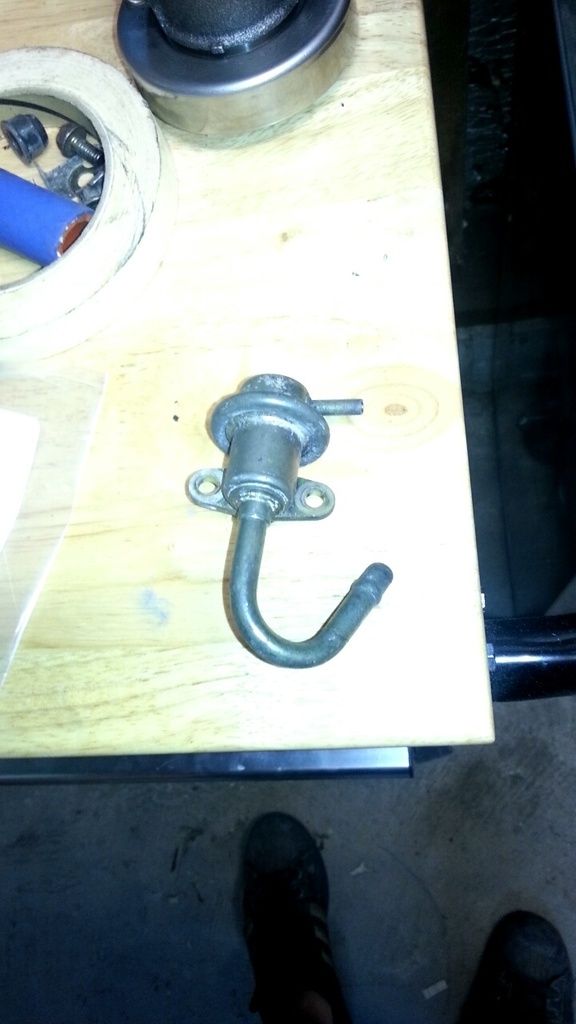
Cut the metal tube that "loops" in the correct direction. I used a Dremel cutoff tool and cut the tube off right at the bottom of the stock fuel pressure regulator so as to keep the little "lip". It's hard to see but it would be on the right side in this picture.
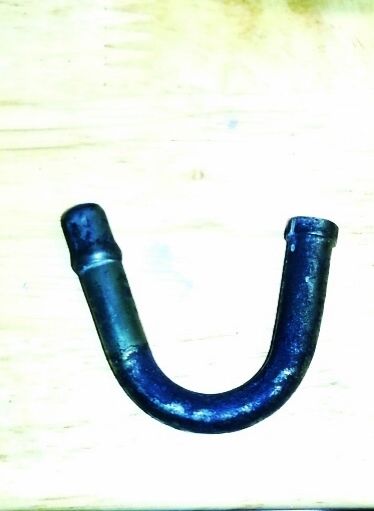
See how it looks?
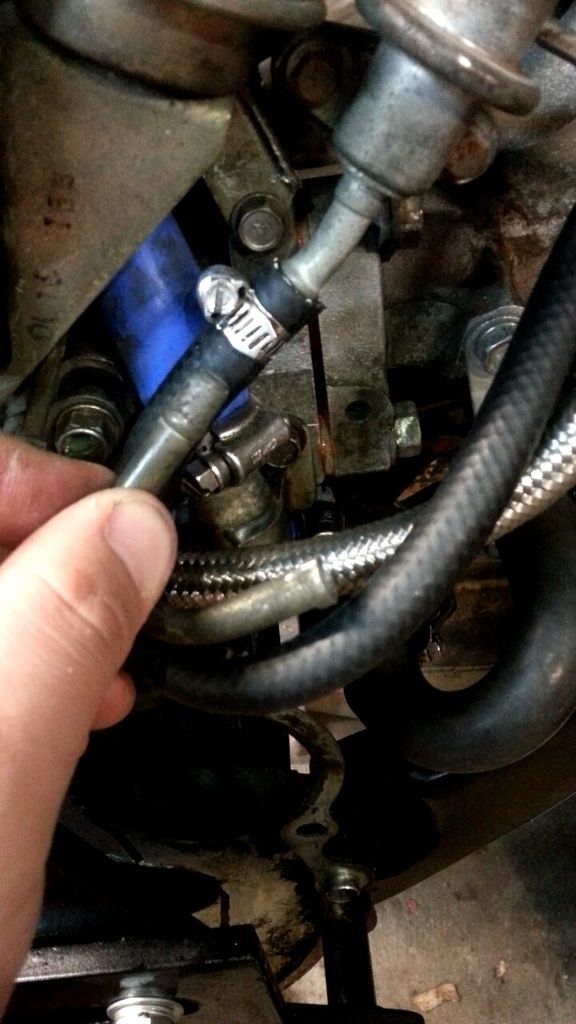
Completed!
Now I have no worries of the line kinking and causing fuel pressure issues.
Took the stock CA18DET fuel pressure regulator

Cut the metal tube that "loops" in the correct direction. I used a Dremel cutoff tool and cut the tube off right at the bottom of the stock fuel pressure regulator so as to keep the little "lip". It's hard to see but it would be on the right side in this picture.

See how it looks?

Completed!

Now I have no worries of the line kinking and causing fuel pressure issues.
-
float_6969
- Moderator
- Posts: 19857
- Joined: Mon Aug 26, 2002 1:55 pm
- Car: CA18DET swapped 1995 Nissan 240sx (too many mods to list)
2015 SV Leaf w/QC & Bose (daily) - Location: Topeka, Kansas
- Contact:
-
sjbsuperman1425
- Posts: 2889
- Joined: Tue Nov 06, 2007 2:24 pm
- Car: 1989 Nissan 240sx
CA18DET - Location: Bay City, MI
- Contact:
Re: SJBsuperman1425's Upgrade Thread
Well the CA gave me quite the fight last night.
Spent almost 4 hours trying to mate the transmission to the engine and failed..In the process, I did find that I did damage the pilot bushing when I installed it so I guess it isn't all bad, but the new SPEC Stage 2+ clutch disc is giving me quite the hard time going onto the splines of the input shaft. The splines are the same, it's just almost like the fit is very tight. I took the SPEC disc off the flywheel and pushed it up and down the splines of the input shaft a few times and it has gotten easier, but I just couldn't get the transmission to mate up all the way to the engine.
Going back at it tonight.
-
float_6969
- Moderator
- Posts: 19857
- Joined: Mon Aug 26, 2002 1:55 pm
- Car: CA18DET swapped 1995 Nissan 240sx (too many mods to list)
2015 SV Leaf w/QC & Bose (daily) - Location: Topeka, Kansas
- Contact:
Re: SJBsuperman1425's Upgrade Thread
I just noticed your cooling line changes. That's not going to work unless you don't want a heater or the thermostat to work properly. Those lines HAVE to connect back to that pipe for the lower cooling line. If they don't, there's no circulation and the coolant will just stagnate in there, assuming it even gets coolant into them. They'll likely just sit full of air. I really hope you get this before you put the engine back in the car. You NEED to get that fixed before you run it.
-
sjbsuperman1425
- Posts: 2889
- Joined: Tue Nov 06, 2007 2:24 pm
- Car: 1989 Nissan 240sx
CA18DET - Location: Bay City, MI
- Contact:
Re: SJBsuperman1425's Upgrade Thread
Are you talking about the lower metal pipe that runs to the heater/turbo lines should connect back to the lower radiator hose?
-
float_6969
- Moderator
- Posts: 19857
- Joined: Mon Aug 26, 2002 1:55 pm
- Car: CA18DET swapped 1995 Nissan 240sx (too many mods to list)
2015 SV Leaf w/QC & Bose (daily) - Location: Topeka, Kansas
- Contact:
Re: SJBsuperman1425's Upgrade Thread
Yes, and the large metal 45 under the TB. They all HAVE to connect back to the lower radiator hose connector tee thing. If they don't, there's no circulation.
-
sjbsuperman1425
- Posts: 2889
- Joined: Tue Nov 06, 2007 2:24 pm
- Car: 1989 Nissan 240sx
CA18DET - Location: Bay City, MI
- Contact:
Re: SJBsuperman1425's Upgrade Thread

You are completely right. I guess I was always under the assumption that the flow worked different. Feel pretty bad that I used to refer people to the Driftopia site pages for the "cooling line simplification" process. The way I have it, there is a pressure force at both sides basically pushing against each other. I've ran it like this for years (basing my knowledge off the Driftopia site) and have always blown hoses and what not. No overheating issues, but my problems were always around that side. Thanks for spotting that Ryan or else I probably would have never looked at it again. I had cut up a the lower hardline so hopefully I have some of the pieces still in a bag somewhere and can use them. If not it's off to home depot for some T's.
Again thanks a bunch for spotting that Ryan. The engine is not in yet, but its definitely not that hard to get to when its in the car. lol
-
float_6969
- Moderator
- Posts: 19857
- Joined: Mon Aug 26, 2002 1:55 pm
- Car: CA18DET swapped 1995 Nissan 240sx (too many mods to list)
2015 SV Leaf w/QC & Bose (daily) - Location: Topeka, Kansas
- Contact:
Re: SJBsuperman1425's Upgrade Thread
Glad to help! Also, I would HIGHLY recommend the silicone hose kit on eBay. It has every hose in there as far as I can tell and they all appear to be good quality. Also includes those hard to find idle air control hoses.
Find Your Forum!