This is the method I used to replace / upgrade my rear turn signals to LEDs. While reading it, it may seem like it will be an all day affair, but it only takes about 30 minutes from start to finish (15-20 minutes per side).
TOOLS NEEDED:
1 small flat-head screwdriver,1 pair of pliers, a small crescent wrench, painter's tape (or masking tape), and latex or lint-free golves.
Inside the trunk, you will find a large plastic trim piece along the lower opening.

It is held in place by 4 large clamps (these also hold the cargo net if you have one). There are also 2 smaller clamps that are visible half-way between the upper and the lower large clamps. All of these need to be removed. Use the screwdriver to lift the center portion up, then pull on the base to remove them.


There is a light fixture facing inward on the lower area of the plastic trim piece. Use the screwdriver to lift out one side, then the other until it falls out and hangs inside the trunk. Then slide off the wire connector and set the fixture aside. You should be left with just the connecting wire as seen below.

After the clips and the light fixture are removed, stand centered at the trunk opening, reach under the plastic piece with hands on either side of the trunk latch, and lift sharply upward to pop off the trim piece. It is held in place by 4 tabs across the bottom. Set this aside. Now remove the carpet liner (if you have one), then the other carpeted pieces that line the bottom of the trunk.

Before you proceed with the rest of the steps, it's a good idea to tape a soft towel where the rear lamp assembly sits on the bumper. you will be sliding the lamp fixture out soon and it could scratch the finish of your bumper.

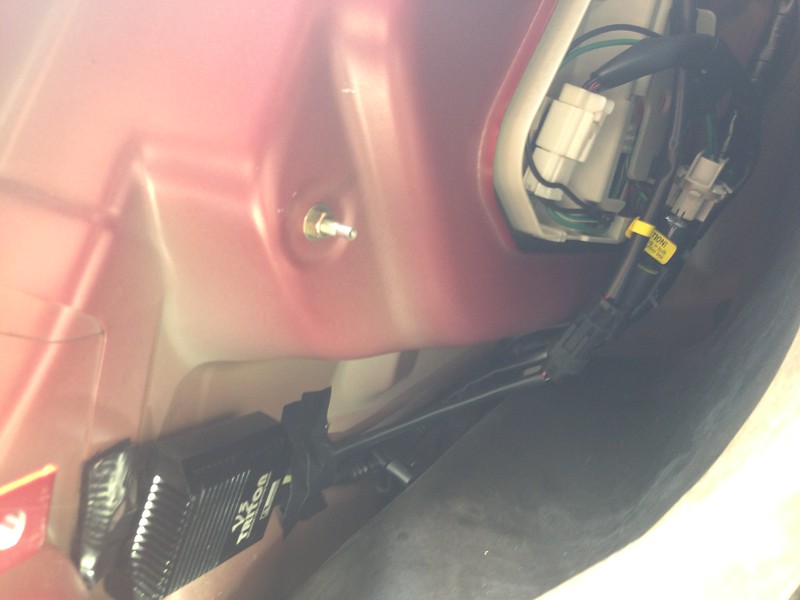
Look inside the trunk on the left / right sides and you can now pull the felt liner away from the rear of the car. You could continue removing the remaining clips and take the side liners out of the trunk, but it's easy enough to just pry the rear liner away from the rear to expose the bolts holding the light fixture in place.

You will need to remove the entire rear tail light assembly to work on the bulbs comfortably. There are 4 small bolts on the outer corners of the light fixture - I used a small crescent wrench to loosen, then my fingers to remove them..

Stand outside at the corner of the trunk and slide the lamp out by pushing from the inside while holding your other hand on the outer surface to keep it from falling out and dangling. You will then need to unplug the white harness connector so you can remove the assembly from the car completely.
I placed my light assembly red side down on a plush towel on my workbench in the garge to replace the lamps. No matter where you choose to lay the fixture, it will need to be red side down and you will need to place it on a surface that won't scratch the outside lens.
Next, peel back the rubber seal to expose the turn signal bulb. You can re-glue it after you have replaced the bulb. The bulbs twist and slide out of the fixture like other bulbs on the car. BE SURE TO WEAR GLOVES when handling bulbs!

I replaced my bulbs with a special brand that doesn't look like any other LEDs. Don't let that confuse you. If you are using standard LEDs, your bulbs will look different then mine. Either way, you unplug and insert LEDs as you normaly do for any other location on your car.
If you use LEDs for turn signals, you will need a set of decoders OR a set of resistors to eliminate errors on your dash and hyper-flashing when activating your turn signals. One for each of the two bulbs.
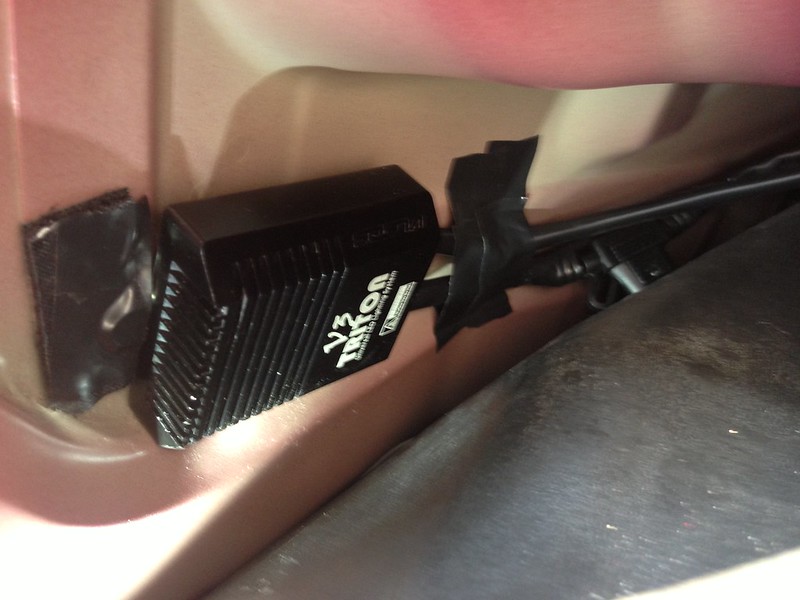
For virtually ANY brand of LEDs, you can purchase decoders as shown below for a nice clean install. You also have the option of using less expensive resistors (neither works better - its just a matter of preference). I have a pic of both choices below. However, if you DO choose to use the V3 Triton bulbs from Vled, you can NOT use a set of decoders - they require old school resistors (or you can purchase the proprietary V3 Triton decoders from Vled). I used standard resistors for my V3 Tritons. Again, you can use either of the items below for any brand BUT V3 Tritons.

-

The decoder sets are installed like an extention set - one end to the existing car socket, the other end holds the bulb and is inserted into the lens of the tail light. Resistors, however, must be 'tapped' into your car's wiring but they come with clamps that make it very easy. Simply open the clamp flat, lay one of the car's existing wires in one groove, then lay either wire from the resistor in the other grove, then close the clip firmly with pliers. It doesn't matter which wire from the car is paired to one of the resistor wires. Just repeat for both the green and black wires from your existing harness, each clamped to it's own wire from the resistor. You can place the resistors anywhere along the car's existing wires but it's best to leave some space from the bulb end to ensure they can pushed back through the hole in the trunk frame when you re-bolt the fixture back in place.

V3 Tritons are more complicated as they can be adjusted to extend deep or shallow into the reflector and they don't have the standard plastic piece that twists into the socket. They also require special adapters (to match your car) that you won't need if you use ANY other brand of LED. ALL other LEDs will NOT need adapters to fit your car, just a set of decoders or old school resistors.

While still wearing gloves, place the bulb back into the lens by CAREFULLY sliding it through the lens opening (avoid rubbing the LEDs against the lens opening, and make sure the bulb is tight in the socket so it doesn't fall out and into the lens when handling it).
Then re-connect the the white plug with the wiring harness from the car and slide the lens back into place on the rear of the car but DO NOT bolt the tail light on yet. You may want to use a bit of painter's tape to hold the tail light in place against the outside of your car until you're ready to bolt it.
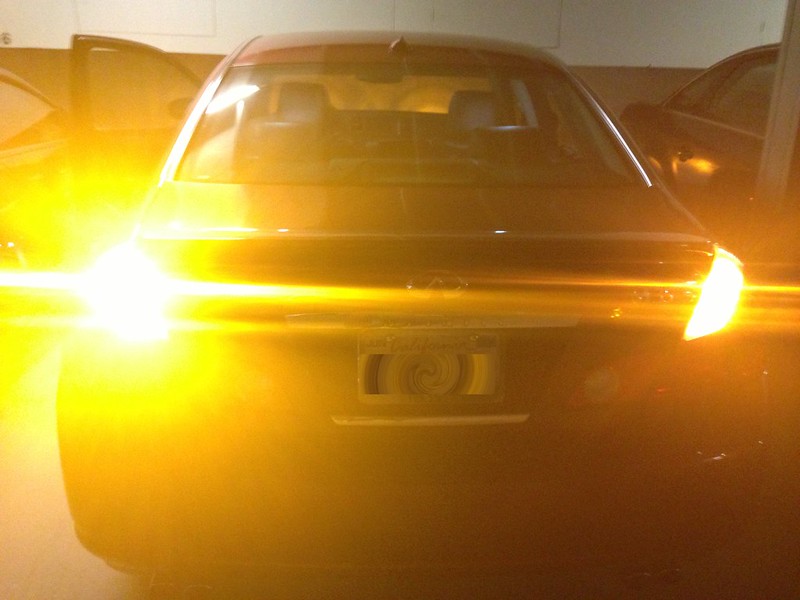
You will need to check the bulb to be sure it blinks. Some LEDs are 'polar' and you may need to remove the bulb and reverse it's position it in the holder to get it to blink. After you make sure the bulb blinks and does NOT hyper flash, glue the rubber barrier back into place. You can now tighten the bolts holding the tail light in place. Another plus with decoder sets is they are more fool-proof and you won't get hyper-flashing. If you used regular resistors, and the bulb is hyper-flashing: check the clamps on the resistor and make sure
1) the wires from the car and the resistor are snugly INSIDE the grooves - if not, re-do them
2) make sure the clamp is completely closed and both wires inside the clamp have been pierced by the metal. Squeeze the clamps hard with pliers and this should fix the hyper-flash.
While re-installing the tail light, carefully move all the inside wires and resistors through the hole in the trunk so the fixture fits evenly and firmly against the car.
*** Resistors and decoders generate a fair amount of heat when your turn signals are activated *** - make sure you attach them to a surface that will not melt during very long periods of blinking. You should either screw them into the frame of the trunk, or arrange them so they hang freely and away from heat sensitive surfaces. DO NOT put any tape on the metal resistor itself - this will cause them to retain heat and eventually they can fail. The metal portion of the resistor must be left clean so it is able to expel the heat as it is generated. Don't worry - we aren't talking nuclear fusion temps or a fire risk, just heat.
Repeat this process for the other side.
RE-INSTALLING TRUNK PIECES:
First replace the stiff carpeted floor pieces, then the carpet liner (if you have one).
The plastic trim piece is installed LAST as follows:
Feed the wire for the cargo lamp back through it's hole in the plastic trim piece. If you look on the underside of the plastic trim, you will see 4 tabs. Make sure they did not move out of place on the trim piece, then line them up with the 4 small holes on the trunk surface. After you align them, place one hand on each side of the trunk latch and push it downward - then move to the outer tabs and be sure to push them back into place. Now replace the cargo light fixture. The housing has a flexible 'tab' on one side. Place the side WITHOUT the tab into the hole first, then slide the other side WITH THE TAB into place.

-

Replace the inner large clamps on the plastic trim FIRST. Take one clamp at a time, slide the inner round part out and remove it, leaving only the base. Line up the holes in the felt liner with the holes on the trunk and the plastic trim frame and push the BASE into the hole firmly, then insert the inner round portion and push inward to lock it.
You may need to manipulate the liner and the base but eventually, it will slide in and grab.

Then replace the small clamps by pulling the inner round section out, but NOT off. Push the BASE into the hole while the inner portion is still sticking out, then after the base is in place, push the inner portion inward to lock it.

Re-attach your cargo net if you have one and you're done.