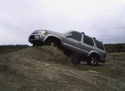
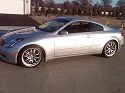
Hey guys the name is Bryan, this is my first topic in the Pathy/QX4 forum, I wanted to share my experience with the DIY painting of my stock wheels. I just picked the QX4 up a few weeks ago with 53K on the clock. I am new to Infiniti Trucks but I have owned a G35 Coupe for about two years now and my Girlfriend drives a FX35. So I got tired of seeing my newer looking QX4 with such filthy wheels. Here is a few shots of what I started with. -
As you can see the finish on the wheels were in bad shape from the previous owner. Most of the time I was embarrassed that my wheels looked the way they did.
Materials Used:1. "Stripper" I used the stuff you apply with a brush but you can also buy a spray on "Stripper" which I feel would work just as well. 2. Scrapper - started with plastic and moved onto a metal one3. 2 "Fine" Sanding Sponges4. Acetone (for cleaning surfaces)5. Primer (sand-able)6. Wheel Paint7. Clear Coat8. Tape9. Sand paper (200-600 grit) for smoothing any scratches or cuts in the wheel10. Heat Gun
After I purchased the things I needed I started by applying the stripper to the wheel in plentiful amounts, the thicker the coats the better it strips. It took about 8 - 10 coats per wheel to get most of the paint off. I was not able to get all of the paint off so I used the sponges to get the remaining loose paint. The paint that did not come off at least got smoothed out. NOTE: At this point I nearly gave up on getting the paint completely off. I called around to some local shops who specialize in sandblasting as well as powder coating and got a few quotes. I really was only considering getting the wheels sandblasted and still painting them myself. It will cost anywhere from $100 - $200 for 4 wheels depending on the shop you go to. CONTINUED: I decided against getting them sand blasted. I spent about 1 hour on each wheel just simply sanding away with the sponges.
I watched many videos on youtube on how to paint your wheels. I came across a guy who was painting these BMW wheels and he had an interesting idea. He used a stand, in which he was able to mount a wheel facing upward and spin it as he sprayed the wheel with paint. Genius! I began to look on the Internet for something similar that I could use to spin my wheels. I then read somewhere about possibly using a desk chair because it can spin in circles. Well it just so happens I have a desk chair that can provide me with a spinning surface. I rigged something up on a whim. It was everything short of pretty but it got the job done. Here is a picture of my contraption.
I wanted to keep the Infiniti Emblems on the wheel cover chrome so I popped them off of the cover. I thought this would be easier than trying to mask them off.
I again thoroughly sanded all parts of the wheel to make sure it was smooth enough for primer. The wheel covers only got minor sanding just to rough up the surface enough for the primer to grab. One can of primer was enough for two coats on each wheel and I mean just enough to finish the last one. I had planned on sanding the primer to smooth out any imperfections in the primer, but it was not necessary because it looked good and smooth. Immediately after every coat of spray I used a Wagner Heat Gun while continuing to spin the wheel to allow the paint to dry to a smooth finish (careful not to get too close because it can melt the paint). Here are pictures of what the primer color looked like. Not a bad color huh?
The only thing I did in between primer and paint was wipe the primer surface with Acetone just to get any dust particles that may have settled. Again one can of paint was enough for all four wheels. Again I used the heat gun in between each coat. Here are some pictures of the difference between primer and the graphite paint.
Also in between paint and clear coat I wiped down the wheel with Acetone. One can of clear was enough for two coats for each wheel. Heat Gun was used in between coat as well.
I let the wheels sit for about two days before I went and got the tires re mounted on the wheels. I feel this was enough time for the clear coat to cure. The final product is not too bad for my first time doing anything like this. I feel the color is a bit too dark for my style. I was also watching on youtube where a guy with a sweet mustang used graphite paint and then used stock color paint over the top. It made the stock paint a bit darker and I really liked that. I figure if I want to go over the graphite with stock color again I can do that. But this is it for now. At least through the winter, lets see how it holds up. Thanks for reading.
Painted My Wheels
-
naladude911
- Posts: 4818
- Joined: Tue Oct 03, 2006 10:28 am
- Car: 2001 Infiniti QX4
- Location: Mount Kisco, New York
-
Densetsu

- Posts: 557
- Joined: Wed Mar 12, 2008 5:50 am
- Car: 2004 Nissan Pathfinder Chinook
Prev: 2003 Nissan Pathfinder Chilkoot - Location: Edmonton, AB
Re: Painted My Wheels (2 Coupes)
Not too dark, love the contrast the Infiniti logo has with the rest of the wheel.
That stripper looks nasty, though I guess it's easier than sanding the entire thing by hand. Had to laugh at "America's #1 Stripper Brand" on the can. :P
That stripper looks nasty, though I guess it's easier than sanding the entire thing by hand. Had to laugh at "America's #1 Stripper Brand" on the can. :P
Re: Painted My Wheels (Densetsu)
Nice write up! I don't think it looks too dark, looks good!
-
2001lodown
- Posts: 10
- Joined: Fri Jul 31, 2009 1:34 pm
- Car: 2001 Black on Black QX4
-
lino
- Posts: 3533
- Joined: Mon Aug 15, 2005 7:48 am
- Car: 1991 Q45a Fed-Spec, IQP/White, Texasoil 9 Accumulator Recharge, '93 TCU 1st Gear Start, JWFSB, B&M 70268 Transmission Cooler, BBS Forged Wheels, DRLs, Silverstars, Tint, Very Well Serviced.
- Contact:
Re: Painted My Wheels (2 Coupes)
Nice work! I love your wheel holder contraption
-
WINNIPEGS_MOST_WANTED
- Posts: 222
- Joined: Fri Jun 15, 2007 12:41 pm
- Car: 2003 Nissan Pathfinder
Re: Painted My Wheels (lino)
That looks sharp!
-
miamiheat3332
- Posts: 1211
- Joined: Wed Aug 13, 2008 12:43 pm
- Car: 2002 Nissan Pathfinder SE - 2006 BMW X5 4.8is - 2001 Audi A4 1.8T Quattro Sport
Re: Painted My Wheels (WINNIPEGS_MOST_WANTED)
yeah i really love then nice contrast between the infiniti logo and the wheel color, would look even hotter if your car was that kind of graphite grey color, or if it was the 2 tone with the dark graphite grey bumpers and all.
nonetheless great work.
nonetheless great work.
-
slickroger
- Posts: 919
- Joined: Sun Jan 06, 2008 12:33 pm
- Car: 2001 Nissan Pathfinder
- Contact:
Re: Painted My Wheels (2 Coupes)
Looks good. I like the contraption it had to have made the process much easier. I wish my wheels came with chrome badges
-
naladude911
- Posts: 4818
- Joined: Tue Oct 03, 2006 10:28 am
- Car: 2001 Infiniti QX4
- Location: Mount Kisco, New York
-
2 Coupes
- Posts: 51
- Joined: Fri Aug 17, 2007 3:06 am
- Car: Mine- 03 QX4
Hers- 07 FX35 - Location: Columbus, OH
Re: (naladude911)
If you are going to be doing any services to your QX4 I suggest that you invest in a Jack and two stands. You can pick up a 2 1/2 ton set for under $50. Though most of the services I have already done on my QX4 did not require jack and stands. I suppose you could strip and sand while the wheels are on the car, but it makes it easier when they are off. I would suggest taking the wheels off when you paint though.naladude911 wrote:Do you have to take the wheels off to paint them? I dont have a jack or jack stands
Modified by 2 Coupes at 12:11 PM 11/13/2009
-
JHC828
- Posts: 145
- Joined: Sun Jan 28, 2007 12:21 pm
- Car: M56 S / Escalade ESV Platinum / Lexus LS F Sport
FX50 S & M45 - sold - Contact:
Re: (2 Coupes)
Good job! Perfect color choice!
-
GRNMACHINE
- Posts: 634
- Joined: Fri May 08, 2009 6:30 am
- Car: 1999.5 Pathfinder SE 4x4
Re: Painted My Wheels (2 Coupes)
Lookin Good! I really like the color, nice contrast. Your paint stand chair is an incredible idea! Looking forward to update on how the paint holds thru winter. Had a few quotes of anywhere between $65-$110 per wheel to powdercoat. At that price replaced them with aftermarkets. Seeing the results here with Duplicolor makes me wonder. Nice Job!!
-
Duckman540i
- Posts: 23
- Joined: Sat Nov 29, 2008 4:10 pm
Re: (Duckman540i)
Speaking of which.... you never posted pics of the finished product!Duckman540i wrote:That is the exact color I want to paint my wheels. I have a silver '02 QX4 identical to yours. I think that looks perfect. That grey would accent my blacked out headlights and fogs perfectly.
Re: Painted My Wheels (2 Coupes)
Now I know what to do with my old office chair!!! Seriously though looks like good work how is it holding up?

-
Black2003SE

- Posts: 27
- Joined: Wed May 20, 2009 7:17 am
- Car: Black on Black 2003 Pathfinder
Re: Painted My Wheels (2 Coupes)
This looks great. Love the color. If I had the LE type wheels I would have looked into doing this but I don't feel it will look as good on my SE type.
-
K03sport

- Posts: 418
- Joined: Sat Mar 14, 2009 2:05 pm
- Car: 04 Pathfinder. My first Nissan was a '72 Datsun 510 Wagon.
Re: Painted My Wheels (Black2003SE)
Good job. If you want a stronger stripper, you might want to try some aircraft stripper. You got stripper for household paint, not automotive paint.
In any case, the wheels look fine. They are just wheels after all and will get beat up over time. Save your time and money for newer, shinier wheels, and let these be your winter wheels.
Graphite gray works well asa wheel color. Body color-matched wheels seem too 80's to me. Sure, it can look good on some cars, but that is only one some.