If it makes you feel any better, evidently Nissan takes rust seriously now.
http://www.youtube.com/watch?v=O-KPwAL_ ... e=youtu.be

My S13 was built on a Friday Restoration
-
PapaSmurf2k3

- Site Admin
- Posts: 24000
- Joined: Thu Nov 21, 2002 3:20 pm
- Car: 2017 Corvette, 2018 Focus ST, 1993 240sx truck KA Turbo.
- Location: Merrimack, NH
-
Hijacker

- Posts: 15759
- Joined: Wed Aug 13, 2003 4:57 am
- Car: '92 240sx Convertible
'94 F-150 - Location: Fredericksburg, VA
Re: My S13 was built on a Friday Restoration
Shame they didn't have that dedication 30-40 years ago.
-
asoomal

- Posts: 2374
- Joined: Tue Feb 26, 2008 4:45 pm
- Car: 2001 Subaru Impreza L 5MT (Daily)
1992 Nissan 240SX SE 5MT w/HICAS (Being restored) - Location: Canada
Re: My S13 was built on a Friday Restoration
Guess they had to wait for a recall...like the Pathfinders/QX4's.PapaSmurf2k3 wrote:If it makes you feel any better, evidently Nissan takes rust seriously now.
http://www.youtube.com/watch?v=O-KPwAL_ ... e=youtu.be
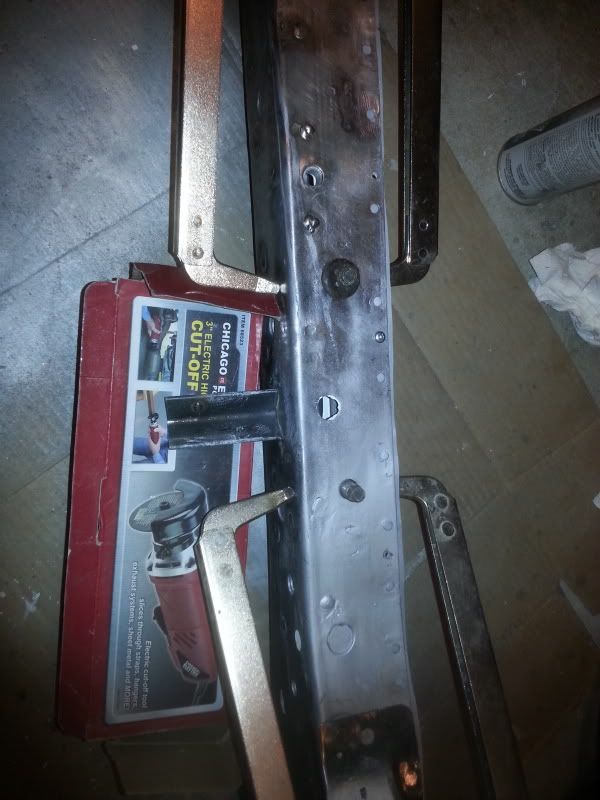
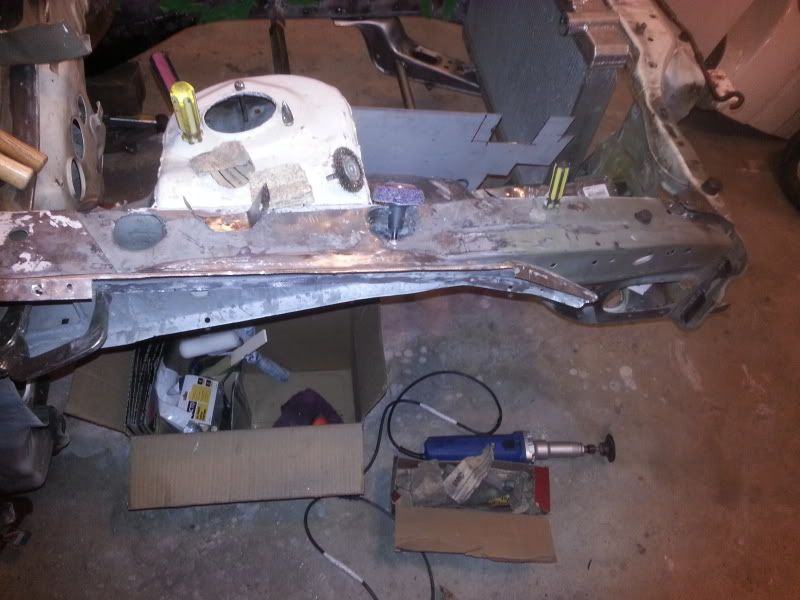
For grinding the welds, I'm using one of these guys on a 1/4 electric die grinder. It cuts the bead pretty fast.

For hard to reach areas I'm using 3 cutoff wheels stacked together on a Dremel.
I'm also using some of these to dress the welds

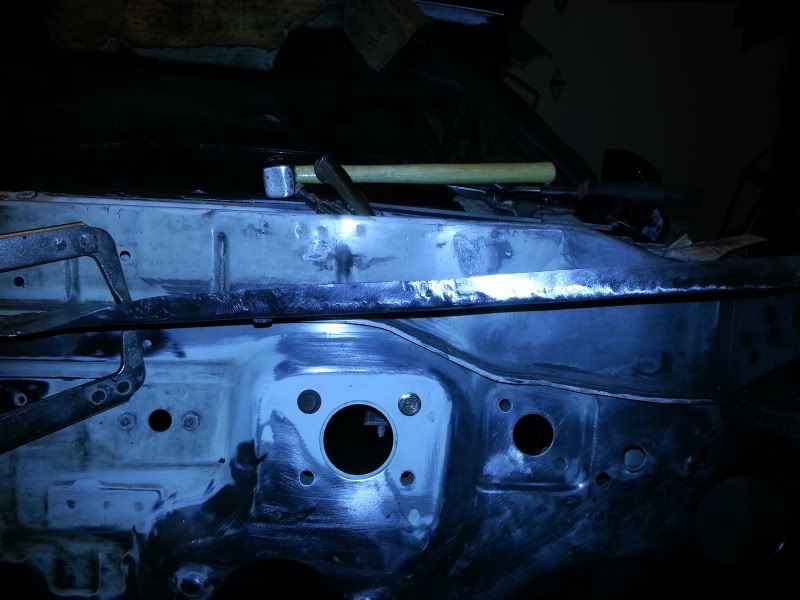
Moarr updates:
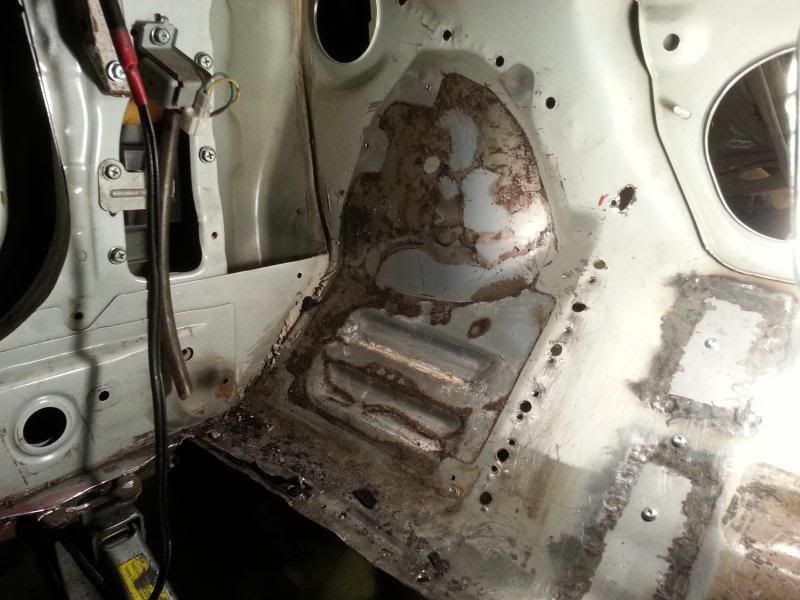
Took most of the sound deadening off with a hammer and a flat blade.
No paint, but a light gray-blue coating, probably the phosphate coating on the Durasteel they used back in the day.
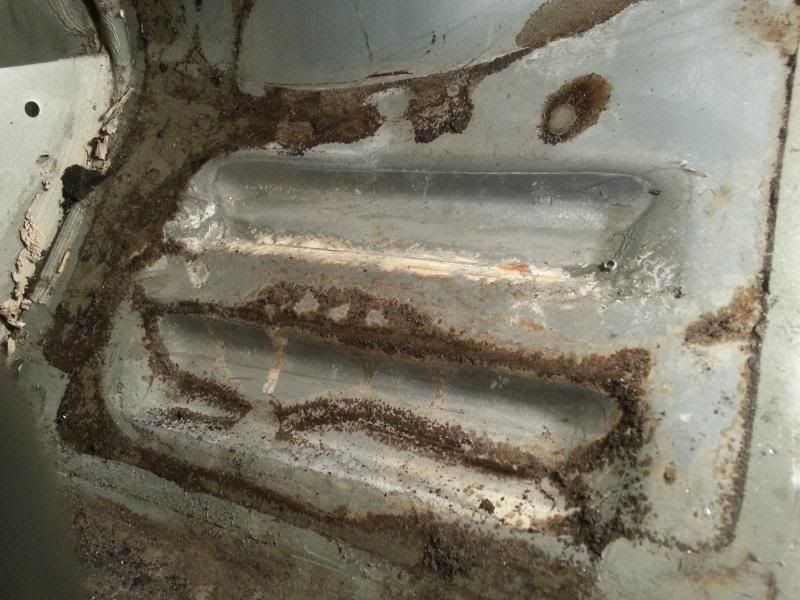
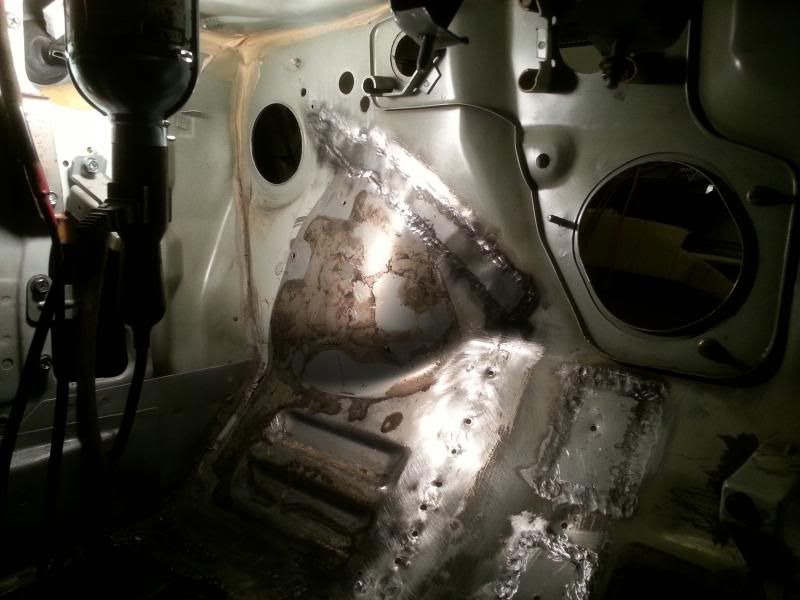
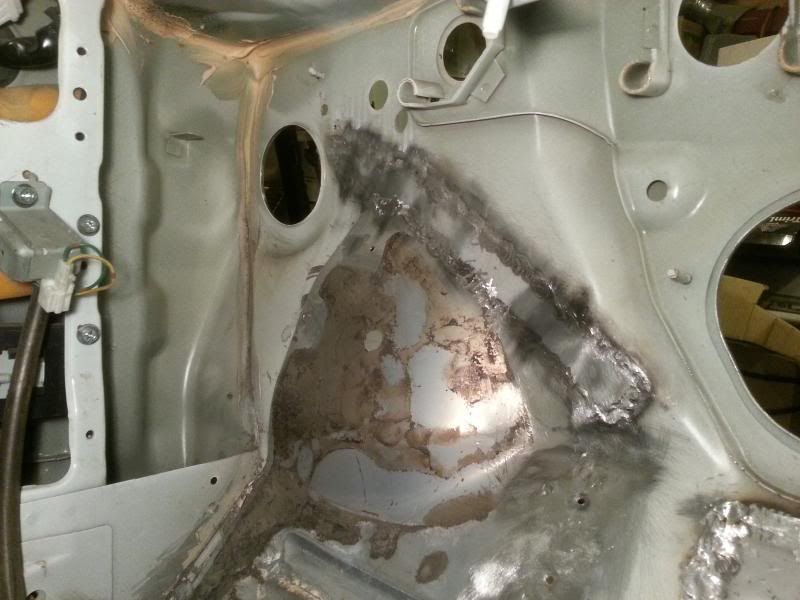
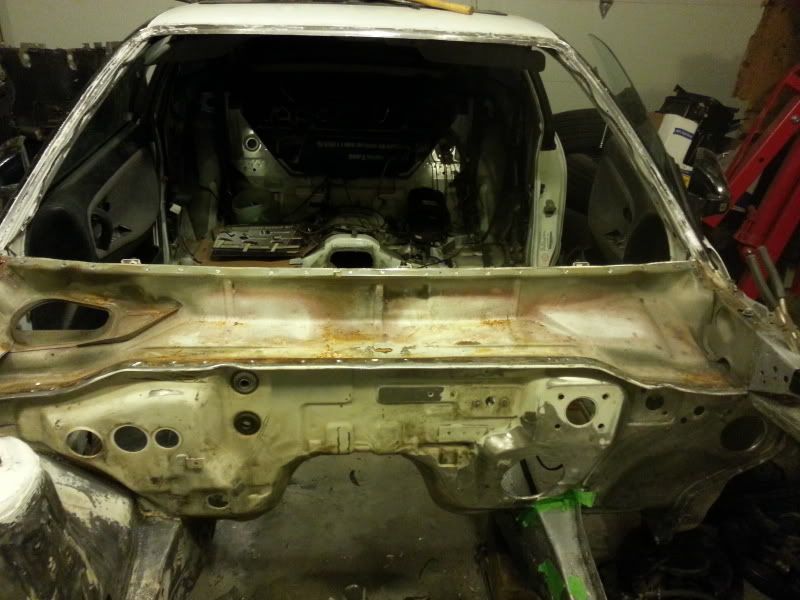
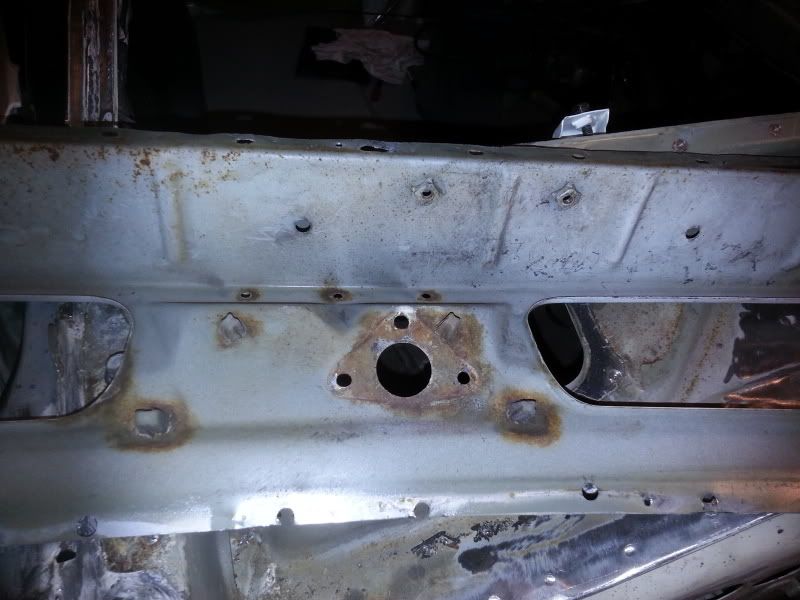
Started to cut out the rusted section on the firewall.


From the interior.
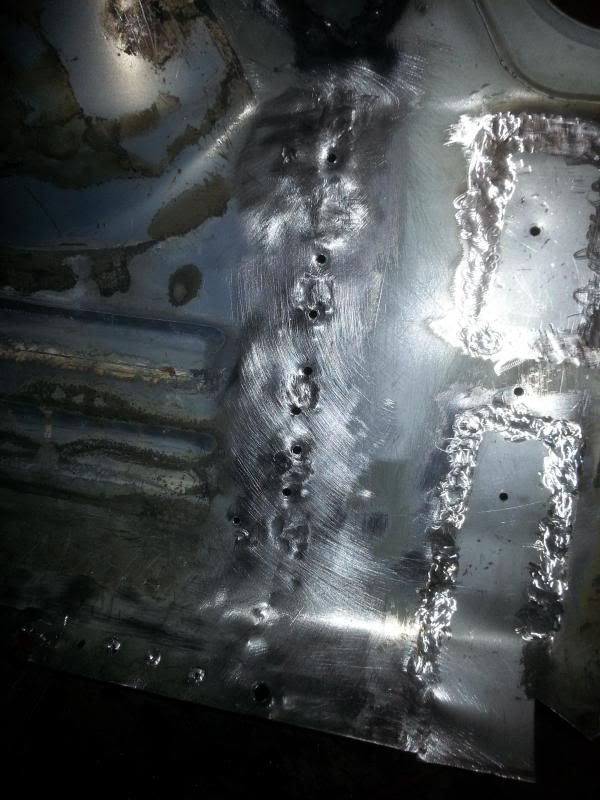
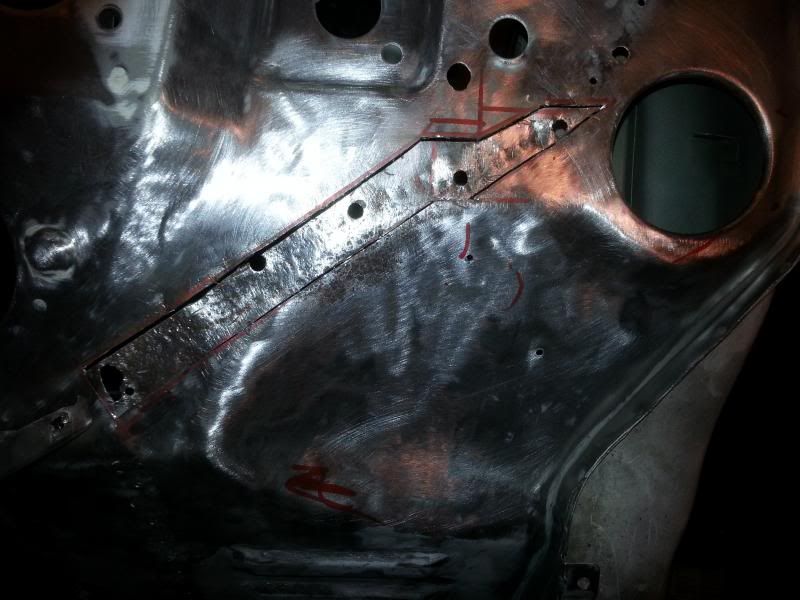
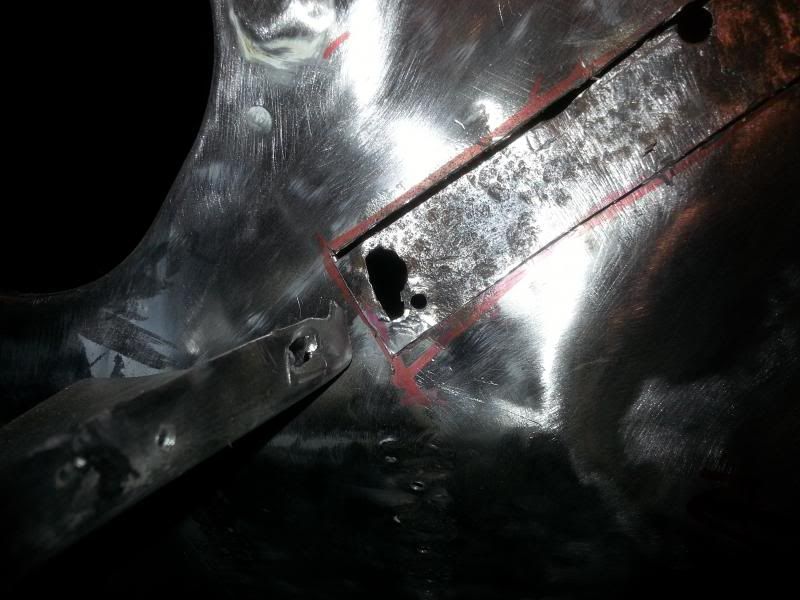
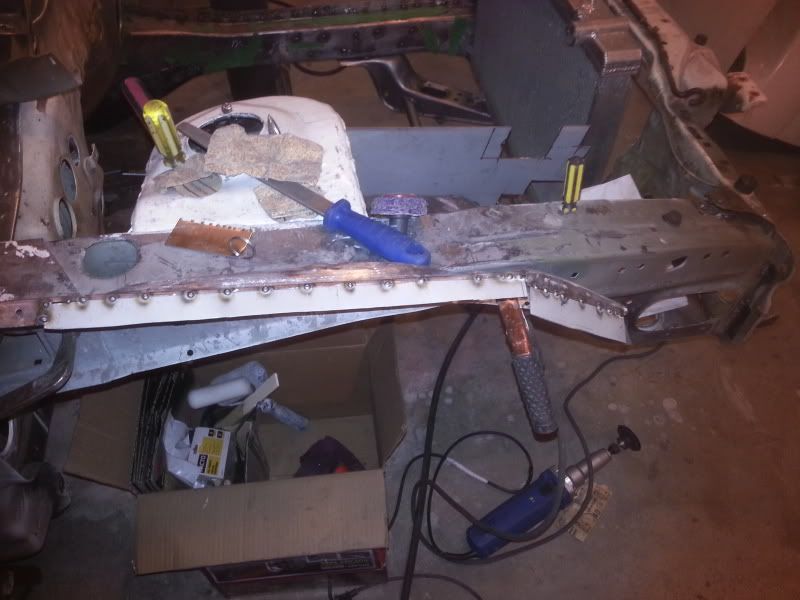
Also filled in the spot weld holes and grinded them flush.
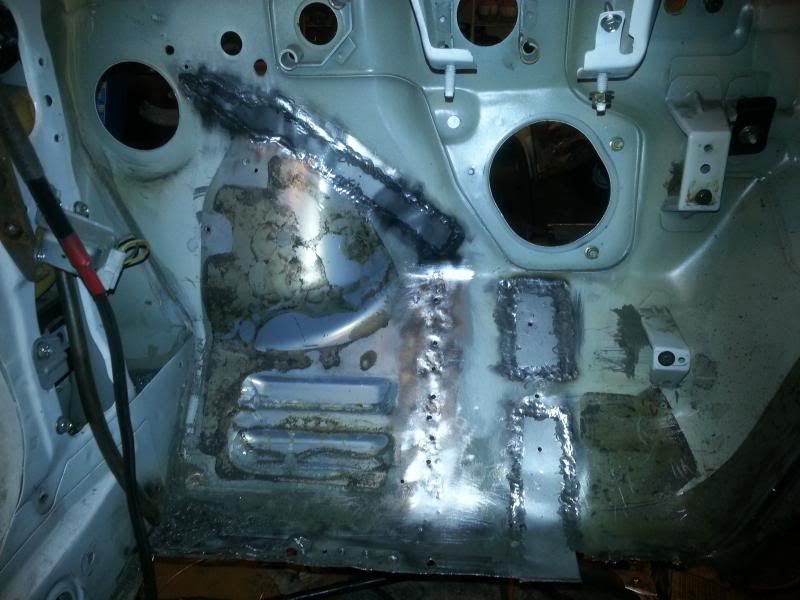
The small holes you see on the lower firewall are for the machine screws. I used self tapping screws to hold the panels before I drilled out the welds, it'll make it a lot easier to line it back up.
-
asoomal
- Posts: 2374
- Joined: Tue Feb 26, 2008 4:45 pm
- Car: 2001 Subaru Impreza L 5MT (Daily)
1992 Nissan 240SX SE 5MT w/HICAS (Being restored) - Location: Canada
Re: My S13 was built on a Friday Restoration
Time goes by too fast.
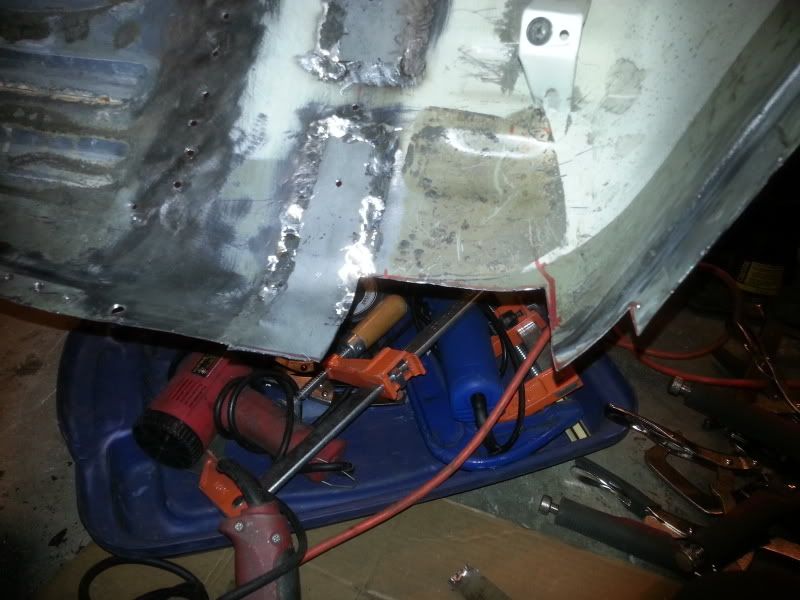
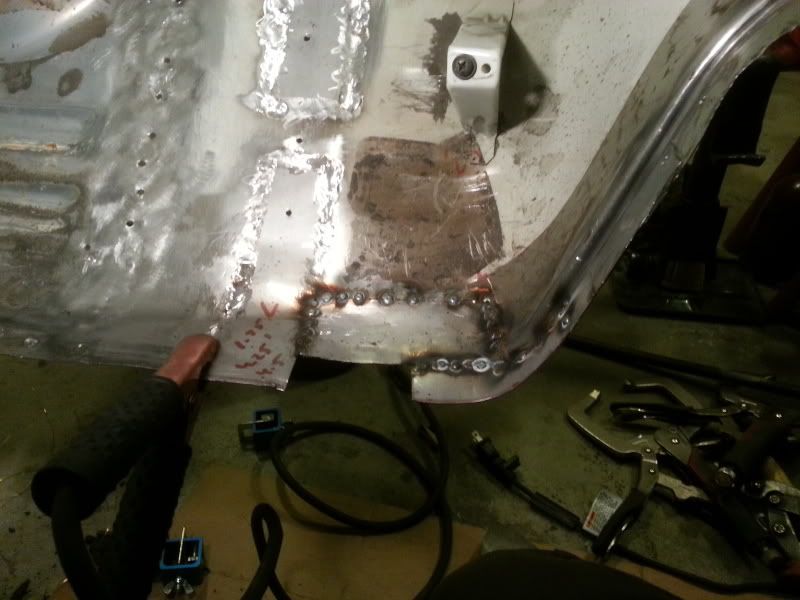
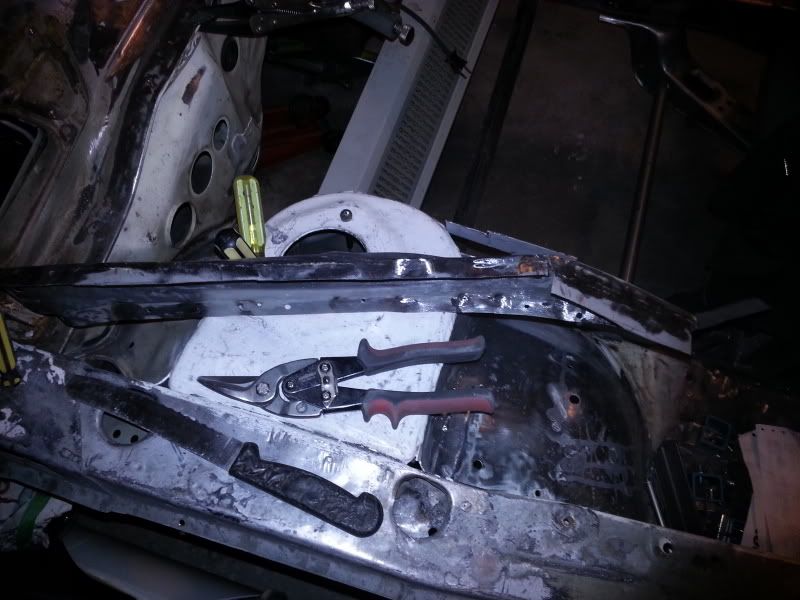
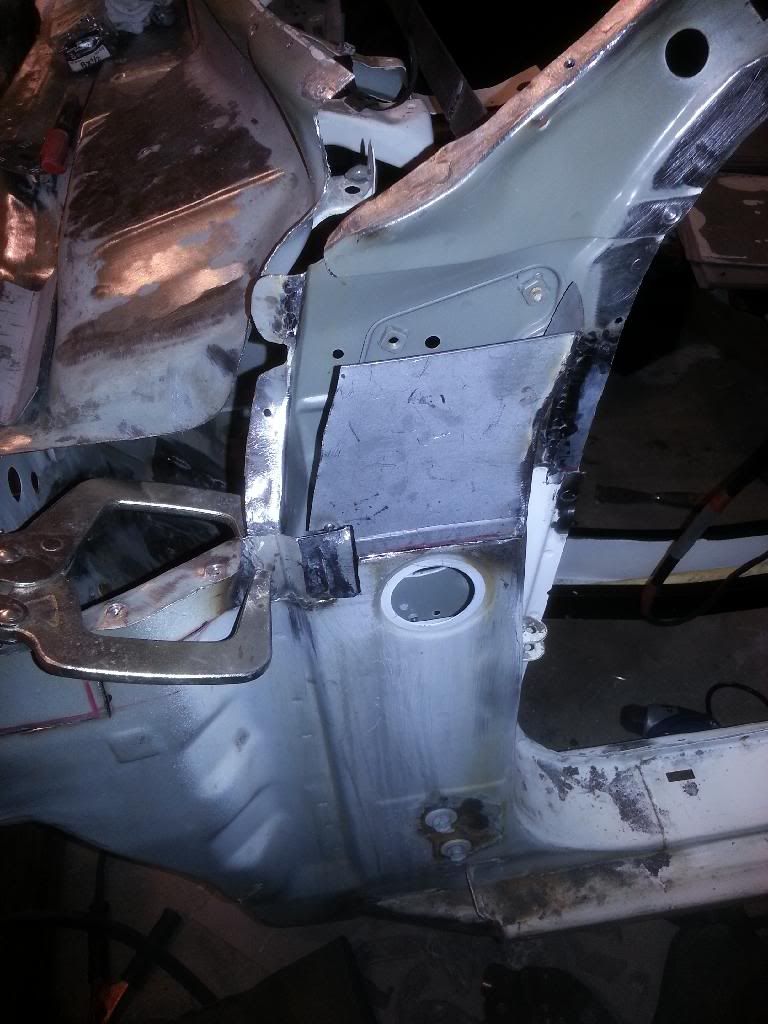
Cut out another rusted section on the lower firewall area
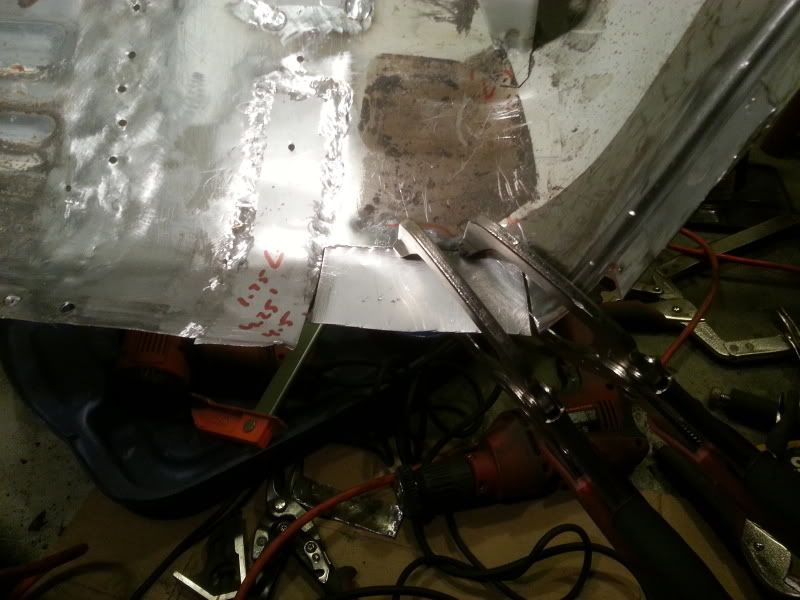
New roughly cut piece clamped in place
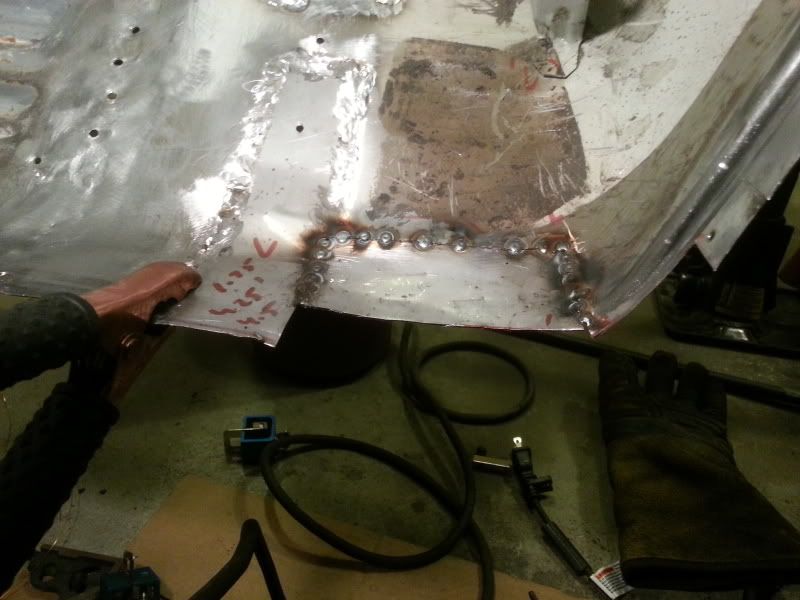
Bent it to shape as I tack welded it around
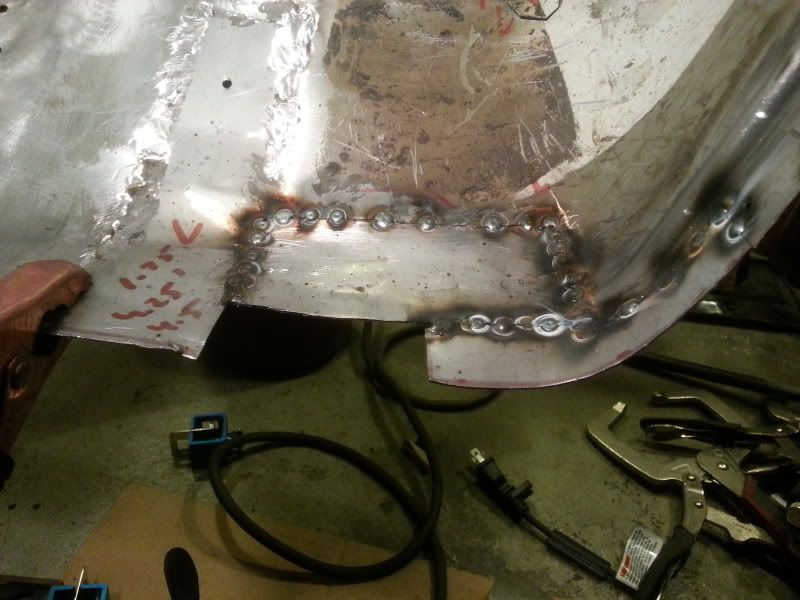
Added another piece
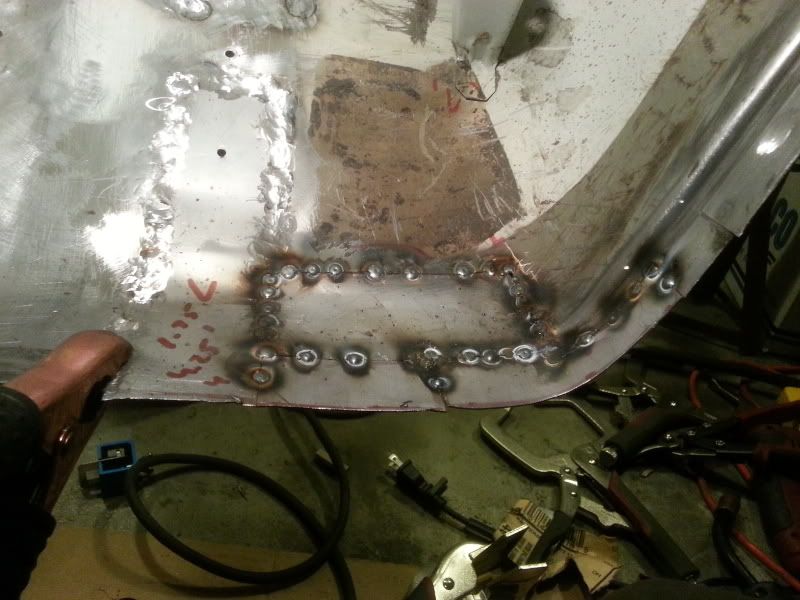
And another piece
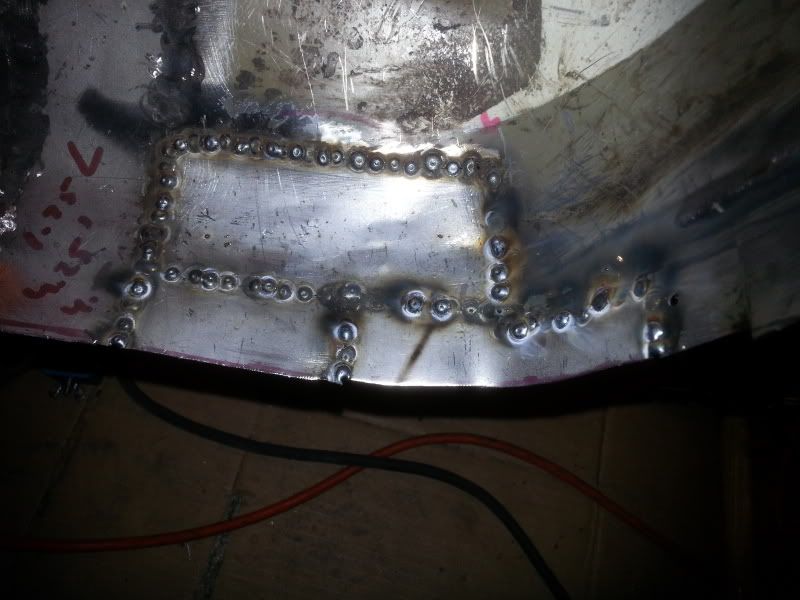
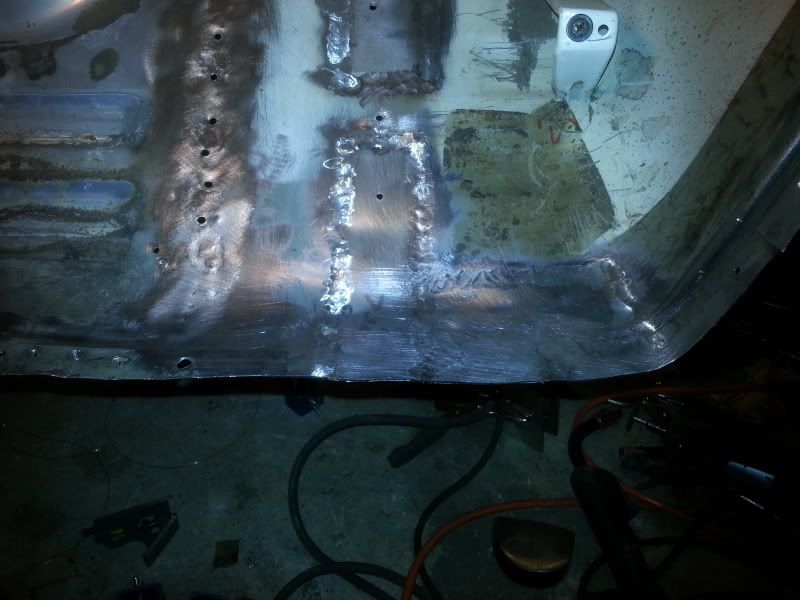
Flush
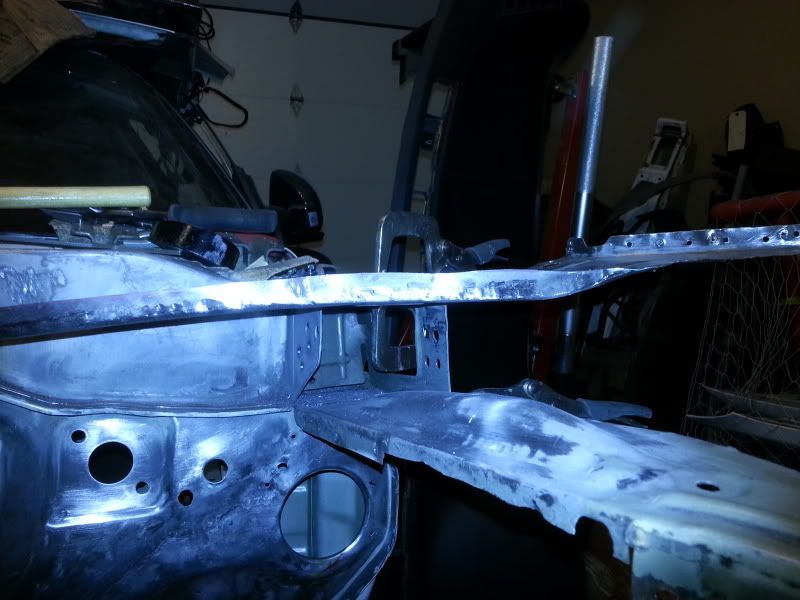
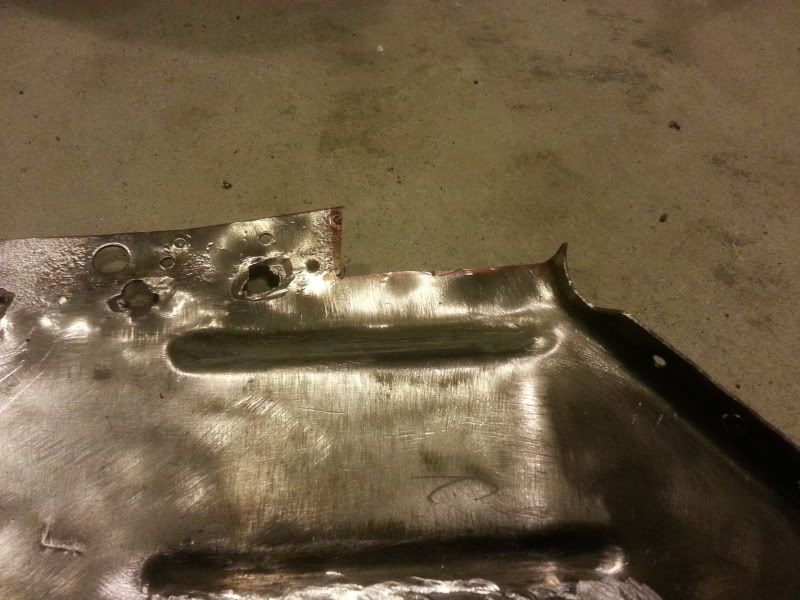
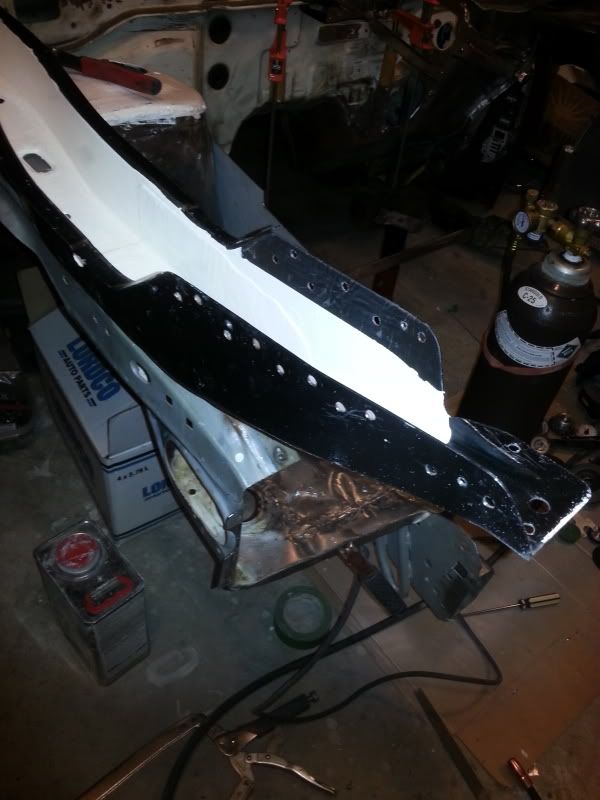
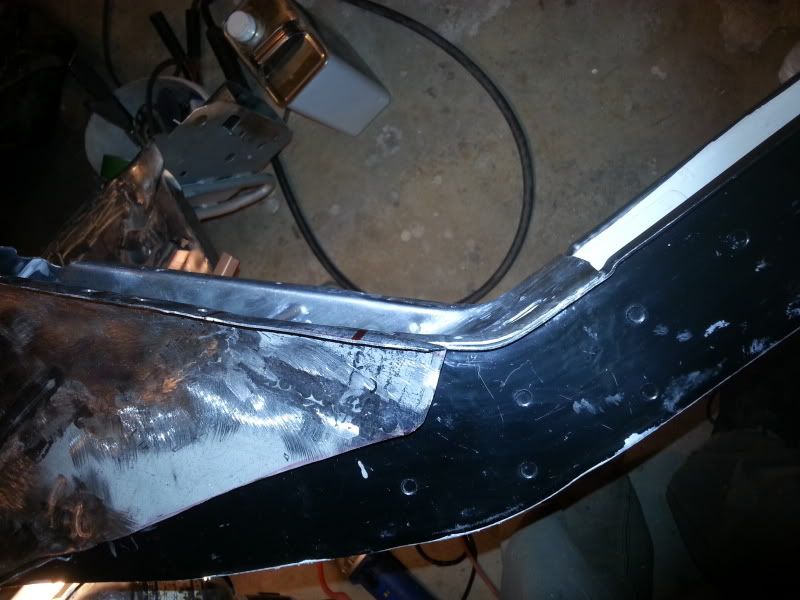
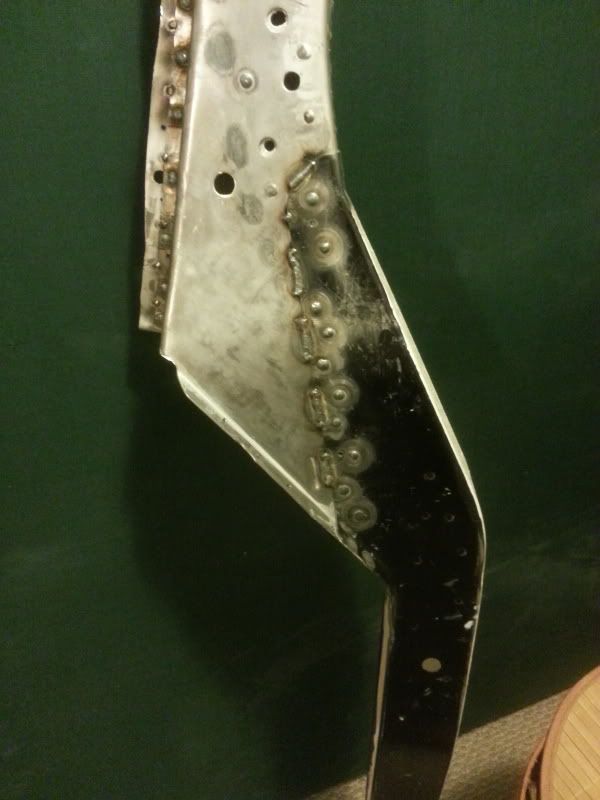
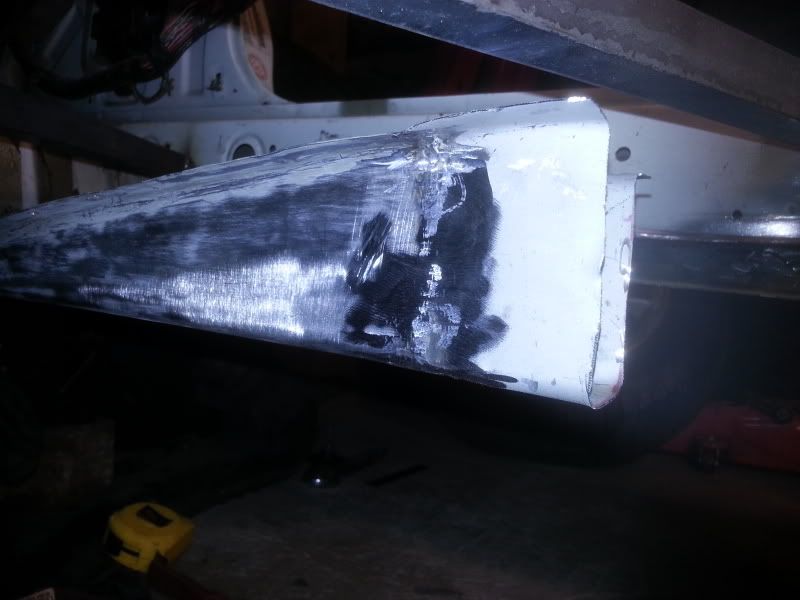
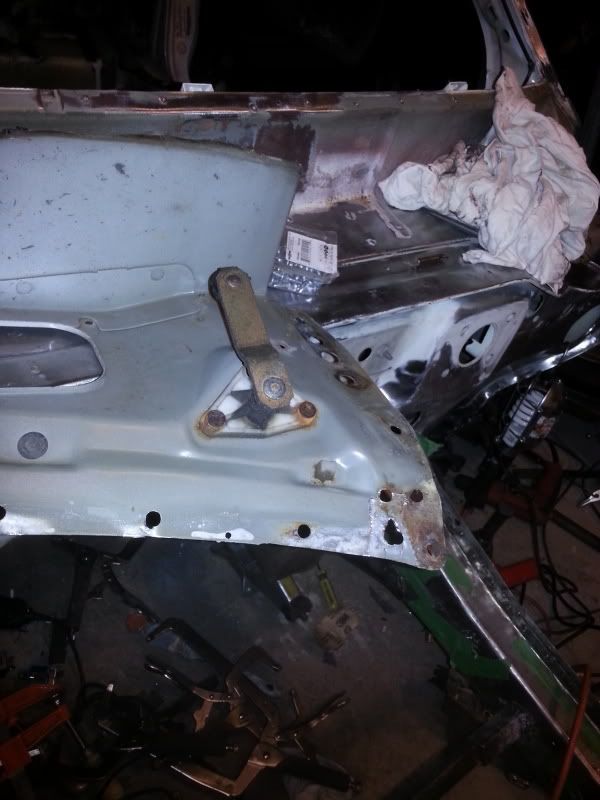
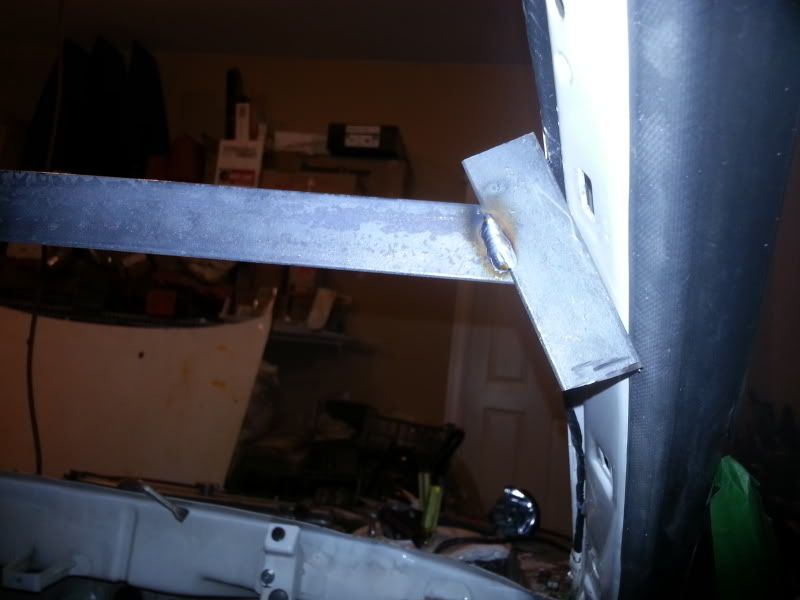
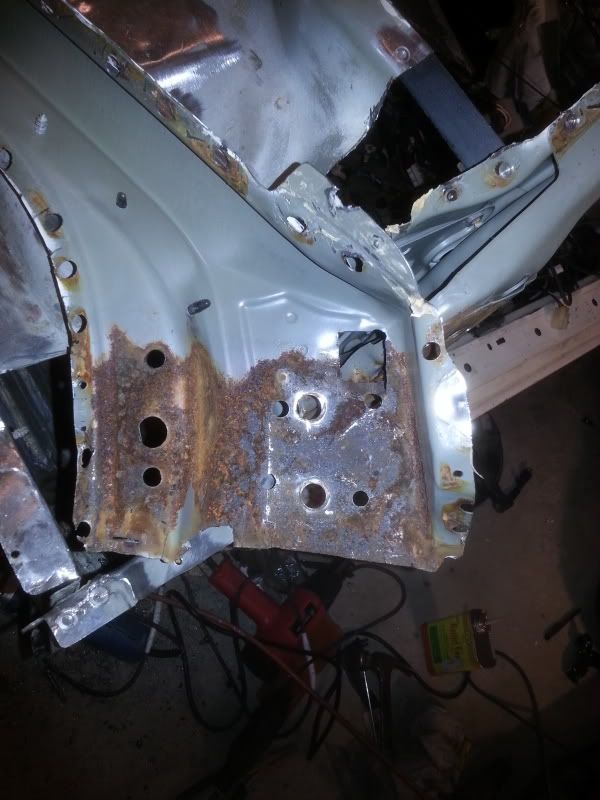
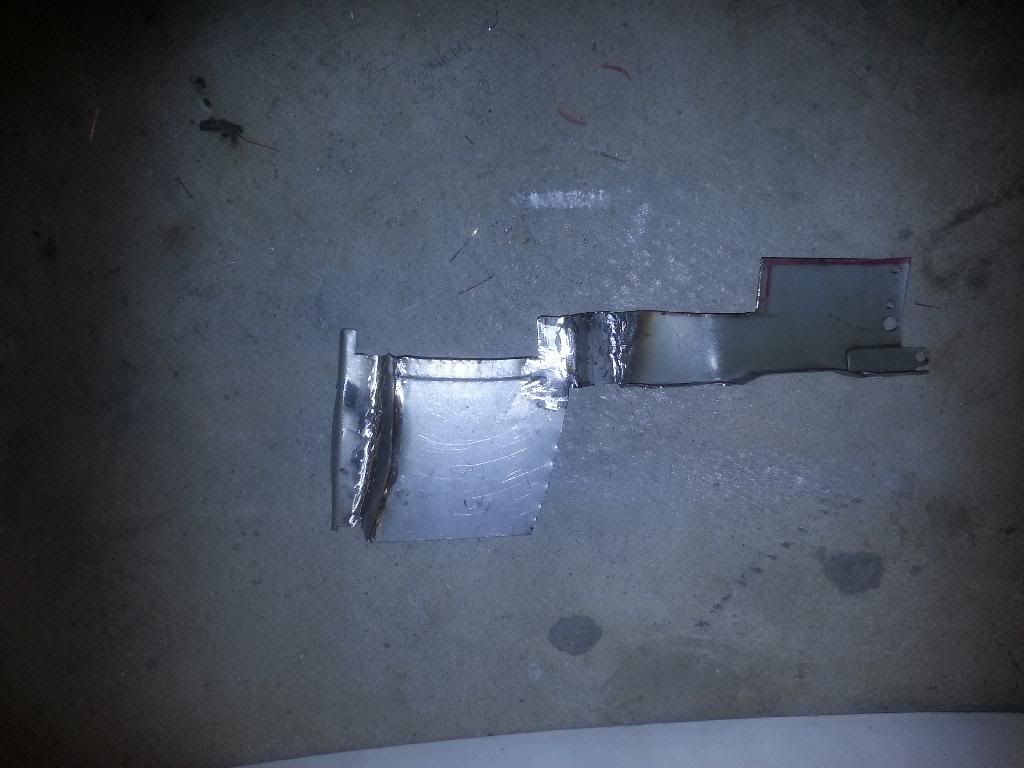
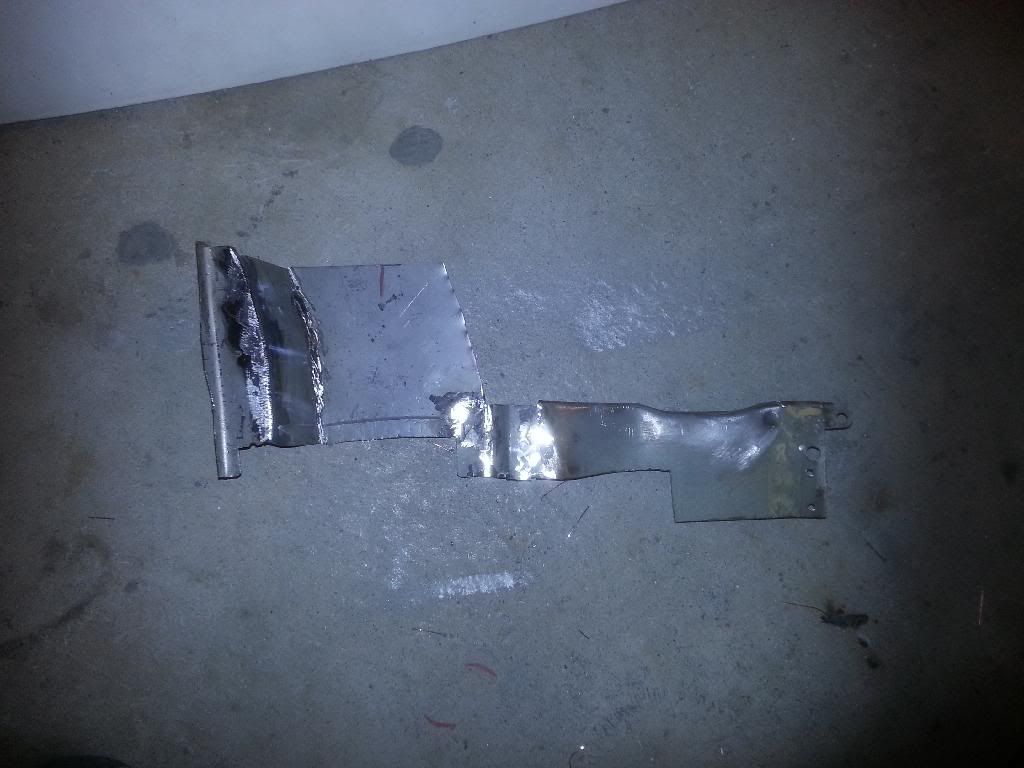
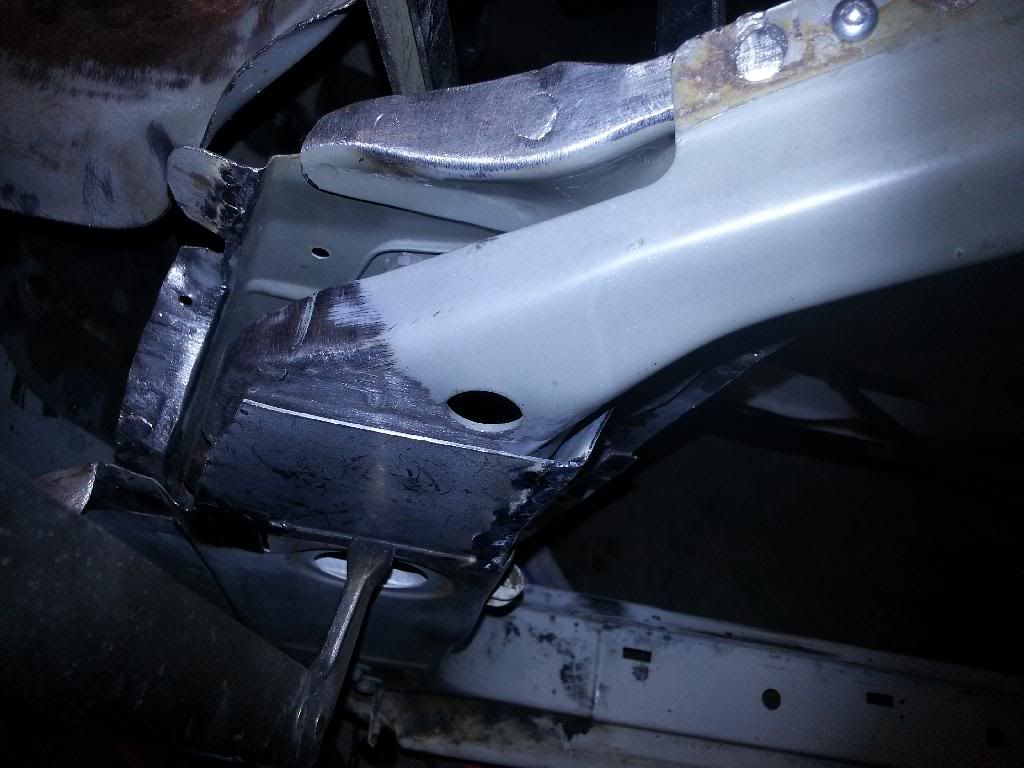
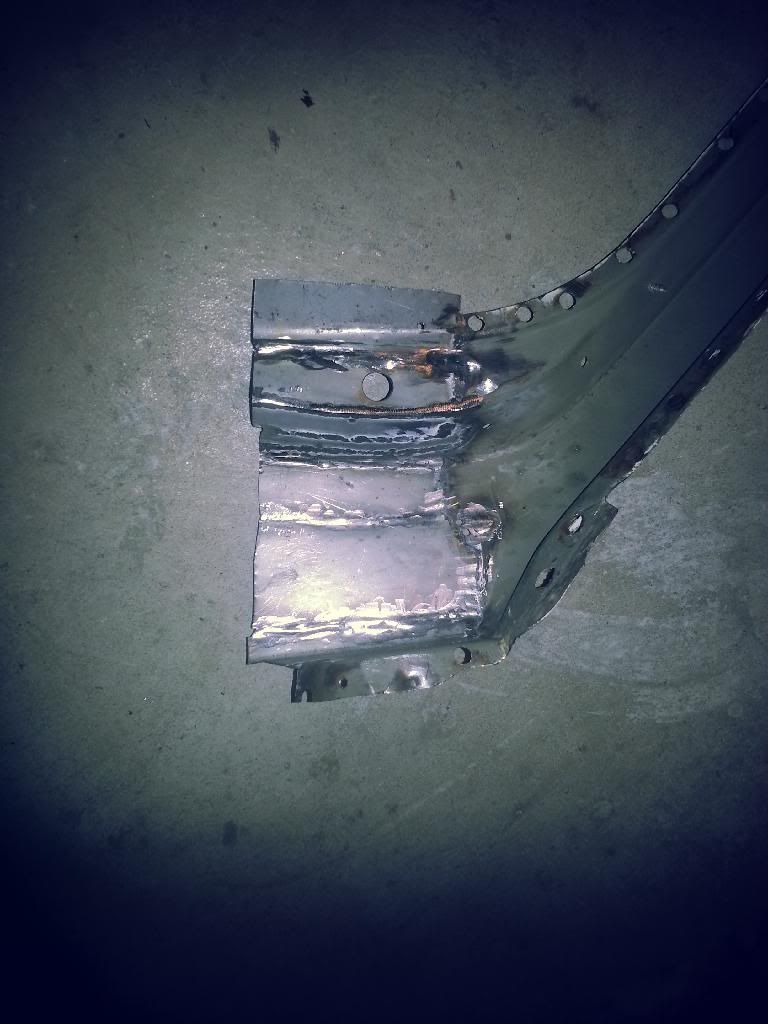
Now to fix this abomination from last year...should have spent more time learning how to weld before trying to fix it.
The thick sheet metal welded on to the hood ledge is part of the strut tower cap
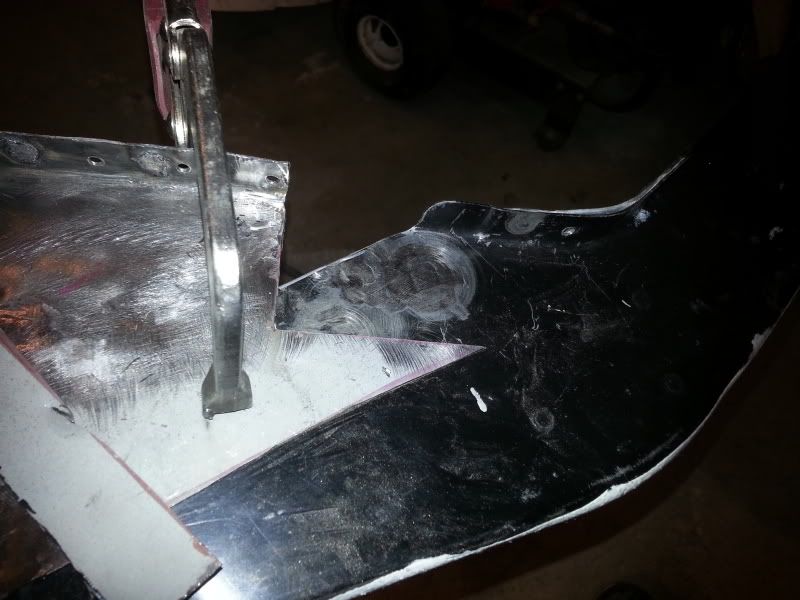
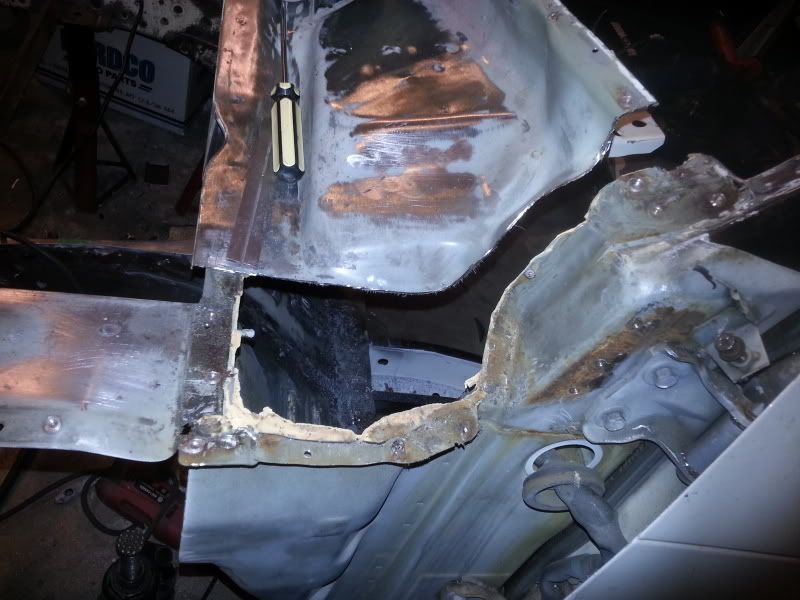
Cut out and yayy more seam rust
Had to cut half of it in order to remove the inner reinforcement. Surprisingly it looks clean, no paint though, just the phosphate coating.

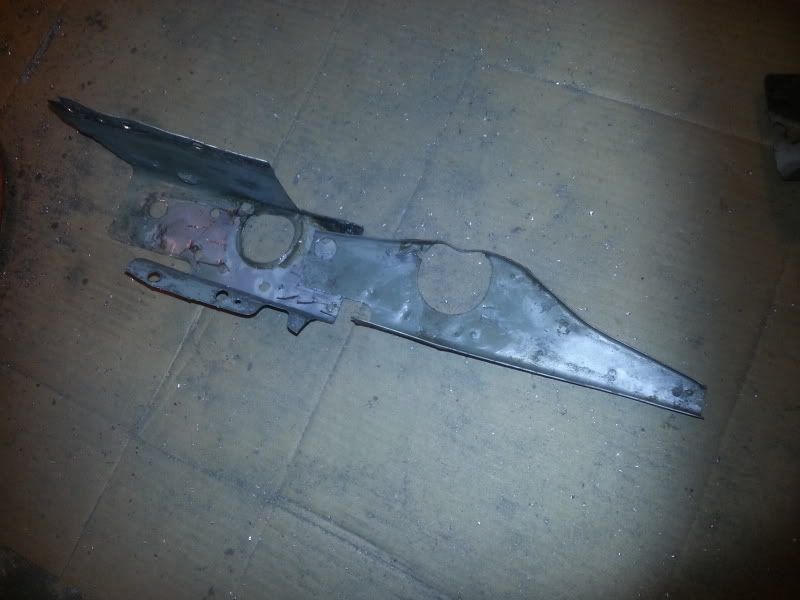
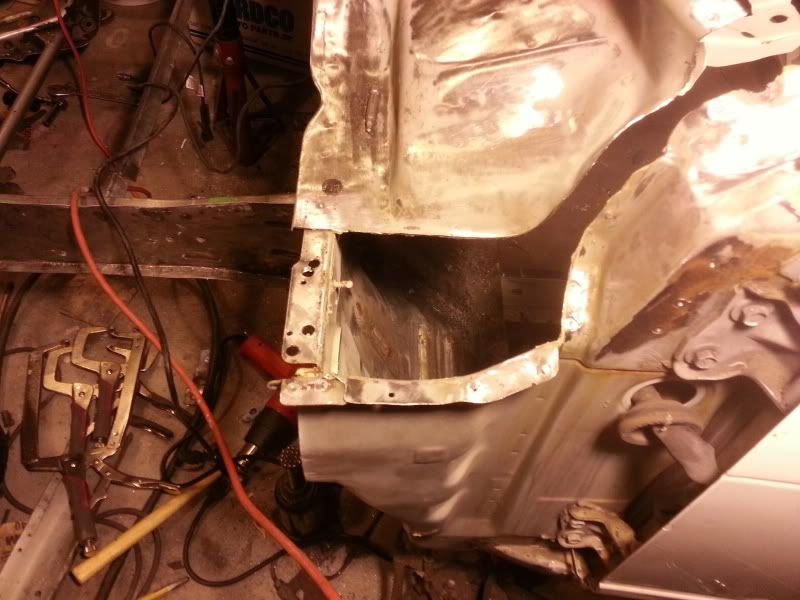
Drilled out the spot welds and removed the reinforcement and part of the frame rail thing....

The piece I drilled/cut out
BIRDDDDDDDDDDD
Tack welded the other end of the upper hood ledge.
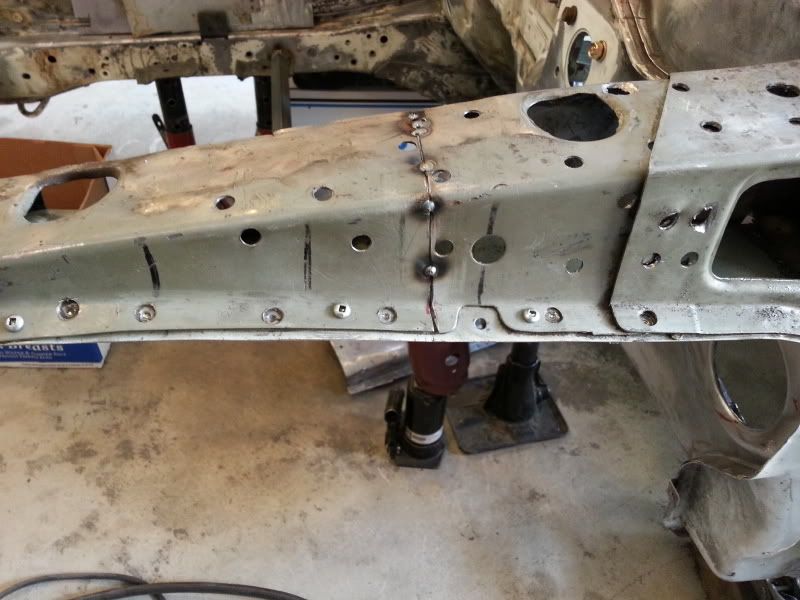
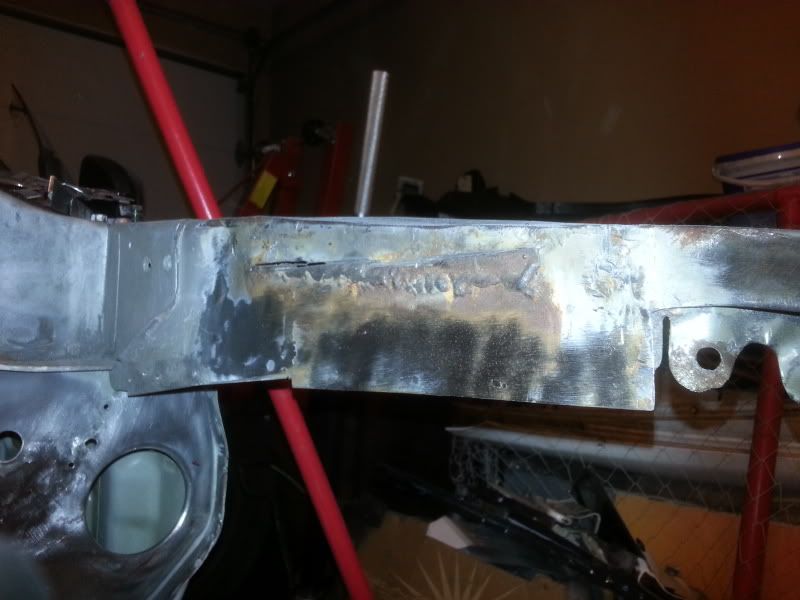
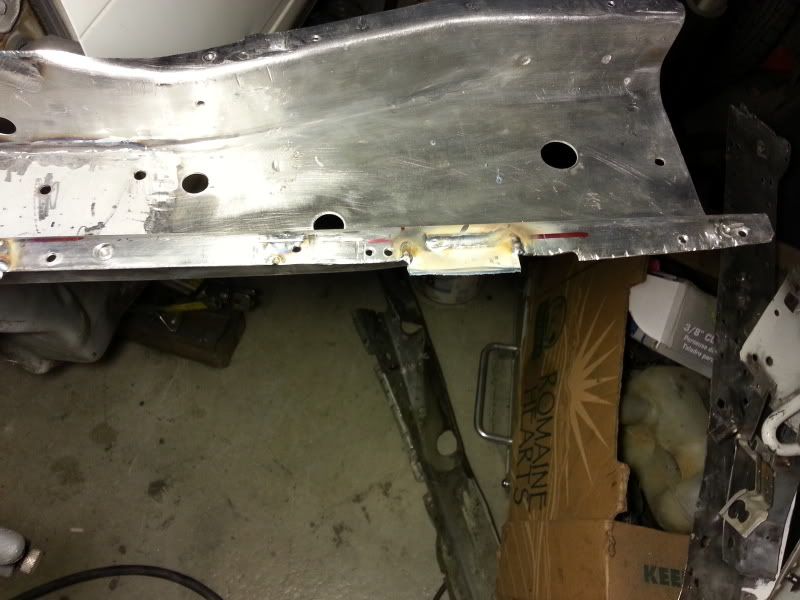
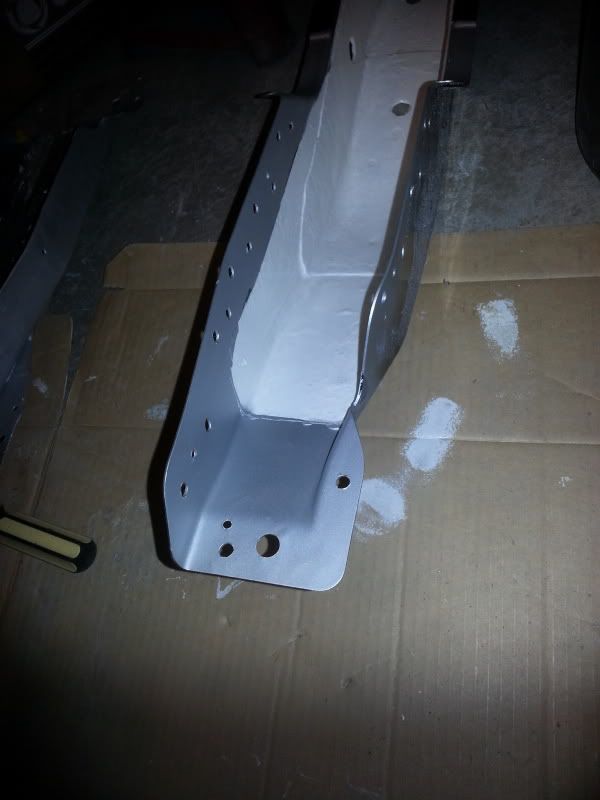
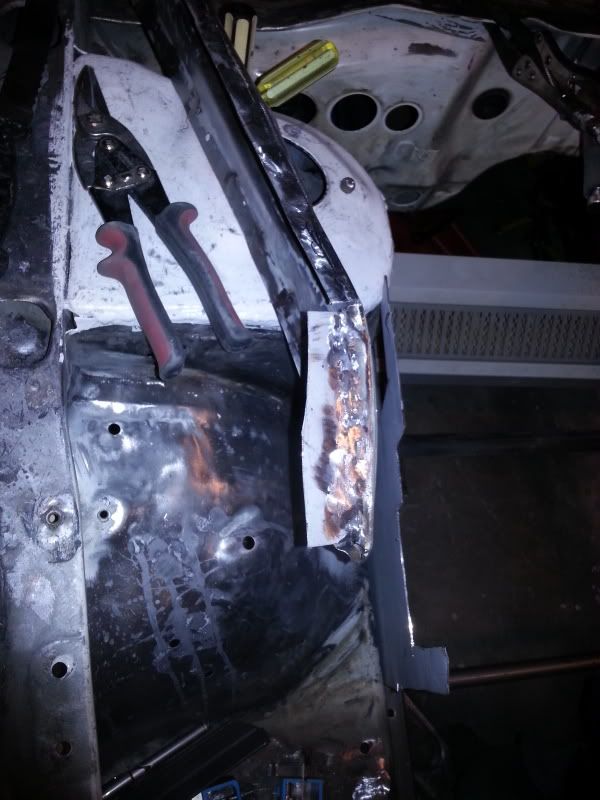
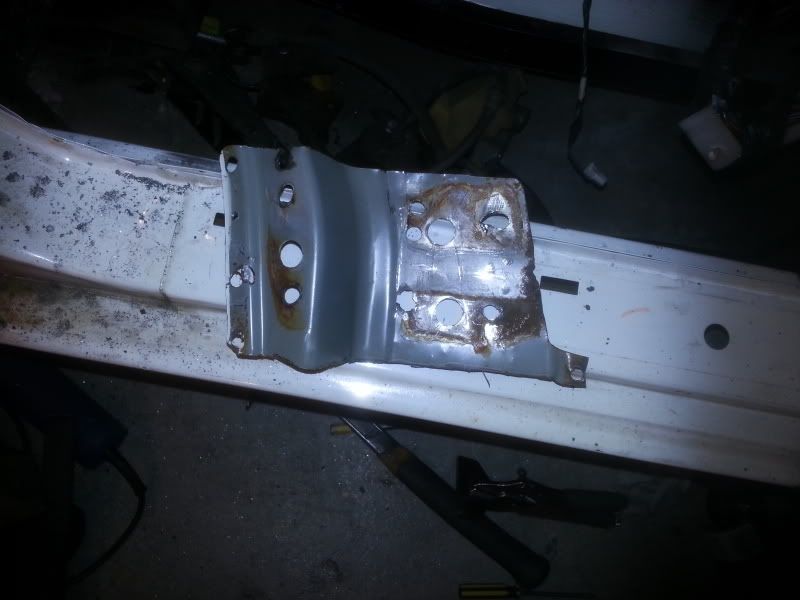
And not to repair the lower front frame member. Cut out some parts of the flanged section.
Note to self: Don't weld too close to a trouble light
All welded up. Galvanneal welds really nice

I need a work bench
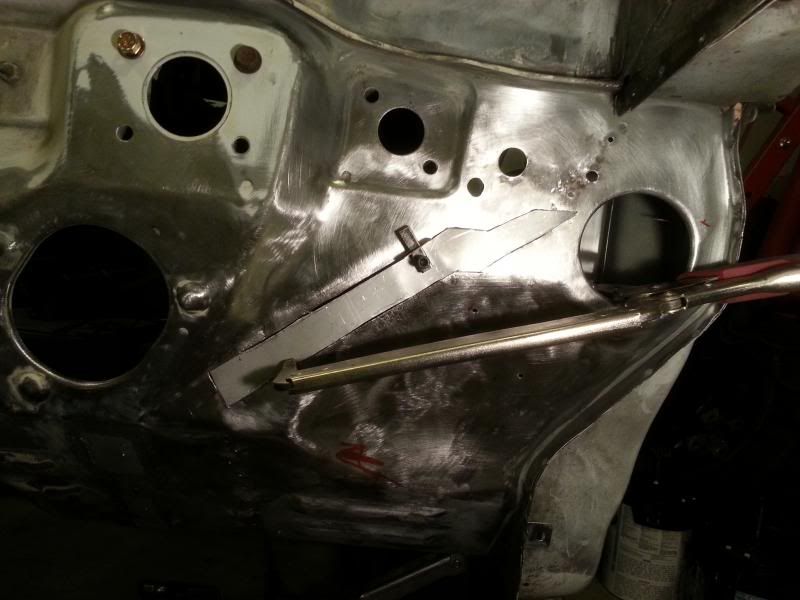
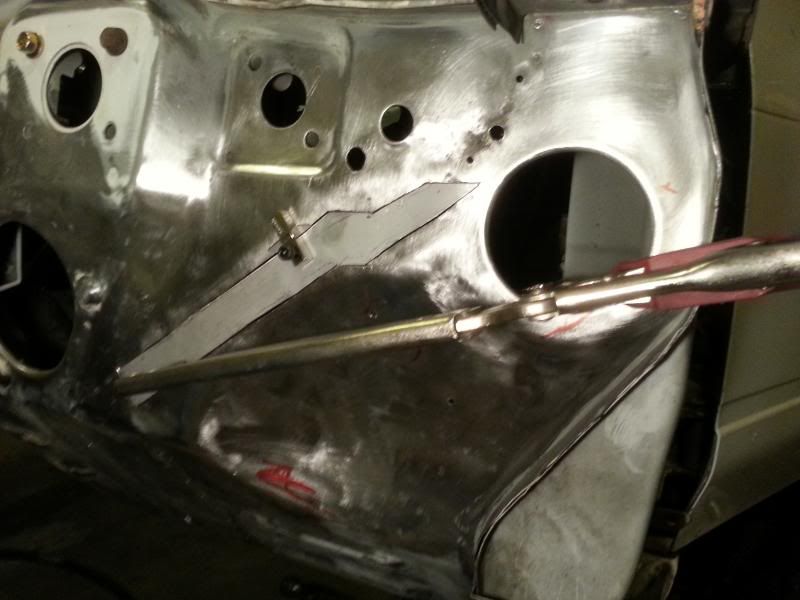
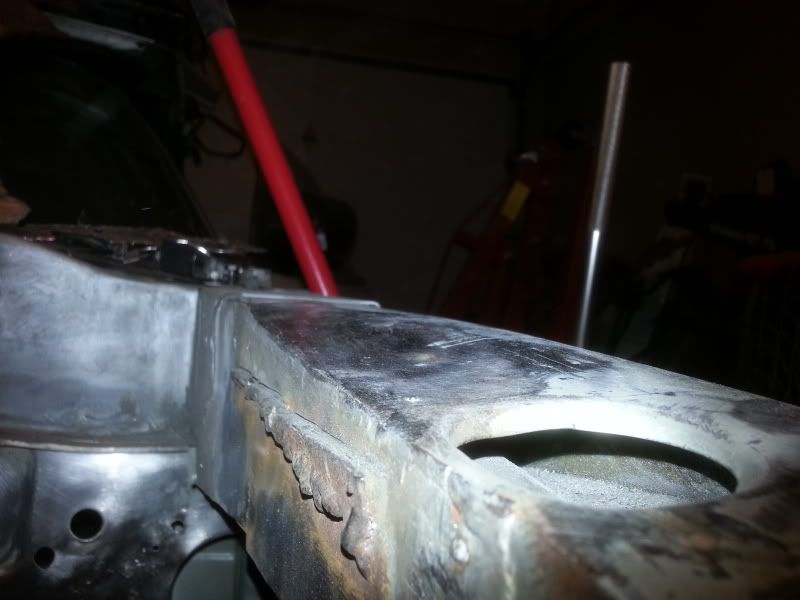
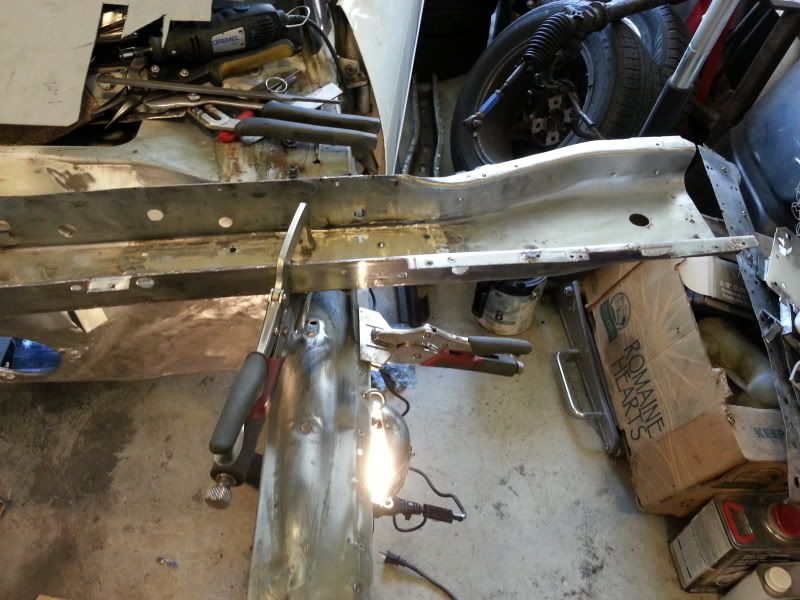
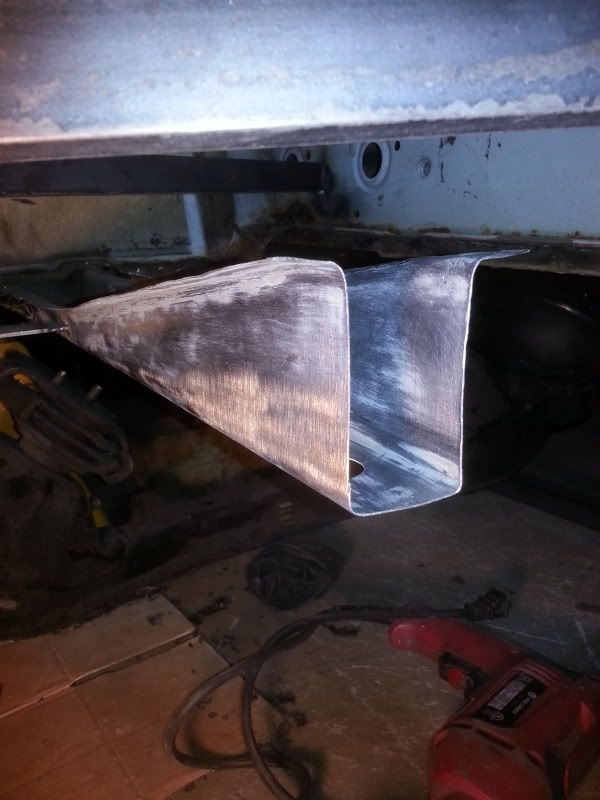
Now to weld the triangular brace for reinforcement for the front member. Etched it with phosphoric acid and shot some weld through primer. The phosphoric acid really makes the weld through stick to the metal.

And the brace
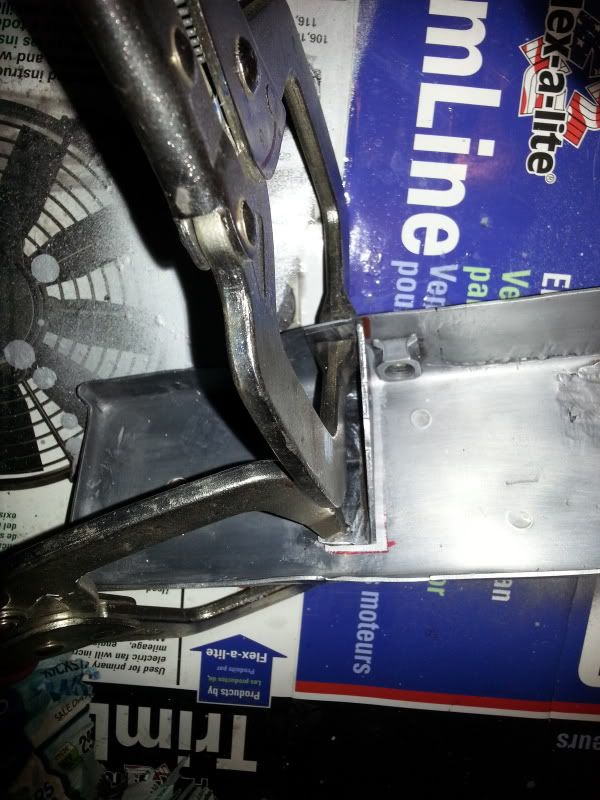
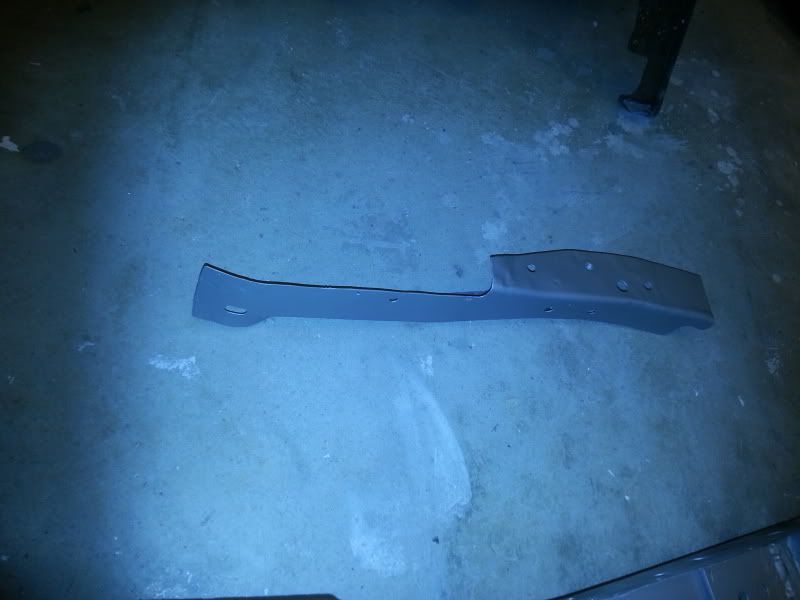
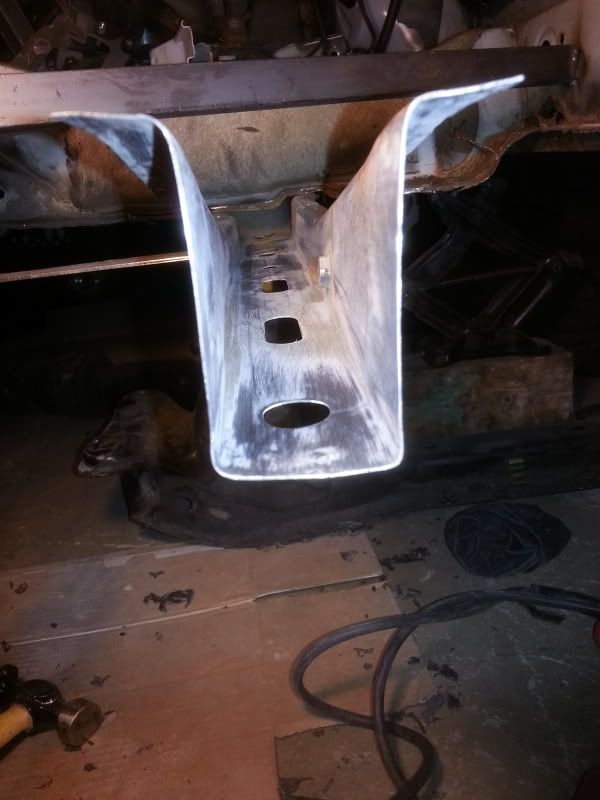
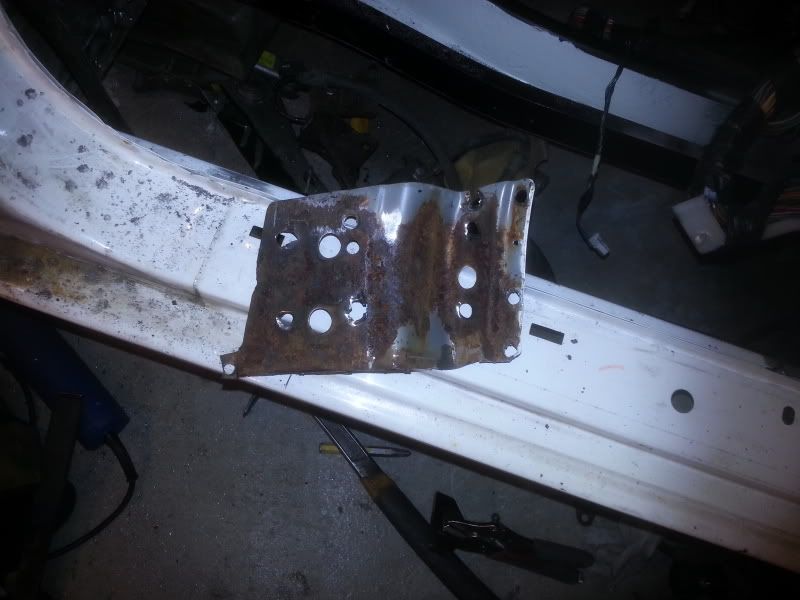
Frame member closing plate
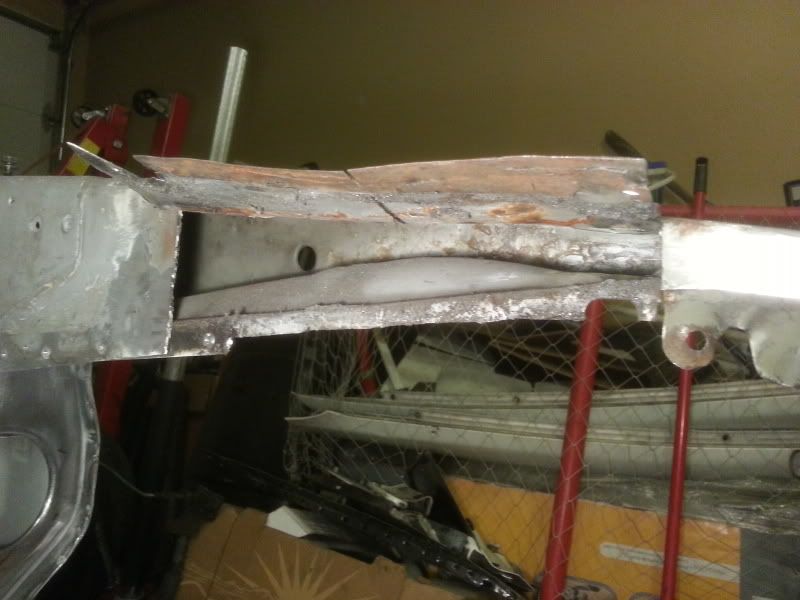
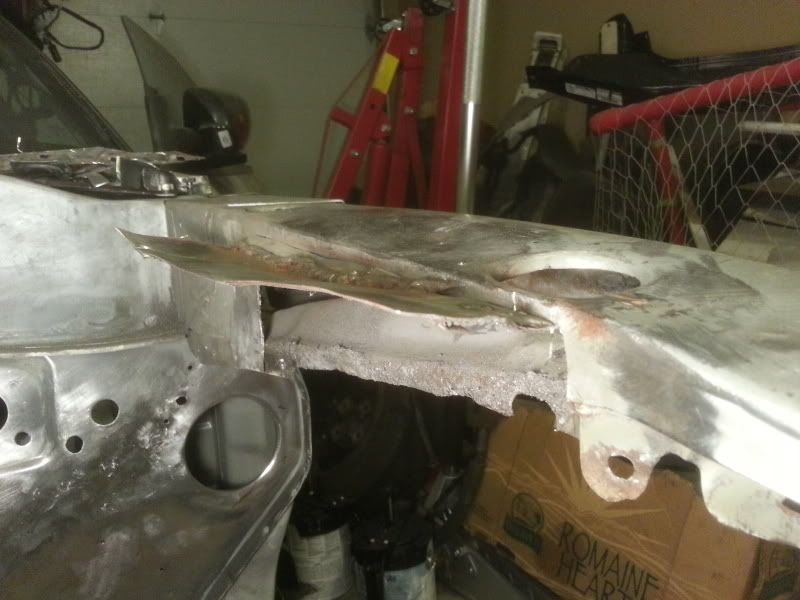
Cut out the rusty flanged end

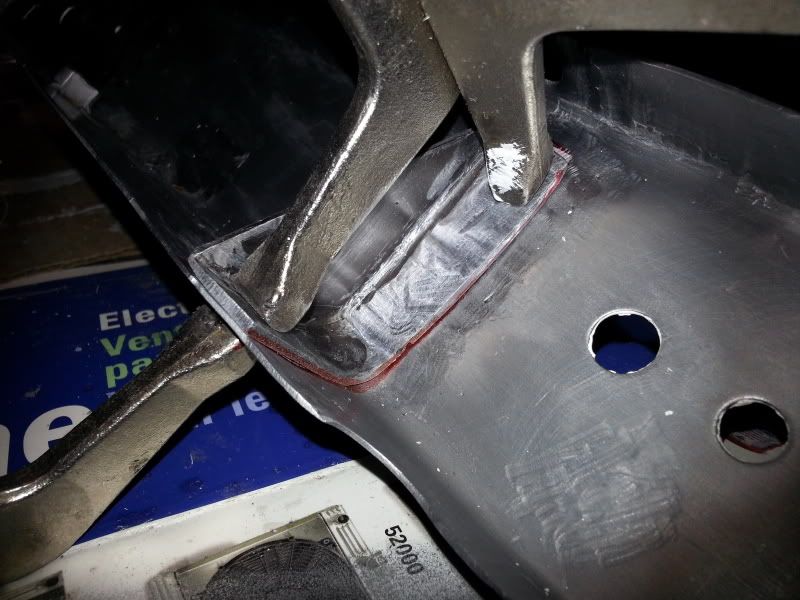
Tacked in place
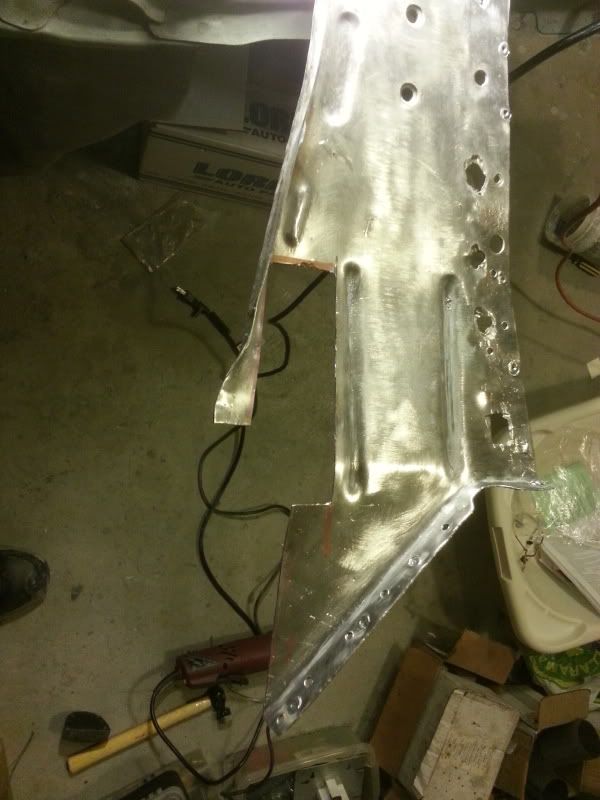

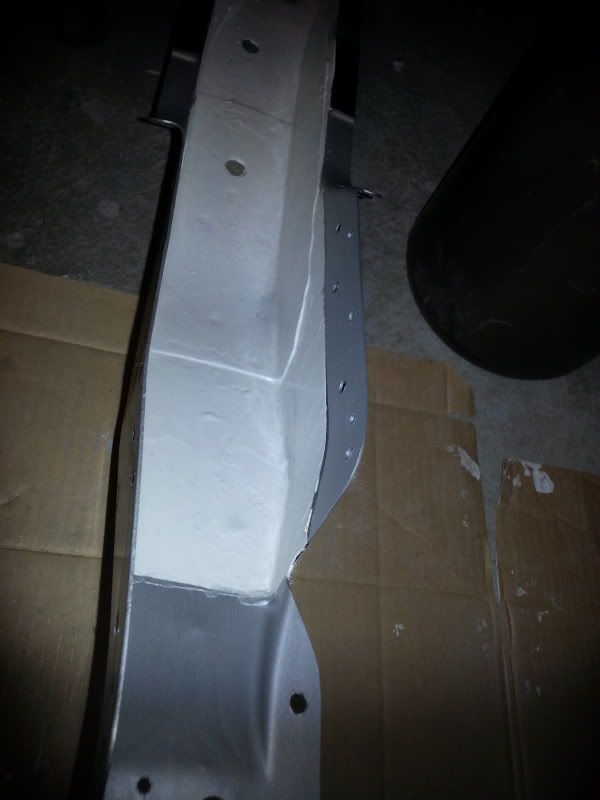
Welded, finished and etched. The phosphoric acid turned the galvannealed metal into a dark gray colour. I'm guessing that would be zinc phosphate?
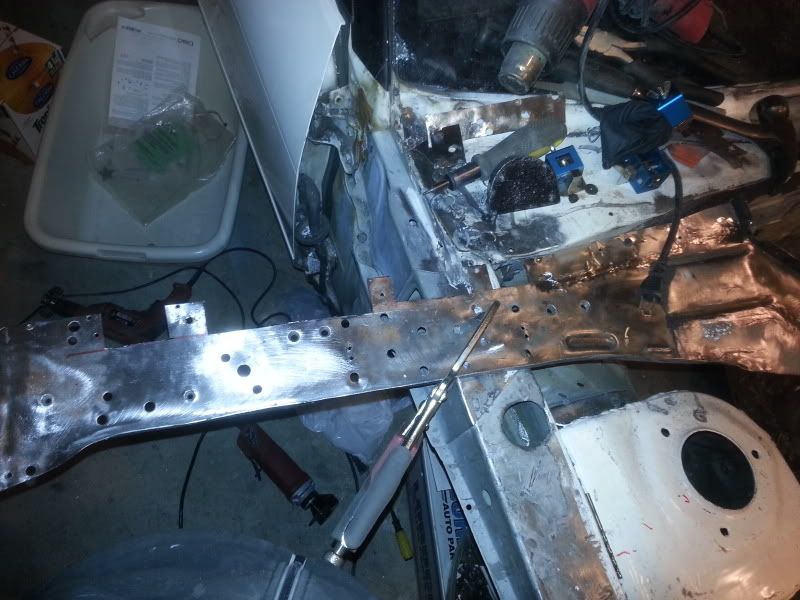
So many braces and reinforcements...

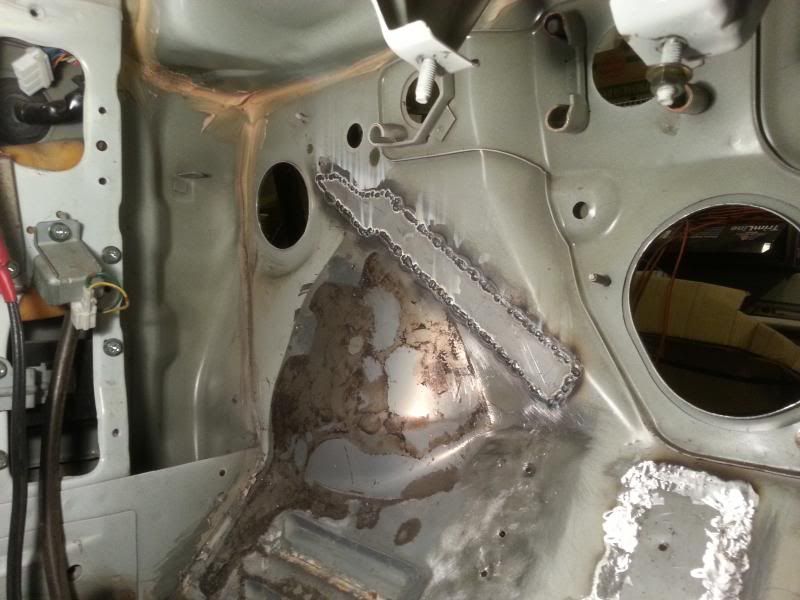
Stitch welded on top of plug welding.
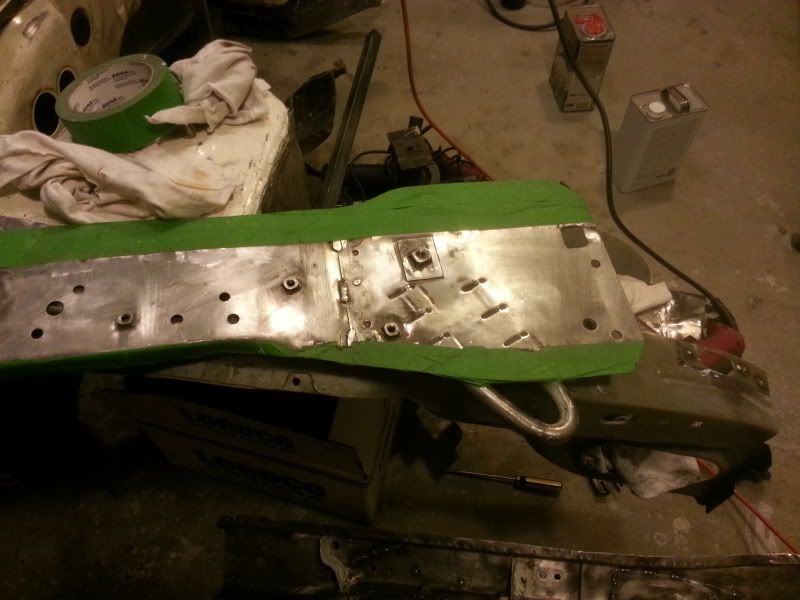
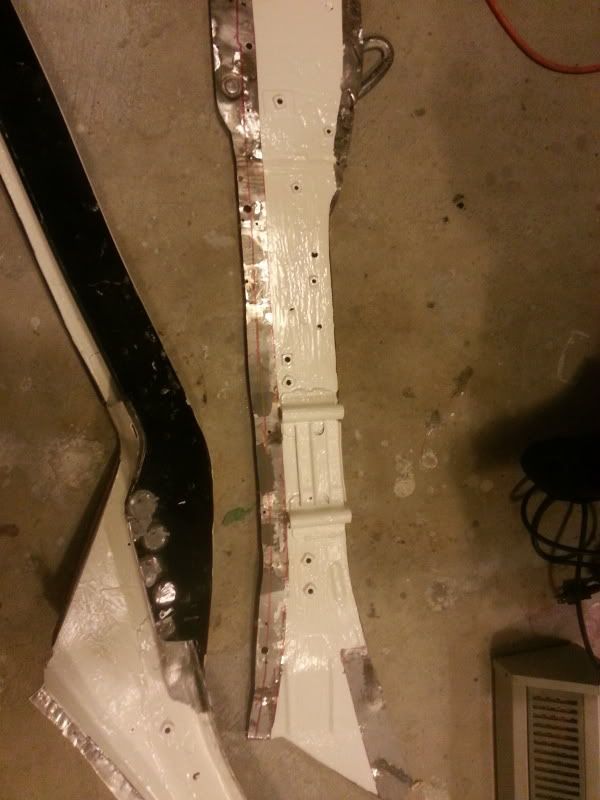
Also decided to paint the new inner rail. I wanted to seal the inner reinforcement for the jack stands with the epoxy
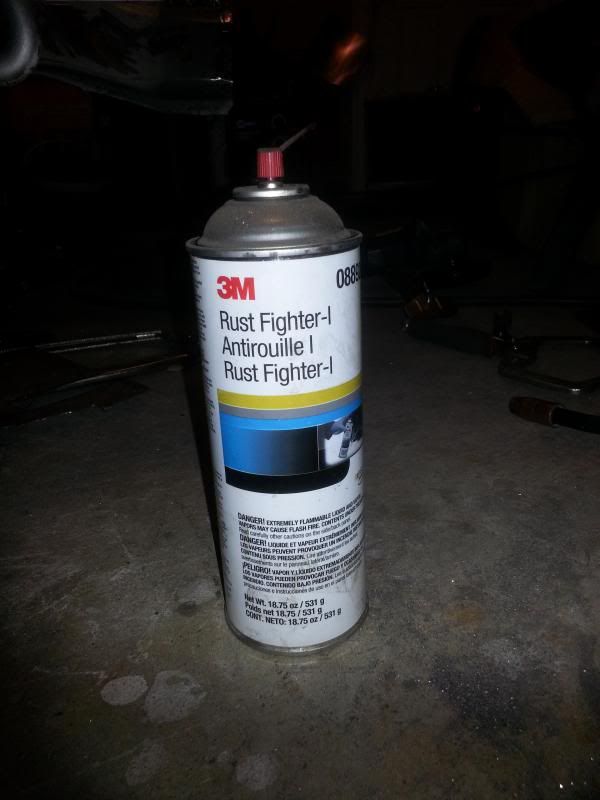
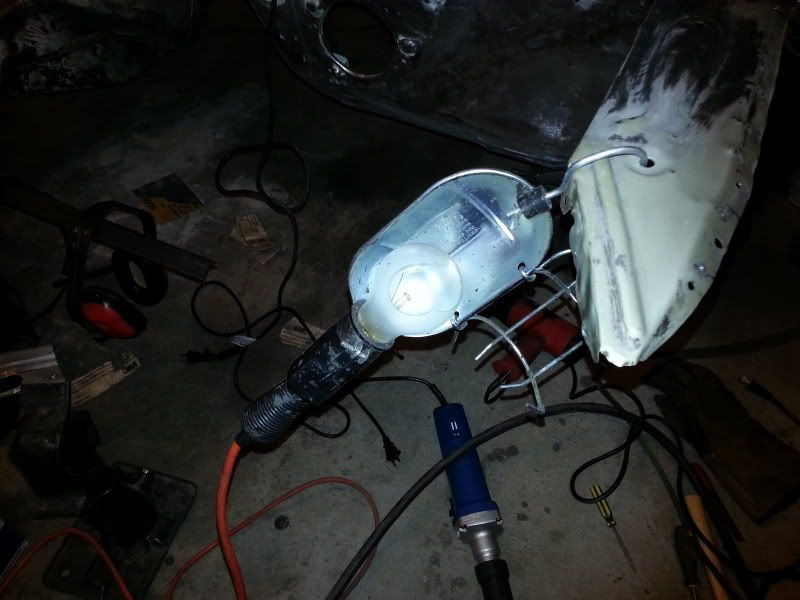
Used this stuff, cavity wax, to coat the inside of the reinforcement.
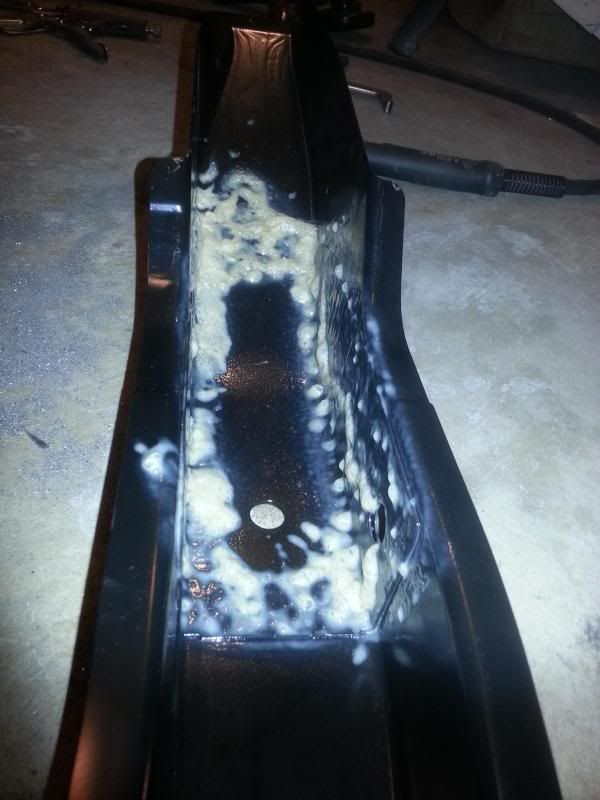
Sprayed it along the seam
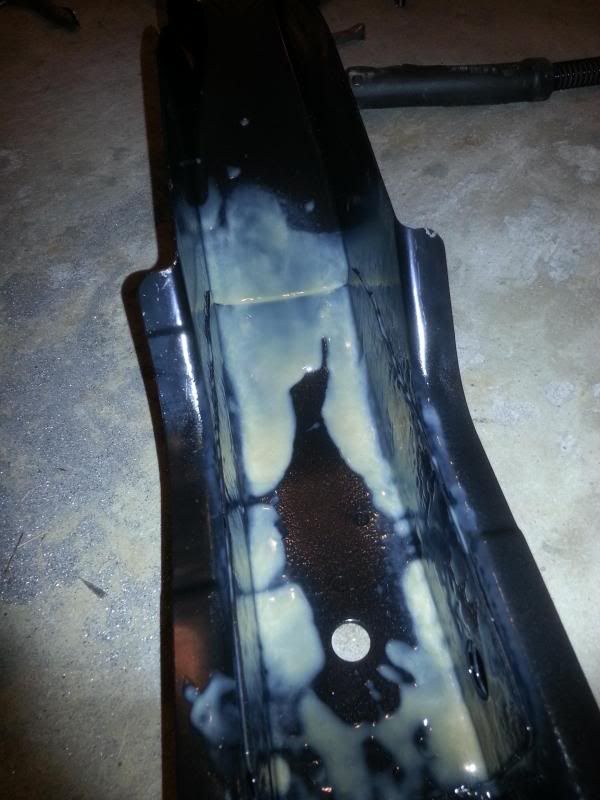
And used a heat gun to heat it up until it became a thin liquid and creeped between the two layers.
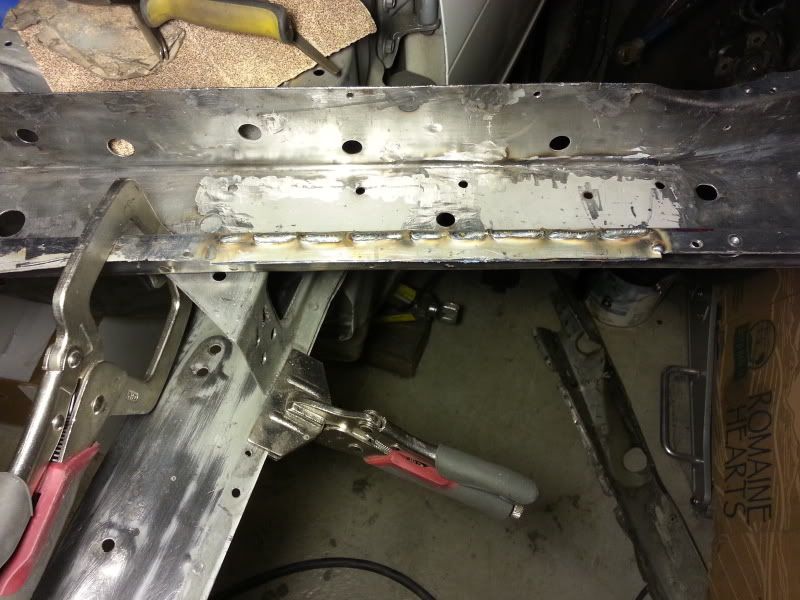
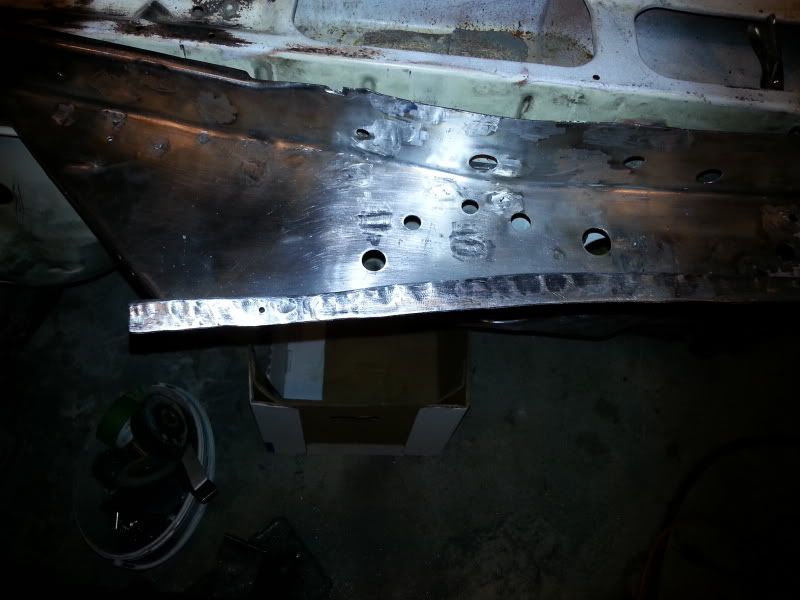
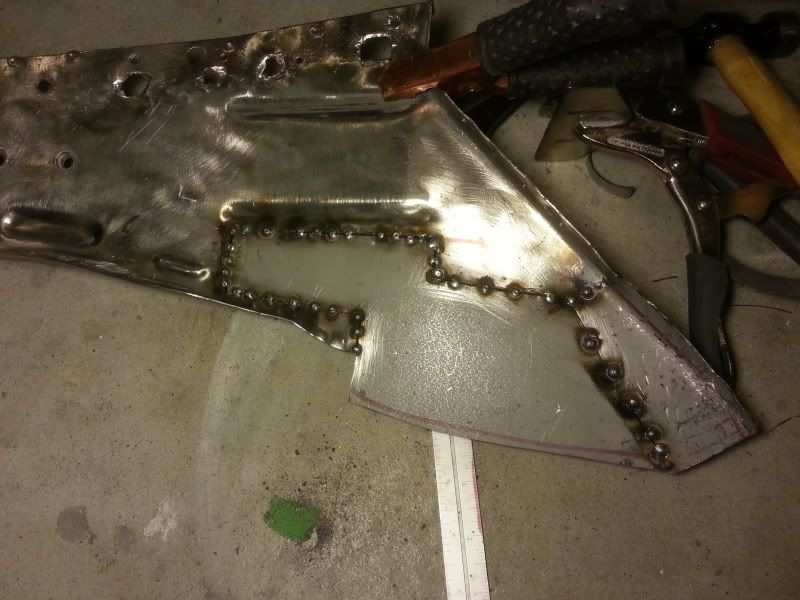
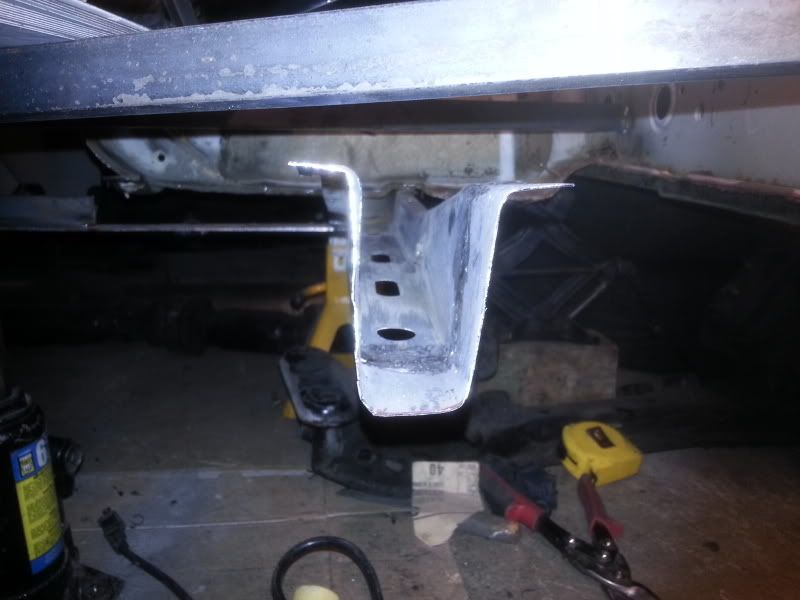
The holes are for the welds
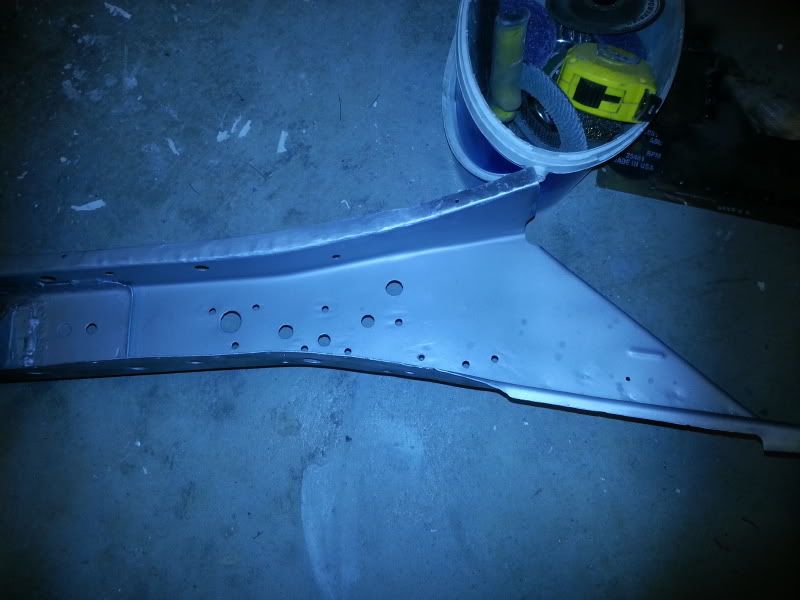
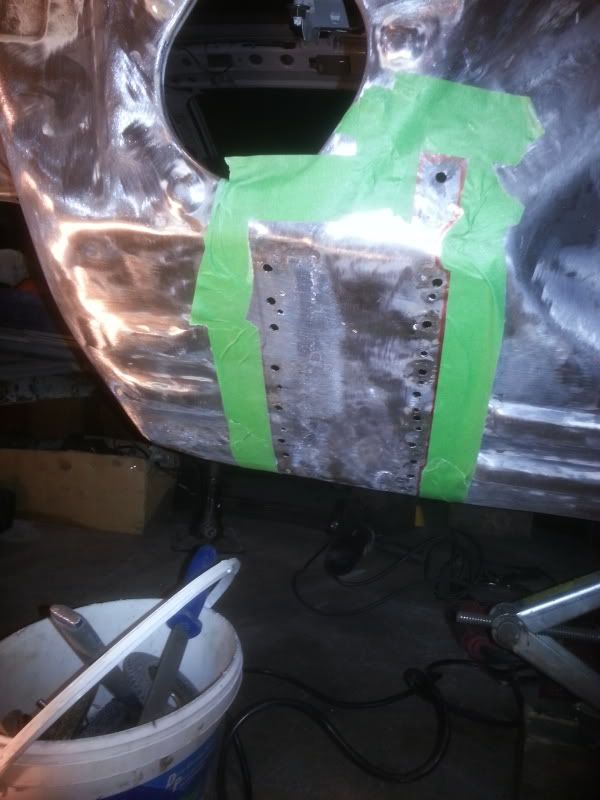
Drill the holes for the plug welds and etched it with phosphoric acid and a couple coats of weld through. Didn't bother masking it since it comes off easily with lacquer thinner.
And the 2nd inner reinforcement as well.
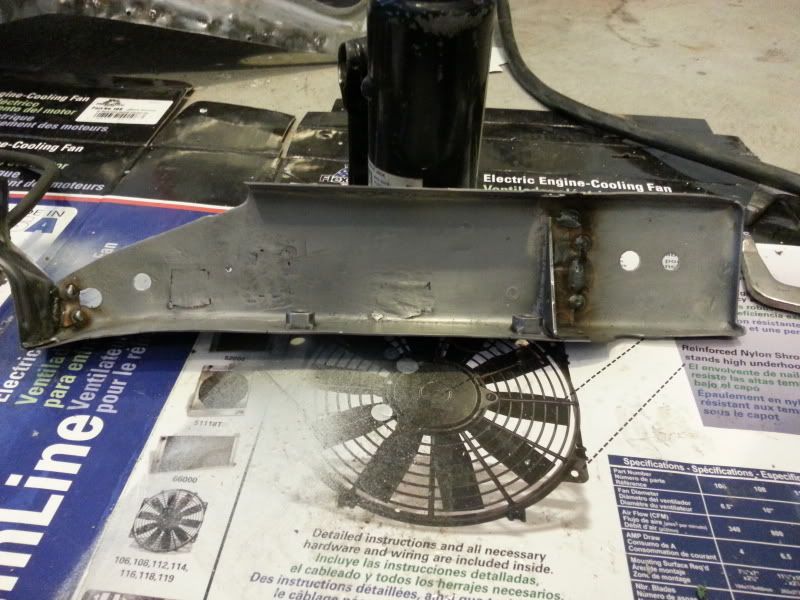
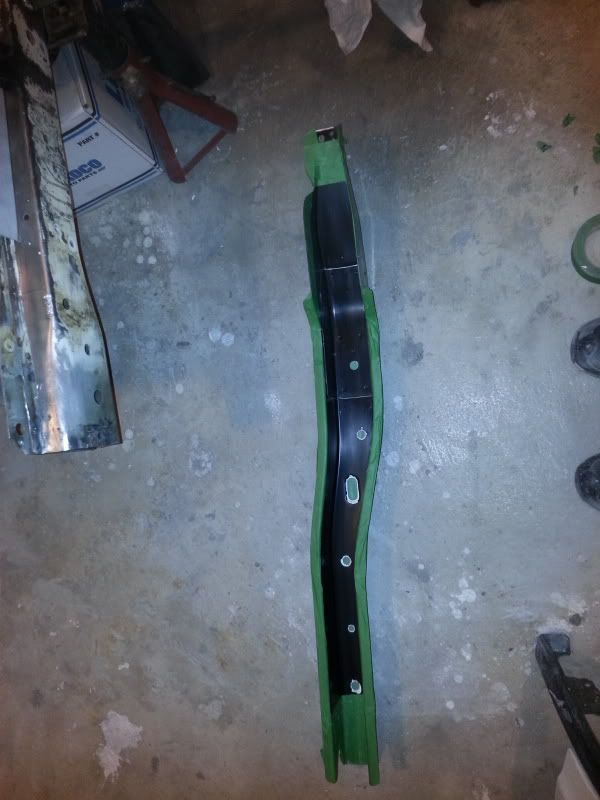
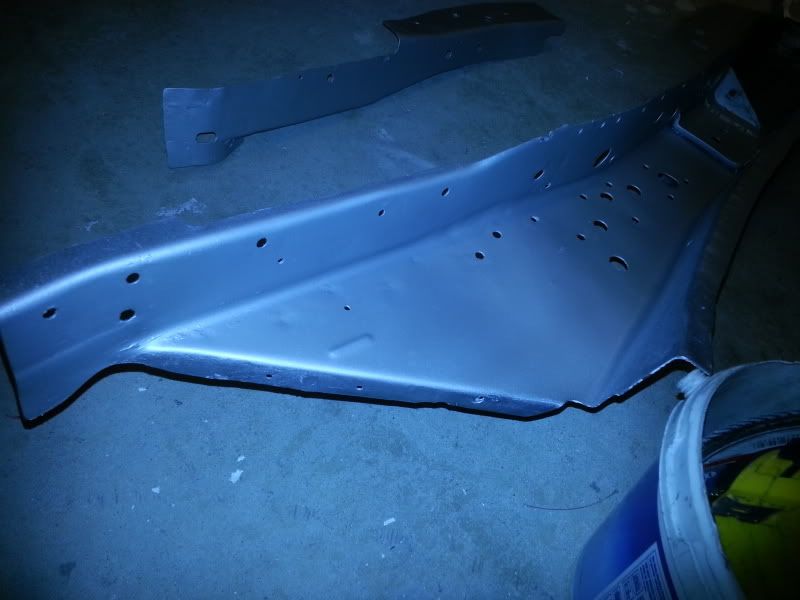
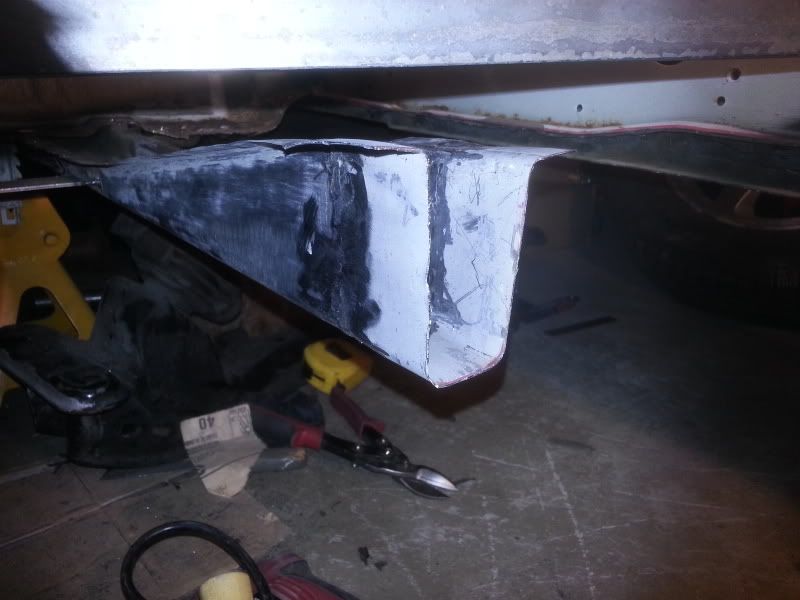
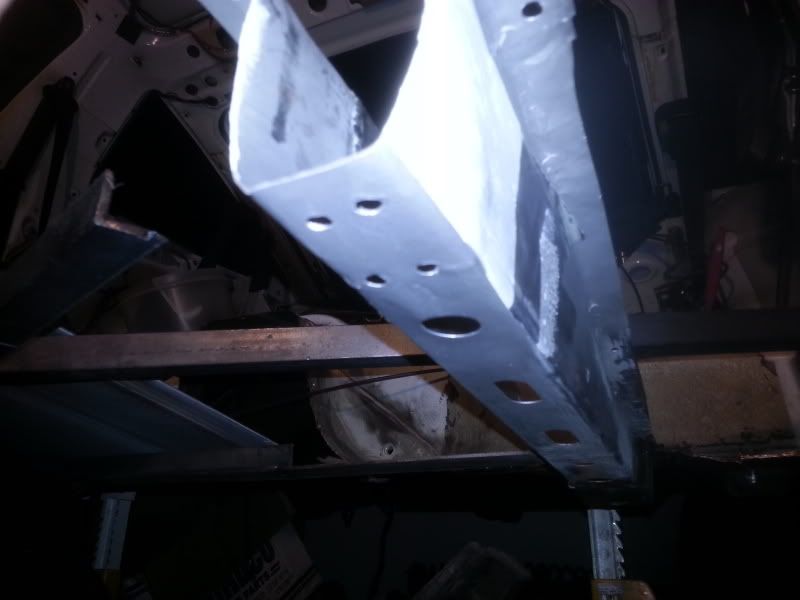
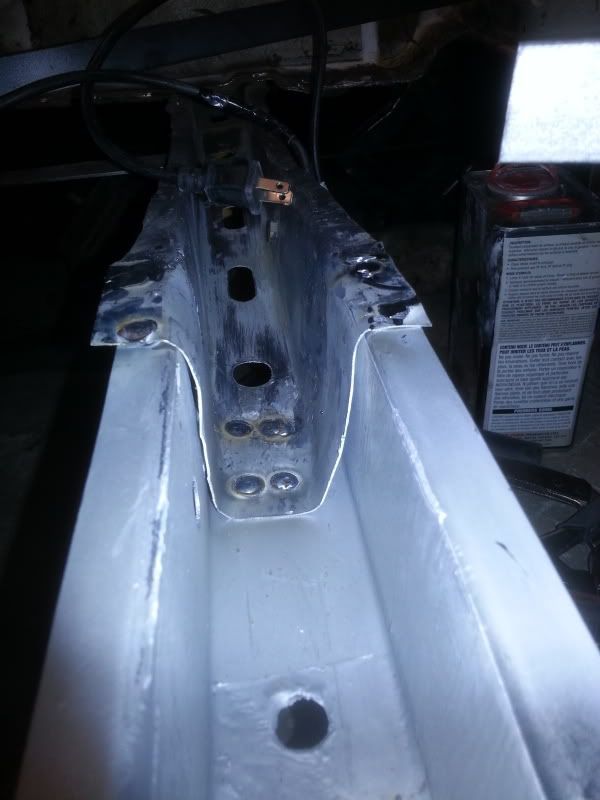
Brushed on the epoxy to the areas that were going to be away from the welding zones and a couple coats of weld through after it dried. This is the bottom of the frame member that extends to the radiator support from the firewall. The new frame rail will be welded to this area.
Even though E-Coat is the best weld through primer, I shot a light coat of the zinc weld through on top just to add a little more protection.
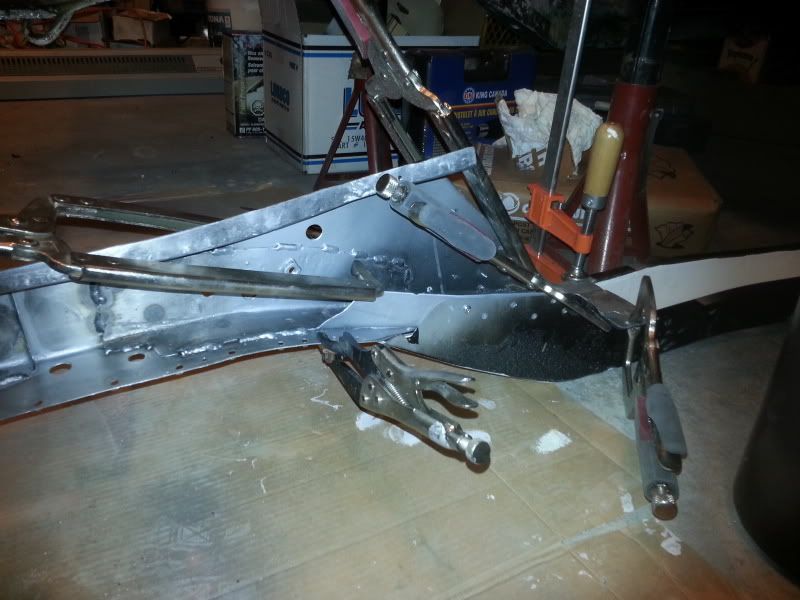
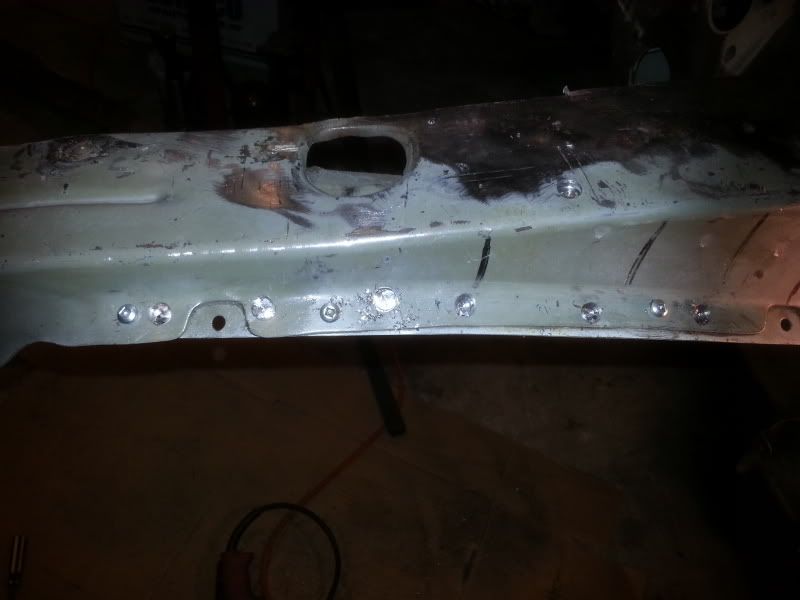
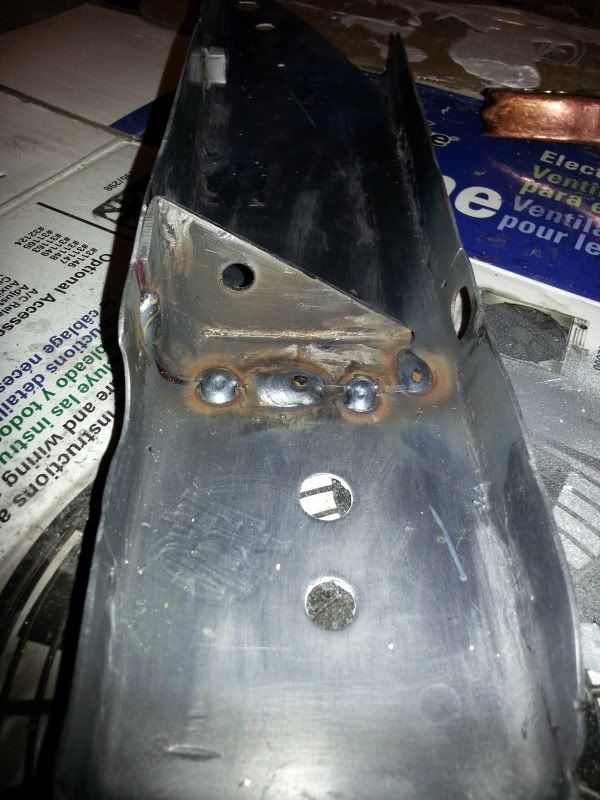
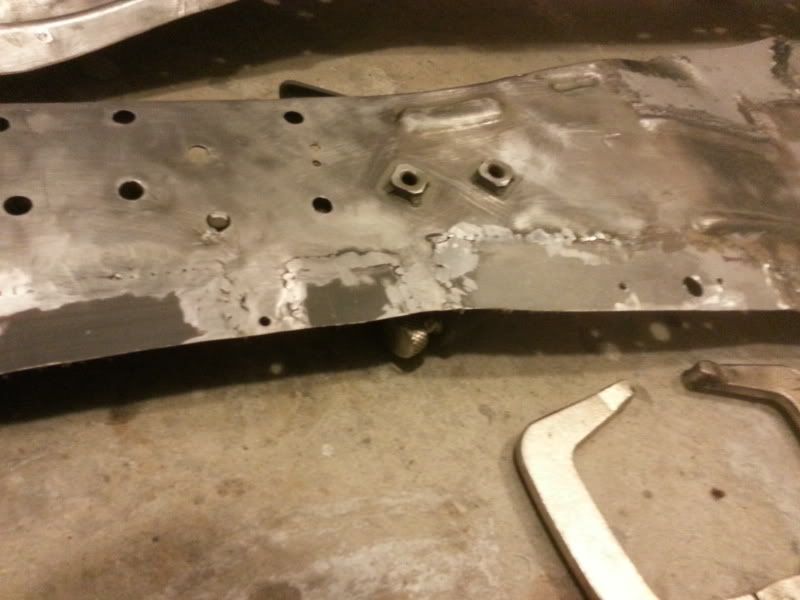
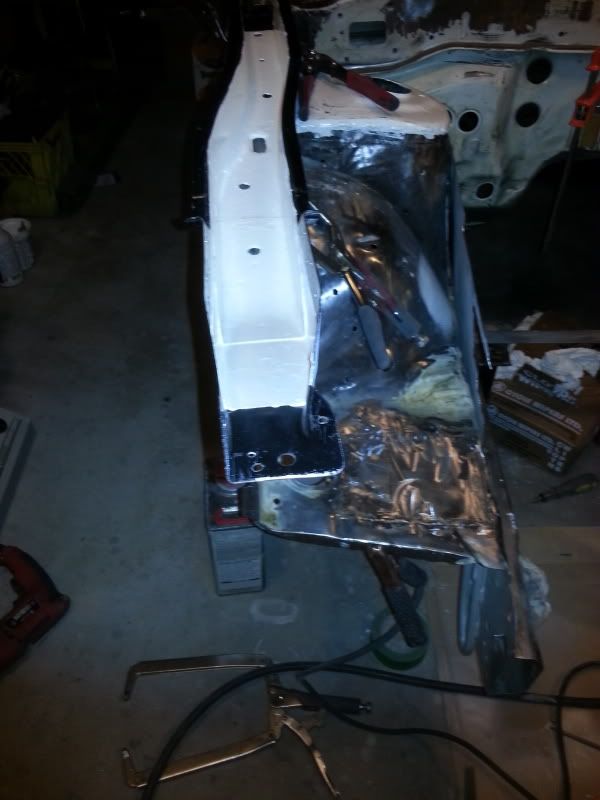
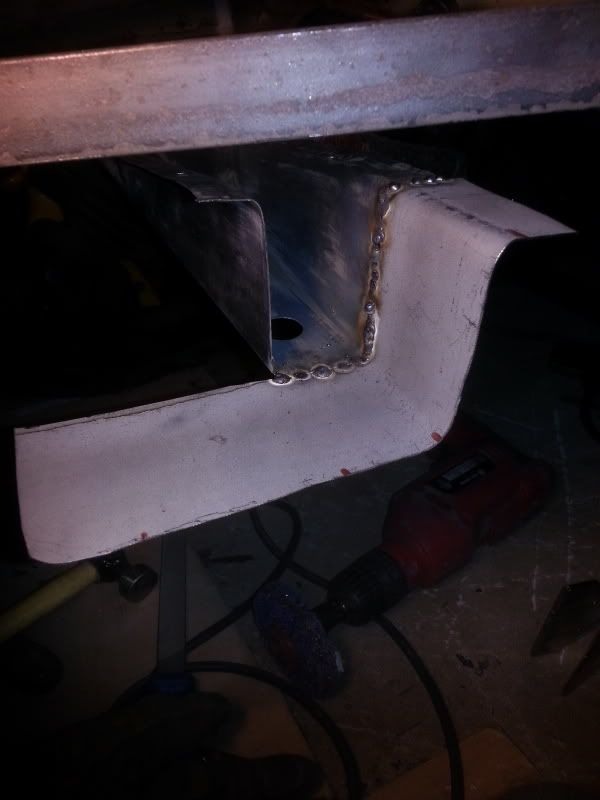
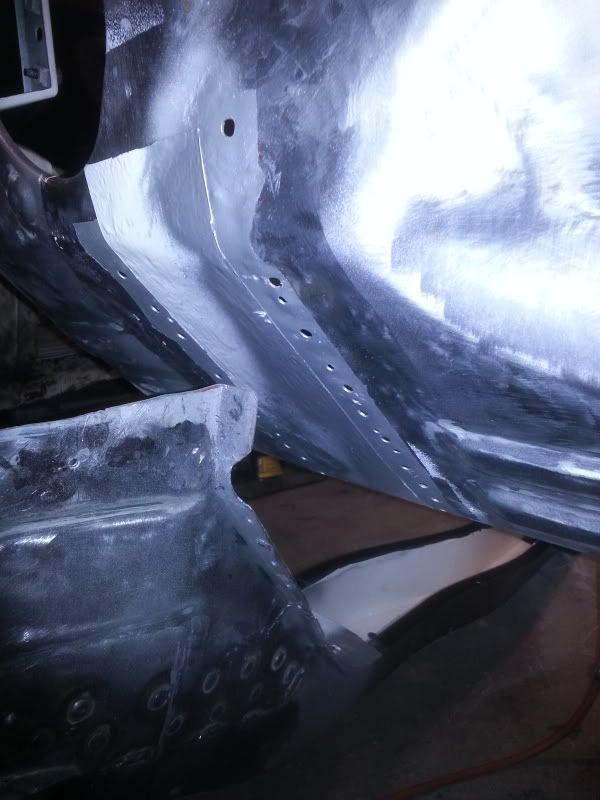
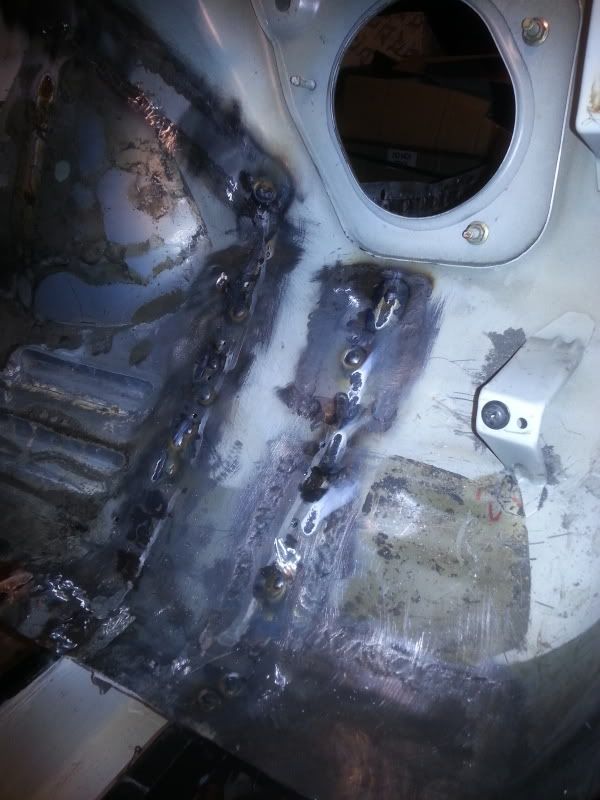
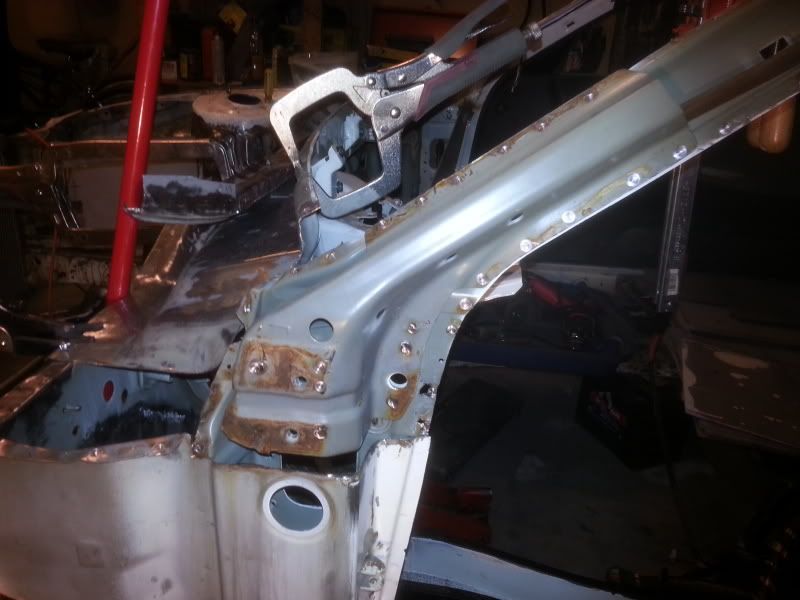
Second inner reinforcement plug and stitched welded to the frame rail/member. Also lined up the new frame rail and positioned it for the plug welds.
Welded.
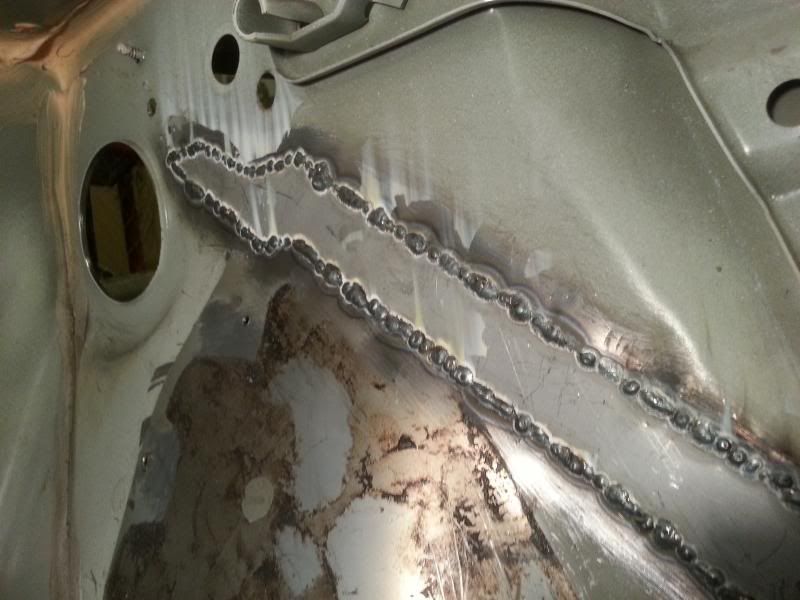
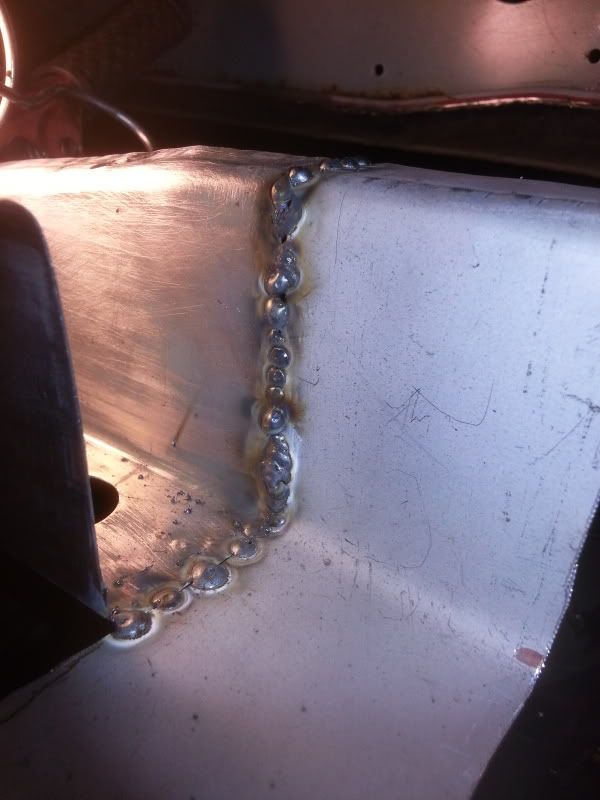
Using cheap welding wire with zinc weld through was a chore. The arc kept on spattering and the puddle wouldn't sometimes go along with the wire. Bought some Air Liquide BlueShield wire after, and holy s*** the difference is night and day!
I facked up the flanged end part...didn't really line up with the frame rail in place.
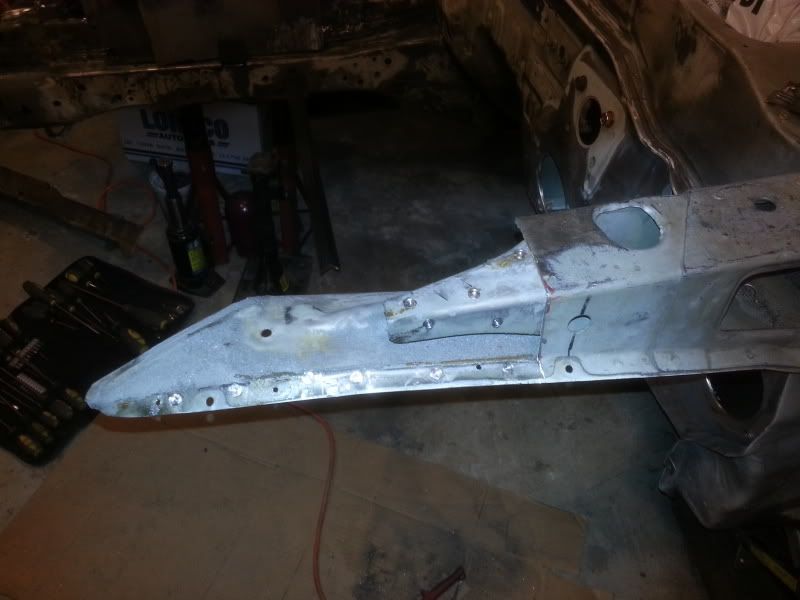
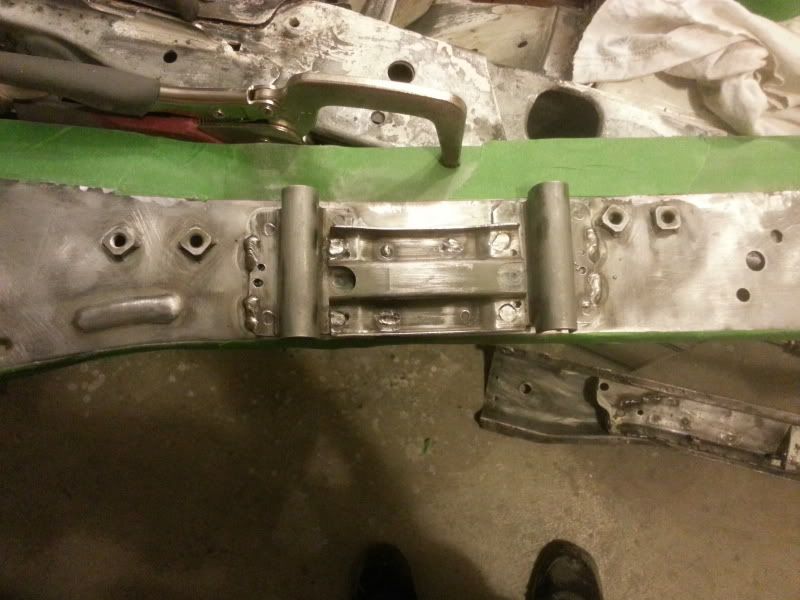
Cut it out...again
Lined right up. That plug weld was done with the Air Liquide wire, the weld puddle flowed really nice.
All welded up

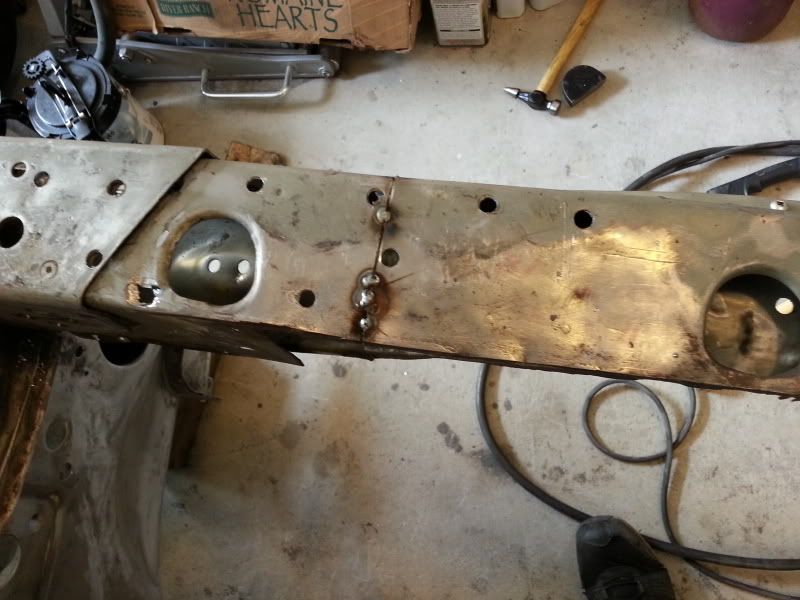
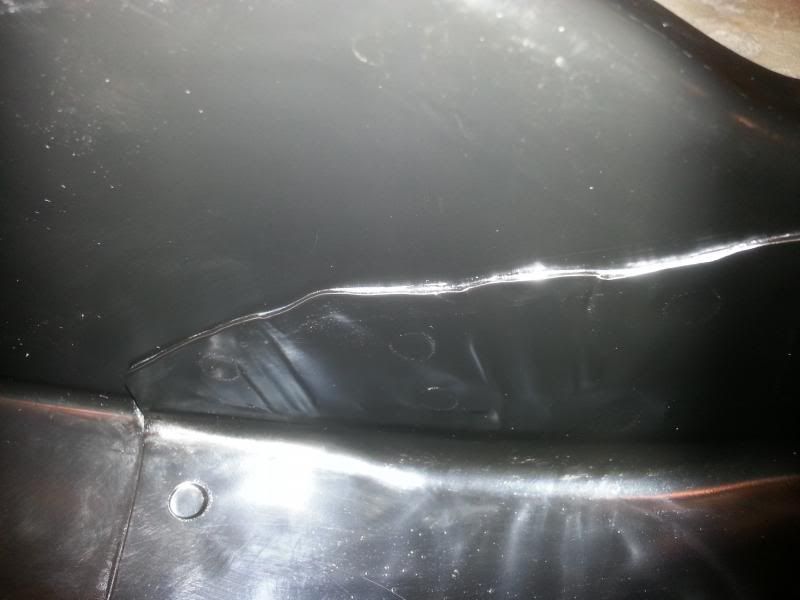
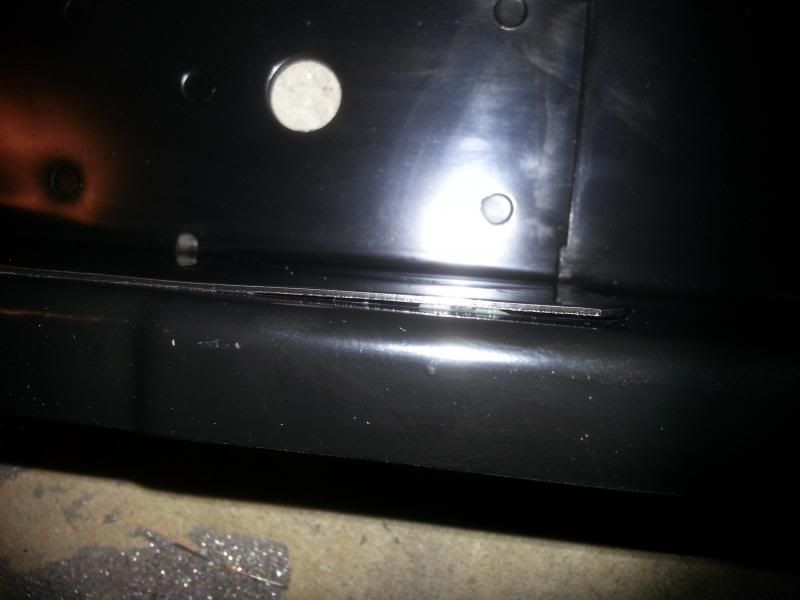
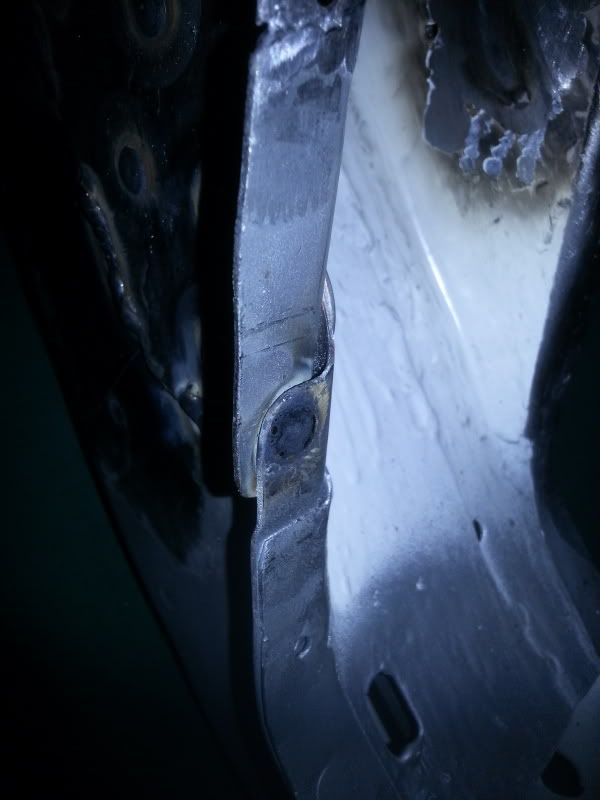
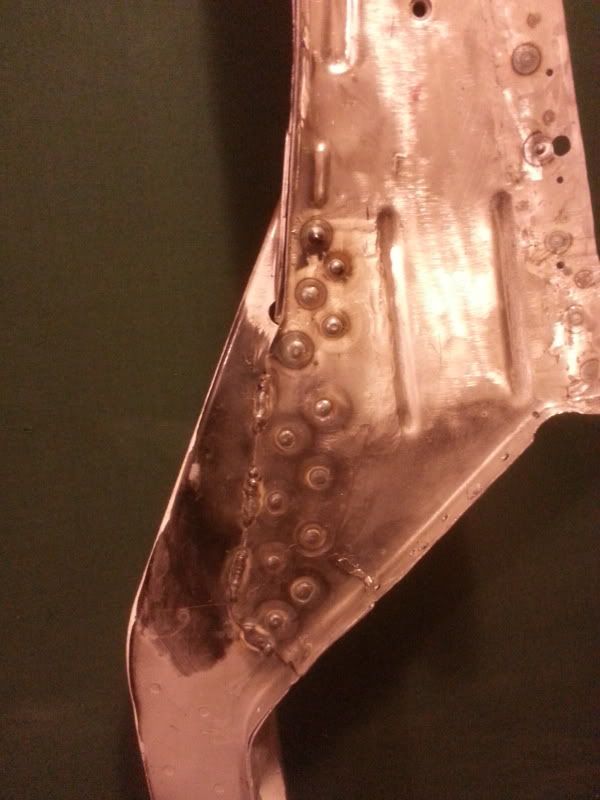
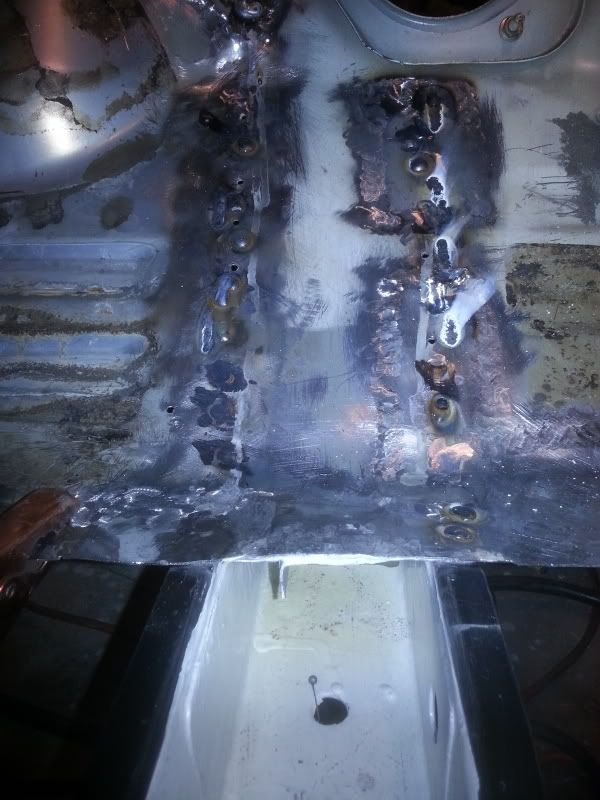
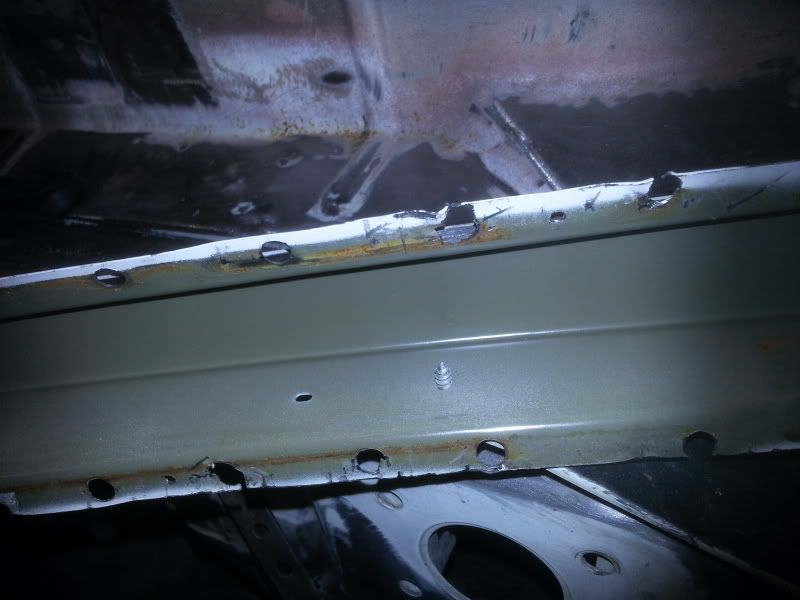
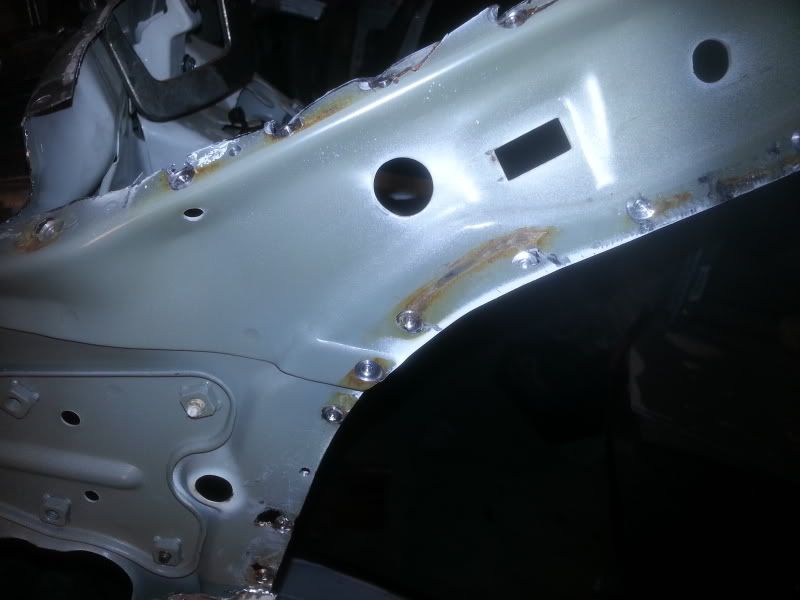
These spot welds were done with the Air Liquide wire, look at how flat and round they are.
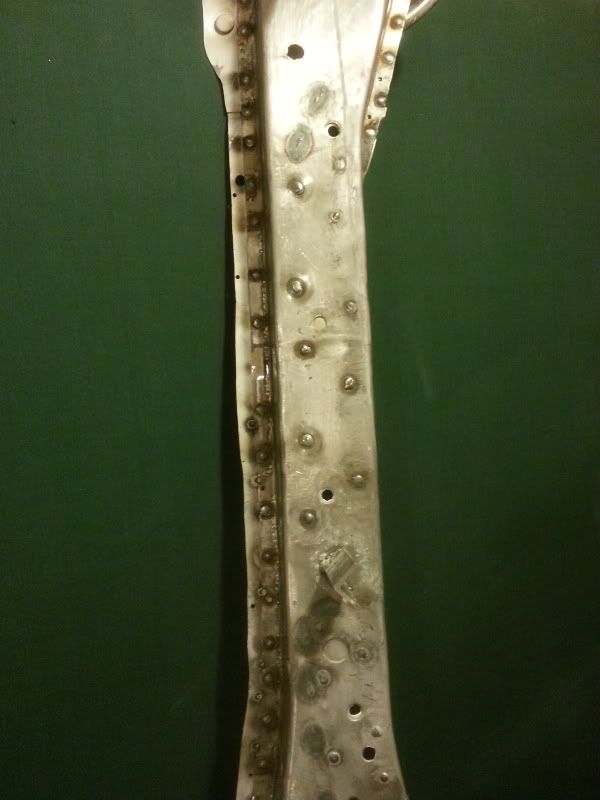
And these were done with some s*** wire

Cut out another rusted section on the lower firewall area
New roughly cut piece clamped in place
Bent it to shape as I tack welded it around
Added another piece
And another piece
Flush
Now to fix this abomination from last year...should have spent more time learning how to weld before trying to fix it.
The thick sheet metal welded on to the hood ledge is part of the strut tower cap
Cut out and yayy more seam rust
Had to cut half of it in order to remove the inner reinforcement. Surprisingly it looks clean, no paint though, just the phosphate coating.
Drilled out the spot welds and removed the reinforcement and part of the frame rail thing....
The piece I drilled/cut out
BIRDDDDDDDDDDD
Tack welded the other end of the upper hood ledge.
And not to repair the lower front frame member. Cut out some parts of the flanged section.
Note to self: Don't weld too close to a trouble light
All welded up. Galvanneal welds really nice
I need a work bench
Now to weld the triangular brace for reinforcement for the front member. Etched it with phosphoric acid and shot some weld through primer. The phosphoric acid really makes the weld through stick to the metal.
And the brace
Frame member closing plate
Cut out the rusty flanged end
Tacked in place
Welded, finished and etched. The phosphoric acid turned the galvannealed metal into a dark gray colour. I'm guessing that would be zinc phosphate?
So many braces and reinforcements...
Stitch welded on top of plug welding.
Also decided to paint the new inner rail. I wanted to seal the inner reinforcement for the jack stands with the epoxy
Used this stuff, cavity wax, to coat the inside of the reinforcement.
Sprayed it along the seam
And used a heat gun to heat it up until it became a thin liquid and creeped between the two layers.
The holes are for the welds
Drill the holes for the plug welds and etched it with phosphoric acid and a couple coats of weld through. Didn't bother masking it since it comes off easily with lacquer thinner.
And the 2nd inner reinforcement as well.
Brushed on the epoxy to the areas that were going to be away from the welding zones and a couple coats of weld through after it dried. This is the bottom of the frame member that extends to the radiator support from the firewall. The new frame rail will be welded to this area.
Even though E-Coat is the best weld through primer, I shot a light coat of the zinc weld through on top just to add a little more protection.
Second inner reinforcement plug and stitched welded to the frame rail/member. Also lined up the new frame rail and positioned it for the plug welds.
Welded.
Using cheap welding wire with zinc weld through was a chore. The arc kept on spattering and the puddle wouldn't sometimes go along with the wire. Bought some Air Liquide BlueShield wire after, and holy s*** the difference is night and day!
I facked up the flanged end part...didn't really line up with the frame rail in place.
Cut it out...again
Lined right up. That plug weld was done with the Air Liquide wire, the weld puddle flowed really nice.
All welded up
These spot welds were done with the Air Liquide wire, look at how flat and round they are.
And these were done with some s*** wire
-
PapaSmurf2k3
- Site Admin
- Posts: 24000
- Joined: Thu Nov 21, 2002 3:20 pm
- Car: 2017 Corvette, 2018 Focus ST, 1993 240sx truck KA Turbo.
- Location: Merrimack, NH
Re: My S13 was built on a Friday Restoration
That's a cool weld wire comparison you've got there.
Still, holy s*** that's a lot of work.
Still, holy s*** that's a lot of work.
-
krash
- Posts: 5064
- Joined: Mon Apr 11, 2005 10:43 am
- Car: 1993 Nissan 240sx Convertible
- Location: Memphis, TN
- Contact:
Re: My S13 was built on a Friday Restoration
Man that is dedication, good work man. If it was me, I would have done tube front.
-
breadbox

- Posts: 8550
- Joined: Tue Oct 17, 2006 4:09 pm
- Car: Red 89 240sx,Black 89 Koop, White 84 720 4x4KC
- Location: Va Bch
Re: My S13 was built on a Friday Restoration
-
asoomal
- Posts: 2374
- Joined: Tue Feb 26, 2008 4:45 pm
- Car: 2001 Subaru Impreza L 5MT (Daily)
1992 Nissan 240SX SE 5MT w/HICAS (Being restored) - Location: Canada
Re: My S13 was built on a Friday Restoration
i didn't want to mess around with the crumple zones, so I just kept it stock.krash wrote:Man that is dedication, good work man. If it was me, I would have done tube front.
-
asoomal
- Posts: 2374
- Joined: Tue Feb 26, 2008 4:45 pm
- Car: 2001 Subaru Impreza L 5MT (Daily)
1992 Nissan 240SX SE 5MT w/HICAS (Being restored) - Location: Canada
Re: My S13 was built on a Friday Restoration
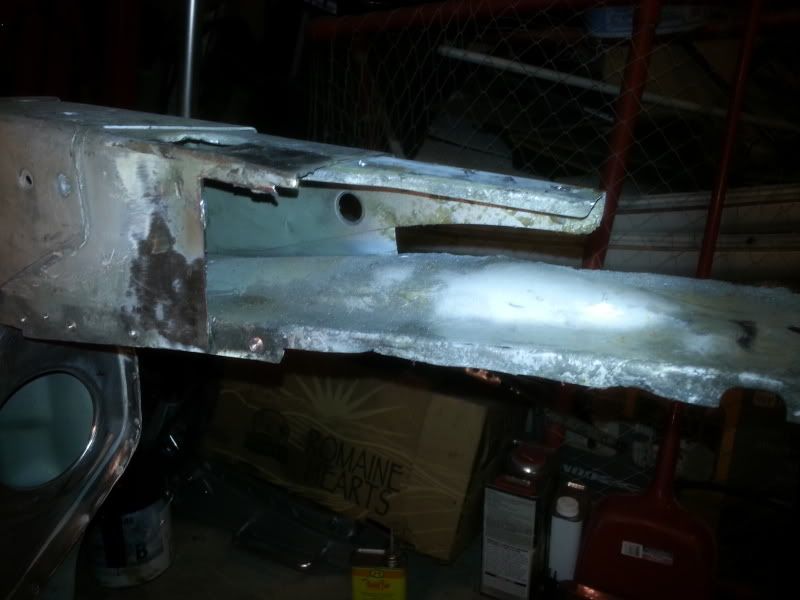
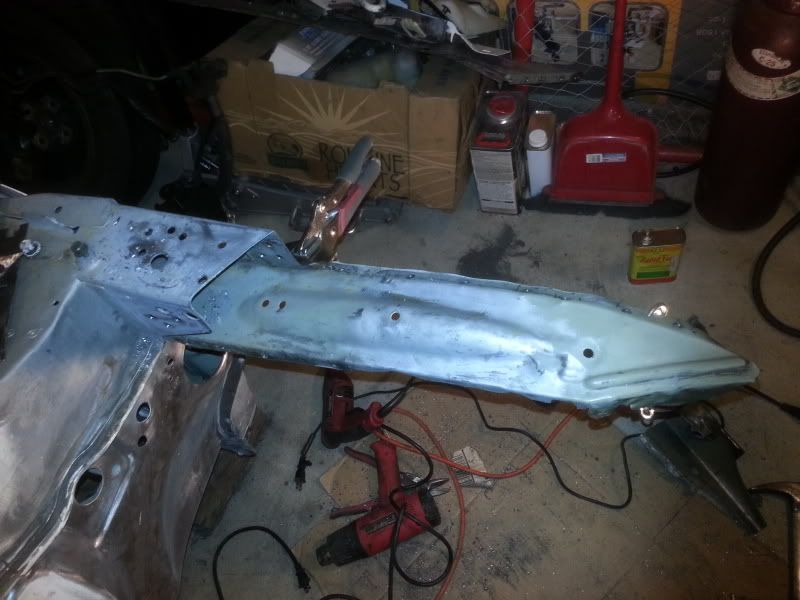
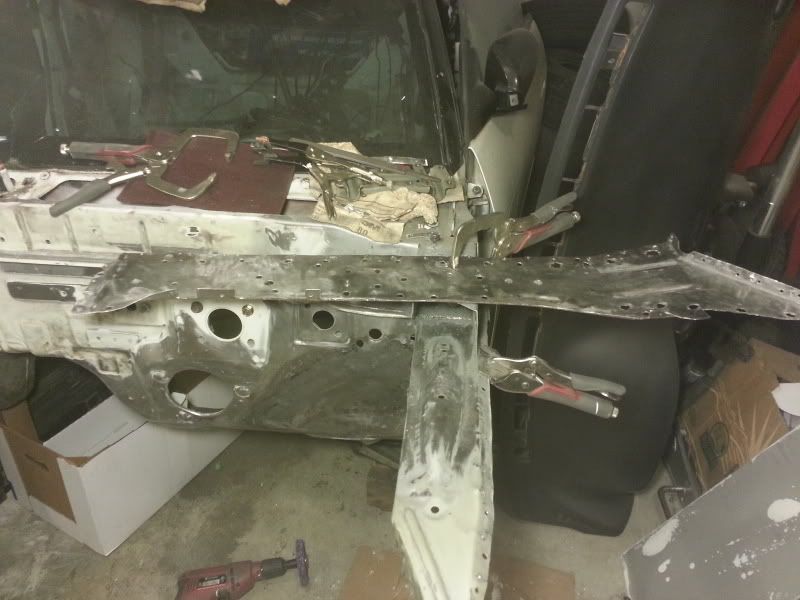
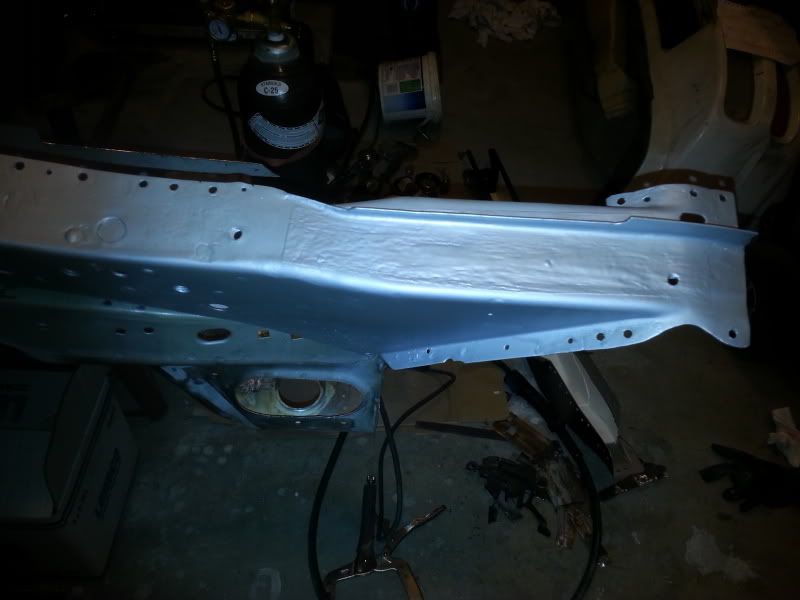
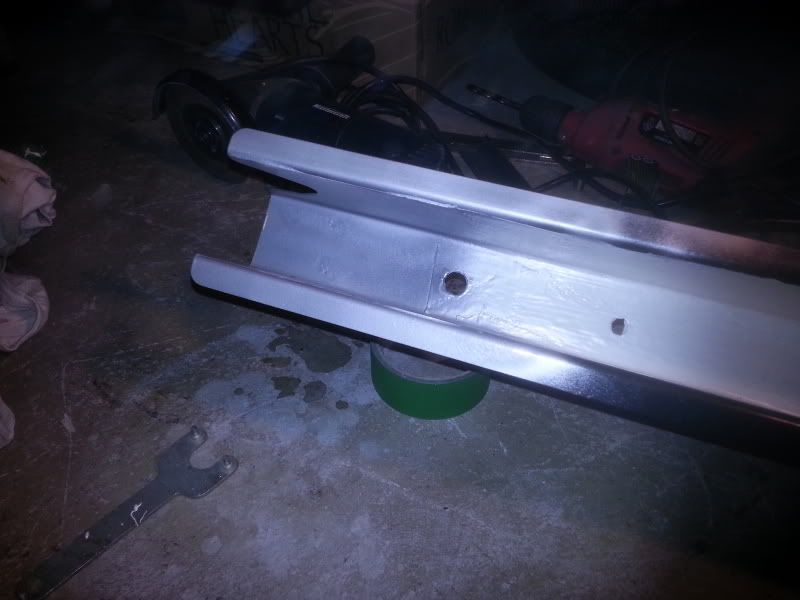
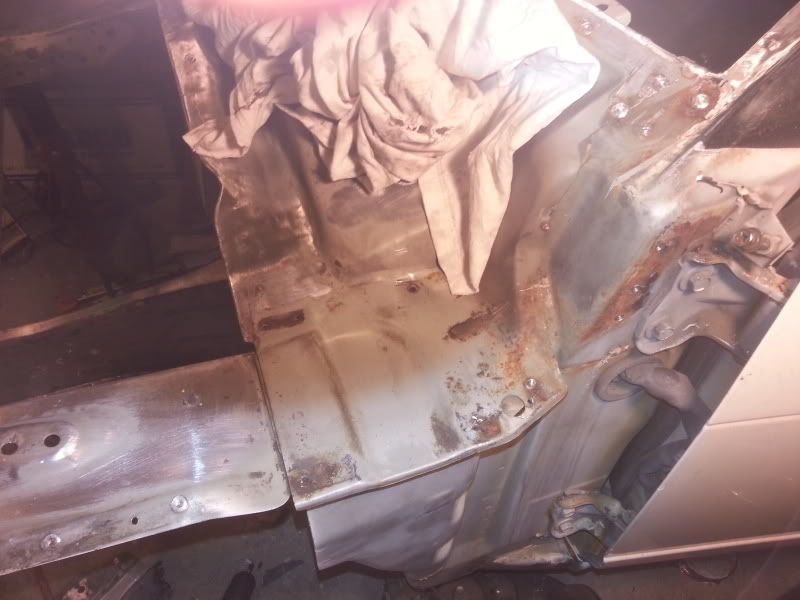
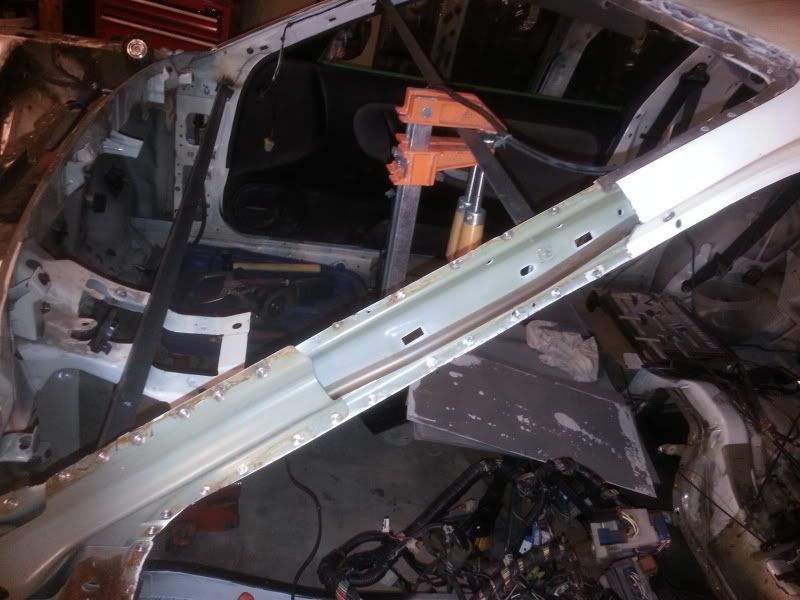
Cut a couple inches off at the end of the middle frame rail because there was some rust on the welded sections.
Lined up the new piece and started to tack and bend it.
Done
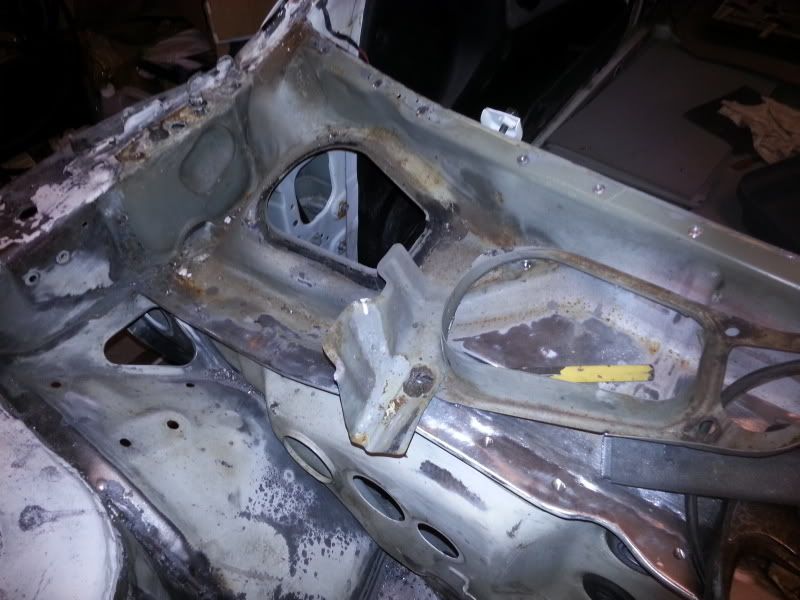
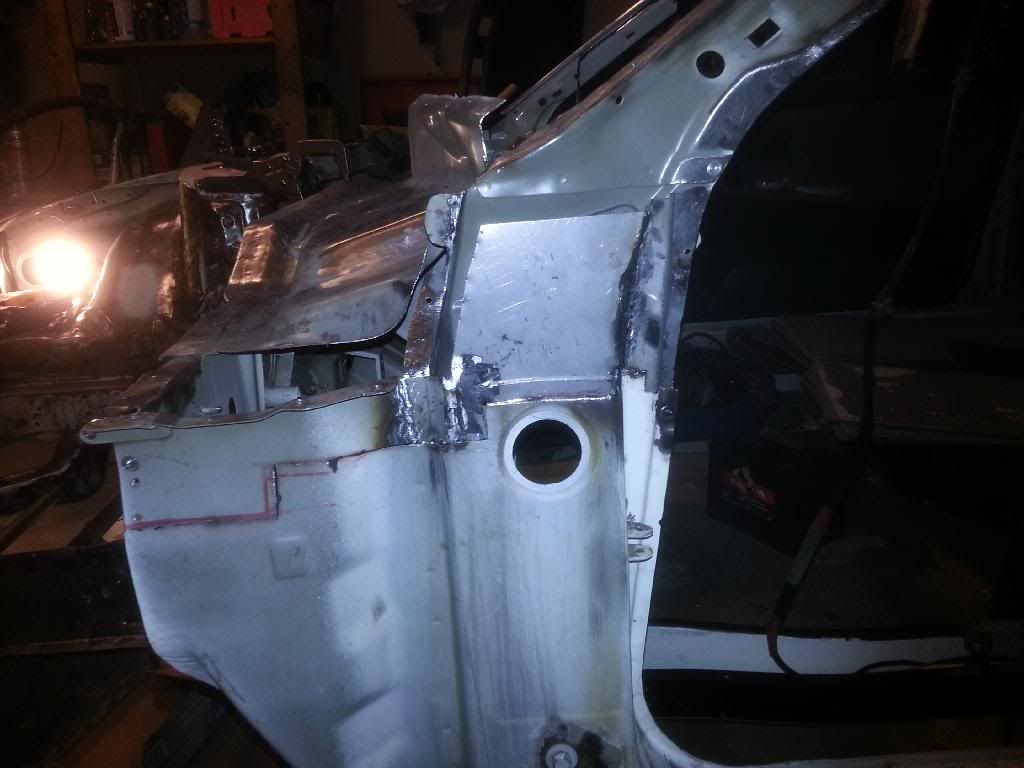
Started to prep the area on the firewall that was going to be hidden because the frame rail was going to cover it.
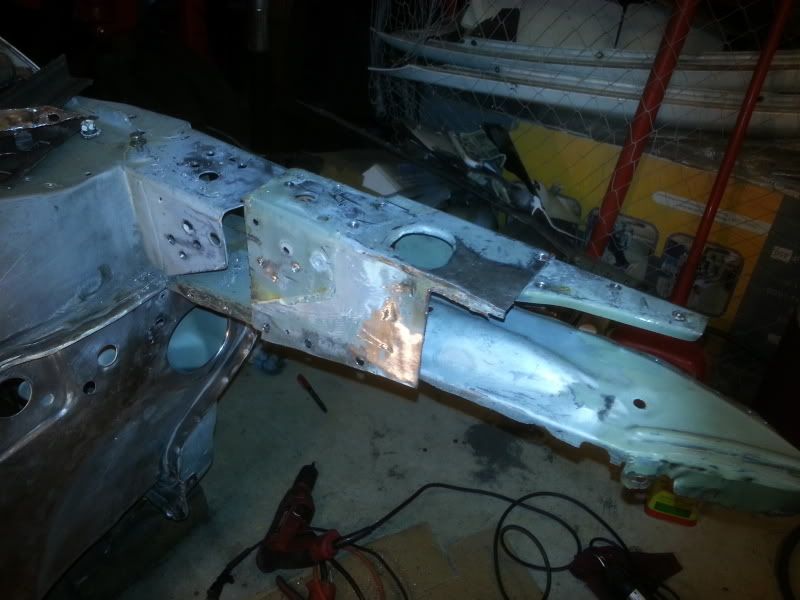
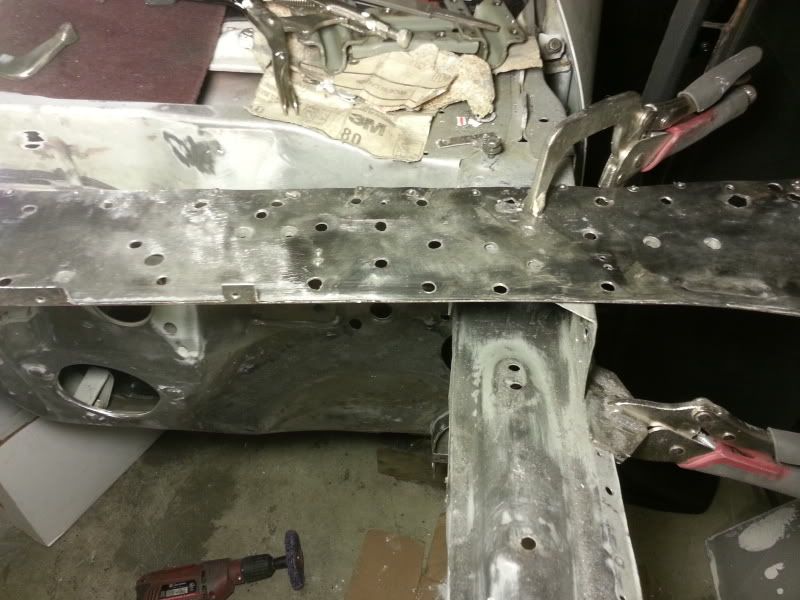
Weld through where the flanges meet and epoxy in the middle.
Also painted the center frame rail, weld through on the bottom and the flanges, epoxy on the sides.
And the new frame rail as well.
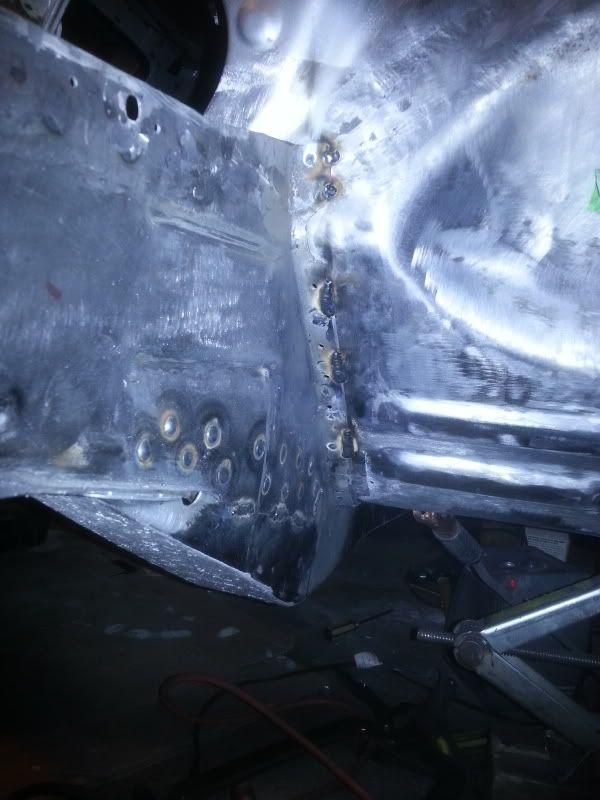
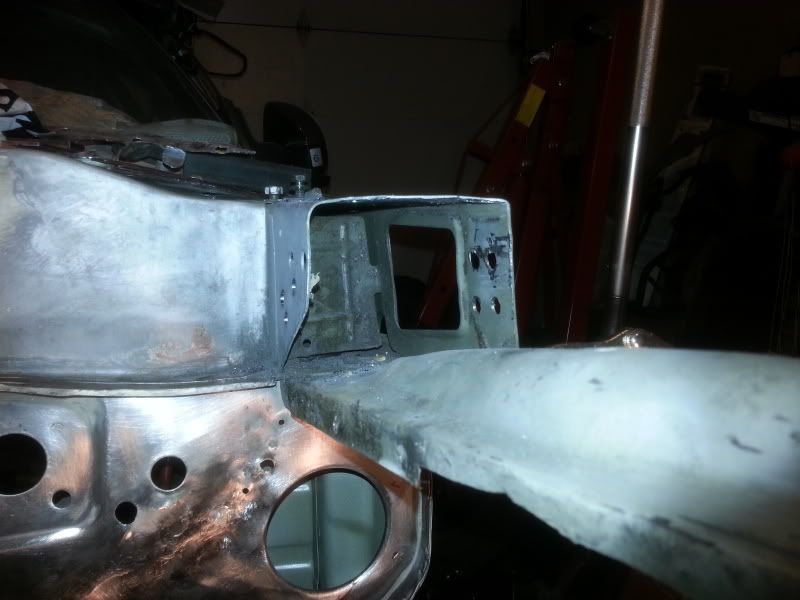
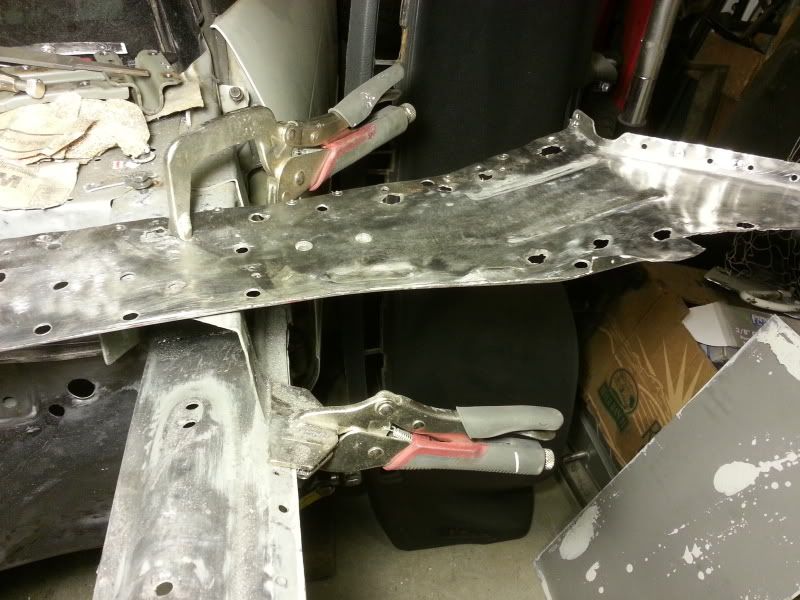
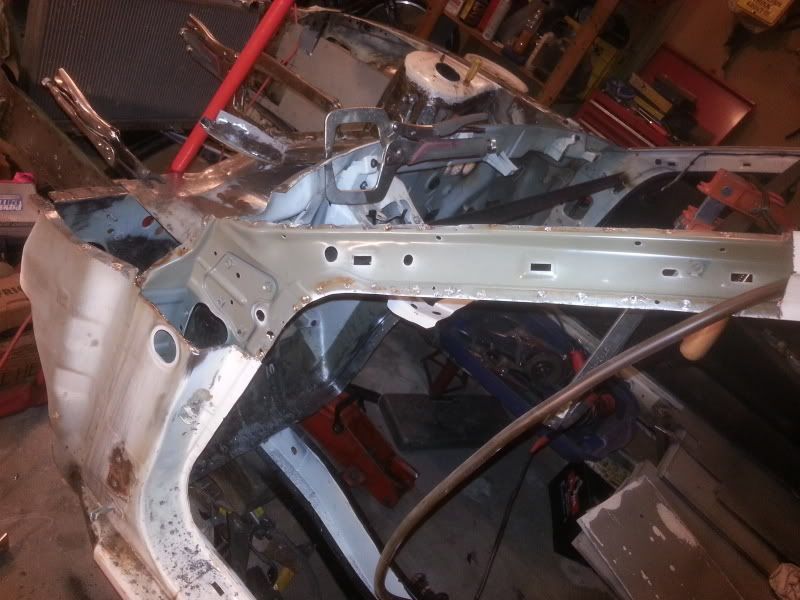
All welded up. I did a combination of plug and stitch welding.
From the inside.
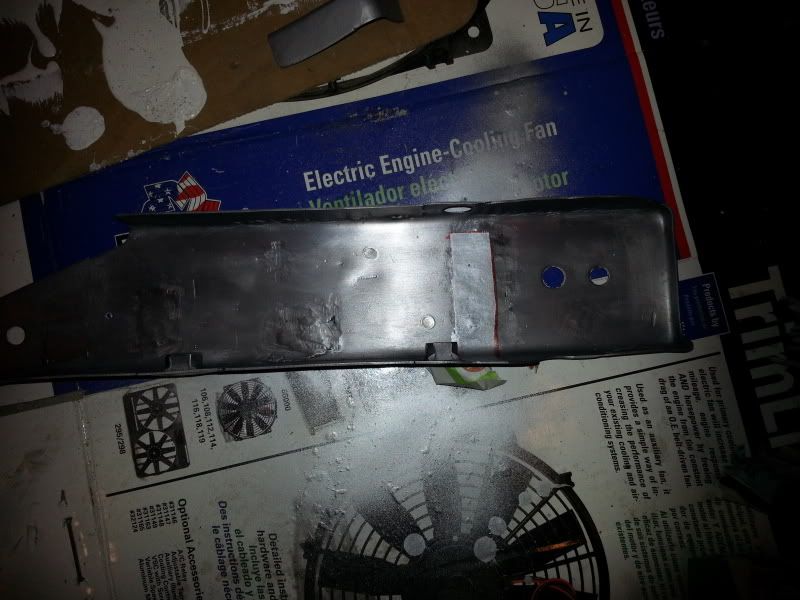
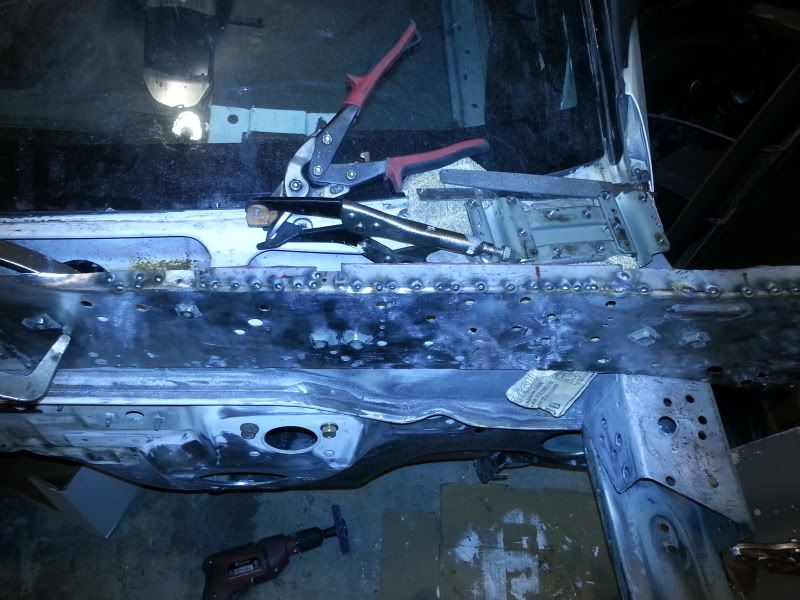
The other end of the frame rail, added two more plug welds over factory for more strength.
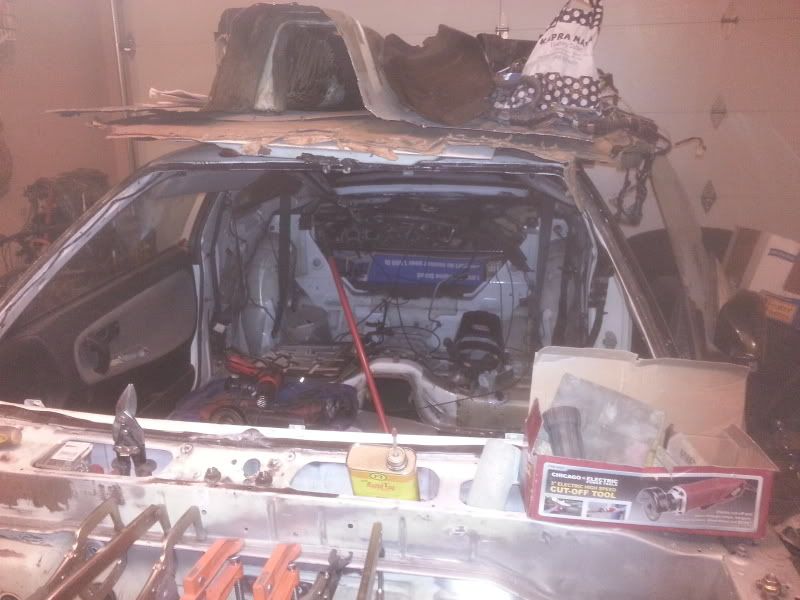
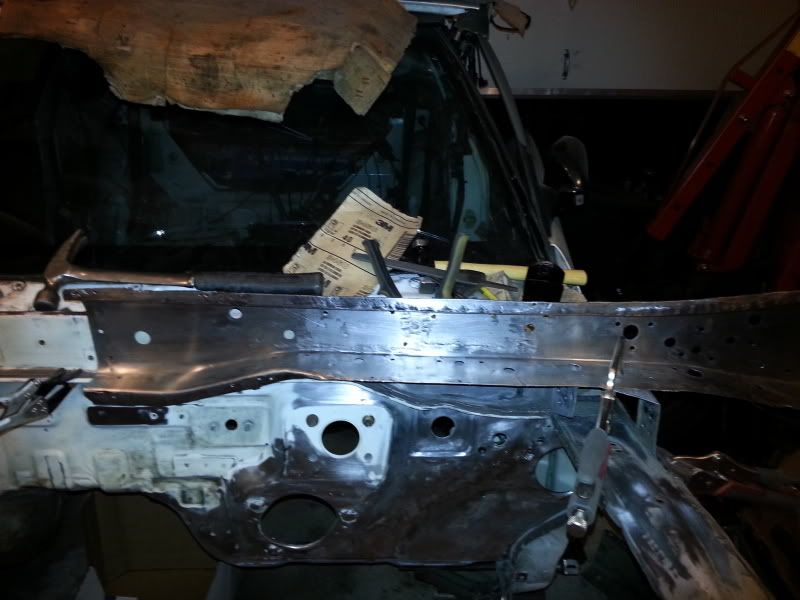
Removed the windshield.
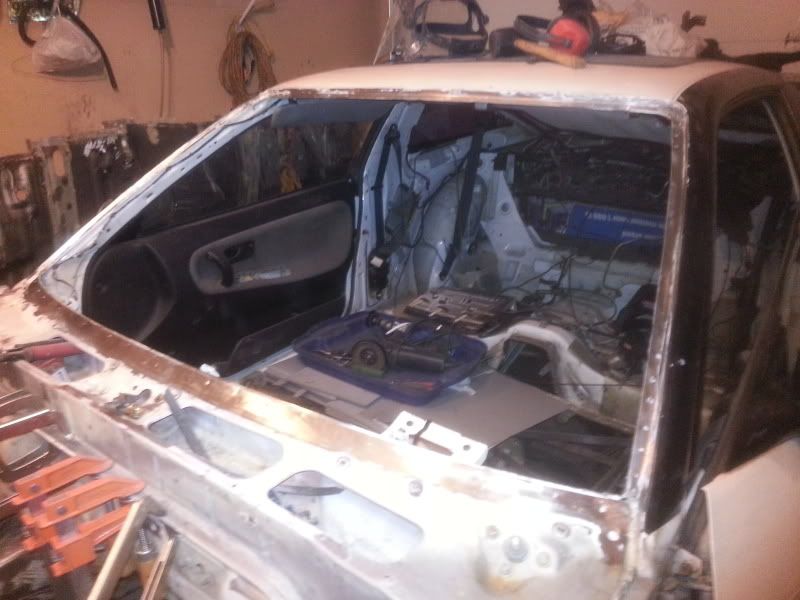

Drilled out the spot welds for the cowl.

Moarrrrrrrr rust
Removed the blower motor intake hole guard thing.
Removed the driver side upper hoodledge assembly as well.
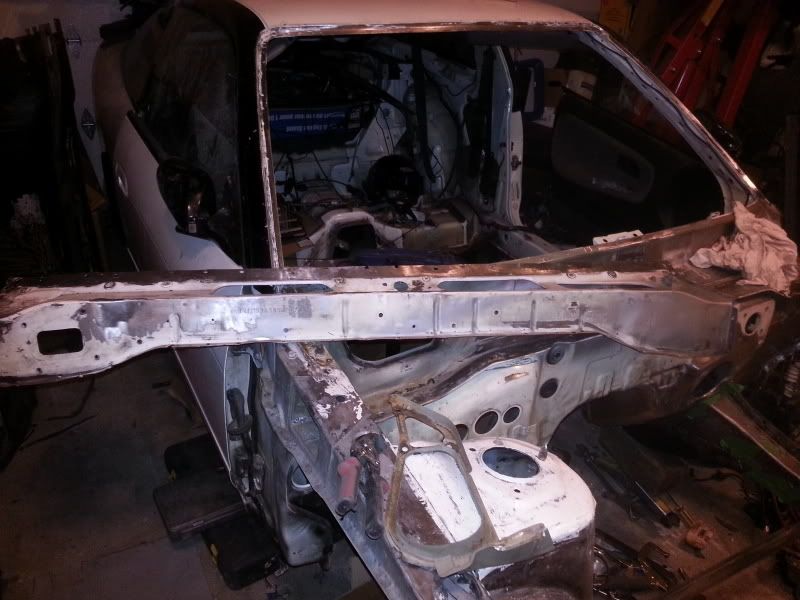
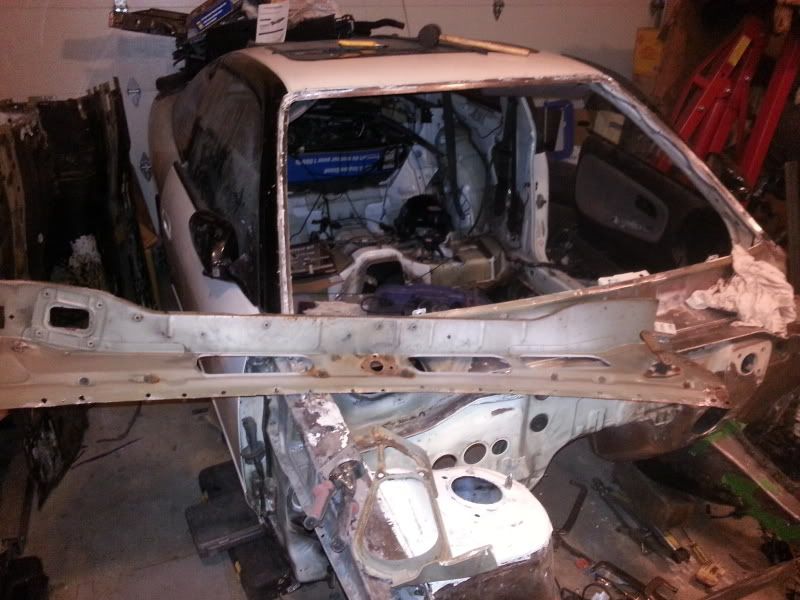
Underside of the cowl.
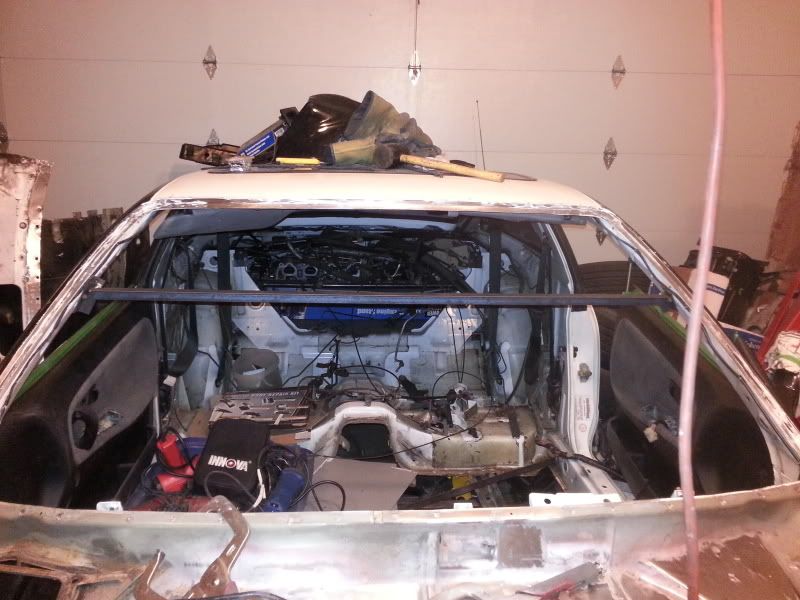
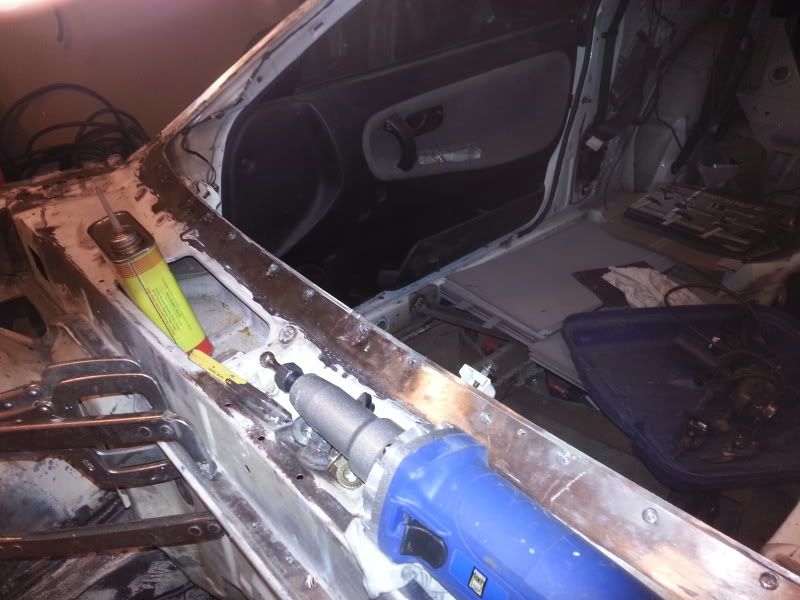
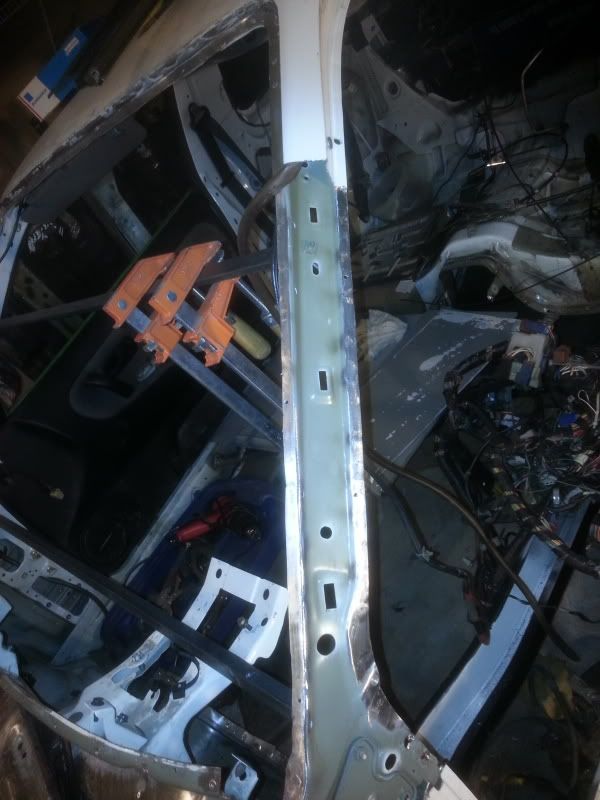
Made a brace out of angle iron and bolted it to the factory threaded holes.
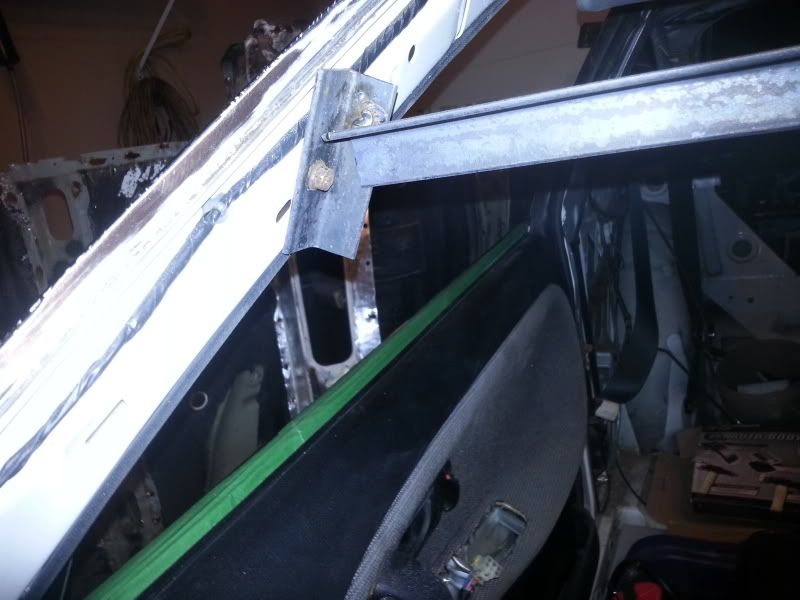
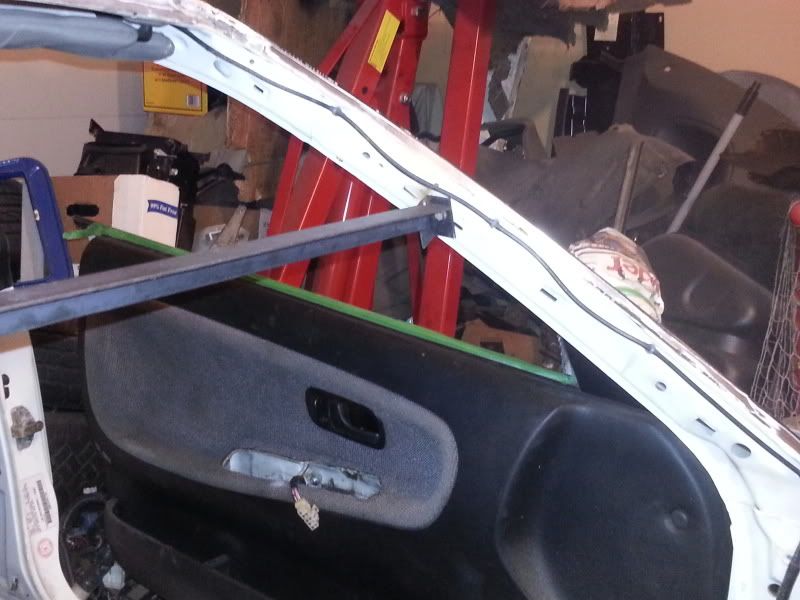
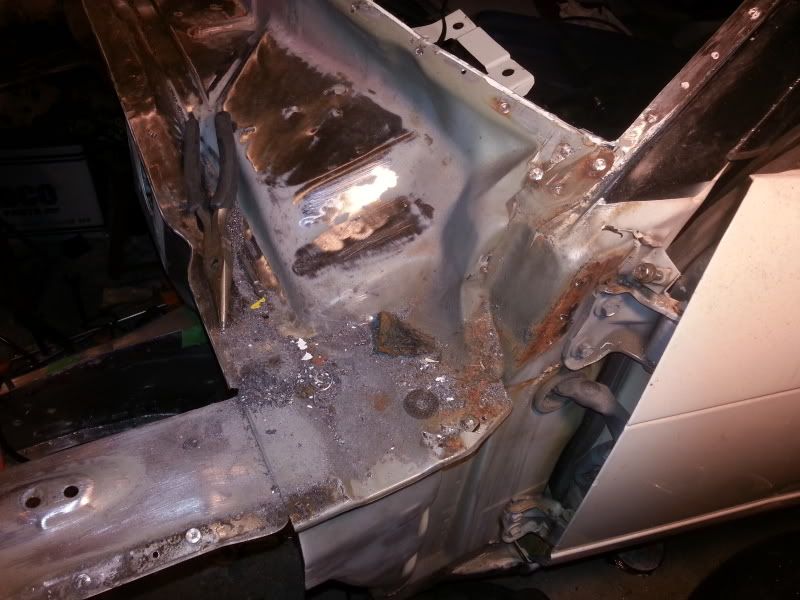
Cut out the driver side section of the lower cowl area. This is why I made the brace, didn't want the A pillar shifting.

Hit it with an abrasive wheel.

-
hammtheman
- Posts: 10
- Joined: Sun Nov 17, 2013 11:31 pm
- Car: RB25det powered S13 drag car....
Re: My S13 was built on a Friday Restoration
Amazing repair work man. Gonna keep an eye on this build
-
asoomal
- Posts: 2374
- Joined: Tue Feb 26, 2008 4:45 pm
- Car: 2001 Subaru Impreza L 5MT (Daily)
1992 Nissan 240SX SE 5MT w/HICAS (Being restored) - Location: Canada
Re: My S13 was built on a Friday Restoration
f*** you Nissan.
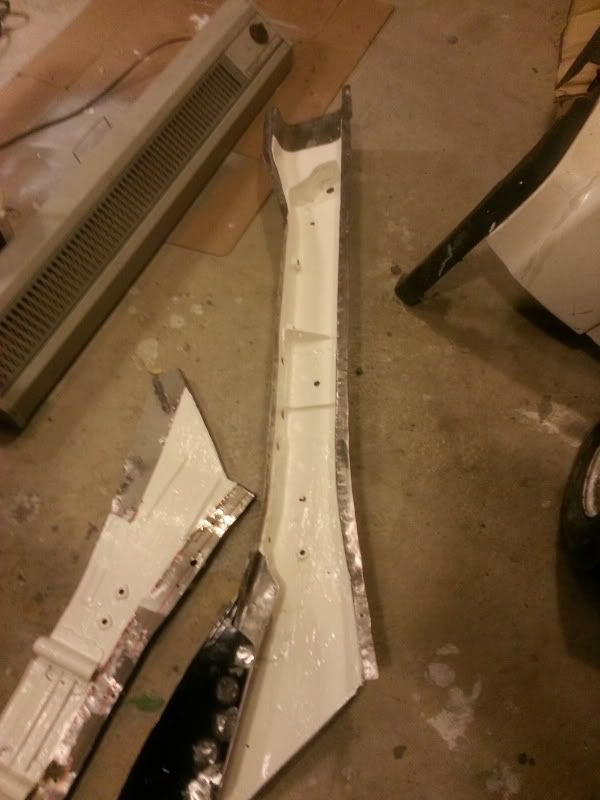
Cut out the rusted flanged section off the hoodledge lower plate thingy.
Finished
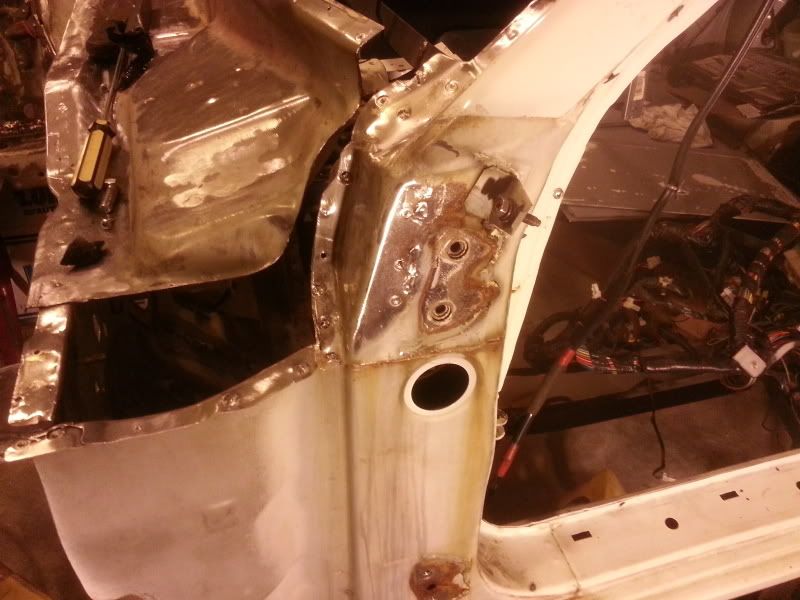
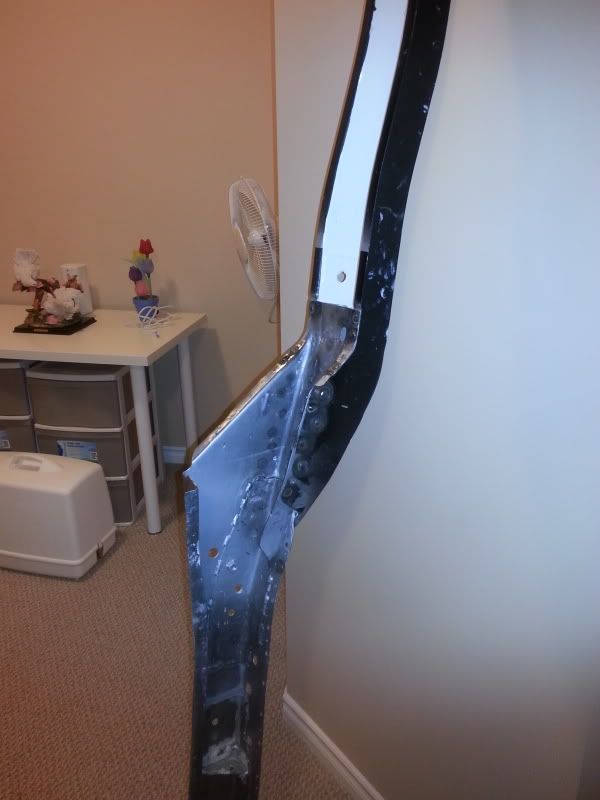
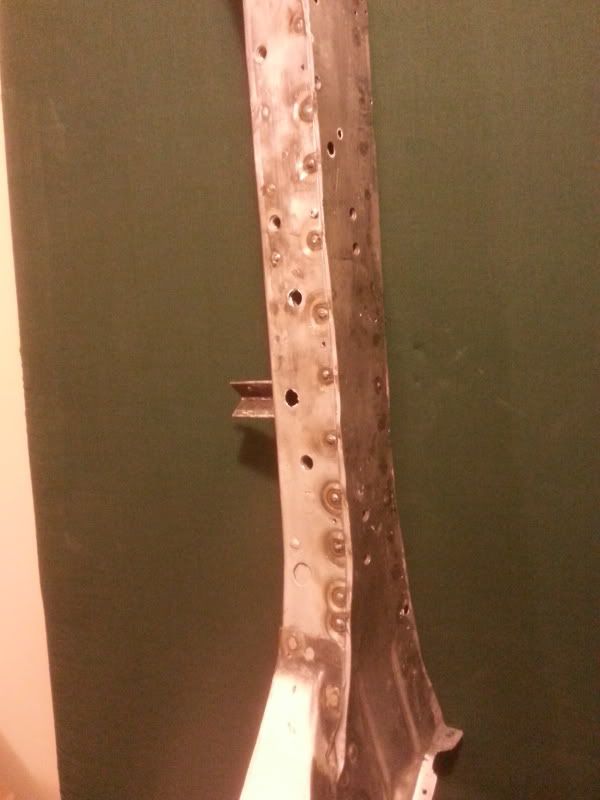
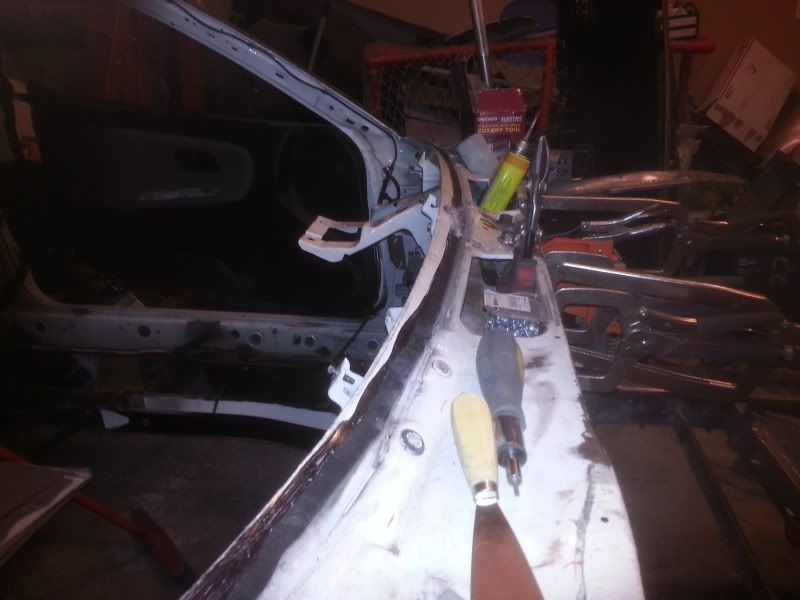
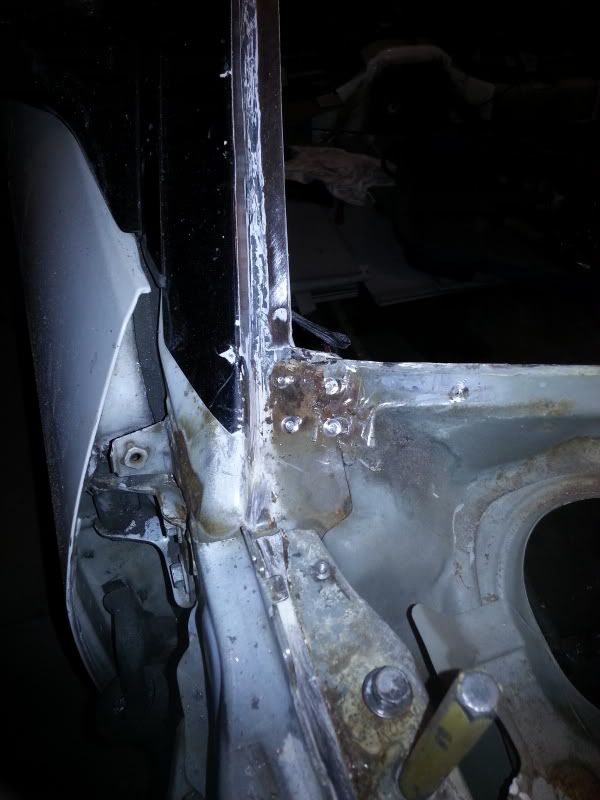
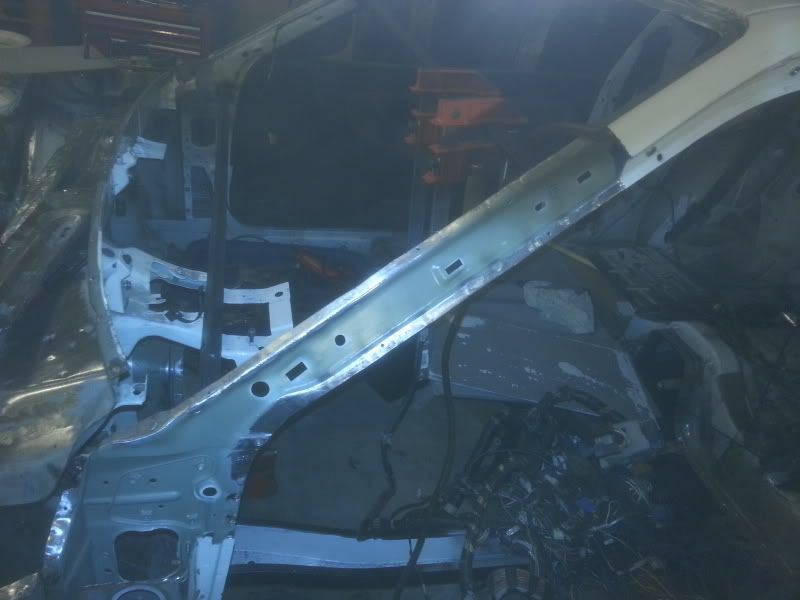
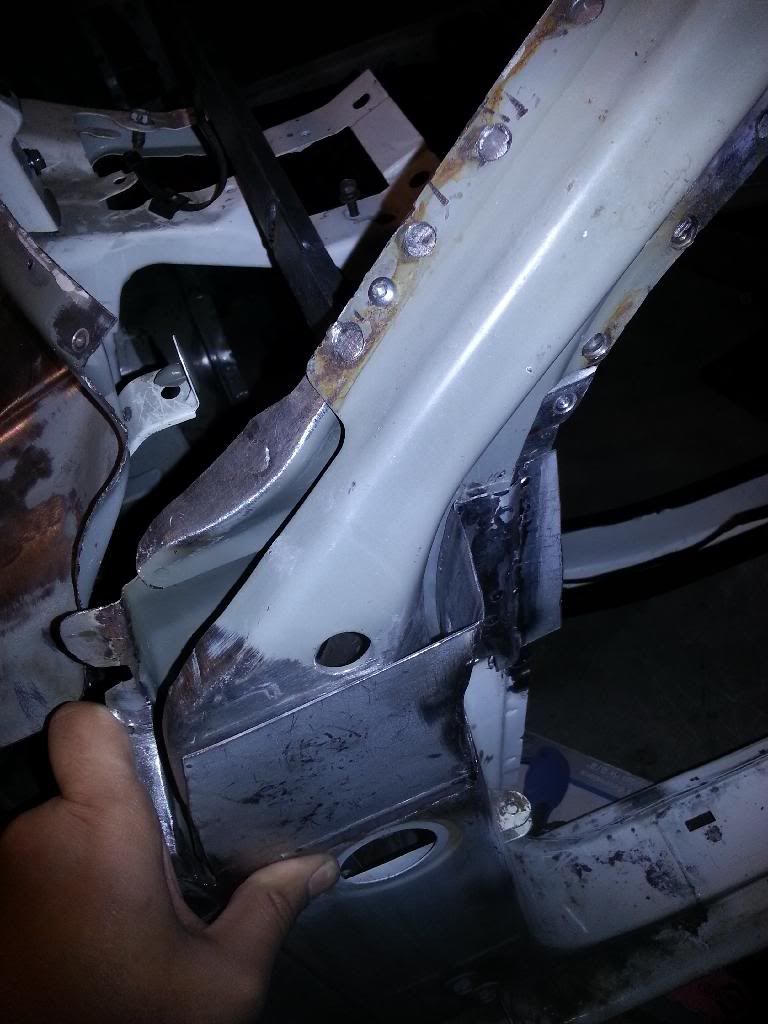
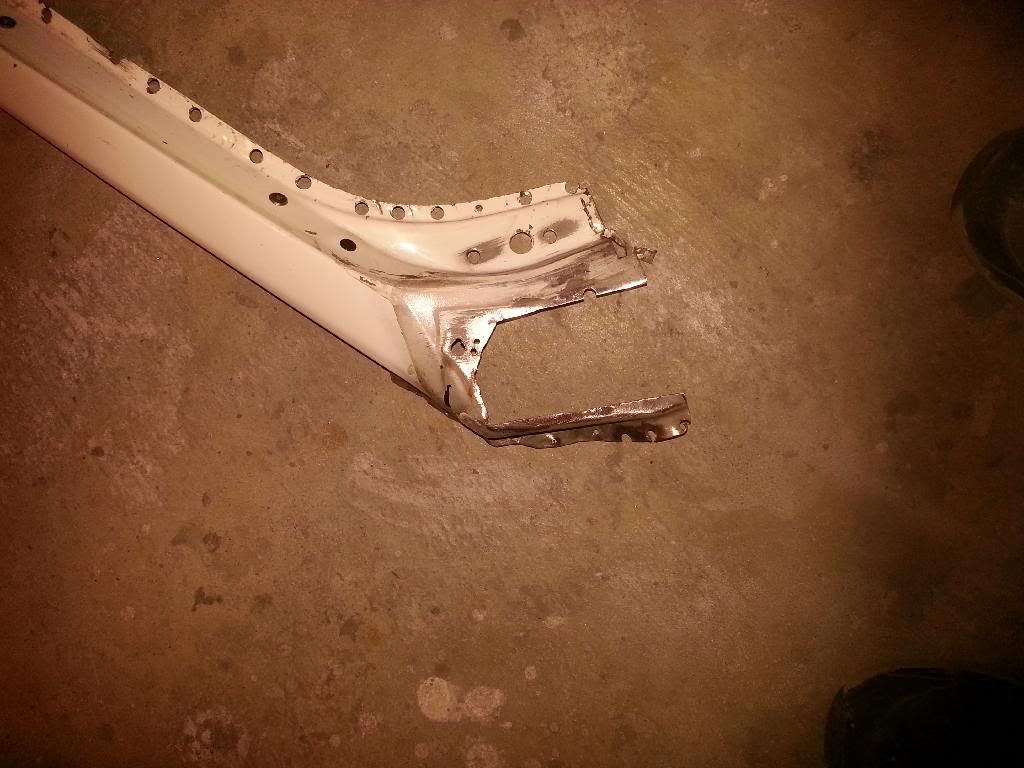
Now to focus on this guy here.
No wonder it wouldn't come off, looks like the guys at the factory did a little bit of brass brazing.
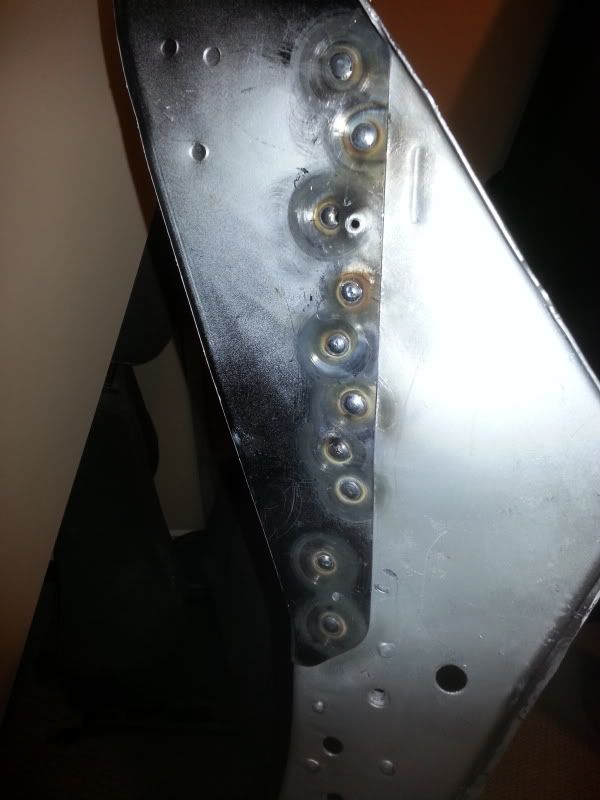
Drilled out moarrrr welds
Decided to cut it from there. In order to fully remove the pillar, the roof skin will need to come off. I would have taken the roof skin off, but I don't have much time as I will be going back to school in January in the States and need to make the shell at least rollable before I go....or I'll probably find it at the wreckers when I come back.
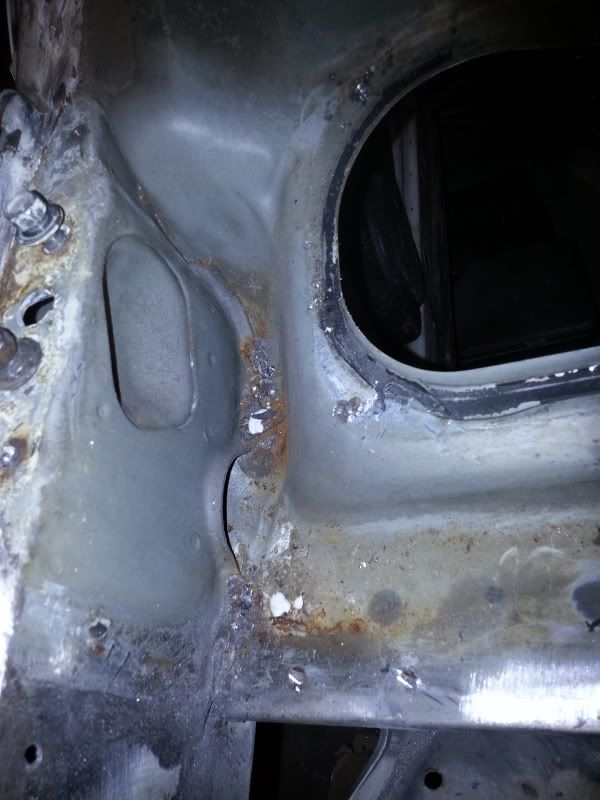
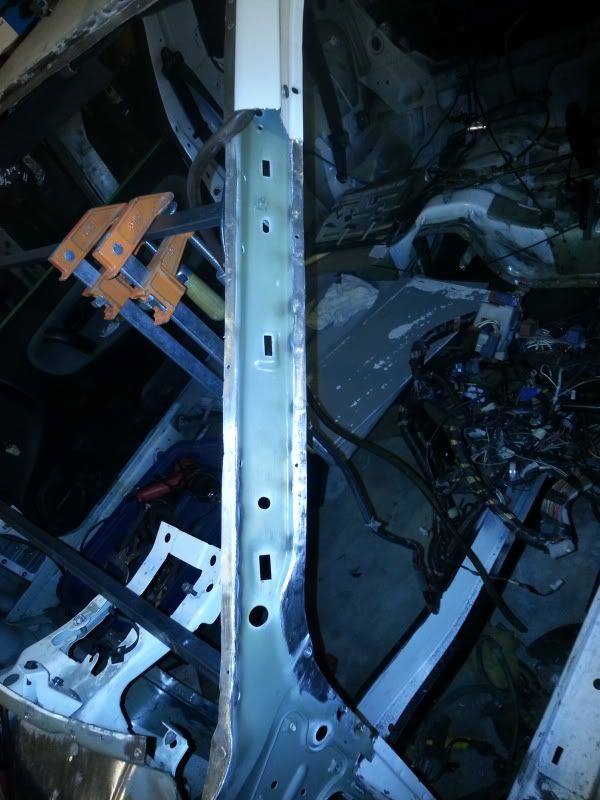
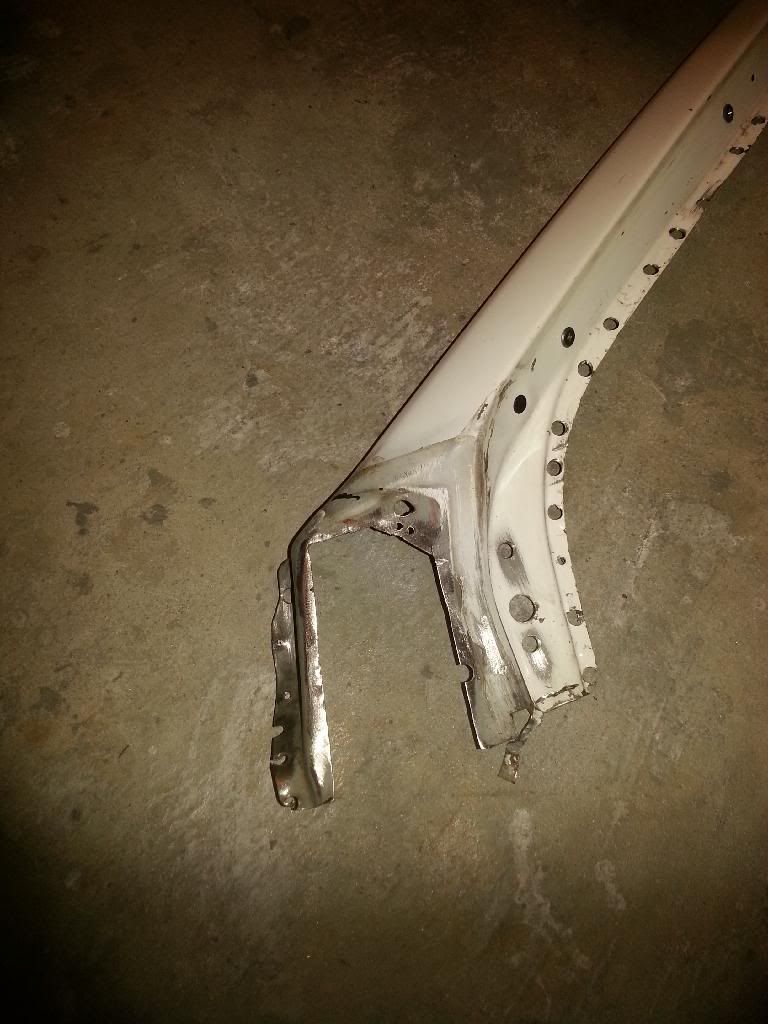
Just a little bit of surface rust, nothing major.
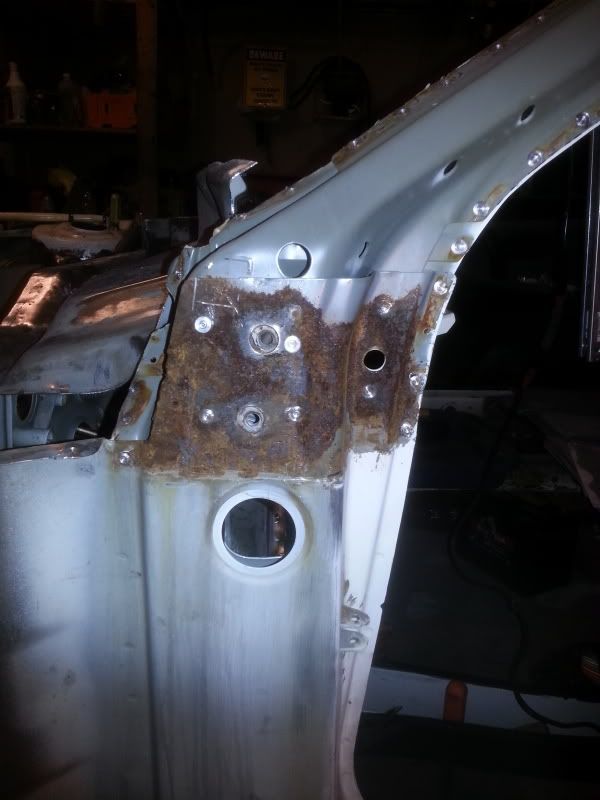
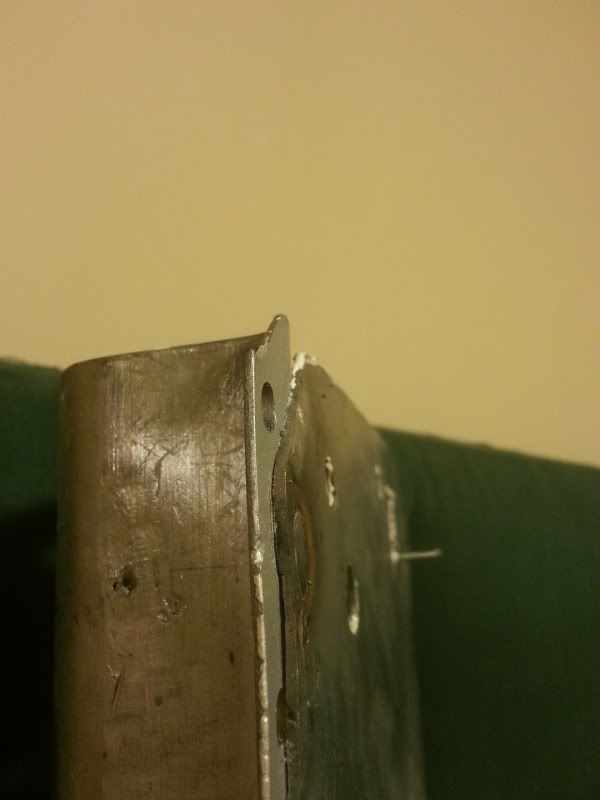
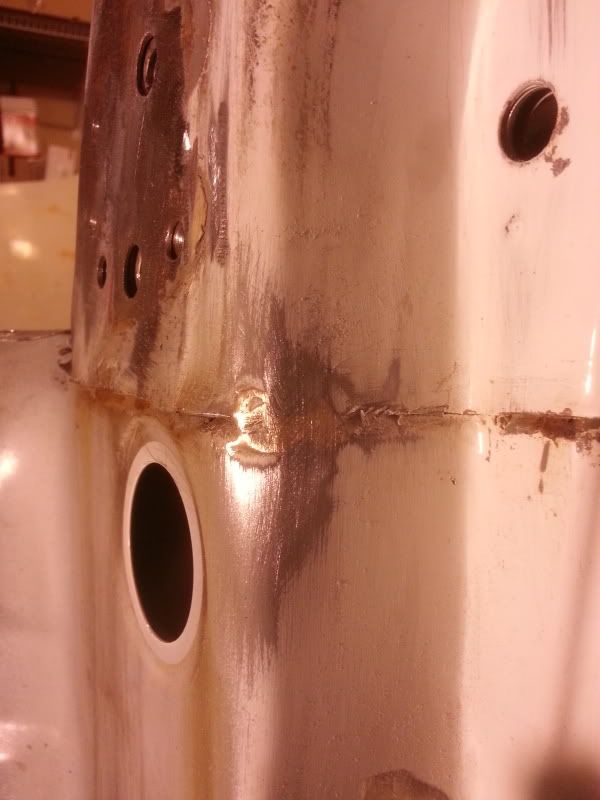
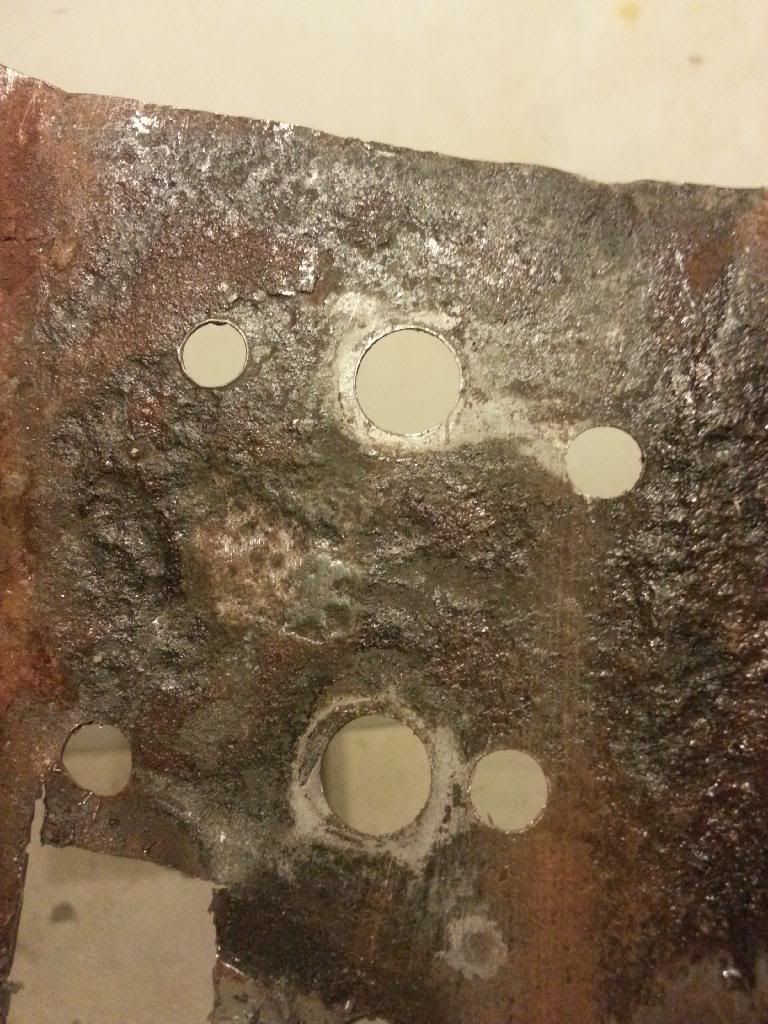
And this. Looks like the 3 layers of metal were welded together very tightly which didn't allow the E-Coat to seep in during the process. There was no coating whatsoever.
Seriously WTF
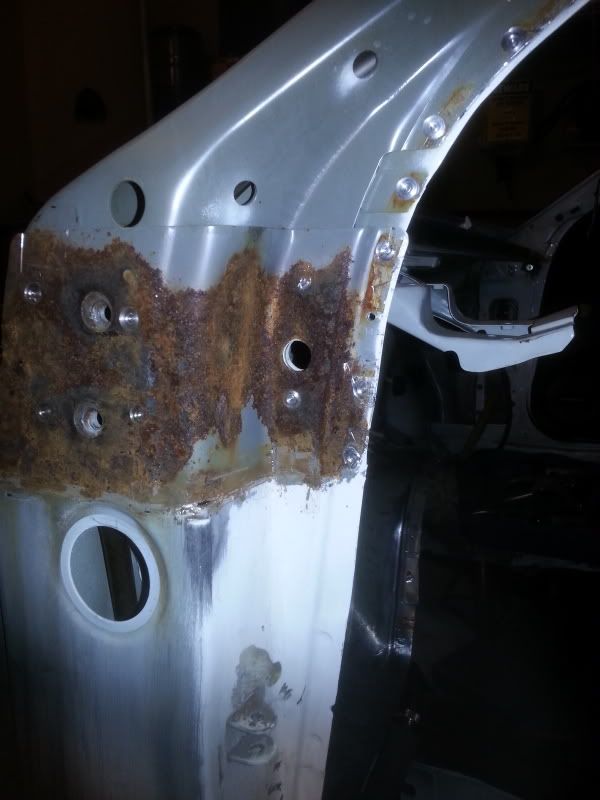
And the cover side. If you take a closer look at the holes, you can see that it's just plain metal.
Cut the second layer off.
Removed the A-pillar reinforcement as well.
Cut out the damaged and corroded sections and welded some new metal and ground it flush.
And now to the good stuff:
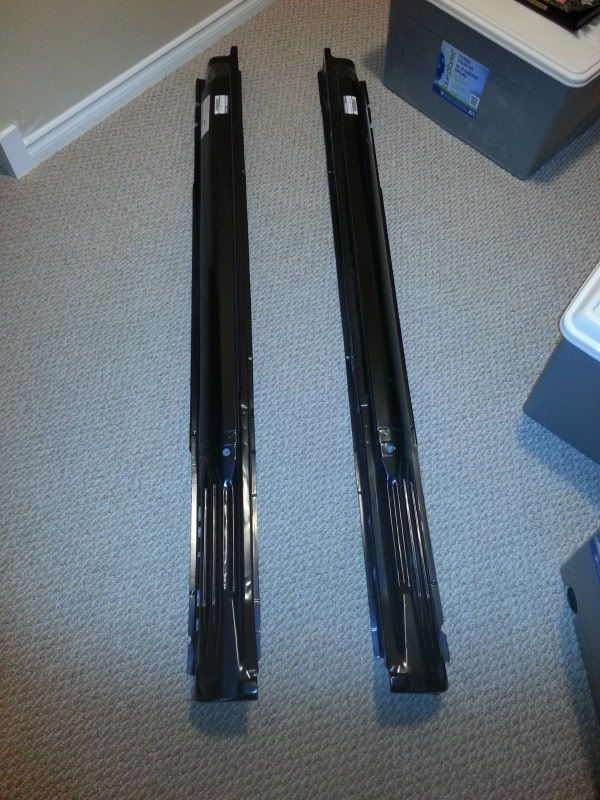
Picked up my new rocker panels from the States.
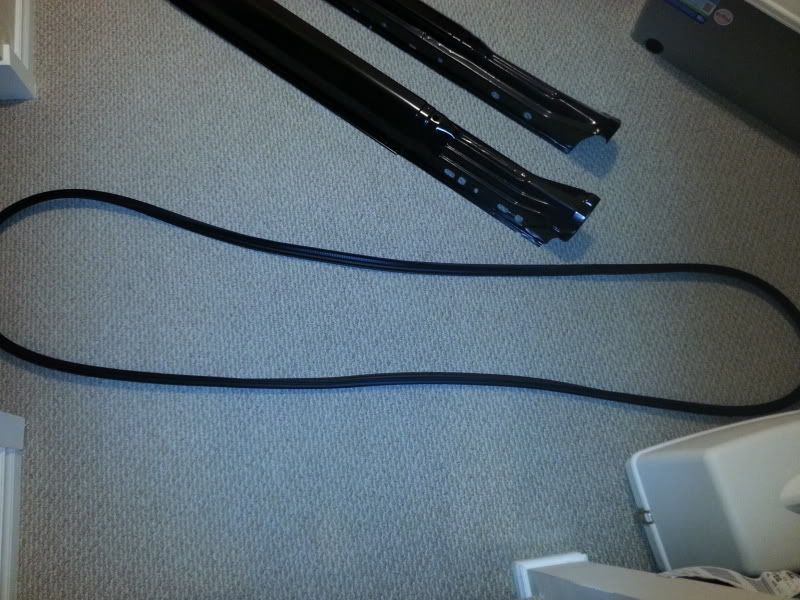
Hatch weather stripping.
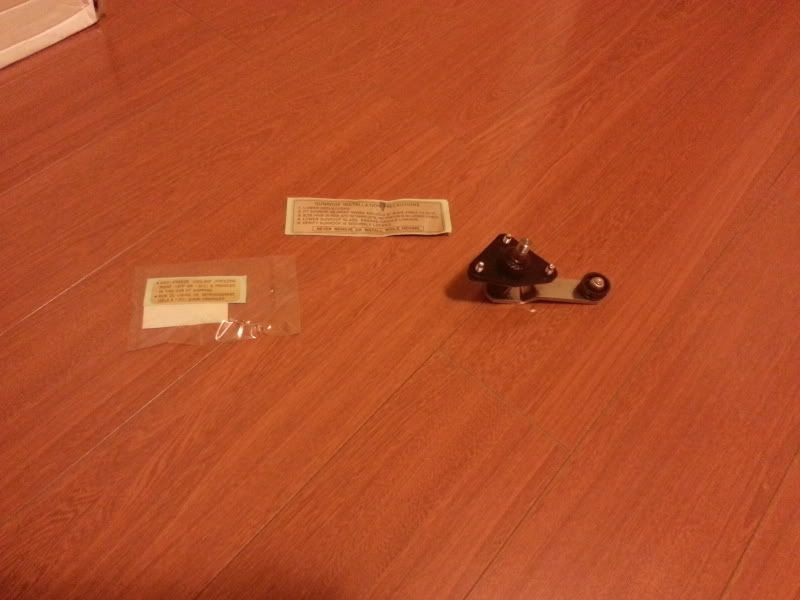
Also picked up a passenger side wiper pivot (already replaced the driver one last year) and a couple of labels.
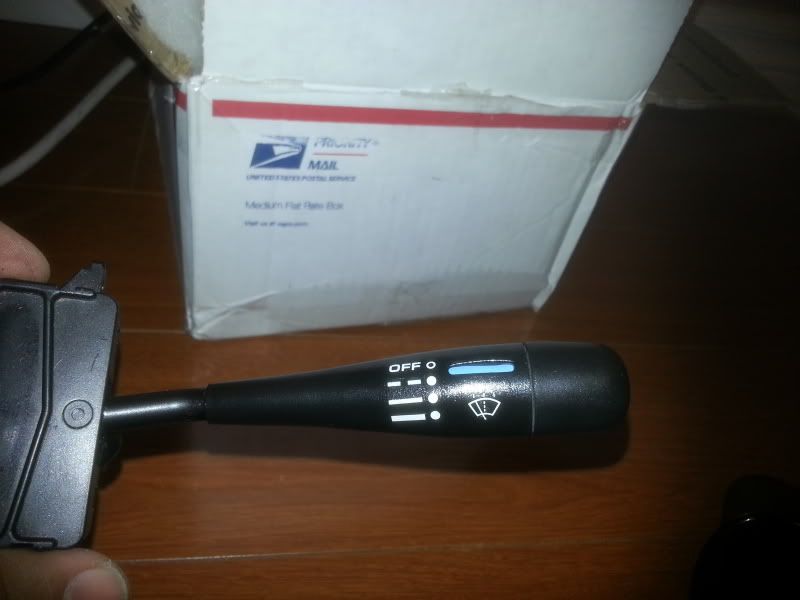
I also sent out my window and lock switch assemblies out to Misteeno Performance in Hawaii and had them restored. Picked those up today as well.
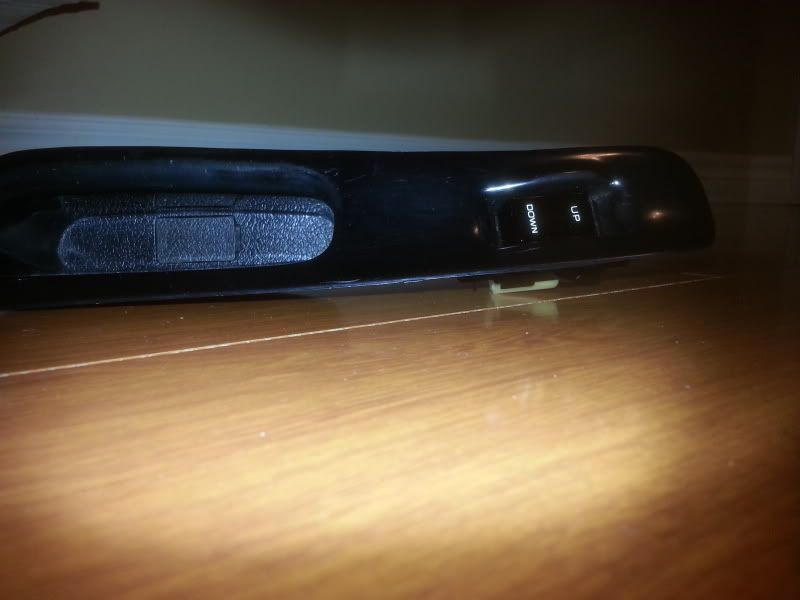
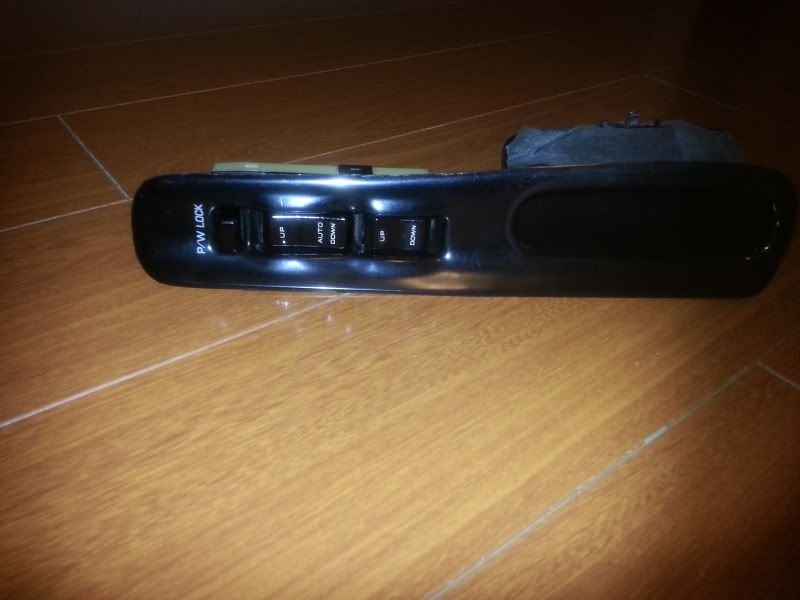
No more ugly sun faded switches. Also had the markings restored.
And that's it for today =)
Cut out the rusted flanged section off the hoodledge lower plate thingy.
Finished
Now to focus on this guy here.
No wonder it wouldn't come off, looks like the guys at the factory did a little bit of brass brazing.
Drilled out moarrrr welds
Decided to cut it from there. In order to fully remove the pillar, the roof skin will need to come off. I would have taken the roof skin off, but I don't have much time as I will be going back to school in January in the States and need to make the shell at least rollable before I go....or I'll probably find it at the wreckers when I come back.
Just a little bit of surface rust, nothing major.
And this. Looks like the 3 layers of metal were welded together very tightly which didn't allow the E-Coat to seep in during the process. There was no coating whatsoever.
Seriously WTF
And the cover side. If you take a closer look at the holes, you can see that it's just plain metal.
Cut the second layer off.
Removed the A-pillar reinforcement as well.
Cut out the damaged and corroded sections and welded some new metal and ground it flush.
And now to the good stuff:
Picked up my new rocker panels from the States.
Hatch weather stripping.
Also picked up a passenger side wiper pivot (already replaced the driver one last year) and a couple of labels.
I also sent out my window and lock switch assemblies out to Misteeno Performance in Hawaii and had them restored. Picked those up today as well.
No more ugly sun faded switches. Also had the markings restored.
And that's it for today =)
-
Hijacker
- Posts: 15759
- Joined: Wed Aug 13, 2003 4:57 am
- Car: '92 240sx Convertible
'94 F-150 - Location: Fredericksburg, VA
Re: My S13 was built on a Friday Restoration
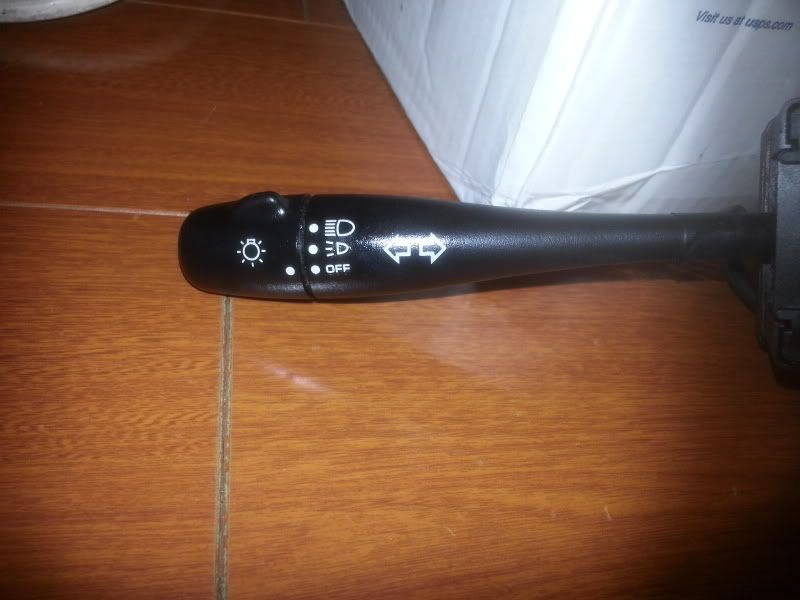
How happy are you with the job Misteeno did? I was planning to send my stalks to them, but the stalks in a vert sun bleach the worst. I've been meaning to send them an email with some pictures to see if they would be able to fix the sun bleaching.
-
asoomal
- Posts: 2374
- Joined: Tue Feb 26, 2008 4:45 pm
- Car: 2001 Subaru Impreza L 5MT (Daily)
1992 Nissan 240SX SE 5MT w/HICAS (Being restored) - Location: Canada
Re: My S13 was built on a Friday Restoration
Pretty good job. The pictures make them look glossier than they are, it has the factory satin finish.

Re: My S13 was built on a Friday Restoration
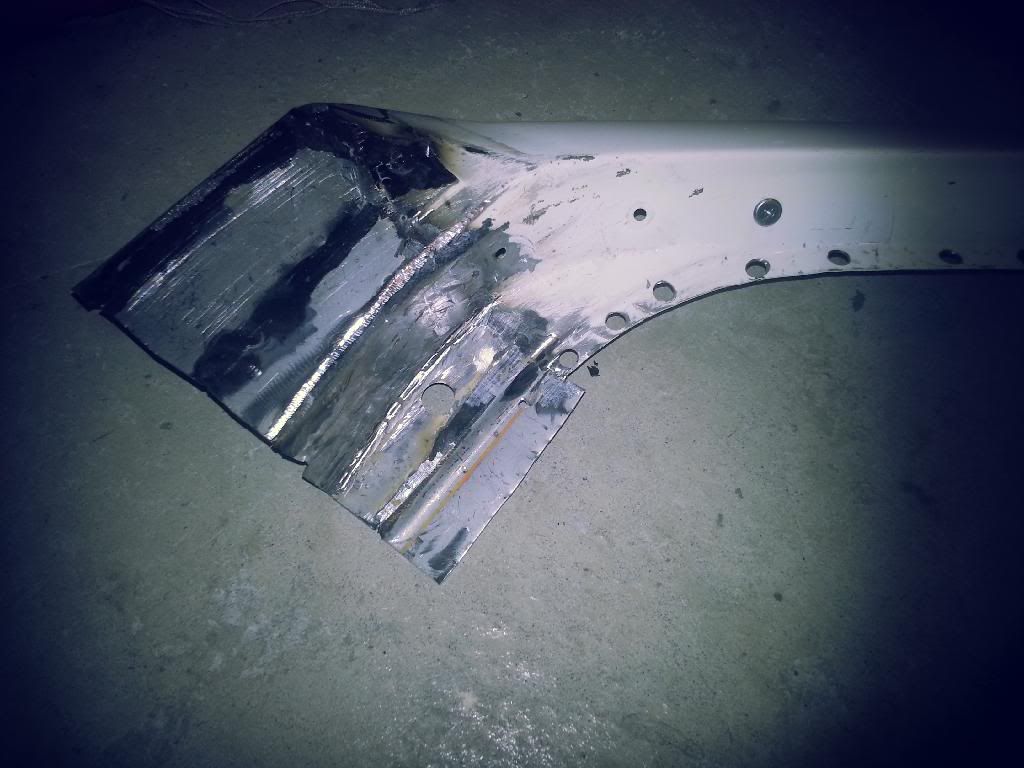
well this certainly looks familiar lol. remaking that piece with its different bends and angles was a pain in the f*** a**.asoomal wrote:
are you going to redo it like factory and have double layers or do 1 thicker piece to eliminate that problem in the future?
-
asoomal
- Posts: 2374
- Joined: Tue Feb 26, 2008 4:45 pm
- Car: 2001 Subaru Impreza L 5MT (Daily)
1992 Nissan 240SX SE 5MT w/HICAS (Being restored) - Location: Canada
Re: My S13 was built on a Friday Restoration
Yea it definitely will be a b**** to make. As long as I seal it with seam sealer and the epoxy primer, I don't think I'll have a problem with multiple layers.
Then again, I'll have to take a closer look and see what I can do about it.
Then again, I'll have to take a closer look and see what I can do about it.

Re: My S13 was built on a Friday Restoration
Mother of god thats one heck of a resto good on ya and keep up the awesome work!
-
pepesilvia

- Posts: 584
- Joined: Tue Feb 21, 2012 8:15 pm
- Car: 96 S14
- Location: New Jersey :(
Re: My S13 was built on a Friday Restoration
Mmmmmm.... resto builds are my favorite. Keep it up, dude.
-
Hijacker
- Posts: 15759
- Joined: Wed Aug 13, 2003 4:57 am
- Car: '92 240sx Convertible
'94 F-150 - Location: Fredericksburg, VA
Re: My S13 was built on a Friday Restoration
Asoomal, I found this in our updated service manual library. I think it'll come in handy for you:
http://www.nicoclub.com/FSM/240sx/s13-body-repair.pdf
http://www.nicoclub.com/FSM/240sx/s13-body-repair.pdf
-
asoomal
- Posts: 2374
- Joined: Tue Feb 26, 2008 4:45 pm
- Car: 2001 Subaru Impreza L 5MT (Daily)
1992 Nissan 240SX SE 5MT w/HICAS (Being restored) - Location: Canada
Re: My S13 was built on a Friday Restoration
I already downloaded it a year ago 
However, thank you for looking out
I will post updates soon, been busy with moving
However, thank you for looking out
I will post updates soon, been busy with moving
-
2_Liter_Turbo
- Posts: 2980
- Joined: Sat Jan 24, 2004 10:41 am
- Car: _________________
'96 S14 Coupe: SR20VET
'90 R32 TH1 GTR: RB26DETT
'92 S13 Fastback: SR20DET
'11 V36 Sedan: VQ25HR
'06 GMT800 2500HD: LBZ Duramax - Location: DFW, Texas
- Contact:
Re: My S13 was built on a Friday Restoration
Wow! What a project, it's looking great so far!
-
PapaSmurf2k3
- Site Admin
- Posts: 24000
- Joined: Thu Nov 21, 2002 3:20 pm
- Car: 2017 Corvette, 2018 Focus ST, 1993 240sx truck KA Turbo.
- Location: Merrimack, NH
Re: My S13 was built on a Friday Restoration
You should really apply to go to the North American International Auto Show in this thread:
win-a-trip-to-the-detroit-auto-show-t583625.html
win-a-trip-to-the-detroit-auto-show-t583625.html
-
asoomal
- Posts: 2374
- Joined: Tue Feb 26, 2008 4:45 pm
- Car: 2001 Subaru Impreza L 5MT (Daily)
1992 Nissan 240SX SE 5MT w/HICAS (Being restored) - Location: Canada
Re: My S13 was built on a Friday Restoration
I would if I could, but I'll be attending school starting on that week.
-
asoomal
- Posts: 2374
- Joined: Tue Feb 26, 2008 4:45 pm
- Car: 2001 Subaru Impreza L 5MT (Daily)
1992 Nissan 240SX SE 5MT w/HICAS (Being restored) - Location: Canada
Re: My S13 was built on a Friday Restoration
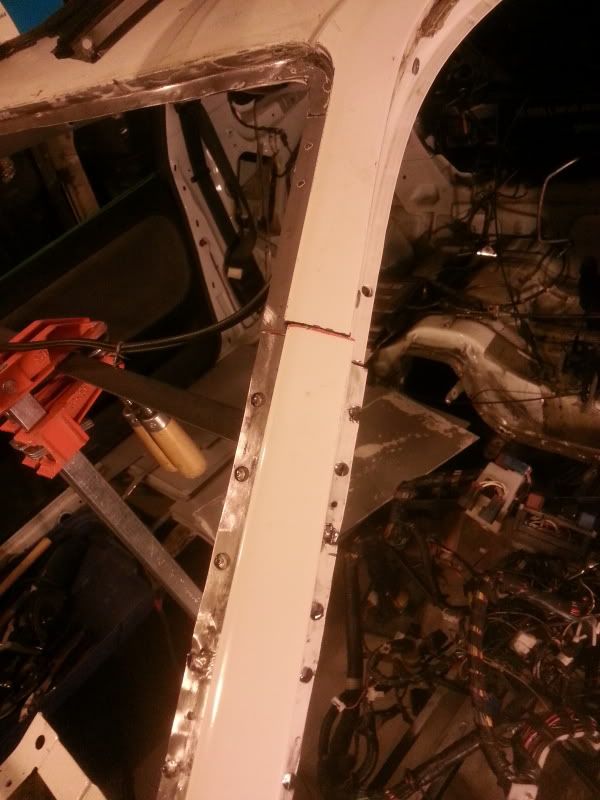
Finally had the chance to upload some more pics.
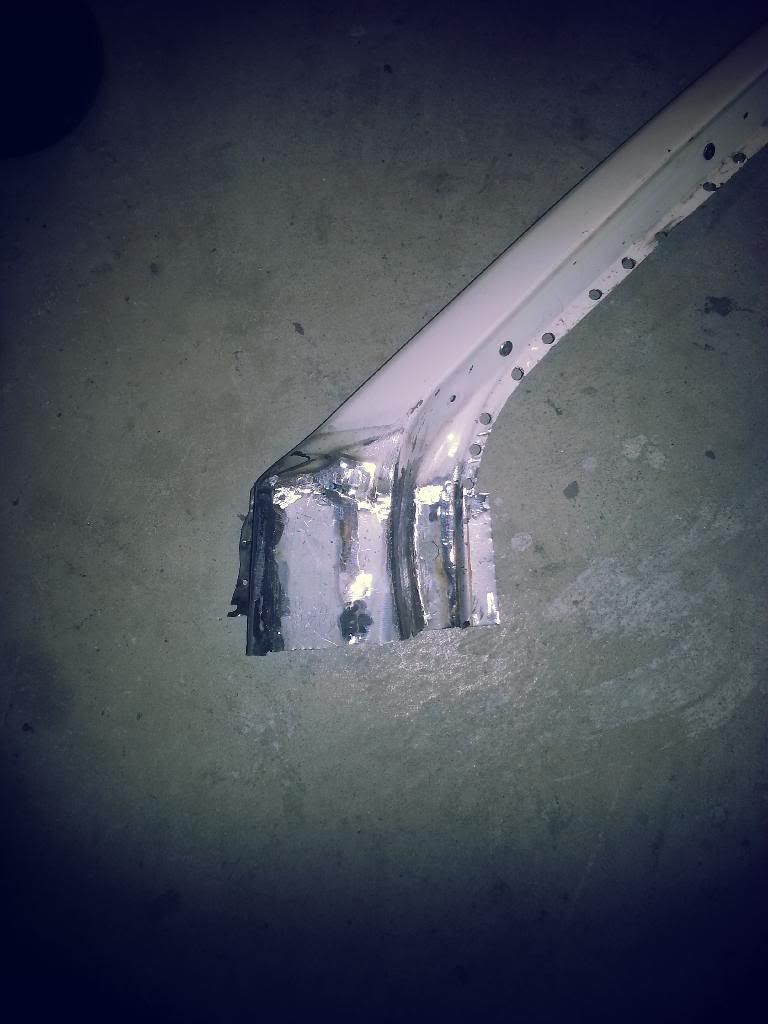
Attempt one.

Looked good so far...
Welded it to the old piece.
So far soo good
f***.
Had to redo the curve -.-

Muchhhhh better.
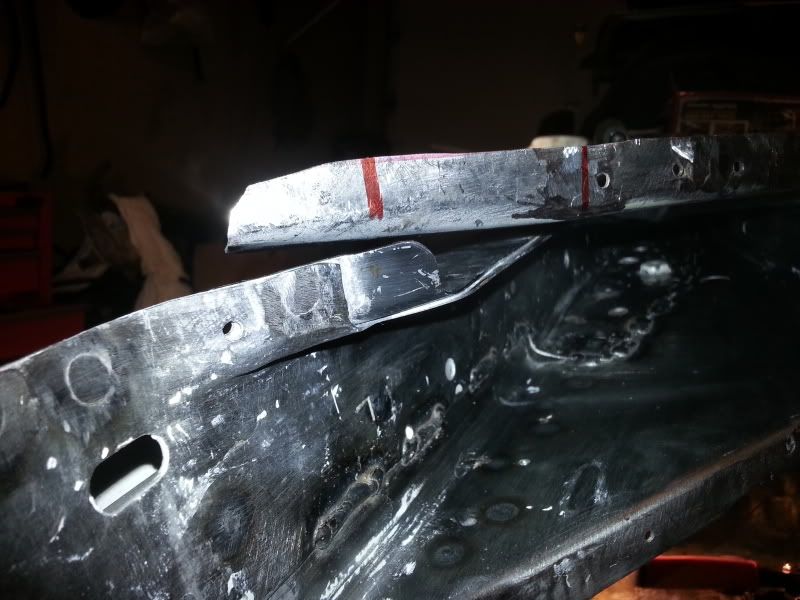
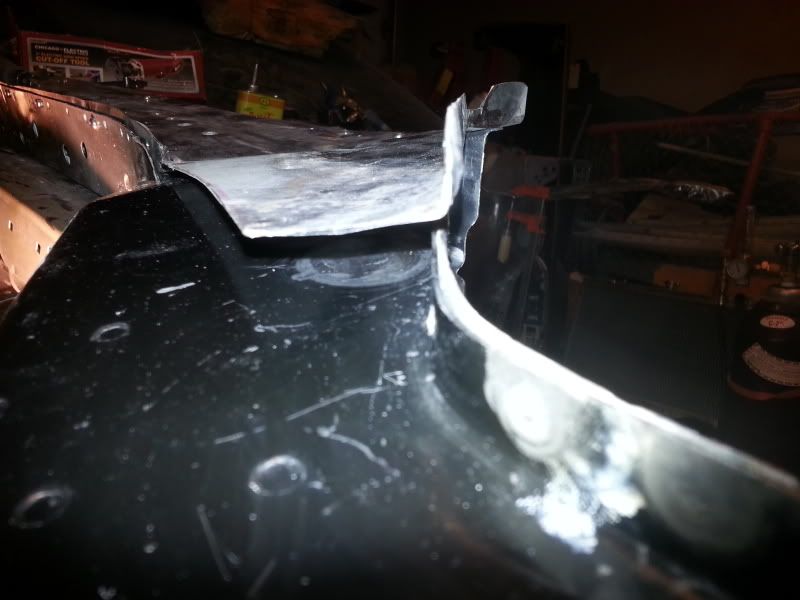
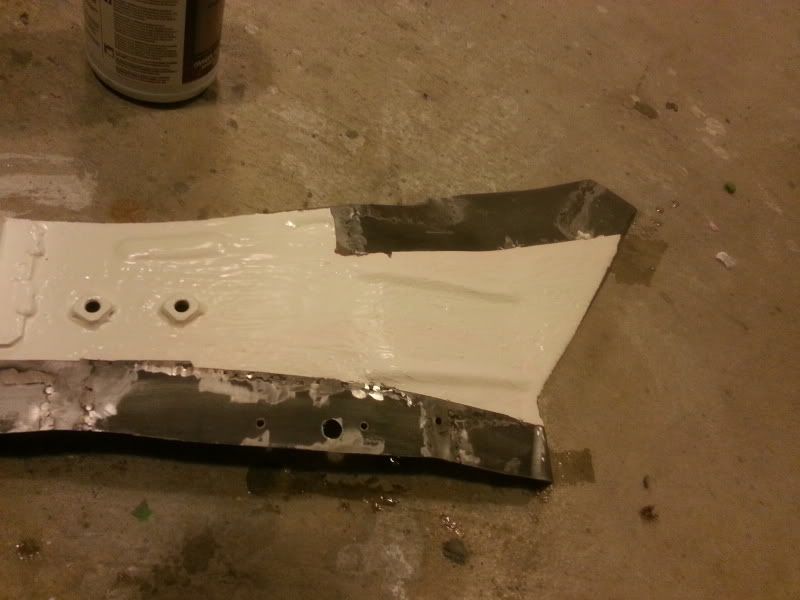
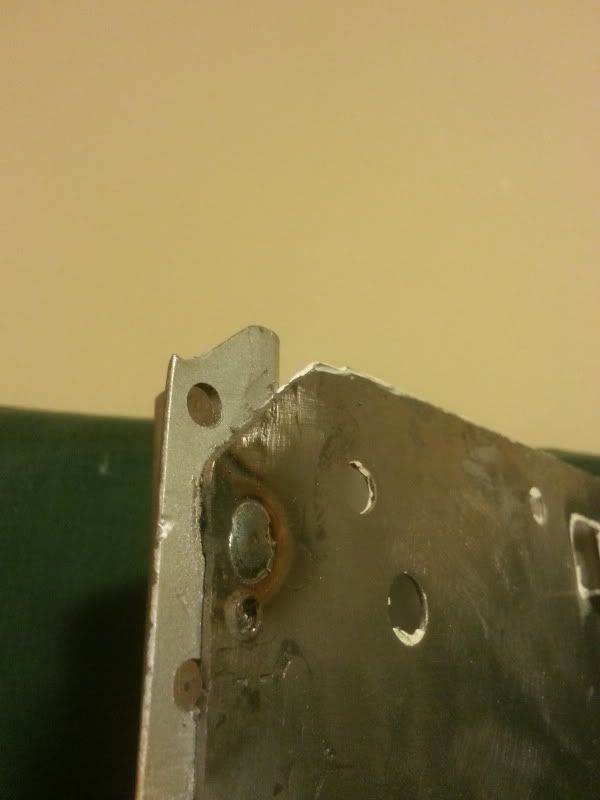
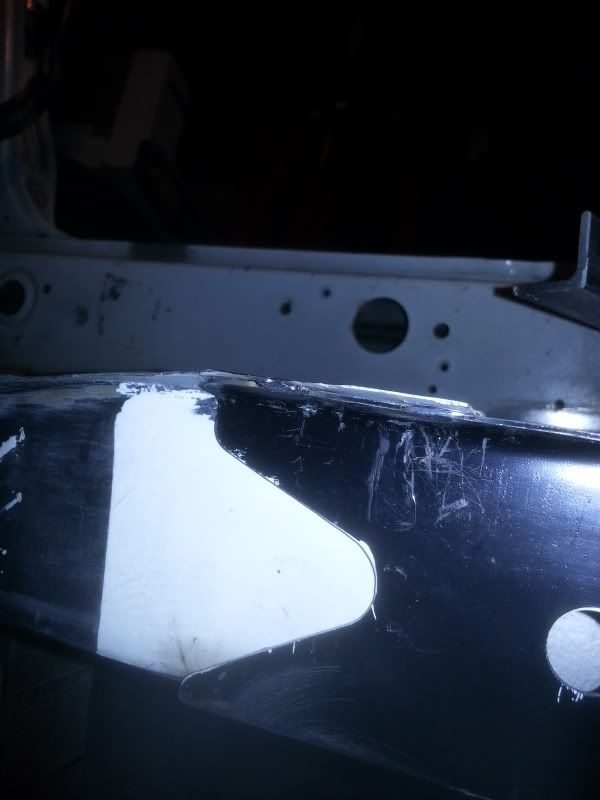
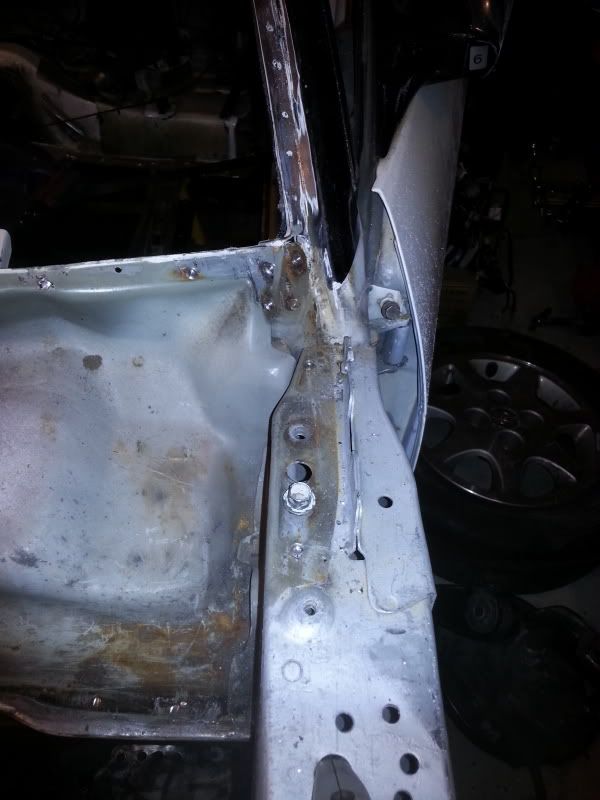
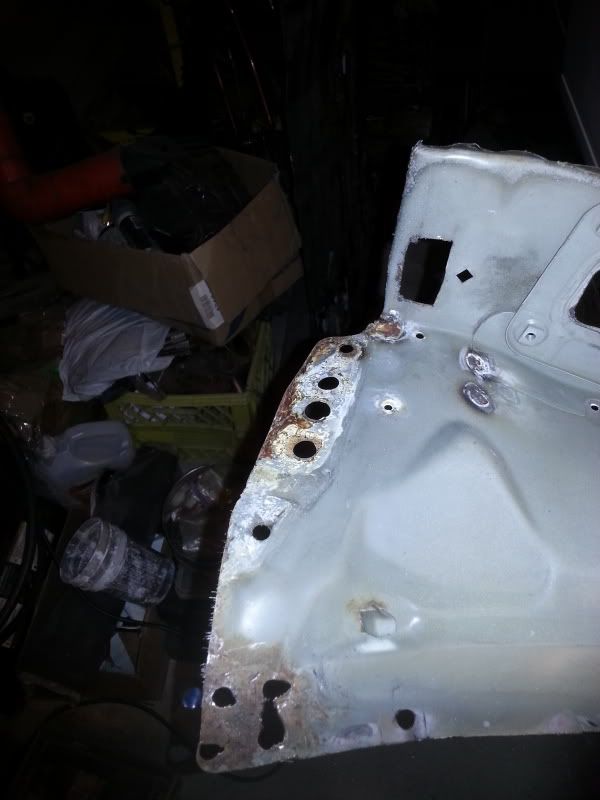
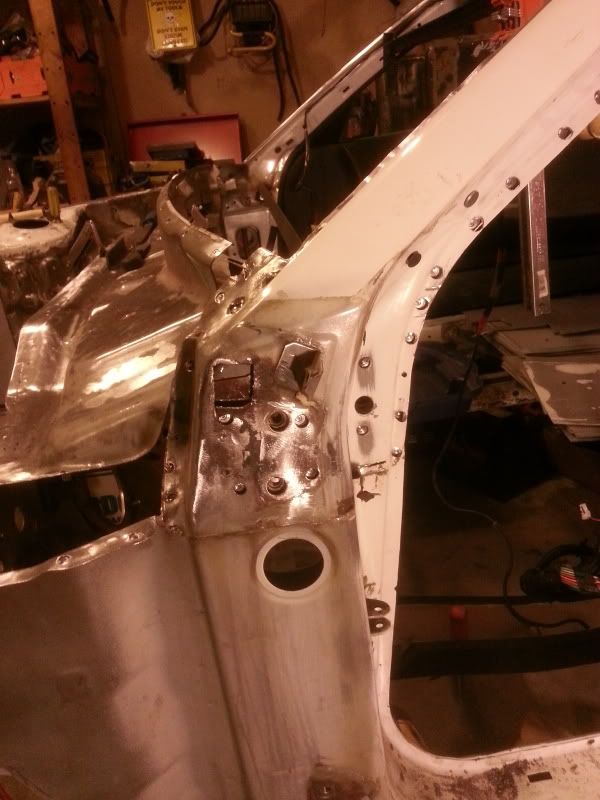
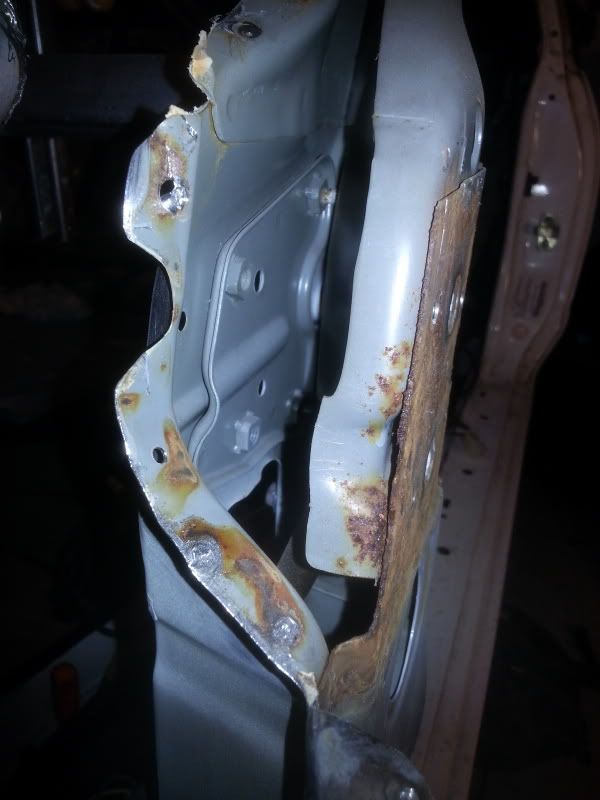
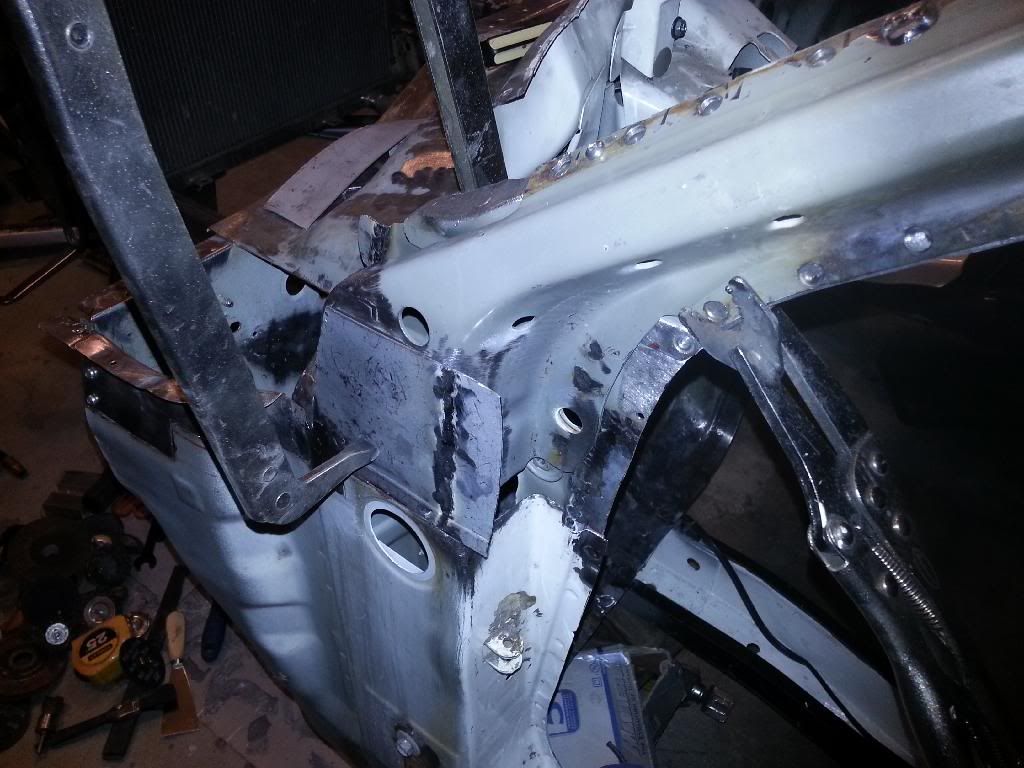
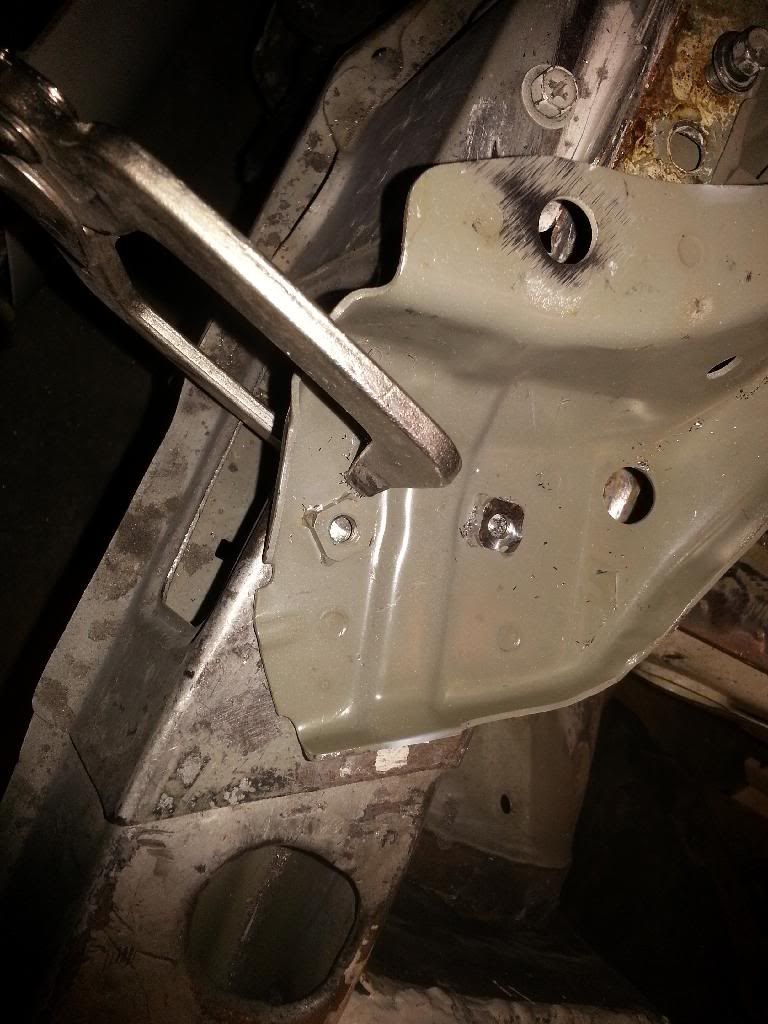
This here is the backside of the topmost layer of the A-pillar. You can see around the holes where there was a gap for the moisture to escape. Also note that there is no paint on it.

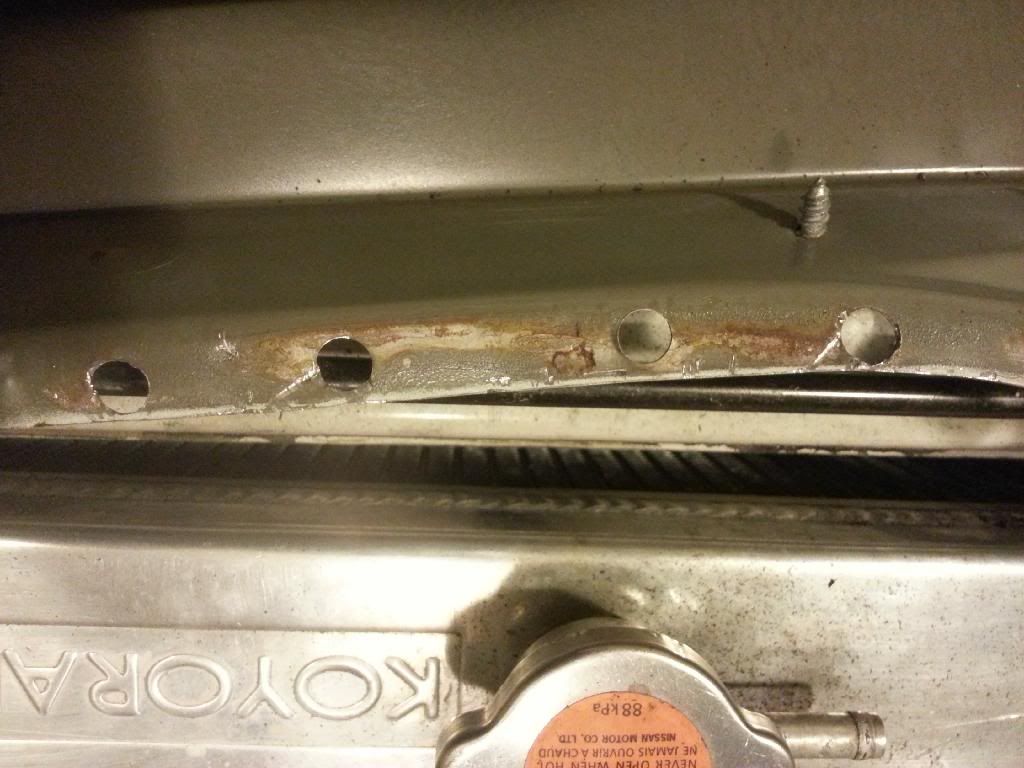
The flanged end that goes up along the A-Pillar structure. Again, no paint on some areas.
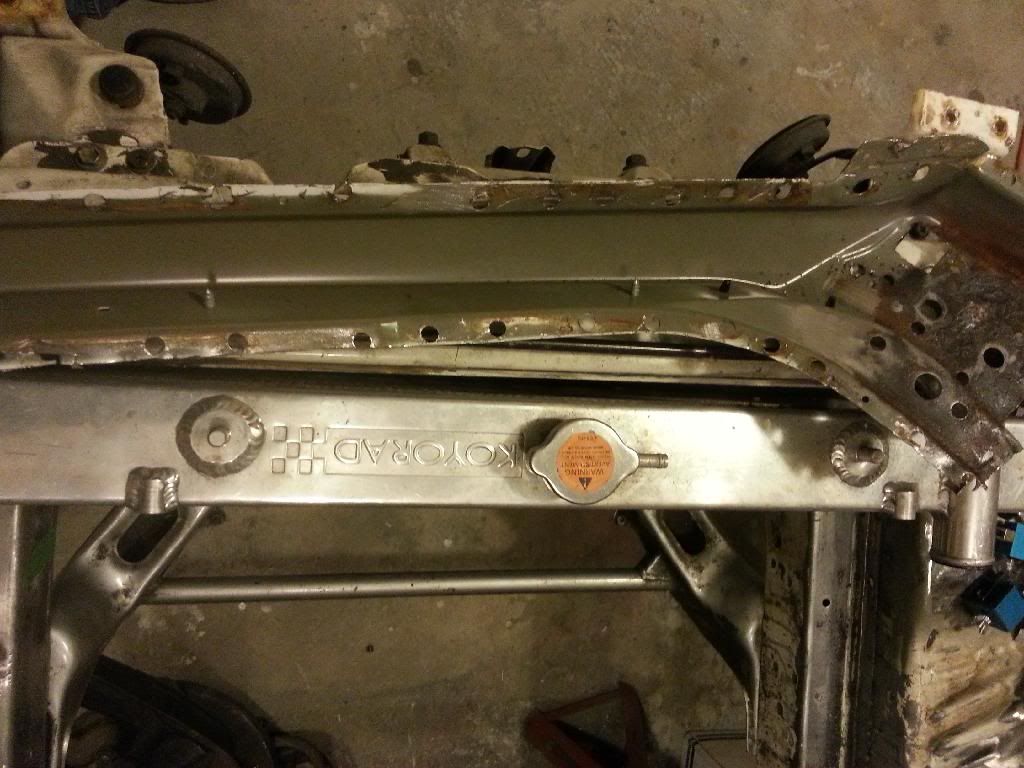
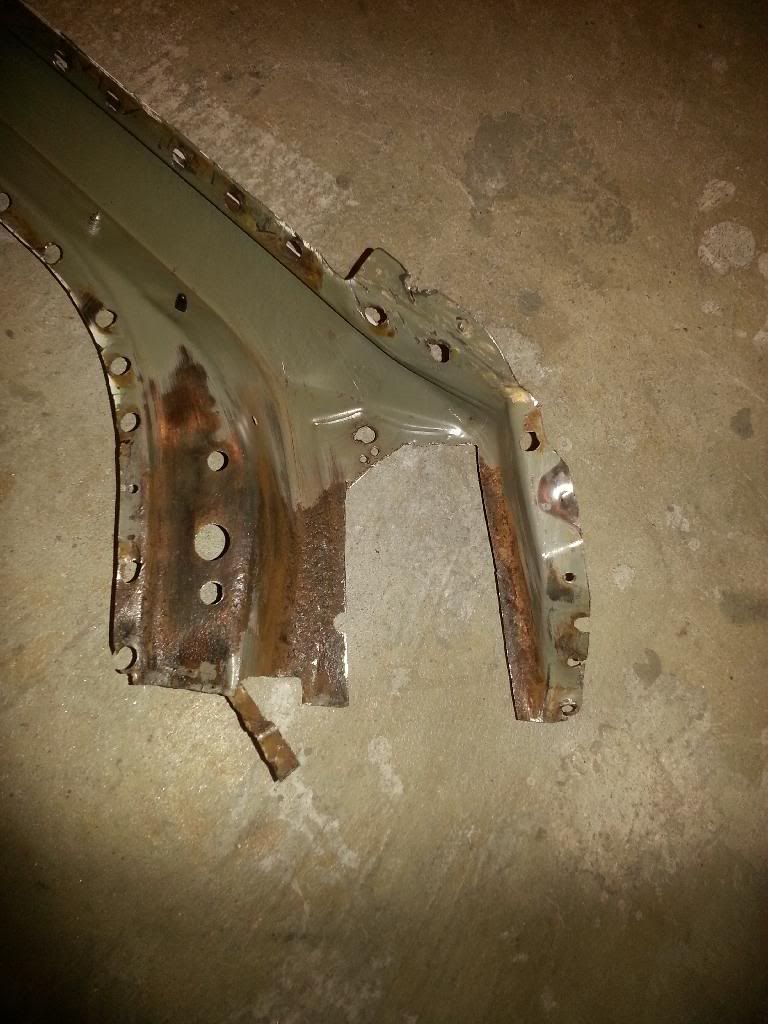
Trimmed the edges and made sure everything was flush. Don't have any pics of the finished pillar yet.
Also ground down the nuts on the A-pillar brace, there was some rust between the welded nuts and the brace.
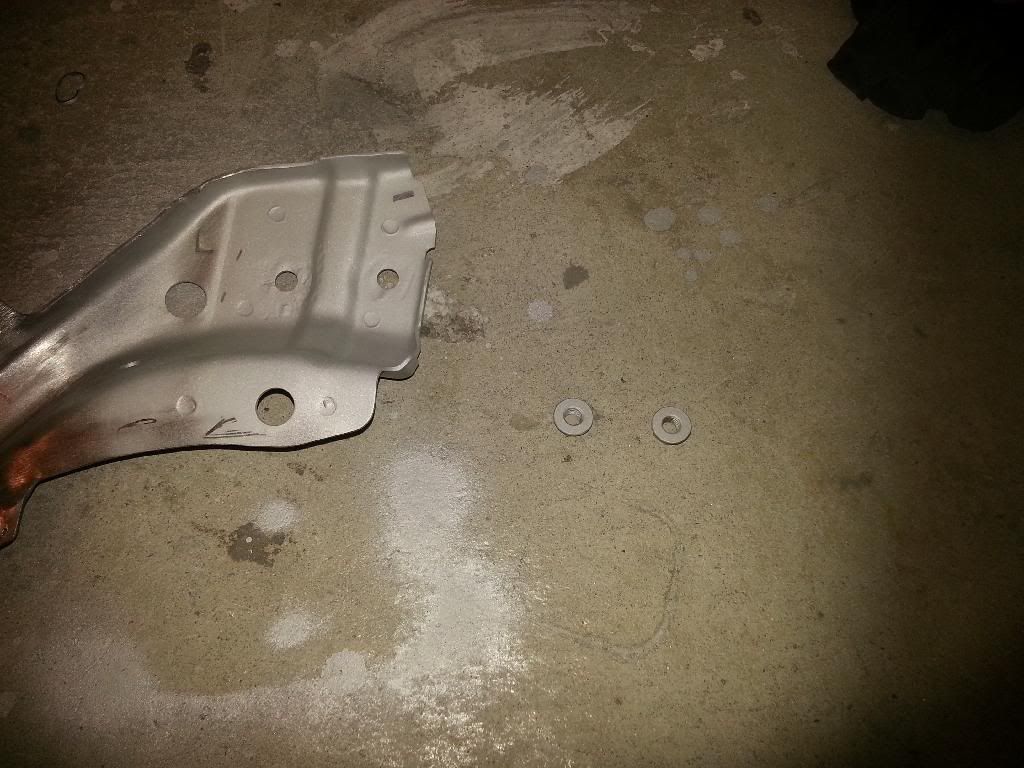
Cleaned up the metal and the new nuts hit it with self etch and welded it on. Don't have any pics of the finished product yet. Didn't have much time, was getting ready to go to school [:P]
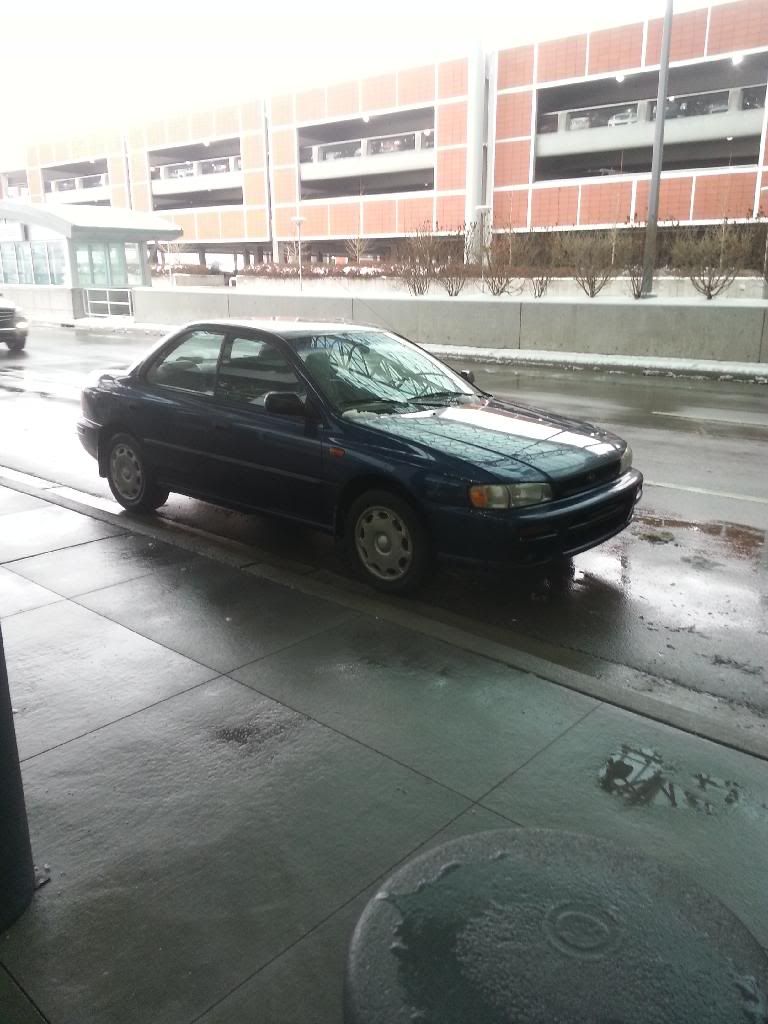
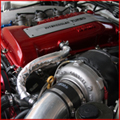
My new whip.
EJ22, 5 Speed, 208xxx MILES.
Attempt one.
Looked good so far...
Welded it to the old piece.
So far soo good
f***.
Had to redo the curve -.-
Muchhhhh better.
This here is the backside of the topmost layer of the A-pillar. You can see around the holes where there was a gap for the moisture to escape. Also note that there is no paint on it.
The flanged end that goes up along the A-Pillar structure. Again, no paint on some areas.
Trimmed the edges and made sure everything was flush. Don't have any pics of the finished pillar yet.
Also ground down the nuts on the A-pillar brace, there was some rust between the welded nuts and the brace.
Cleaned up the metal and the new nuts hit it with self etch and welded it on. Don't have any pics of the finished product yet. Didn't have much time, was getting ready to go to school [:P]
My new whip.
EJ22, 5 Speed, 208xxx MILES.
Re: My S13 was built on a Friday Restoration
Nice job, at first I was like this guy is wasting his time, but you doing an amazing job
-
PapaSmurf2k3
- Site Admin
- Posts: 24000
- Joined: Thu Nov 21, 2002 3:20 pm
- Car: 2017 Corvette, 2018 Focus ST, 1993 240sx truck KA Turbo.
- Location: Merrimack, NH
Re: My S13 was built on a Friday Restoration
Does it irk you when someone wants to scrap their whole 240 because they have a tiny spot of strut tower rust now? 
-
asoomal
- Posts: 2374
- Joined: Tue Feb 26, 2008 4:45 pm
- Car: 2001 Subaru Impreza L 5MT (Daily)
1992 Nissan 240SX SE 5MT w/HICAS (Being restored) - Location: Canada
Re: My S13 was built on a Friday Restoration
Oh yeah -.-
Then again, if it has tiny spots on the strut tower, I'm sure there would be more hiding in hard to repair areas.
Then again, if it has tiny spots on the strut tower, I'm sure there would be more hiding in hard to repair areas.
Re: My S13 was built on a Friday Restoration
Any progress on this? Its been 2 years since the last update. I would love to see this fully restored.
-
Topless_S13
- Posts: 23
- Joined: Sun Jan 17, 2016 6:19 pm
- Car: 1994 Nissan 240SX Convertible
- Location: Indiana
Re: My S13 was built on a Friday Restoration
I was just thinking the same thing! The depth of this restoration is insane!
-
asoomal
- Posts: 2374
- Joined: Tue Feb 26, 2008 4:45 pm
- Car: 2001 Subaru Impreza L 5MT (Daily)
1992 Nissan 240SX SE 5MT w/HICAS (Being restored) - Location: Canada
Re: My S13 was built on a Friday Restoration
Hey guys,
Sorry, but no updates as of yet.
The car is still in my garage back home in Canada. I'm still in the US completing my degree.
Looks like some of the pics have dead links, gonna try to fix those for the time being.
Sorry, but no updates as of yet.
The car is still in my garage back home in Canada. I'm still in the US completing my degree.
Looks like some of the pics have dead links, gonna try to fix those for the time being.
-
PapaSmurf2k3
- Site Admin
- Posts: 24000
- Joined: Thu Nov 21, 2002 3:20 pm
- Car: 2017 Corvette, 2018 Focus ST, 1993 240sx truck KA Turbo.
- Location: Merrimack, NH
Re: My S13 was built on a Friday Restoration
Thanks for the thread maintenance!
Find Your Forum!