It's on the first or second page of the thread.Kalypso123 wrote:you removed your crank pulley and replaced the front main seal, but I cant find that post anymore.
where is it?
My S13 SR20DET Prep
-
positron1

- Posts: 3609
- Joined: Mon Mar 21, 2005 12:29 am
- Car: Project: 1993 Nissan 240SX Coupe SR
Daily: 2010 Honda Civic Coupe - Location: Starkville, MS.
Re: (Kalypso123)
-
I WE TODD ED
- Posts: 296
- Joined: Fri Jul 27, 2007 3:01 pm
- Car: '90 & '91 S13
Re: (positron_)
Thanks man. That is just what I needed.
Apparently the A/C brackets on the redtop sr's are different than the A/C brackets on the blacktop sr's. I just wanted to see a redtop bracket so I could confirm that.
Thanks again
Apparently the A/C brackets on the redtop sr's are different than the A/C brackets on the blacktop sr's. I just wanted to see a redtop bracket so I could confirm that.
Thanks again
-
positron1
- Posts: 3609
- Joined: Mon Mar 21, 2005 12:29 am
- Car: Project: 1993 Nissan 240SX Coupe SR
Daily: 2010 Honda Civic Coupe - Location: Starkville, MS.
Re: (I WE TODD ED)
Hummm, I didn't know that either.
Re: (positron_)
thanks saf,
im trying to remove my rear rotor, but it seems rusted shut... I read your rotor swap guide and its nice.
I would ask questions but by the time you post back ill have it off
im trying to remove my rear rotor, but it seems rusted shut... I read your rotor swap guide and its nice.
I would ask questions but by the time you post back ill have it off
-
positron1
- Posts: 3609
- Joined: Mon Mar 21, 2005 12:29 am
- Car: Project: 1993 Nissan 240SX Coupe SR
Daily: 2010 Honda Civic Coupe - Location: Starkville, MS.
Re: (Kalypso123)
Did you get that rotor off?
Re: (positron_)
not yet, I have been wailing at it with the rubber mallet.I need another strategy
but the front hubs are off tho, and sporting a fresh new set of 350z studs.
but the front hubs are off tho, and sporting a fresh new set of 350z studs.
-
I WE TODD ED
- Posts: 296
- Joined: Fri Jul 27, 2007 3:01 pm
- Car: '90 & '91 S13
Re: (positron_)
Hey Positron,
Are you going to keep A/C?If not, would you sell me your A/C compressor bracket?
Thanks
Are you going to keep A/C?If not, would you sell me your A/C compressor bracket?
Thanks
Re: (I WE TODD ED)
I got the rear rotors offand I added the info to your brake rotor thread for posterity.
the ichiba rear hubs are at a machine shop know
the holes for the studs are 7/100's of an inch too small so they are going to be slightly overboard by that much and then ill press the new studs in myself.
Modified by Kalypso123 at 4:38 AM 6/12/2008
the ichiba rear hubs are at a machine shop know
the holes for the studs are 7/100's of an inch too small so they are going to be slightly overboard by that much and then ill press the new studs in myself.
Modified by Kalypso123 at 4:38 AM 6/12/2008
-
positron1
- Posts: 3609
- Joined: Mon Mar 21, 2005 12:29 am
- Car: Project: 1993 Nissan 240SX Coupe SR
Daily: 2010 Honda Civic Coupe - Location: Starkville, MS.
Re: (Kalypso123)
Cool man, you're gonna enjoy that new setup!
-
positron1
- Posts: 3609
- Joined: Mon Mar 21, 2005 12:29 am
- Car: Project: 1993 Nissan 240SX Coupe SR
Daily: 2010 Honda Civic Coupe - Location: Starkville, MS.
Re: (I WE TODD ED)
PM sent!I WE TODD ED wrote:Hey Positron,
Are you going to keep A/C?If not, would you sell me your A/C compressor bracket?
Thanks
Re: (positron_)
your threads made it possible - question for you,
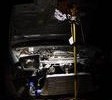
on the right circle - the hose that leaves the valve cover, what exactly does that hose do?
I see if going to the box on the left - I am wondering the benefits of this setup
on the right circle - the hose that leaves the valve cover, what exactly does that hose do?
I see if going to the box on the left - I am wondering the benefits of this setup
-
positron1
- Posts: 3609
- Joined: Mon Mar 21, 2005 12:29 am
- Car: Project: 1993 Nissan 240SX Coupe SR
Daily: 2010 Honda Civic Coupe - Location: Starkville, MS.
Re: (Kalypso123)
I'm not exactly sure what it does but the pics I've seen either have that hose leaving the T on the valve cover going to that plastic intake or to a catch can.
Re: (positron_)
its quite the mysteryhere there is a small filter, Ive seen a few cars doing that.
i wanted to try it, but I would like to understand how it benefitsill search some more
i wanted to try it, but I would like to understand how it benefitsill search some more
-
inkslingers13

- Posts: 1063
- Joined: Tue Dec 04, 2007 5:32 pm
- Car: 1985 Corolla Gt-S
Re: (Kalypso123)
i have mine hooked up to a catch can, it goes front of the t-fitting to one side of the catch can, then the other side of the catch can to my intake. i wouldn't run a breather filter on the end of that fitting, oil will leak out of it and its in no way going to benefit your motor. put a breather filter on top of the catch can. hope this helps
-
inkslingers13
- Posts: 1063
- Joined: Tue Dec 04, 2007 5:32 pm
- Car: 1985 Corolla Gt-S
Re: (Kalypso123)
and im pretty sure that the PVC valve from the valve cover goes straight into the intake for a vacuum source. not to the catch can...Kalypso123 wrote:your threads made it possible - question for you,
on the right circle - the hose that leaves the valve cover, what exactly does that hose do?
I see if going to the box on the left - I am wondering the benefits of this setup
Re: (inkslingers13)
how does a breather filter benefit
-
inkslingers13
- Posts: 1063
- Joined: Tue Dec 04, 2007 5:32 pm
- Car: 1985 Corolla Gt-S
Re: (Kalypso123)
it doesn't, on the catch can it just would make everything flow a bit better. the way its hooked up on the FLASHY sr is bad. look up how to hook up a catch can on here. it explains how running it like that is bad
-
positron1
- Posts: 3609
- Joined: Mon Mar 21, 2005 12:29 am
- Car: Project: 1993 Nissan 240SX Coupe SR
Daily: 2010 Honda Civic Coupe - Location: Starkville, MS.
Re: (inkslingers13)
I think I'm gonna run mine with a hose from the T to the catch can and a hose from the catch can to the plastic intake hose/adapter.
Re: (inkslingers13)
inkslingers13 wrote:it doesn't, on the catch can it just would make everything flow a bit better. the way its hooked up on the FLASHY sr is bad. look up how to hook up a catch can on here. it explains how running it like that is bad
thanks, I will
I need to learn about vacuum lines and the science behind them also.I have a BOV and a manual boost controler that I dont know how to hook up I want to sort all of that out.
-
inkslingers13
- Posts: 1063
- Joined: Tue Dec 04, 2007 5:32 pm
- Car: 1985 Corolla Gt-S
Re: (positron_)
thats exactly what you should dopositron_ wrote:I think I'm gonna run mine with a hose from the T to the catch can and a hose from the catch can to the plastic intake hose/adapter.
-
positron1
- Posts: 3609
- Joined: Mon Mar 21, 2005 12:29 am
- Car: Project: 1993 Nissan 240SX Coupe SR
Daily: 2010 Honda Civic Coupe - Location: Starkville, MS.
Re: (Kalypso123)
Ditto!Kalypso123 wrote:
thanks, I will
I need to learn about vacuum lines and the science behind them also.I have a BOV and a manual boost controler that I dont know how to hook up I want to sort all of that out.
-
inkslingers13
- Posts: 1063
- Joined: Tue Dec 04, 2007 5:32 pm
- Car: 1985 Corolla Gt-S
Re: (positron_)
positron_ wrote:Ditto!
Re: (inkslingers13)
Ok so you are going to 1 and it seems like the first post goes to 2
-
positron1
- Posts: 3609
- Joined: Mon Mar 21, 2005 12:29 am
- Car: Project: 1993 Nissan 240SX Coupe SR
Daily: 2010 Honda Civic Coupe - Location: Starkville, MS.
Re: (inkslingers13)
I'm serious...I have no idea what I'm doing!inkslingers13 wrote:
-
positron1
- Posts: 3609
- Joined: Mon Mar 21, 2005 12:29 am
- Car: Project: 1993 Nissan 240SX Coupe SR
Daily: 2010 Honda Civic Coupe - Location: Starkville, MS.
Re: (Kalypso123)
The hose at the end of the arrow on 2 connects to the cold pipe right?Kalypso123 wrote:Ok so you are going to 1 and it seems like the first post goes to 2
-
callmeweezy724

- Posts: 1181
- Joined: Sun Nov 12, 2006 7:28 am
- Car: 1990 240sx w/s13 blacktop swap, 1986 e30 325e 4dr 5spd,1997 infiniti Q45
- Contact:
Re: (positron_)
yea thats correct..it connects to the pipe coming out of the side of the cold pipe..
-
positron1
- Posts: 3609
- Joined: Mon Mar 21, 2005 12:29 am
- Car: Project: 1993 Nissan 240SX Coupe SR
Daily: 2010 Honda Civic Coupe - Location: Starkville, MS.
Turbo Manifold/Outlet Install
I finally got a exhaust manifold and turbo outlet. I did some research and narrowed my decision to a Tomei Extreme manifold and Circuit Sports outlet but decided to scrap those plans and get those items when I upgrade to a new T28 and go front mount. For the stock turbo I just went with the best "bang for the buck" setup.
Tools needed:Socket wrenchSocket extension13mm socket14mm socket15mm socketNeedlenose pliersScrewdriverHammer(you'll see why later)Anti-seizeThreadlockerRazorblade
I got a setup in the other day.Megan Racing turbo manifold.Megan Racing turbo outlet.OEM T25 S13 TurboOEM multilayer metal exhaust manifold gasket part#:14036-75F00.OEM metal turbo inlet gasket part#:14415-17M00.OEM metal turbo outlet gasket part#:14445-26E00.OEM turbo locking plates part#:14495-40P10.OEM exhaust manifold washer part#:14037-42L02.OEM exhaust manifold nut part#:08912-8401AThe manifold came with new studs and hardware, like a brace of some sort. I went ahead and installed the brace...and seated the studs into place. Don't forget to use some anti-seize on the studs all around for the future if need be.Take the turbo inlet gasket...and place it on.I had to back it off a bit so that I would have room to put the locking tabs and nuts on.Like so.The manifold came with some nuts but they have flared ends so they pretty much covered the tabs on the locking plates so I used a set of M8-1,25 from the parts store instead. These are just like the stock nuts that I originally removed from the turbo and they don't have flared ends so you can fold the tabs over these nuts...can I say that?!While I was at it I decided to use some threadlocker as well because I had been reading a lot of threads about how these have a tendency to back off because of all the pressure from the turbo.Examples......I put the nuts on next. Space is tight so some of them are pretty tricky to get on unless you've got those little monkey hands.To get one of the nuts near the top of the turbo inlet on, I had to remove the water line for extra space.
Next, I tightened and torqued to 16-22ft.lbs.Use a set of needlenose pliers to fold the locking tabs over the nuts.Like so.
The nut on the inlet side was hard to get to with the pliers so I just used a screwdriver and a hammer to bend the tab on this one. This is where the hammer comes into play. The manifold is mounted to the turbo so now you can install it on the block.Exhaust ports.I had some old gasket still on the ports so I used a razorblade to remove it and clean the area before I placed my manifold gasket on.Take the exhaust manifold gasket...and place it on.Take the turbo and mount it on the block.Break out your cleanin' gloves and lube up the studs with some anti-seize before you put the hardware on. This stuff STINKS!!!!Place your exhaust washers and nuts on.From here you need to break out the FSM(factory service manual) because the nuts need to be tightened in a specific order.Tighten and torque to 27-35ft.lbs...and the manifold/turbo is mounted.Now on to the turbo lines.I started with the water line.On a S13 SR it will connect here. On a S14/S15 SR, it connects to the water neck unless you get a S14/S15 water neck and use it on a S13 engine...you confused yet?Use a screwdriver to loosen the fitting...and place it on the hardline here. Tighten it back with the screwdriver.Water line.I moved to the next water line.Take the banjo fitting off, the two crush washers that should be supplied and the stock banjo bolt. Like my new gloves, hobo style FTMFW!Put two crushers on both sides of the banjo bolt and install.Tighten and torque to 14-23ft.lbs.Lastly, the oil outlet line.Remove the fitting and the crush washer.Place it on the block...tighten and torque to 14-23ft.lbs.Almost complete!I can't install the turbo outlet yet because the people I ordered it from forgot to pack in the hardware(studs) so I'll have to wait on that.
I also don't have a O2 sensor or adapter yet.
TO BE CONTINUED...
Modified by positron_ at 1:36 PM 6/13/2008
-
inkslingers13
- Posts: 1063
- Joined: Tue Dec 04, 2007 5:32 pm
- Car: 1985 Corolla Gt-S
Re: Turbo Manifold/Outlet Install (positron_)
looking really nice man! how long till she goes in?
Re: Turbo Manifold/Outlet Install (inkslingers13)
that is insightful
ill get a t28 or a gt28rs and this is a useful demo for the install.
ill get a t28 or a gt28rs and this is a useful demo for the install.
Re: Turbo Manifold/Outlet Install (Kalypso123)
so red box on the left is actually an oil catch can!?
thats cool. and it has a breather valve going to the cold pipe... that works
thats cool. and it has a breather valve going to the cold pipe... that works