My S13 SR20DET Prep
-
duffman1278
- Posts: 6816
- Joined: Sun Apr 01, 2007 3:09 pm
- Car: 89 240sx Hatch, the wildcats!
-
1unar3clipse

- Posts: 1543
- Joined: Thu Nov 23, 2006 6:22 pm
- Car: 93 240sx HB, 01 Dodge Dakota SLT
Re: (ophaschillm)
Man this thread if choc full of win.
-
240sxHitman

- Posts: 918
- Joined: Sun May 30, 2004 3:11 pm
- Car: Boosted '91 240sx
- Contact:
Re: (positronone)
I just put those bolts in my coil packs today and there good also. Thanks again postironone. I put in my thermostat n coolant neck on today also. What you got next coming up for an update?
-
positron1

- Posts: 3609
- Joined: Mon Mar 21, 2005 12:29 am
- Car: Project: 1993 Nissan 240SX Coupe SR
Daily: 2010 Honda Civic Coupe - Location: Starkville, MS.
Re: (240sxHitman)
I'm trying to make a decision on what turbo elbow and manifold to go with, what are you doing next?
-
duffman1278
- Posts: 6816
- Joined: Sun Apr 01, 2007 3:09 pm
- Car: 89 240sx Hatch, the wildcats!
-
positron1
- Posts: 3609
- Joined: Mon Mar 21, 2005 12:29 am
- Car: Project: 1993 Nissan 240SX Coupe SR
Daily: 2010 Honda Civic Coupe - Location: Starkville, MS.
Re: (duffman1278)
I think I will.
-
240sxHitman
- Posts: 918
- Joined: Sun May 30, 2004 3:11 pm
- Car: Boosted '91 240sx
- Contact:
Re: (positronone)
Well i just ordered some gaskets for the turbo, exhaust, front and rear main seals. Just took my pilot bearing out just a few mins ago to just get that out of the way. i borrowed the puller from a tech at my job. Im not upgrading to much just yet. I wanna just get the motor in the car and make sure it starts and runs good before i begin to upgrade.
But when i do upgrade, i was looking at the full race manifold. I know its pricey but should be worth every penny, unless i hear otherwise
But when i do upgrade, i was looking at the full race manifold. I know its pricey but should be worth every penny, unless i hear otherwise
-
positron1
- Posts: 3609
- Joined: Mon Mar 21, 2005 12:29 am
- Car: Project: 1993 Nissan 240SX Coupe SR
Daily: 2010 Honda Civic Coupe - Location: Starkville, MS.
Re: (codyace)
The FSM didn't specify exactly what kind to use, it just said "Genuine liquid gasket or an equivalent" and that gasket hanging out the sides of the components can easily be pulled off at anytime. Do you mean the intake manifold brace?codyace wrote:no offense, but why in the world are you using orange silicone!
1. It's not nearly as good as ultra gray (which btw: it's what Nissan recommneds)
2. it looks ganky as hell all over, whereas gray can blend in.
Also: Take that silly factory brace off...talk about getting in the way!
-
duffman1278
- Posts: 6816
- Joined: Sun Apr 01, 2007 3:09 pm
- Car: 89 240sx Hatch, the wildcats!
Don't even sweat that brace on the intake manifold, its really easy to take off and put on when the motors in, trust me, I just did this like 3 weeks ago. Took my like 5 minutes, mostly because you have to get under the car to take off the bolts on the bottom.
One I'll mention to you now since your motor is out is if you plan on installing an oil pressure gauge, install the sending unit NOW, while the motors out because it was so lame to work under the car just to get access to the oil pressure sensor area.
One I'll mention to you now since your motor is out is if you plan on installing an oil pressure gauge, install the sending unit NOW, while the motors out because it was so lame to work under the car just to get access to the oil pressure sensor area.
-
Hijacker

- Posts: 14373
- Joined: Wed Aug 13, 2003 4:57 am
- Car: '92 240sx Convertible
'94 F-150 - Location: Fredericksburg, VA
Re: (codyace)
Cody, you really should give the Toyota crankcase sealant a try. You'll completely forget all about permatex after that. It's black, and it holds better than any gasket maker I have ever messed with.codyace wrote:no offense, but why in the world are you using orange silicone!
1. It's not nearly as good as ultra gray (which btw: it's what Nissan recommneds)
2. it looks ganky as hell all over, whereas gray can blend in.
Also: Take that silly factory brace off...talk about getting in the way!
-
homeslicej2

- Posts: 5446
- Joined: Mon Jan 15, 2007 5:46 pm
- Car: 1990 Nissan 240SX S13 SR'd hatch
Re: (duffman1278)
no room in there and awkward angles.duffman1278 wrote:...One I'll mention to you now since your motor is out is if you plan on installing an oil pressure gauge, install the sending unit NOW, while the motors out because it was so lame to work under the car just to get access to the oil pressure sensor area.
-
I WE TODD ED
- Posts: 296
- Joined: Fri Jul 27, 2007 3:01 pm
- Car: '90 & '91 S13
Re: (homeslicej2)
Excellent thread man! Kudos to you. I am definitely going to use this as a guide to replace some stuff on my sr while it's just laying around.
Quick question: What would be the major and most important things to replace on my engine? (besides belts and fluids)
Thanks and keep up the good work
Quick question: What would be the major and most important things to replace on my engine? (besides belts and fluids)
Thanks and keep up the good work
-
positron1
- Posts: 3609
- Joined: Mon Mar 21, 2005 12:29 am
- Car: Project: 1993 Nissan 240SX Coupe SR
Daily: 2010 Honda Civic Coupe - Location: Starkville, MS.
Re: (duffman1278)
Good to hear on the brace! As far as the oil pressure gauge goes, yeah I was going to put one on so thanks for the heads-up on that one!duffman1278 wrote:Don't even sweat that brace on the intake manifold, its really easy to take off and put on when the motors in, trust me, I just did this like 3 weeks ago. Took my like 5 minutes, mostly because you have to get under the car to take off the bolts on the bottom.
One I'll mention to you now since your motor is out is if you plan on installing an oil pressure gauge, install the sending unit NOW, while the motors out because it was so lame to work under the car just to get access to the oil pressure sensor area.
-
positron1
- Posts: 3609
- Joined: Mon Mar 21, 2005 12:29 am
- Car: Project: 1993 Nissan 240SX Coupe SR
Daily: 2010 Honda Civic Coupe - Location: Starkville, MS.
Re: (I WE TODD ED)
Thanks bro and I'll sit back and let the pros answer that question. I basically tried to do all the small parts that I could, belts, fluids, spark and such. Clean it up so it'll be easier to spot any leaks or problems after the startup.I WE TODD ED wrote:Excellent thread man! Kudos to you. I am definitely going to use this as a guide to replace some stuff on my sr while it's just laying around.
Quick question: What would be the major and most important things to replace on my engine? (besides belts and fluids)
Thanks and keep up the good work
Do you mean that ultra black? Question, do you guys think I should get this other type of liquid gasket and redo my gaskets?Hijacker wrote:Cody, you really should give the Toyota crankcase sealant a try. You'll completely forget all about permatex after that. It's black, and it holds better than any gasket maker I have ever messed with.
Re: (Hijacker)
Point noted! I'll keep that in mind for my next build (which may end up being a KA...yuck hehe)Hijacker wrote:
Cody, you really should give the Toyota crankcase sealant a try. You'll completely forget all about permatex after that. It's black, and it holds better than any gasket maker I have ever messed with.
I also like Honda-Bond, as well as the Cummins Factory Sealent stuff they use.
Toyota <> Ultra Black. He just mentioned it was black.positronone wrote:Do you mean that ultra black? Question, do you guys think I should get this other type of liquid gasket and redo my gaskets?
I personally would (if I were you), but that's namely because I think the Orange looks like complete trash (no offense) all over an engine...almost giving it a cheap look. Ontop of that, I don't think the orange stuff seals for crap either.
-
positron1
- Posts: 3609
- Joined: Mon Mar 21, 2005 12:29 am
- Car: Project: 1993 Nissan 240SX Coupe SR
Daily: 2010 Honda Civic Coupe - Location: Starkville, MS.
Re: (ophaschillm)
Went to the junkyard today to help a friend pull the head off a 1st gen Integra and while we were at it I noticed a purple 2nd gen Altima sitting a couple of feet away. When we were done I went over and popped the hood, the radiator was gone but what did I find just sitting in the bay....this set of Altima fans in great condition. I'm not sure if this is the set that everyone uses but we tested them at the junkyard, they both run and I only paid $40 for them so if this is the correct set then I came out on top. If these are the right fans I'm gonna clean them up and sell the Permacool.
-
240sxHitman
- Posts: 918
- Joined: Sun May 30, 2004 3:11 pm
- Car: Boosted '91 240sx
- Contact:
Re: (positronone)
thats whats up! good find. I gotta start looking for some fans myself
not to mention i also used the orange sealant, thinking it was ok to use. Imma just pick up some nissan sealant from phase2 or west co
not to mention i also used the orange sealant, thinking it was ok to use. Imma just pick up some nissan sealant from phase2 or west co
-
positron1
- Posts: 3609
- Joined: Mon Mar 21, 2005 12:29 am
- Car: Project: 1993 Nissan 240SX Coupe SR
Daily: 2010 Honda Civic Coupe - Location: Starkville, MS.
Re: (240sxHitman)
Dude I was looking out for you. I checked the other Altimas in the yard and there were no more fans. If I had found one I was gonna stash it and see if you wanted dibs.
-
240sxHitman
- Posts: 918
- Joined: Sun May 30, 2004 3:11 pm
- Car: Boosted '91 240sx
- Contact:
Re: (positronone)
its koo, but thanks for looking out though! Hopefully I find something on ebay, or I'll take a look in the junkyards around my way.
-
duffman1278
- Posts: 6816
- Joined: Sun Apr 01, 2007 3:09 pm
- Car: 89 240sx Hatch, the wildcats!
-
positron1
- Posts: 3609
- Joined: Mon Mar 21, 2005 12:29 am
- Car: Project: 1993 Nissan 240SX Coupe SR
Daily: 2010 Honda Civic Coupe - Location: Starkville, MS.
Re: (duffman1278)
Excellent, all the hard work has been done and it's a pretty good price! Thanks!
-
positron1
- Posts: 3609
- Joined: Mon Mar 21, 2005 12:29 am
- Car: Project: 1993 Nissan 240SX Coupe SR
Daily: 2010 Honda Civic Coupe - Location: Starkville, MS.
Fan
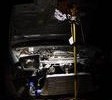
I had originally bought a 14" Permacool fan that I planned to use for my swap but after doing some research and a stroke of luck, I was able to nab an Altima dual fan set-up instead.Koyo rad, Altima fans and the Permacool.The dual Altima fans cover the entire surface area of the radiator, as a matter of fact, they hang over a bit which is where you might run into a slight complication.The Altima fans don't exactly line up with all the mounting points on the Koyo radiator so it doesn't sit flush against the rad. This is where you have to mod it for fitment. This is where I didn't want to go, if I have to mod this thing and couldn't do a clean job I was planning to just go with the Permacool setup or just wait and save for the Flex-a-lites which to my knowledge have no fitment issues.The upper left mounting point fits perfectly, all I will need to do here is place a bolt to mount the fan to the Koyo.The upper right mounting point does not line up, I also thought I might have to trim this off because of the radiator bracket but we'll get into that later.The lower left mounting point does not line up with the bracket on the Koyo or sit flush either. It overlaps so the little tab just will not go into the slot as you can see here.The lower right mounting point also does not line up or sit flush against the radiator.As you can see here the fan is blocked by the lower radiator outlet and will need to be modded.I figured the easiest way would just be to trim the plastic just enough to allow the fan to sit flush against the radiator, time to use the knife again.I started with the lower left mounting point first.I just sawed into it from all directions until it was loose enough to snap off.This is how much I took off.Next, I went to the lower right mounting point.It's blocked by the lower radiator outlet...and just needs a small wafer of a section trimmed off to allow the flushness.Complete!While I was at it I decided to mount the radiator brackets on because I was also worried that because the mounting points didn't line up then the rad brackets would also block the fan from sitting flush but they did not interfere at all.As I said before the upper left mounting point lines up perfectly, you can bolt it in and the rad bracket does not interfere.The upper right mounting point does not line up to where you can bolt it to the rad but it also does not interfere with flushness. The rad bracket can be mounted without any problem. You are left with this mounting point sticking out above the rad. You have the option to shave it off also since it's not needed but it's not necessary.When I was done trimming the excess plastic off, I just took a sanding block and sanded the edges down smooth for a cleaner look.With all the trimming done the fans now sit flush against the radiator. All I have to do now is get some of those ties that they use for mounting the rads and wire it up...but before I did that I decided to break it down and clean it up first.All you need is a 10mm socket. For the fans there is one 10mm nut holding them in.And for the fan motors there are three 10mm bolts holding them in.
TO BE CONTINUED.....
TO BE CONTINUED.....
-
homeslicej2
- Posts: 5446
- Joined: Mon Jan 15, 2007 5:46 pm
- Car: 1990 Nissan 240SX S13 SR'd hatch
Re: Fan (positronone)
Yeah, you have to mod the Altima fans a bit for them to fit on the rad and in the engine bay, but they flow more CFM than the Flex-a-lites. Also, don't use those wire supports that run through the rad core. The fans weigh to much and will eventually cause core damage. Since you have the rad and fans out, keep test fitting an trimming until it fits in the engine bay and then fab up some brackets to mount them to rad body. good find, I paid $50 for mine from a 97 ($10 shipping). I'm going to clean them up as well before I install them, get some of the corrosion off.
-
positron1
- Posts: 3609
- Joined: Mon Mar 21, 2005 12:29 am
- Car: Project: 1993 Nissan 240SX Coupe SR
Daily: 2010 Honda Civic Coupe - Location: Starkville, MS.
Re: Fan (homeslicej2)
Thanks for the heads up on the brackets and the weight of the fans!
-
240sxHitman
- Posts: 918
- Joined: Sun May 30, 2004 3:11 pm
- Car: Boosted '91 240sx
- Contact:
-
positron1
- Posts: 3609
- Joined: Mon Mar 21, 2005 12:29 am
- Car: Project: 1993 Nissan 240SX Coupe SR
Daily: 2010 Honda Civic Coupe - Location: Starkville, MS.
Re: (240sxHitman)
M8-1,25. I just got some the other day.240sxHitman wrote:Good DIY on those fans! definitely gonna be back looking ova all this if i get my hands them also.
by the way would u know the size nut that would screw on to the bolt where the exhaust manifold and turbo bolt together.
-
s14brennen

- Posts: 109
- Joined: Tue Dec 11, 2007 3:49 pm
- Car: 96 240SX SR20
Re: (positronone)
nice thread bro keep up the great work
-
positron1
- Posts: 3609
- Joined: Mon Mar 21, 2005 12:29 am
- Car: Project: 1993 Nissan 240SX Coupe SR
Daily: 2010 Honda Civic Coupe - Location: Starkville, MS.
Re: (s14brennen)
Thanks!
-
inkslingers13

- Posts: 1063
- Joined: Tue Dec 04, 2007 5:32 pm
- Car: 1985 Corolla Gt-S
Re: (positronone)
looking good man! keep up the good work