Jared's RB-7

Discuss the RB20, RB25 and RB26 series engines.
jaredperry
Posts: 50
Joined: Sun Mar 09, 2014 8:43 pm
Car: '69 510
Location: Newbury Park, CA

Post

I started wiring last weekend and my goodness… I didn’t realize the extent of what I am up against and it’s going to be pretty time consuming for one guy. I was able to get everything I needed to routed and in the correct direction. Also, I was able to mount the Haltech and prep for the cables to be run from the Racepak to the ECU.

Image

Image

Image

Image

Also, I welded up the head light housings last weekend to help with the wiring. The front end is growing to be more and more, but I really cannot build anything until the bumper arrives. Anyways, here is the progress:

Image

Image

Image


jaredperry
Posts: 50
Joined: Sun Mar 09, 2014 8:43 pm
Car: '69 510
Location: Newbury Park, CA

Post

Over the last week a bunch of progress was made with the car.

The two row Mishimoto radiator was replaced with a three row, which required a bit of modification to the front end. I was also able to move the Mishimoto intercooler back and down a bit to accommodate with the new radiator space requirements. With all that welding going on I figured it was a good time to install the hood pins and start the initial front chassis harness routing.

The lights are now operational with the help of a friend. Blinkers, high / low beam and hazards are good to go including the brake lights.

Image

Image

Image

Next up to bat for the car is finalizing the engine harness, which entails a bit of housekeeping and new wiring with the added air temperature sensor and boost control solenoid for the haltech pro plug in setup.

I was also able to get the -4 AN oil feed and -8 AN oil drain lines made up for the turbo in addition to running some -3 AN lines for the brakes and proportioning valve.

Image

Yellow4g63
Posts: 3718
Joined: Mon Jan 20, 2003 6:07 pm
Car: 95 RB20 240, 91 NX2000 VE power, 95 Stock 240sx
Contact:

Post

Nice Project!

jaredperry
Posts: 50
Joined: Sun Mar 09, 2014 8:43 pm
Car: '69 510
Location: Newbury Park, CA

Post

Yellow4g63 wrote:Nice Project!
Thanks!

jaredperry
Posts: 50
Joined: Sun Mar 09, 2014 8:43 pm
Car: '69 510
Location: Newbury Park, CA

Post

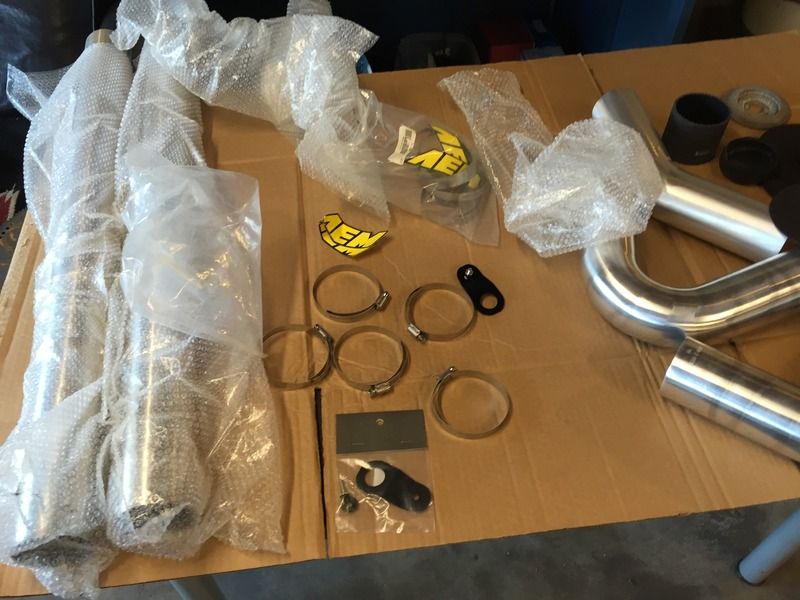
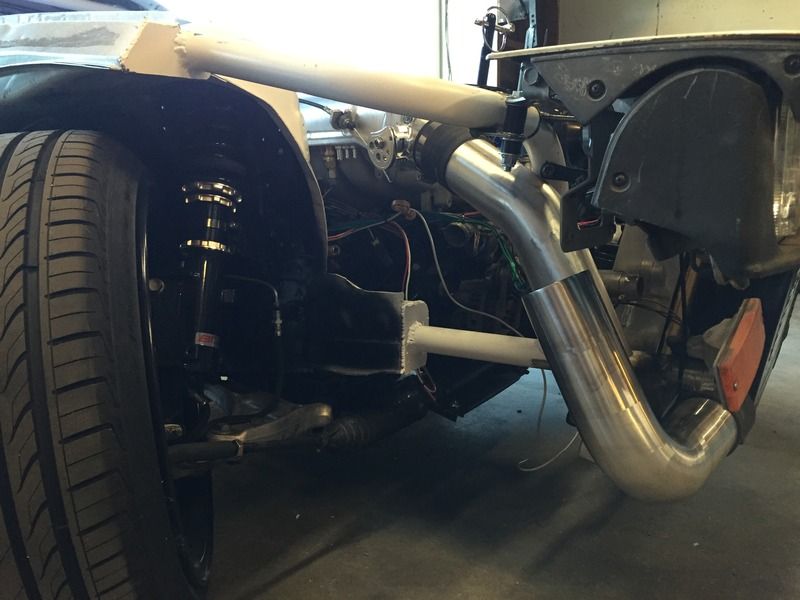
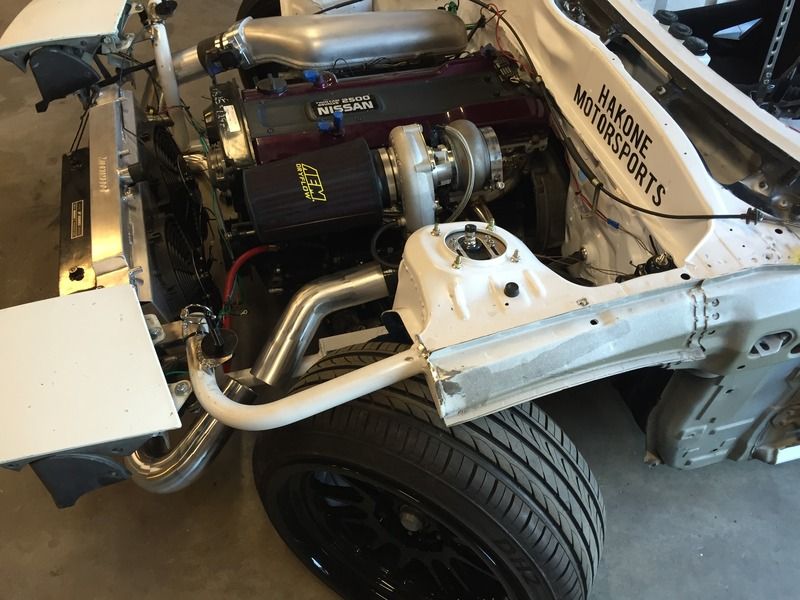
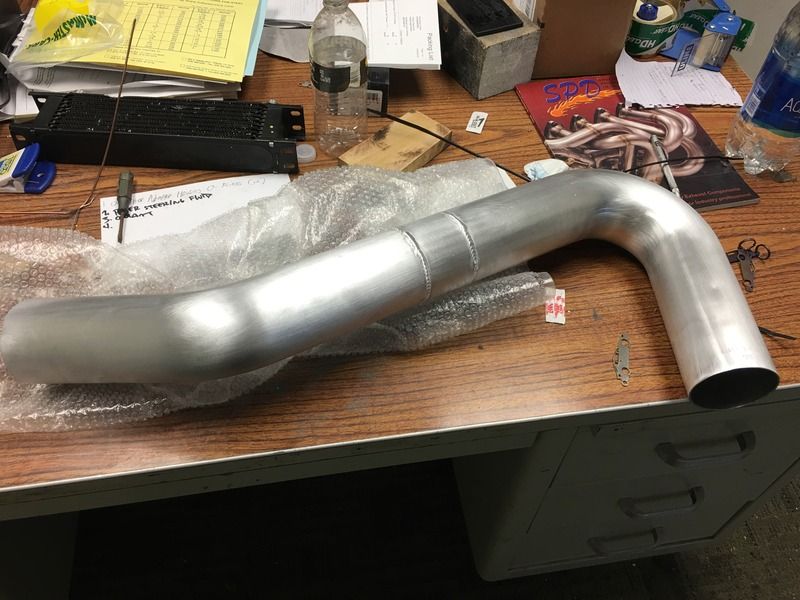
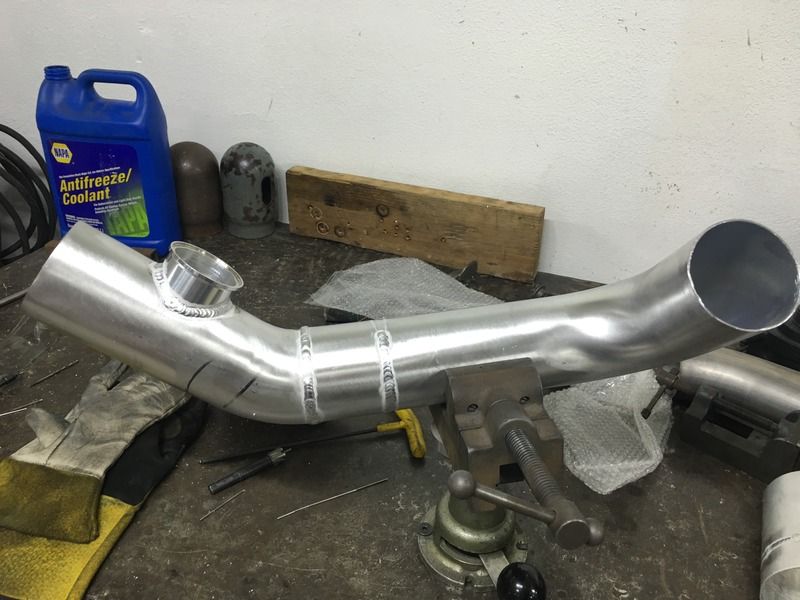
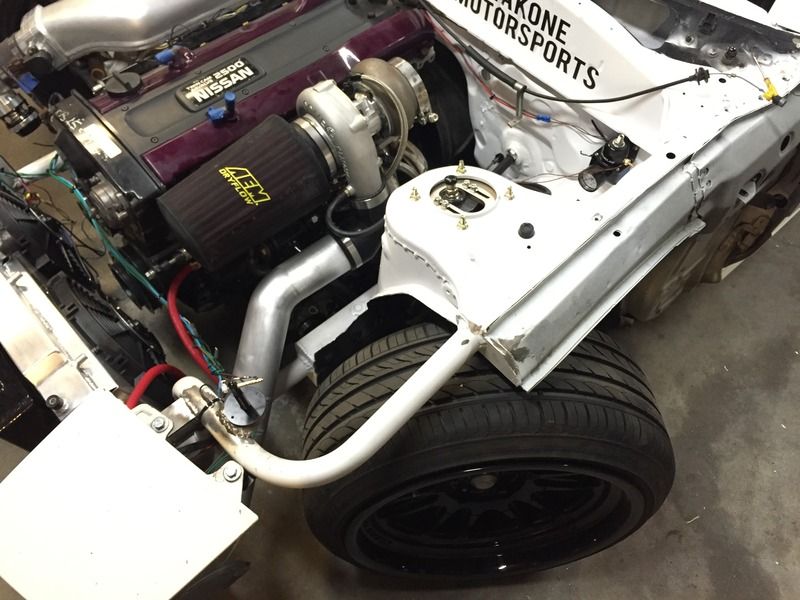
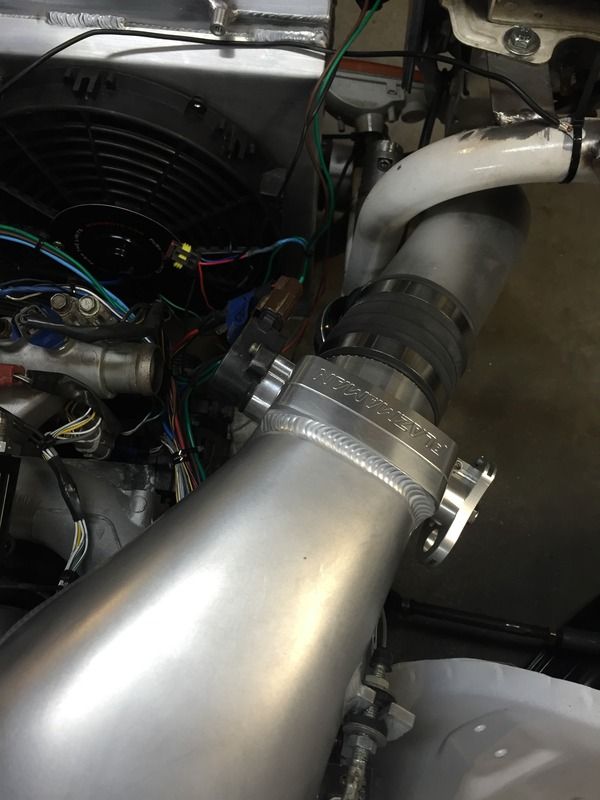
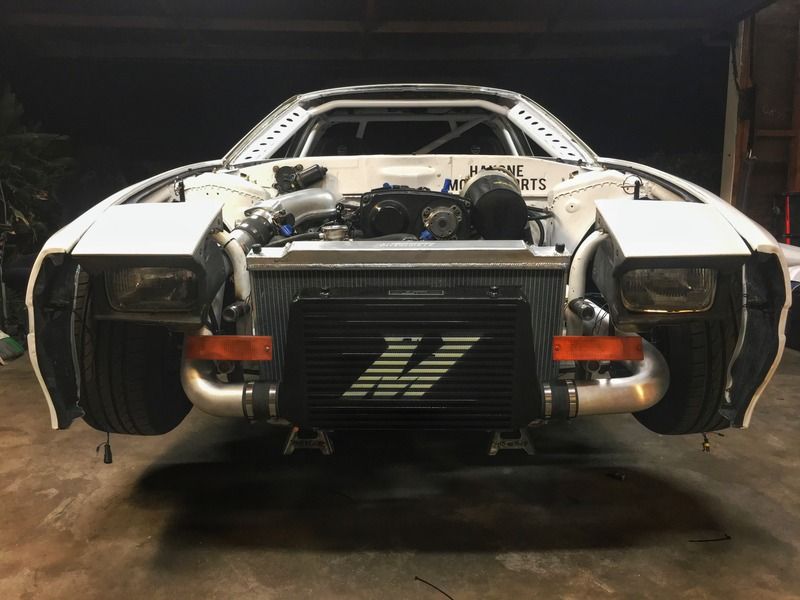
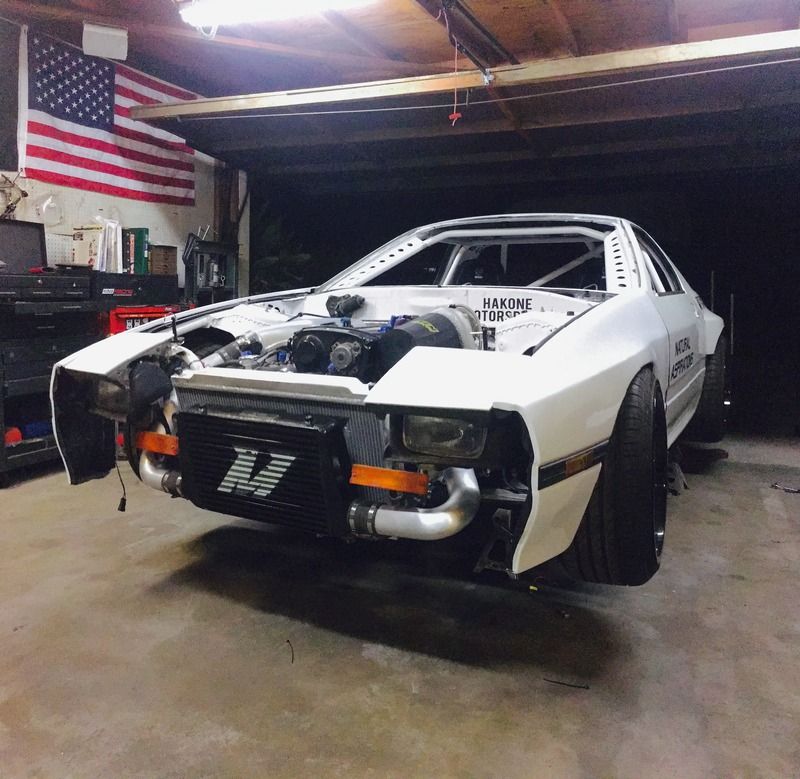
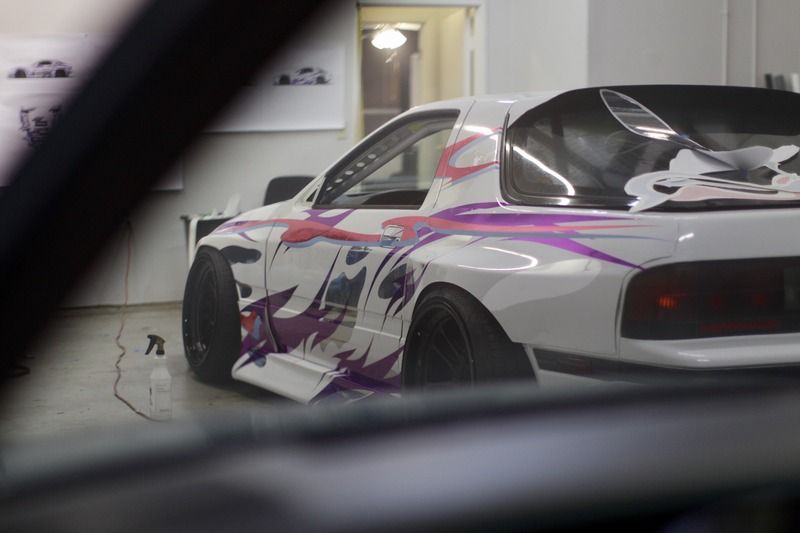
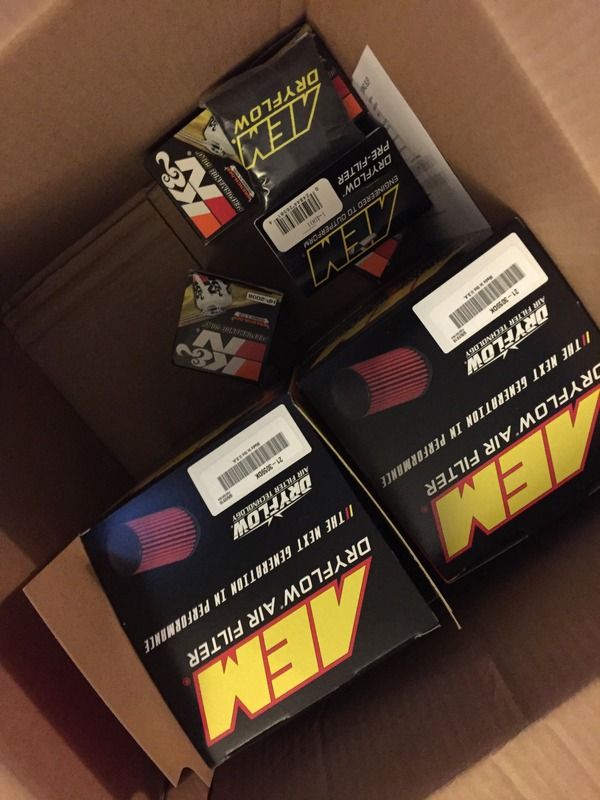
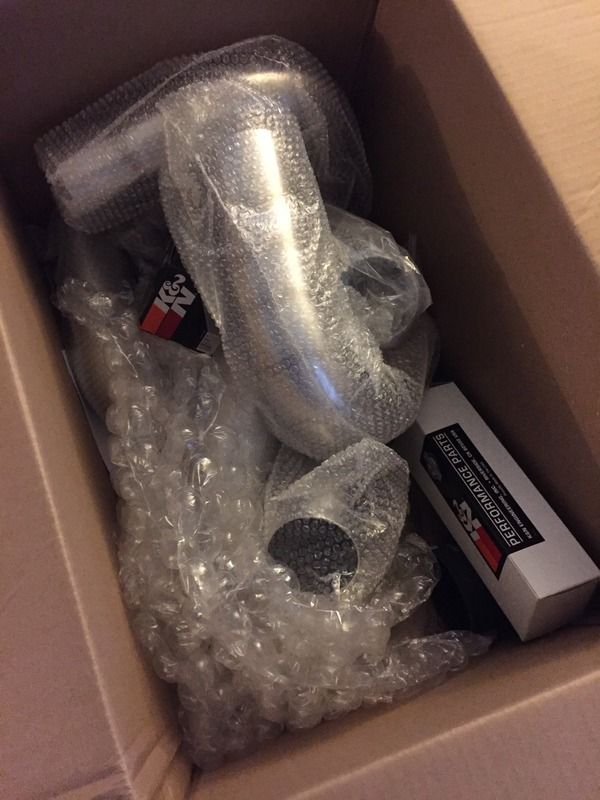
A bunch of stuff arrived for the car this weekend. A box of K&N fuel, oil filters, AEM intake filters and a bunch of AEM 3” tubing made its way to my doorstep. I can’t thank the people over at K&N enough for the opportunity to use their products on this specific car build.

Image

Image

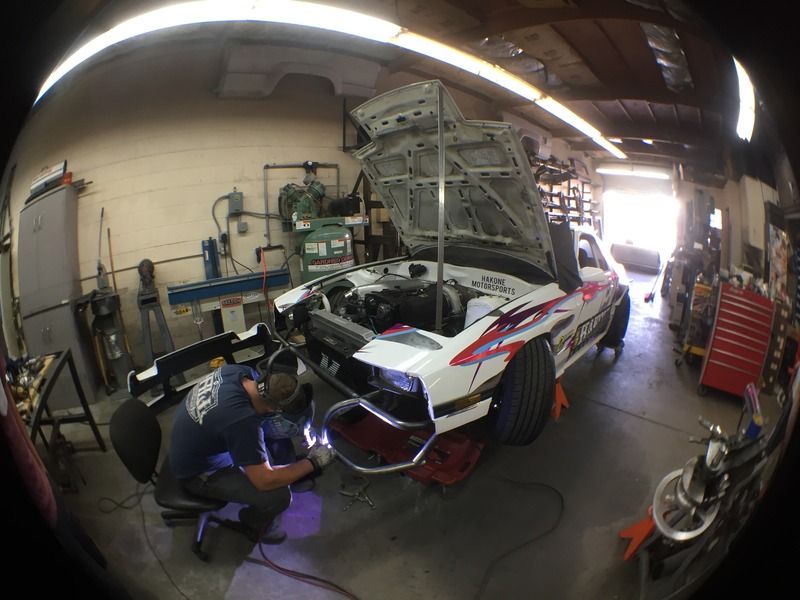
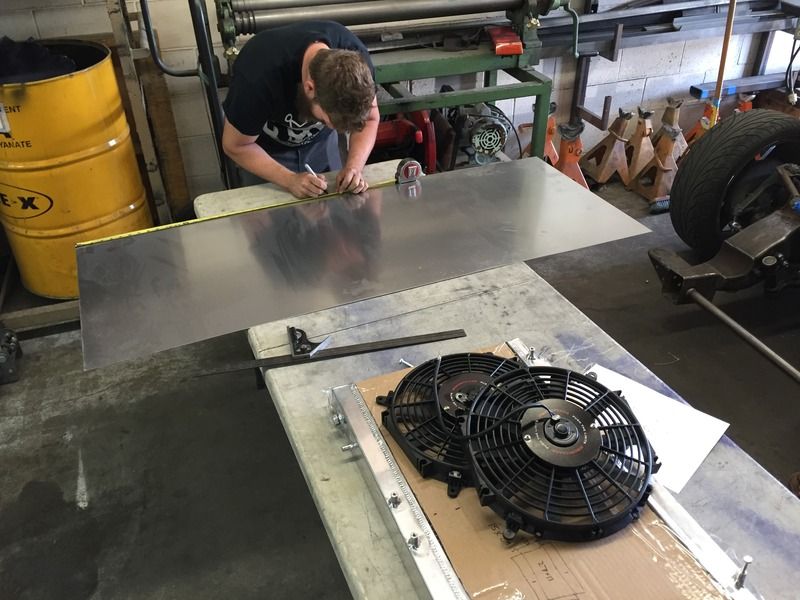
I also spun over to empire fabrication in Simi this weekend to see if Sean, the owner, could school me on some fabrication. He was able to make something pretty rad from some sheet aluminum in a matter of a few minutes. Talk about talented.

Here he is measuring out the Mishimoto fans and the radiator and quickly gathering ideas to run with.

Image

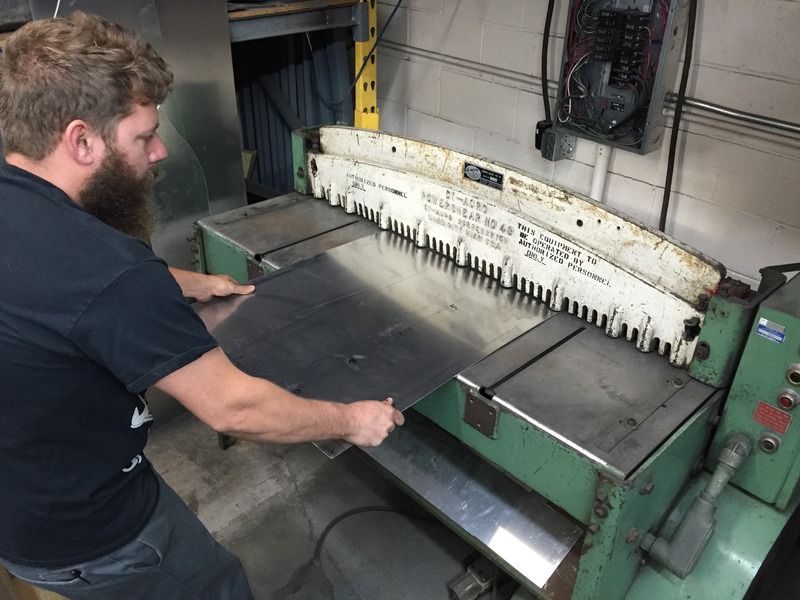
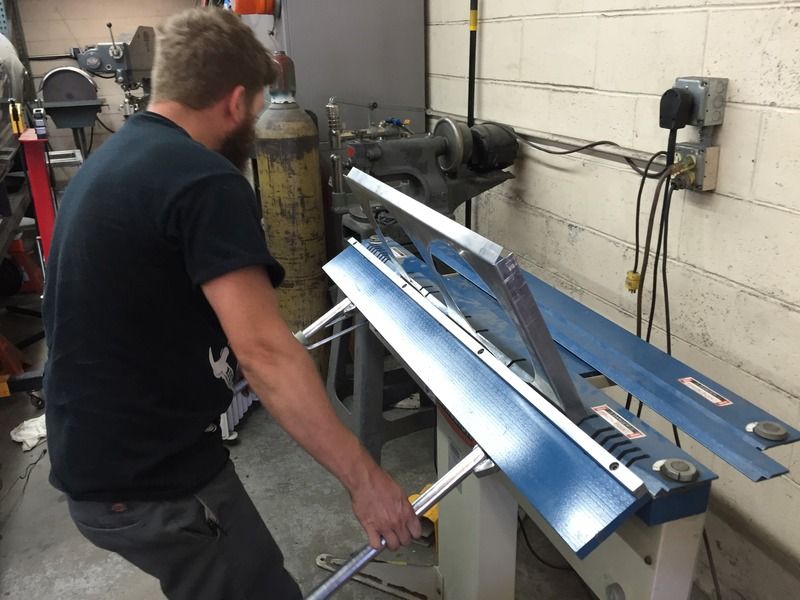
Here, after the break lines and overall dimensions were figured, he is shearing the material for those perfect lines.

Image

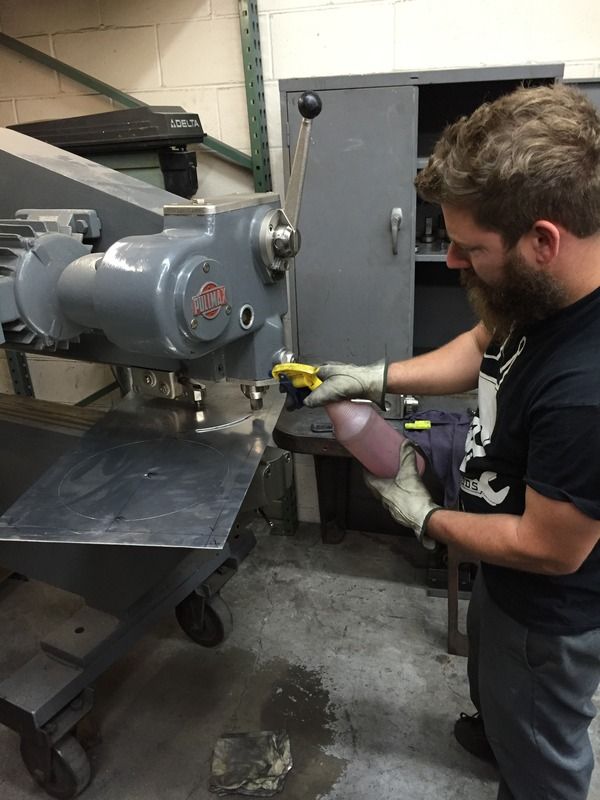
Another sweet tool over at Empire is the Pulmax. This machine was used to shear perfect circles in the material for the fans to pull air from. They turned out awesome!

Image

Here, the press break was used to create the 45* and 90* bends to fit the outsides of the Mishimoto radiator and hold the slim fans.

Image

A bit of fitment verification goin down.

Image

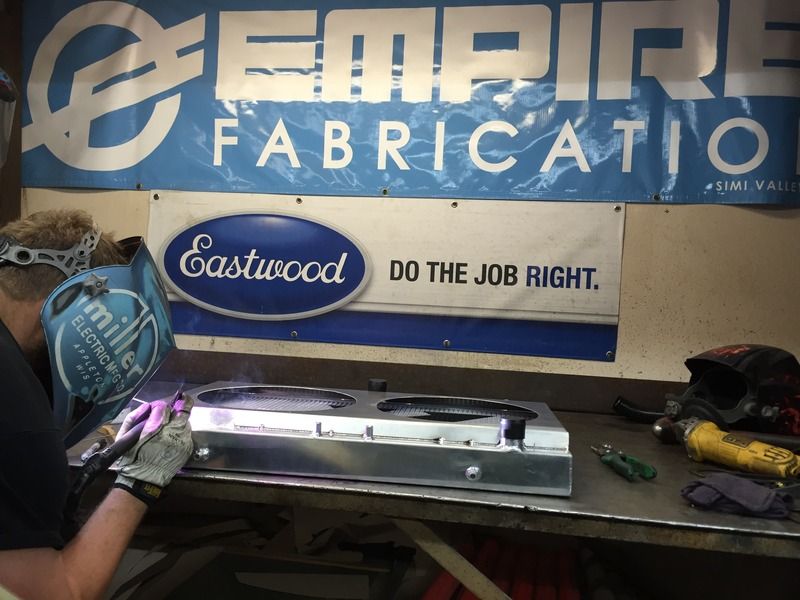
Lastly, here he is throwing down some dimes with his eastwood tig 200 to mount it onto the radiator. This I feel is a better design with all the vibration that is to bound happen than to bolt a shroud onto the radiator.

Image

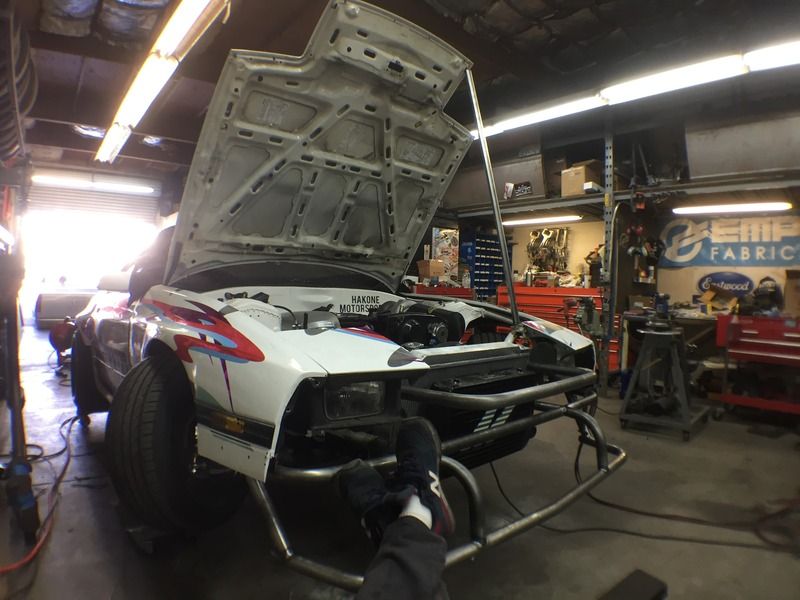
The end product turned out awesome and with a great amount of clearance.

Image

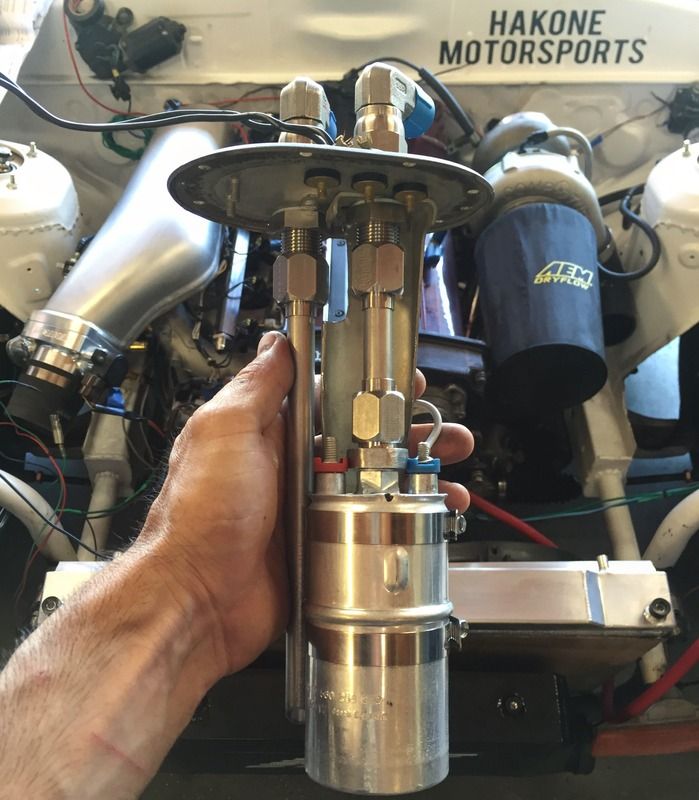
I was also able to make a fuel pump hanger this weekend with the help of my buddy Clint. I used the stock hanger, -8 bulkhead fittings and some 5/8” straight tubing with a single flare on the end. The pump is a Bosch 040 submersible pump. I think she came out pretty nice.

Image

RRRRB
Posts: 758
Joined: Wed Jun 01, 2011 9:31 am
Car: 98 RB powered S14
Location: WA

Post

lookin good dude, i like the fuel pump hanger and the hard line used.

jaredperry
Posts: 50
Joined: Sun Mar 09, 2014 8:43 pm
Car: '69 510
Location: Newbury Park, CA

Post

RRRRB wrote:lookin good dude, i like the fuel pump hanger and the hard line used.
Thanks!

I think the only addition I will add to the fuel pump assembly is some type of check valve for the fuel feed line. Maybe something right after the 90* bulkhead fitting.

jaredperry
Posts: 50
Joined: Sun Mar 09, 2014 8:43 pm
Car: '69 510
Location: Newbury Park, CA

Post

During this week Sean from empire fabrication was kind enough to come over and work with me. We ended up turning some fancy AEM intakes straight sections and bends into front mount intercooler charge pipes. I didn’t anticipate how short these throws ended up being, but I am really excited as to how they turned out; its almost as if this RB25 engine was meant for the FC chassis. He was even able to mount the turbosmart race port BOV for me.

Misc AEM Intakes tubing parts. I failed to get a picture prior. Dude was working too fast…
Image

Sean throwin bends around to see what will work best.
Image

Looks like a 90* and a 120* are pretty much a plug and play. Those AEM tubes sure are fancy.
Image

Sean is suggesting a custom charge pipe setup here. We ended up going a different route with this side.
Image

A 120* and a 90* again look to be a perfect fit.
Image

Full Lock on the drivers side shows that there is plenty of room.
Image

Tig welding with a eastwood 200.
Image

Image

Final products of left and right.

Image

Image

Mounted.

Image

Image

Image

Image

Image

jaredperry
Posts: 50
Joined: Sun Mar 09, 2014 8:43 pm
Car: '69 510
Location: Newbury Park, CA

Post

My buddy Gino over at vaderwerks found some time and wrapped some body parts for the car for last weekend. Fenders and spats are from Shine Auto. Naturally, I was stoked to install the body parts and did so along with starting an initial shakedown for the first start.

Image

Image

Image

With my friends Gino’s help, we ran all the Teflon Steel Braided Fuel lines with AN PTFE Fittings and plumbed in the Cold Start and PCV plumbing system.

Image

Image


I ended up re-routing a lot of electrical wires, changing out the water pump, idlers, timing belt, thermostat and spark plugs. The windshield was also replaced over the weekend.

Oh, here is the first start.

Image

User avatar
peterlujan8
Posts: 6
Joined: Thu Jul 28, 2016 12:53 am

Post

One of the more interesting threads on the site, congrats on the first start! Are you really going to leave the exhaust through the hood?

jaredperry
Posts: 50
Joined: Sun Mar 09, 2014 8:43 pm
Car: '69 510
Location: Newbury Park, CA

Post

peterlujan8 wrote:One of the more interesting threads on the site, congrats on the first start! Are you really going to leave the exhaust through the hood?
Thank you and no. I only had straight tubing on the sunday I fired it up. It was changed the next day.

Here is a video of the map getting cleaned up: https://youtu.be/-p-dqjN8MEQ

RRRRB
Posts: 758
Joined: Wed Jun 01, 2011 9:31 am
Car: 98 RB powered S14
Location: WA

Post

nice man, looking forward to seeing what kinda power it lays down with that turbo..

What EMS you using?

jaredperry
Posts: 50
Joined: Sun Mar 09, 2014 8:43 pm
Car: '69 510
Location: Newbury Park, CA

Post

RRRRB wrote:nice man, looking forward to seeing what kinda power it lays down with that turbo..

What EMS you using?
I am using the Haltech Pro Platinum plug in ECU.

RRRRB
Posts: 758
Joined: Wed Jun 01, 2011 9:31 am
Car: 98 RB powered S14
Location: WA

Post

Been on the dyno yet?

jaredperry
Posts: 50
Joined: Sun Mar 09, 2014 8:43 pm
Car: '69 510
Location: Newbury Park, CA

Post

RRRRB wrote:Been on the dyno yet?
Soon!

On a lighter note, I have had a bit of a break from work and got some stuff done on this beauty. Mounted Skirts, Bumper, Rear Visor and got it all one color.

Image

Image

jaredperry
Posts: 50
Joined: Sun Mar 09, 2014 8:43 pm
Car: '69 510
Location: Newbury Park, CA

Post

Teaser shot:

Image

jaredperry
Posts: 50
Joined: Sun Mar 09, 2014 8:43 pm
Car: '69 510
Location: Newbury Park, CA

Post

So I took the car over to a good fired Sean who owns Empire Fabrication in Simi Valley couple days ago. We were able to knock out a turbo back exhaust and a beefy bash bar from start to finish over the course of a couple long days. The exhaust is tig welded and made of 3" Stainless Steel turbo back using Deeds Engineering CNC'd exhaust hangers, bushings, and Billet V band Clamps. I think it all came out rad. The next thing is to install the LS2 coil packs and a tune over at Natural Aspirations.

Image

Image

Image

Image

Image

Image

Image


Return to “RB20DET / RB25DET / RB26DETT Forum”