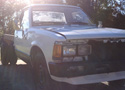
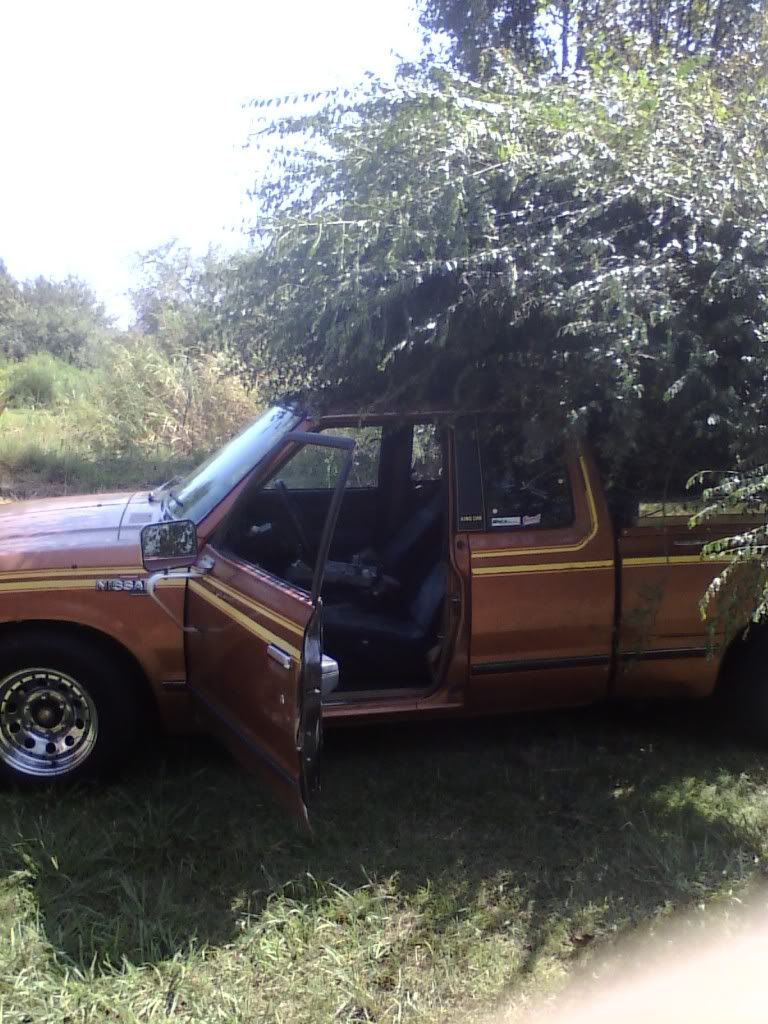
hey new blood here and my 720 I just picked up
-
Rev_D21

- Posts: 5946
- Joined: Sun Jan 12, 2003 9:49 pm
- Car: 1986.5 D21 LB HD 2WD V6 5Speed
1991 D21 Reg 2WD Auto
1995 D21 Reg 2WD 5Spd
1996 D21 Reg 4WD 5Spd
2012 Versa 1.6S 5-Speed - Location: Somwhere in Western NY
- Contact:
Re: hey new blood here and my 720 I just picked up
Yeppers, KA slammer. The fittings are 1/8NPT to barb fittings.
-
synack7350
- Posts: 364
- Joined: Sun Jan 09, 2011 3:08 pm
- Car: nissan '83 720 king cab pickup 2wd 2.4L Z24
- Location: Boaz, AL
-
synack7350
- Posts: 364
- Joined: Sun Jan 09, 2011 3:08 pm
- Car: nissan '83 720 king cab pickup 2wd 2.4L Z24
- Location: Boaz, AL
Re: hey new blood here and my 720 I just picked up
man sorry I've been out of the loop for a while, split with the gf, then finals, but finally got started back on her. I finally got the shocks in from summit. They were back ordered forever! they are pro comp toxic drop shocks, good for drops from 1" - 4" since I only dropped mine like 2 I have plenty of suspension. Was easy peasy putting them on. A little bit of muscle in the compression of the new shocks to get the wholes to line up. If you've already done the drop, doing shocks is going to be nothing. It rides like a dream now! I'll have photos up tomorrow!
Still in a holding pattern for the headers, but I plugged all the extra ports on the carb intake etc... Also adjusted the throttle and pedal as the secondaries weren't opening completely. Holy crap is she fast!!! Still waiting on that diy for the valve adjustments!!!
Still in a holding pattern for the headers, but I plugged all the extra ports on the carb intake etc... Also adjusted the throttle and pedal as the secondaries weren't opening completely. Holy crap is she fast!!! Still waiting on that diy for the valve adjustments!!!
-
Rev_D21
- Posts: 5946
- Joined: Sun Jan 12, 2003 9:49 pm
- Car: 1986.5 D21 LB HD 2WD V6 5Speed
1991 D21 Reg 2WD Auto
1995 D21 Reg 2WD 5Spd
1996 D21 Reg 4WD 5Spd
2012 Versa 1.6S 5-Speed - Location: Somwhere in Western NY
- Contact:
Re: hey new blood here and my 720 I just picked up
Frozen secondaries were not uncommon. Keep up the good work!
-
synack7350
- Posts: 364
- Joined: Sun Jan 09, 2011 3:08 pm
- Car: nissan '83 720 king cab pickup 2wd 2.4L Z24
- Location: Boaz, AL
Re: hey new blood here and my 720 I just picked up
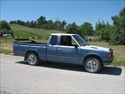
Alright finally some pics
Toxic Shocks!

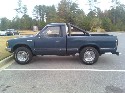
That's her stance now

Motor as it is now except I permanently plugged all the extra ports. L33t stainless vac line. I want to do the rad, brake and fuel lines too. Note the manual choke. Ditched the auto, I like knowing where the choke plates are. It was handy before I got the bigger jets in too, I could manually set my mix.

Ignition coils

stance from the front, its actually about a half inch lower, this was taken right after the new shocks and another torsion adjustment was made. She still had some settling to do. Got her aligned now too! woohoo cheers to even tire wear!

Toxic Shocks!
That's her stance now
Motor as it is now except I permanently plugged all the extra ports. L33t stainless vac line. I want to do the rad, brake and fuel lines too. Note the manual choke. Ditched the auto, I like knowing where the choke plates are. It was handy before I got the bigger jets in too, I could manually set my mix.
Ignition coils
stance from the front, its actually about a half inch lower, this was taken right after the new shocks and another torsion adjustment was made. She still had some settling to do. Got her aligned now too! woohoo cheers to even tire wear!
-
synack7350
- Posts: 364
- Joined: Sun Jan 09, 2011 3:08 pm
- Car: nissan '83 720 king cab pickup 2wd 2.4L Z24
- Location: Boaz, AL
Re: hey new blood here and my 720 I just picked up
so I'm kinda bummed these last couple of days. Trucks been acting up and smoking the blue smoke when I let off on the accelerator at speed. I was thinking head gasket but the rest of the issues aren't there. No oil in the rad fluid, no rad fluid in the oil. I'm thinking she prolly just needs an oil change. I've not bothered with it, cuz the oil pan gasket leaks like a B. When I lowered the truck it messed up the geometry in relation to the exhaust. I broke a weld on the muffler so now she's all redneck loud. Finally I thought it was acting like she was running rich, but the plugs look great, no gas smell in the oil that I can detect. I'm open to ideas...
-
synack7350
- Posts: 364
- Joined: Sun Jan 09, 2011 3:08 pm
- Car: nissan '83 720 king cab pickup 2wd 2.4L Z24
- Location: Boaz, AL
Re: hey new blood here and my 720 I just picked up
well got it sorted the plugs on the 3rd cylinder were shot, prolly a bad ring 
-
N-Dually
- Posts: 93
- Joined: Sat Jul 23, 2011 6:02 pm
- Car: 1986 Nissan 720 Dually
- Location: Tennessee
- Contact:
Re: hey new blood here and my 720 I just picked up
You have a very nice truck! Nice work!
-
synack7350
- Posts: 364
- Joined: Sun Jan 09, 2011 3:08 pm
- Car: nissan '83 720 king cab pickup 2wd 2.4L Z24
- Location: Boaz, AL
Re: hey new blood here and my 720 I just picked up
thanks man:) its been idling a while mostly school / money... but I'm getting back to it. hopefully I can afford body work supplies this month! I'm also wanting to learn how to make custom fiber glass parts. you know valance, roll pan, ground effects. I wanna do something different with the exhaust too. I just haven't decided what yet.
-
synack7350
- Posts: 364
- Joined: Sun Jan 09, 2011 3:08 pm
- Car: nissan '83 720 king cab pickup 2wd 2.4L Z24
- Location: Boaz, AL
Re: hey new blood here and my 720 I just picked up
well money has been flowing again and I've been hard at it. Starter solenoid started sticking so I replaced the whole starter today. Its good for life or they replace it from o'reilly's cost me 40bucks. went ahead and finally ordered some strut rod bushings 32 dollars from advanced. they are the red poly bushings energy suspension I think. My suspension is hella tight with all the new components. Its impressive in the corners. I can hit em wide open and she just grips! Got the valve cover gasket and other assorted bits to do a valve adjustment. I might do it tomorrow. I'm starting to get brave again! If it works out I'll post a howto!
the new starter

My tach and oil pressure gauge!

the new starter
My tach and oil pressure gauge!
Last edited by synack7350 on Mon Aug 08, 2011 2:00 pm, edited 1 time in total.
-
synack7350
- Posts: 364
- Joined: Sun Jan 09, 2011 3:08 pm
- Car: nissan '83 720 king cab pickup 2wd 2.4L Z24
- Location: Boaz, AL
Re: hey new blood here and my 720 I just picked up
Alright Valve adjustment with some pics. It can be stickied and posted in the DIY if y'all want.
parts needed.
27mm Socket
1/2" breaker bar
.30mm feeler gauge
screwdrivers
and I think 7mm wrench can't remember or crescent wrench works.
recommend a new gasket set (12bucks at your preferred parts store)
now I didn't remove the fan or the fan drive belt doing either would have made turning the crank easier (something to keep in mind. I unscrewed the fan shroud to give my breaker bar clearance and kind of fought with the fan.
1st step run engine to operating temperature.
2nd step remove valve cover via 8 valve cover retaining screws
3rd step remove distributor cap. (not necessary if you can read the cam lobes)
4th step align hash mark on crank pully to 0deg timing reference mark
kind of hard to see the hash mark on the crank pully. it's just east of my feeler gauge.

5th step confirm which cylinder is TDC (top dead center) Will be either 1 or 4
you can tell via the position of the rotor in reference to the dizzy cap or by reading the lobes on the cam (if 1st is TDC both the lobes on the valves for the first cylinder will be out of sight (down) the valves will be seated. If not then the 4th piston in TDC.
IF 1st piston is TDC you can check clearance of 1intake 1exhaust 2intake and 3exhaust
IF 4th Piston is TDC you can check 2 exhaust 3 intake 4 intake and 4 exhaust
Here's where you check the clearance and what it looks like in there

the whole kit and caboodle cylinders are 1 2 3 4 from front to back left side intake right side exhaust.

to adjust valve clearance loosen jam nut with wrench and use screw driver to adjust to proper height. there should be a slight drag on the feeler gauge when the gap is correct. while retaining adjustment screw in place re-tighten jam nut. check clearance one more time.
to go between 1st piston TDC and 4th piston TDC requires one full revolution of crank via 27mm socket and breaker bar. that notch on the crank pully will come all the way around to the 0deg reference mark.
once adjustment has been completed reinstall opposite of removal and happy truckin!
Here's a picture of a cam lobe. the way it works cam load presses on rocker arm which opens that valve. so you want to check the valves with them shut ie the cam lobe not pressing on the rocker arm.

also a good time to go ahead and paint the valve cover that color you've always wanted it to be


parts needed.
27mm Socket
1/2" breaker bar
.30mm feeler gauge
screwdrivers
and I think 7mm wrench can't remember or crescent wrench works.
recommend a new gasket set (12bucks at your preferred parts store)
now I didn't remove the fan or the fan drive belt doing either would have made turning the crank easier (something to keep in mind. I unscrewed the fan shroud to give my breaker bar clearance and kind of fought with the fan.
1st step run engine to operating temperature.
2nd step remove valve cover via 8 valve cover retaining screws
3rd step remove distributor cap. (not necessary if you can read the cam lobes)
4th step align hash mark on crank pully to 0deg timing reference mark
kind of hard to see the hash mark on the crank pully. it's just east of my feeler gauge.
5th step confirm which cylinder is TDC (top dead center) Will be either 1 or 4
you can tell via the position of the rotor in reference to the dizzy cap or by reading the lobes on the cam (if 1st is TDC both the lobes on the valves for the first cylinder will be out of sight (down) the valves will be seated. If not then the 4th piston in TDC.
IF 1st piston is TDC you can check clearance of 1intake 1exhaust 2intake and 3exhaust
IF 4th Piston is TDC you can check 2 exhaust 3 intake 4 intake and 4 exhaust
Here's where you check the clearance and what it looks like in there
the whole kit and caboodle cylinders are 1 2 3 4 from front to back left side intake right side exhaust.
to adjust valve clearance loosen jam nut with wrench and use screw driver to adjust to proper height. there should be a slight drag on the feeler gauge when the gap is correct. while retaining adjustment screw in place re-tighten jam nut. check clearance one more time.
to go between 1st piston TDC and 4th piston TDC requires one full revolution of crank via 27mm socket and breaker bar. that notch on the crank pully will come all the way around to the 0deg reference mark.
once adjustment has been completed reinstall opposite of removal and happy truckin!
Here's a picture of a cam lobe. the way it works cam load presses on rocker arm which opens that valve. so you want to check the valves with them shut ie the cam lobe not pressing on the rocker arm.
also a good time to go ahead and paint the valve cover that color you've always wanted it to be
-
fastboatman29212
- Posts: 493
- Joined: Sun Jul 25, 2010 6:45 pm
- Car: left this forum. Sold my truck.
- Location: South Carolina
Re: hey new blood here and my 720 I just picked up
Very nice. I will def reference this when I do mine in a coupla weeks. Needs to go in the DIY section for sure.
-
synack7350
- Posts: 364
- Joined: Sun Jan 09, 2011 3:08 pm
- Car: nissan '83 720 king cab pickup 2wd 2.4L Z24
- Location: Boaz, AL
Re: hey new blood here and my 720 I just picked up
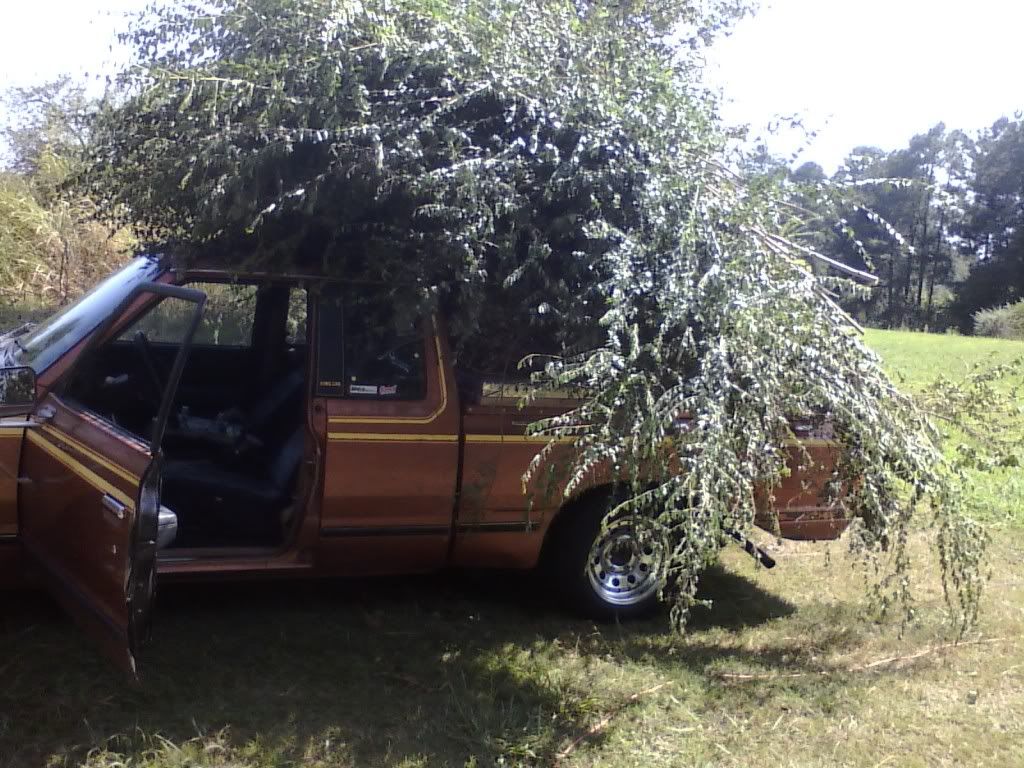
Well been quite busy with work on the plantation. I call it "the land reclamation act of the year of our lord two thousand and eleven". Here's some photos of my little beast earning its keep.

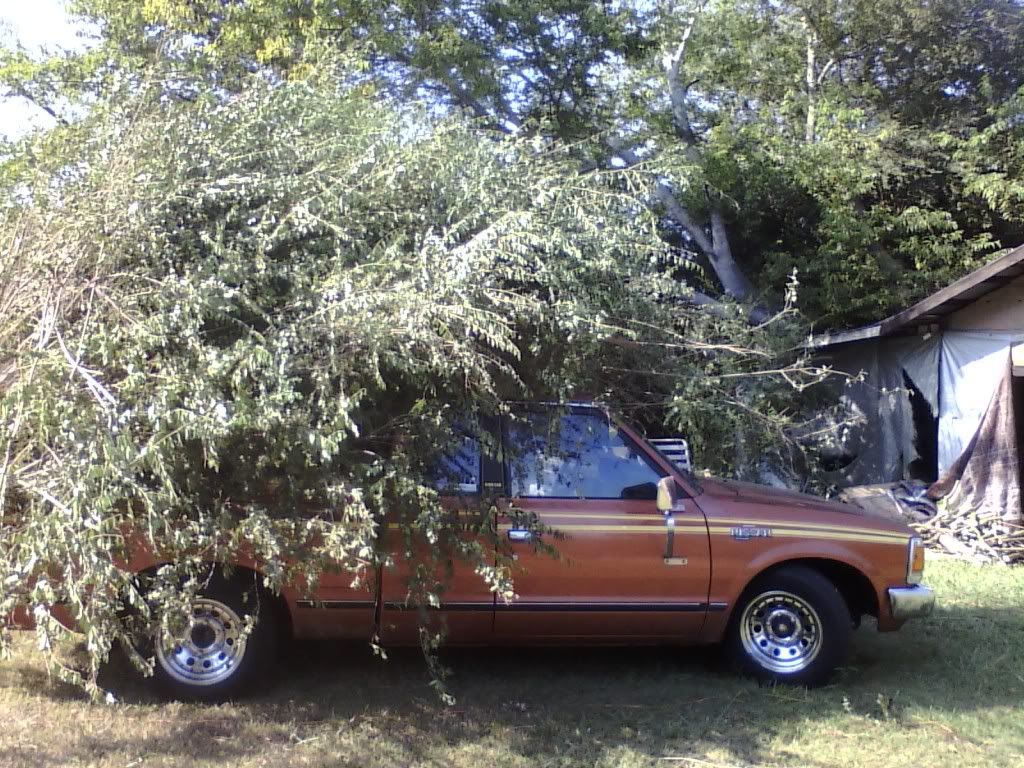
Its not all been work without tinkering. I cleaned up the engine bay some more. Deleted the charcoal canister / coil mounting bracket. Oh and mounted my coils in a way that I think is way cleaner. Cleaned up and deleted a bunch of wiring for options I lack. Redid some of the wiring. Including the lead that goes to the dizzy (its much happier now). Pulled out the windshield washer reservoir (the pump was leaking so I took it apart to replace an O ring, now that I have it out I don't know that I'm going to bother putting it back in. Deleted my Antenna. Removed tow stuff, going to rework it so that I can hide it. Still might need to tow somethin never know.
Pictures of what I've done and continue to do, and continue to do again to follow in the next few days!
Removed my gauge cluster redid some wiring back there and sprayed the ?shroud? silver it looks sick now. I have white gauge faces on order. If anyone has a working speedo they want to get rid of shout at me. I'll take it off your hands. Plan on recoloring the needles as well... Neon blue maybe? It'd match my theme.
I installed some fog lights in the bumper holes (where the rubber goes stock). They work good and look clean.
I installed a 2 farad capacitor for my subs (actually whole electrical system). I dunno if I mentioned replacing the starter I think I did. Anyway while I was doing that I discovered that my alternator is only rated for 37 amps!!! WTF I didn't even know they made alternators that put out 37amps. I think the stock one was 50? This is a no go for my heavily modified electrical system. It also explains not only the severe light dimming when my subs hit but also it seemed like my spark was severely weakening too (act like it'd run rich when drawing power). Since installing the Cap I've got some heavy pep in my step! Alternator is in the near future!
Left to do in the next day or two before school starts back up. I've got some fancy ply wood I'm going to use to custom fab the back area for my subs amps speakers and future audio / light equipment. Debating also making a custom console from it. That or add a 3rd seat. I know a third seat sounds kind of lame with buckets but I was thinking it'd be awesome to have a fold down arm rest / console. and then it folds up and I can have a chick sit there you know straddling... well you get the picture. got some stain and poly to try on the wood otherwise I'll carpet it.
More electrical stuff toggles and tiny green LED's for a switch / indicator panel for all my goodies. My current switches are beginning to look too bastardized. fab that up and get it wired. Do the gauges and do something about the oil pressure gauge to make it blend. Rewire headlights with old school 3way fused pull switch I got for hella cheap.
install all new mirrors. hopefully my subs wont bust the rear view again.
September!!!! body work and paint finally!!!! need some shaved handles for doors and tailgate. Custom roll pan from the sheet metal place, new alternator, electric fan, water pump, radiator. Maybe get some kenwood 6*9"s to replace the 5.25s in the rear. Headers! muffler 1 in 2 out for that double exhaust look, and tips! going to be an expensive month! It might not all get done...
its a bit much from my initial daily driver plan, but hell man I love this ********** truck!!!! I can smoke em barely even getting on it. I might just redo the e brake to a pedal so I can drift it lol. Would definitely like to get her on a dyno to see what this mouse motor is doing. You wouldn't believe it from what I started with! Its friggin strong!
Its not all been work without tinkering. I cleaned up the engine bay some more. Deleted the charcoal canister / coil mounting bracket. Oh and mounted my coils in a way that I think is way cleaner. Cleaned up and deleted a bunch of wiring for options I lack. Redid some of the wiring. Including the lead that goes to the dizzy (its much happier now). Pulled out the windshield washer reservoir (the pump was leaking so I took it apart to replace an O ring, now that I have it out I don't know that I'm going to bother putting it back in. Deleted my Antenna. Removed tow stuff, going to rework it so that I can hide it. Still might need to tow somethin never know.
Pictures of what I've done and continue to do, and continue to do again to follow in the next few days!
Removed my gauge cluster redid some wiring back there and sprayed the ?shroud? silver it looks sick now. I have white gauge faces on order. If anyone has a working speedo they want to get rid of shout at me. I'll take it off your hands. Plan on recoloring the needles as well... Neon blue maybe? It'd match my theme.
I installed some fog lights in the bumper holes (where the rubber goes stock). They work good and look clean.
I installed a 2 farad capacitor for my subs (actually whole electrical system). I dunno if I mentioned replacing the starter I think I did. Anyway while I was doing that I discovered that my alternator is only rated for 37 amps!!! WTF
Left to do in the next day or two before school starts back up. I've got some fancy ply wood I'm going to use to custom fab the back area for my subs amps speakers and future audio / light equipment. Debating also making a custom console from it. That or add a 3rd seat. I know a third seat sounds kind of lame with buckets but I was thinking it'd be awesome to have a fold down arm rest / console. and then it folds up and I can have a chick sit there you know straddling... well you get the picture. got some stain and poly to try on the wood otherwise I'll carpet it.
More electrical stuff toggles and tiny green LED's for a switch / indicator panel for all my goodies. My current switches are beginning to look too bastardized. fab that up and get it wired. Do the gauges and do something about the oil pressure gauge to make it blend. Rewire headlights with old school 3way fused pull switch I got for hella cheap.
install all new mirrors. hopefully my subs wont bust the rear view again.
September!!!! body work and paint finally!!!! need some shaved handles for doors and tailgate. Custom roll pan from the sheet metal place, new alternator, electric fan, water pump, radiator. Maybe get some kenwood 6*9"s to replace the 5.25s in the rear. Headers! muffler 1 in 2 out for that double exhaust look, and tips! going to be an expensive month! It might not all get done...
its a bit much from my initial daily driver plan, but hell man I love this ********** truck!!!! I can smoke em barely even getting on it. I might just redo the e brake to a pedal so I can drift it lol. Would definitely like to get her on a dyno to see what this mouse motor is doing. You wouldn't believe it from what I started with! Its friggin strong!
Re: hey new blood here and my 720 I just picked up
Cant wait to see what your gonna do next!
-
Bloodman324
- Posts: 112
- Joined: Sun Jul 03, 2011 9:02 pm
- Car: 1981 Datsun 720 Kingcab 2WD Automatic
Re: hey new blood here and my 720 I just picked up
I am super jealous of what youve done to your truck! haha i hope one day ill get mine fixed up as good as yours!
-
synack7350
- Posts: 364
- Joined: Sun Jan 09, 2011 3:08 pm
- Car: nissan '83 720 king cab pickup 2wd 2.4L Z24
- Location: Boaz, AL
-
Bloodman324
- Posts: 112
- Joined: Sun Jul 03, 2011 9:02 pm
- Car: 1981 Datsun 720 Kingcab 2WD Automatic
Re: hey new blood here and my 720 I just picked up
Welcome  and hey, i happen to have am instrument cluster that is exactly the same as yours, my trucks an 81, and when i got my interior parts it wouldnt fit, cuz i thinks it was out of an 84 but if you want the speedo out of it you can have the whole cluster if you want
-
synack7350
- Posts: 364
- Joined: Sun Jan 09, 2011 3:08 pm
- Car: nissan '83 720 king cab pickup 2wd 2.4L Z24
- Location: Boaz, AL
Re: hey new blood here and my 720 I just picked up
hell yeah sweet! how much you want for it?
-
Bloodman324
- Posts: 112
- Joined: Sun Jul 03, 2011 9:02 pm
- Car: 1981 Datsun 720 Kingcab 2WD Automatic
Re: hey new blood here and my 720 I just picked up
lol id take 5 bucks for it, not like ill ever use it haha
-
synack7350
- Posts: 364
- Joined: Sun Jan 09, 2011 3:08 pm
- Car: nissan '83 720 king cab pickup 2wd 2.4L Z24
- Location: Boaz, AL
Re: hey new blood here and my 720 I just picked up
bet!! I sent details via PM
-
Bloodman324
- Posts: 112
- Joined: Sun Jul 03, 2011 9:02 pm
- Car: 1981 Datsun 720 Kingcab 2WD Automatic
Re: hey new blood here and my 720 I just picked up
Thanks! haha I sent you a reply via PM
-
synack7350
- Posts: 364
- Joined: Sun Jan 09, 2011 3:08 pm
- Car: nissan '83 720 king cab pickup 2wd 2.4L Z24
- Location: Boaz, AL
Re: hey new blood here and my 720 I just picked up
oh bad day bad day. Pretty sure something seriously busted internally. I knew this day was coming but its never a good day when it finally comes. Wish I could find a cheapo motor to swap in so I can rebuild this one properly at my leisure. I was driving at about 60 when I lost power the truck back fired a bunch rapidly till it eventually just died. (broken valve you think?)
-
Bloodman324
- Posts: 112
- Joined: Sun Jul 03, 2011 9:02 pm
- Car: 1981 Datsun 720 Kingcab 2WD Automatic
Re: hey new blood here and my 720 I just picked up
Damn! that really sucks! Did you try to restart it and see if it would run and see what type of noise it made? Oh and i know a guy down here that has an engine out of one of these trucks for sale. Don't know how that would help you though, seeing as it would be hard to send it to you hahahaha, but really, thats just a bummer. hope its a somewhat easy fix
-
synack7350
- Posts: 364
- Joined: Sun Jan 09, 2011 3:08 pm
- Car: nissan '83 720 king cab pickup 2wd 2.4L Z24
- Location: Boaz, AL
Re: hey new blood here and my 720 I just picked up
yeah it just back fired a ton when I tried to restart it. turned over hard. I'm thinking its a busted valve but I'll find out for sure later today. I'm not sweating it bro. I knew it was going to happen eventually. I have a line on some cars to get me by while I rebuild the motor, or buy a new one. Pretty clean nissan altima for sale down the road for 2g's not a bad deal.
-
synack7350
- Posts: 364
- Joined: Sun Jan 09, 2011 3:08 pm
- Car: nissan '83 720 king cab pickup 2wd 2.4L Z24
- Location: Boaz, AL
Re: hey new blood here and my 720 I just picked up
well happy day, went to pick it up and see about getting it towed managed to fix it there on the spot. Turns out the bolt holding the rotor in place worked its way out so the rotor naturally stopped spinning. Easy fix. Well you know what they say if it isn't one thing its everything. On the way back to the house the bottom bolt holding my alternator on broke. Lucky I was right next to the part store and as I've been meaning to replace that 37 amp (wtf) thing. I went ahead and just bought a new one. It wasn't designed to go in the 720 but there's alot of room to play around to get any alternator to fit as long as the offset for the belt is right. I managed to get it in there with just a large crescent wrench, and a pair of channel locks that's all the tools I had with me lol. (same with fixing the dizzy earlier) BTW bloodman got the gauge set thanks bro!
-
synack7350
- Posts: 364
- Joined: Sun Jan 09, 2011 3:08 pm
- Car: nissan '83 720 king cab pickup 2wd 2.4L Z24
- Location: Boaz, AL
Re: hey new blood here and my 720 I just picked up
How I did my coils (took out the old bracket that held them and the charcoal cannister. Makes more room  )
)

My New Alternator

new battery hold down and windshield wiper tank gone.

another Shot of the coils

projects time
New to me gauge cluster (thanks bloodman) with white gauge faces installed

Custom switch panel I made. Used some really rusty steel took a wire wheel to it then hit it with black undercoat after I made all the holes. Don't mind the red LED that ones special it triggers the missiles.

tomorrow install new thermostat (already flushed the whole system yesterday) was going to leave the thermo stat out but it runs too cold with full flow all the time. Ie it runs like s***.
Add blue loctite to stupid rotor bolt!
Start fabbing my custom king section!!!
My New Alternator
new battery hold down and windshield wiper tank gone.
another Shot of the coils
projects time
New to me gauge cluster (thanks bloodman) with white gauge faces installed
Custom switch panel I made. Used some really rusty steel took a wire wheel to it then hit it with black undercoat after I made all the holes. Don't mind the red LED that ones special it triggers the missiles.
tomorrow install new thermostat (already flushed the whole system yesterday) was going to leave the thermo stat out but it runs too cold with full flow all the time. Ie it runs like s***.
Add blue loctite to stupid rotor bolt!
Start fabbing my custom king section!!!
-
Bloodman324
- Posts: 112
- Joined: Sun Jul 03, 2011 9:02 pm
- Car: 1981 Datsun 720 Kingcab 2WD Automatic
Re: hey new blood here and my 720 I just picked up
Hey no problem man haha glad i could help and looks good! what do the switches activate anyhow?
-
synack7350
- Posts: 364
- Joined: Sun Jan 09, 2011 3:08 pm
- Car: nissan '83 720 king cab pickup 2wd 2.4L Z24
- Location: Boaz, AL
Re: hey new blood here and my 720 I just picked up
Gauge Cluster Installed today!

Night Shot

started working on customizing the king portion of my cab. Its home for my subs. Just making things more permanent I'll finish tomorrow.
frame the base

base

just another pic of my sexy subs with my newish cap.

Finishing plywood can't remember what its called starts with an L. Couldn't decide if I wanted to stain it or carpet it. I decided to carpet it and use whats left for a custom console (stained).

Recesses perfect for the speakers. This is what I'm aiming for.


speaker installation


Oh and bloodman the switches are for fog lights, my custom interior lights, will be adding bed lights, If and when I bag her, I'll use that red switch to drop her to the frame (for parking lol). I have an extra switch might add ground effects???
Oh pssh here's a picture of me just so you know I spent most of my life west coast or new york. Just in case any of yall have some ideas cuz my location says alabama heh. I'm not a native no offense to any potential locals.

Night Shot
started working on customizing the king portion of my cab. Its home for my subs. Just making things more permanent I'll finish tomorrow.
frame the base
base
just another pic of my sexy subs with my newish cap.
Finishing plywood can't remember what its called starts with an L. Couldn't decide if I wanted to stain it or carpet it. I decided to carpet it and use whats left for a custom console (stained).
Recesses perfect for the speakers. This is what I'm aiming for.
speaker installation
Oh and bloodman the switches are for fog lights, my custom interior lights, will be adding bed lights, If and when I bag her, I'll use that red switch to drop her to the frame (for parking lol). I have an extra switch might add ground effects???
Oh pssh here's a picture of me just so you know I spent most of my life west coast or new york. Just in case any of yall have some ideas cuz my location says alabama heh. I'm not a native no offense to any potential locals.
-
synack7350
- Posts: 364
- Joined: Sun Jan 09, 2011 3:08 pm
- Car: nissan '83 720 king cab pickup 2wd 2.4L Z24
- Location: Boaz, AL
Re: hey new blood here and my 720 I just picked up
well I deleted my EGR valve today completely. Plugged the intake and exhaust manifolds. Rewired for a new battery that was larger (my mains wouldn't reach the posts). I used 4awg stereo cable I picked up at the car audio place as I already had the ends I needed. It'll definitely be quite the upgrade of the "big 3" as car audio guys call it. I also replaced the dizzy cap and rotor used blue loctite on all the screws involved with that process so maybe my rotor won't come unbolted while I'm driving down the highway. Also purchased a timing light just to see how far my advance is with my dizzy cranked all the way over. Well pezi I'd like to see what you get for a reading off your truck. I got 4degrees BTDC. I think its just the nature of the weber. I'm starting to think about modifying the slots on the dizzy so I can get close to ping. Specs say 3degs BTDC is the standard. I'm skeptical if my vacuum advance on my dizzy is working. I sucked on the hose (haha shush) and got no advance from it. When I gave her some throttle the timing seemed to retard in proportion to the throttle (that kind of makes sense???) I dunno.
-
synack7350
- Posts: 364
- Joined: Sun Jan 09, 2011 3:08 pm
- Car: nissan '83 720 king cab pickup 2wd 2.4L Z24
- Location: Boaz, AL
Re: hey new blood here and my 720 I just picked up
removed EGR and using the double nut trick to remove studs.

found some long bolts (hacked em down) that had the same thread. I made the cover out of some old galvanized roofing scrap with a pair of tin snips and a drill. I have a bunch of Misc gasket material (you can pick up a pack of assorted from your preferred auto parts store for like 5 bucks) I made a gasket out of some fairly thick cork rubber gasket stuff.


removed the icky pipe from the exhaust side.

a little percussive manipulation.


just slapped that on their no exhaust leak.
and finished up my switches...


found some long bolts (hacked em down) that had the same thread. I made the cover out of some old galvanized roofing scrap with a pair of tin snips and a drill. I have a bunch of Misc gasket material (you can pick up a pack of assorted from your preferred auto parts store for like 5 bucks) I made a gasket out of some fairly thick cork rubber gasket stuff.
removed the icky pipe from the exhaust side.
a little percussive manipulation.
just slapped that on their no exhaust leak.
and finished up my switches...