

1. lift your car with a jack, and use jack stands for safety.
(get to know your car. these are the proper terms & names for the parts.)
2.remove that top bolt circled in pink

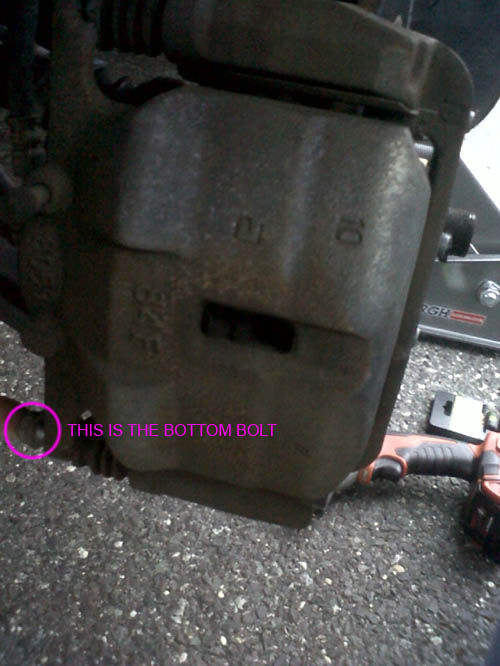
3. remove the bottom bolt circled in pink as well.
4.a few more names for you to understand.
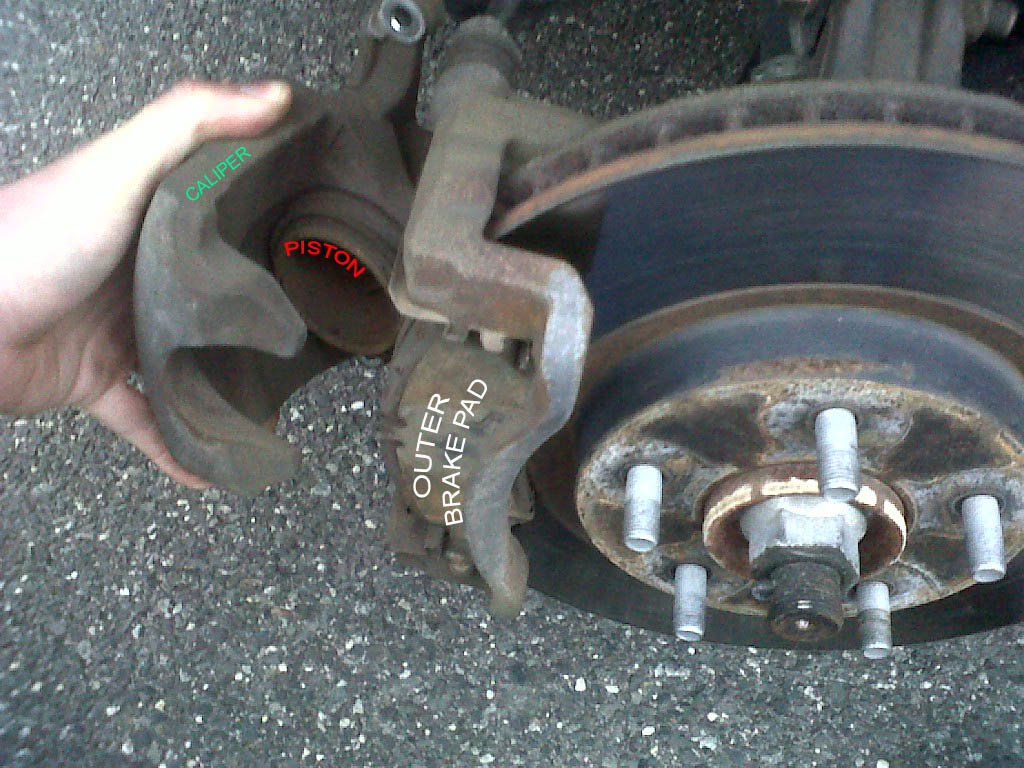
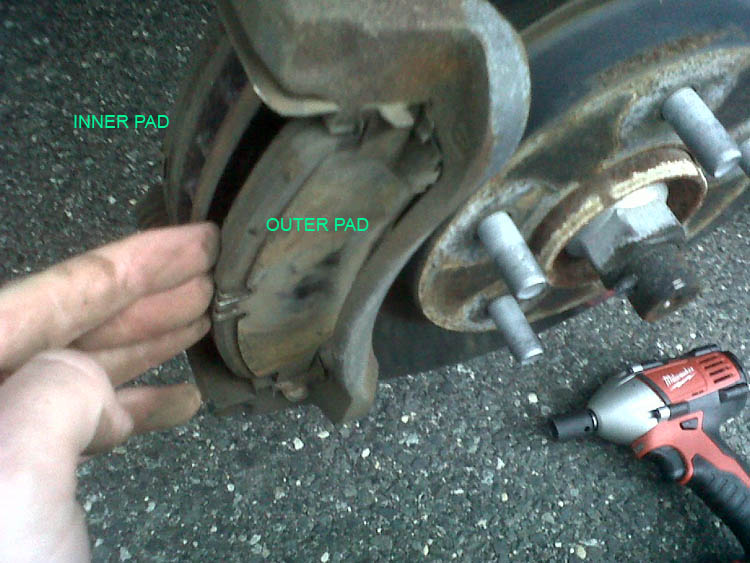
5. shimmy out the outer pad, and the inner pad. they might take some wiggling, or a flat screw driver to gently pry out/apart from the rotor.
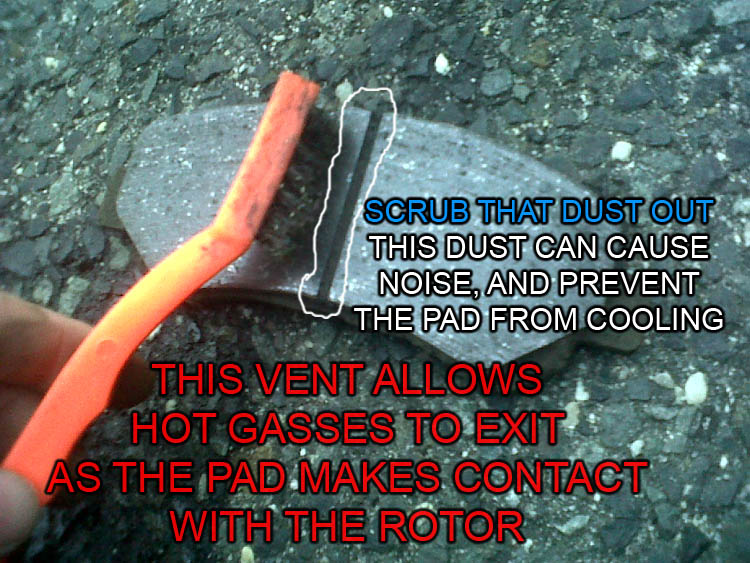
6. your brake pads have a vent in them. that allows hot gasses to escape while the brake pad is sliding along the rotor. often that gets clogged with brake dust (like mine here) and required cleaning. that is one reason why brakes will make noise, even when they dont require replacing.
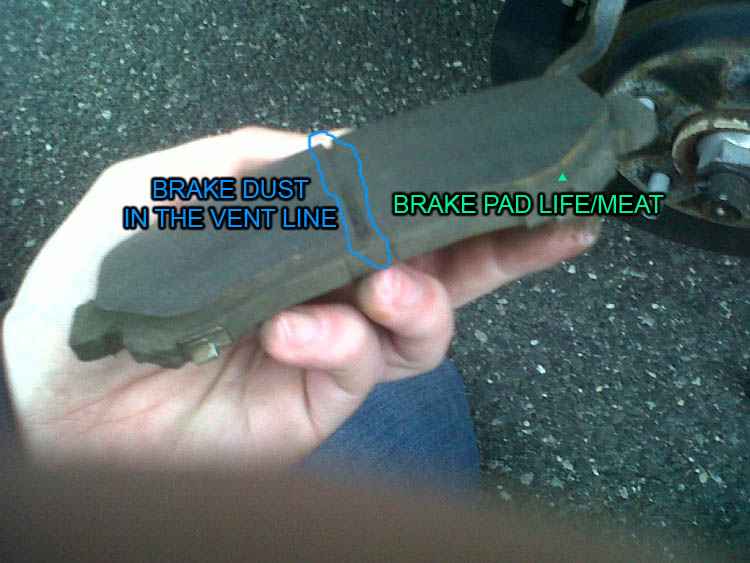
7. take a brush, and gently release the dust. you can use a brake cleaner or simple green to get out. flush with water to clean off the pad.
8. apply some anti-seize or brake caliper grease, to the backs of the pads(the shiny metal plate) so to make sure everything is smooth operating.
9. clean the piston gently too. take care to not touch the rubber boot. 6 - Clean the caliper itself. Be careful not to damage the rubber dust boot. I sometimes use a toothbrush.
(if you are replacing the pads, you will need to push the piston back into its home inside the caliper. you can use your thumbs, or a C-clamp.) Before you begin to push the piston - take off the cap for the brake fluid so not to over-load anything and to get bubbles out if they form.
10. assemble everything back together. make sure to tighten the two bolts to 34.5lbs. make sure the rubber boots, and the metal piece inside the rubber boot that the bolt gets screwed into are sitting right and flush with the caliper. you will see that the piece is squared off and needs to sit on the flat notch on the caliper
if you will be needing to replace your rotors = that will require you to remove the caliper mount that surrounds the rotor. that can be a tough job since those bolts are on REALLY right. i often have to use a breaker bar for those. Using a 19mm wrench, remove the two bolts securing the caliper bracket bracket. remove the 2 retaining clips from each end of the caliper bracket. Be sure to note their positions and orientation. you can also now remove the brake rotor. (Sometimes the rotor will seize itself to the hub. In this case, you can bang it from the ebge and the back(only if your replacing the rotor can you bang the back) with a hammer until it releases. This can be often a total pain - took me 45mins once on a 2002 maxima.)
TIPS: never allow the caliper to hang off the rubber brake line hose. it could cause a tear, allowing brake fluid to leak out- and resulting in a crash. never touch the brake pad surface(the side with the vent) with dirty fingers, or grease. Also, while your in there, clean as much as you can. Its not often your in there, so clean up, and you will see that your brakes wont squeak as much.
if you are replacing ONLY the pads, try and keep the compound of the pads (ie; organic or ceramic or others) the same as what you took off. if you are replacing the same pads/compound you wont need to do anything to the rotors that you are leaving on. if your changing compounds - take 150emery paper and remove as much as you can of the old material off the rotors. this will help with bedding in the new pads.)
BEDDING IN YOUR NEW PADS: (general tips)
(Caution: Immediately after installing new pads, rotors or a big brake kit, the first few applications of the brakes will result in very little braking power. Gently use the brakes a few times at low speed in order to build up some grip before blasting down the road at high speed. Otherwise, you may be in for a nasty surprise the first time you hit the brakes at 60 mph.)
1. From 5mph hit your brakes gently to warm the pads. drive like that for a hundred feet or so.
2. From 35mph hit your brakes till about 5mph - do NOT come to a compelte stop. (do this 5 times until you feel good stopping power)
3. From 60mph, gently apply the brakes a couple of times to bring them up to operating temperature. This prevents you from thermally shocking the rotors and pads in the next steps.
Make eight to ten near-stops from 60mph to about 10-15 mph. Do it HARD by pressing the brakes firmly, but do not lock the wheels or engage ABS. At the end of each slowdown, immediately accelerate back to 60mph and then apply the brakes again.
DO NOT COME TO A COMPLETE STOP! If you stop completely and sit with your foot on the brake pedal, you will imprint pad material onto the hot rotors, which could lead to vibration and uneven braking.
The brakes may begin to fade after the 7th or 8th near-stop. This fade will stabilize, but not completely go away until the brakes have fully cooled. A strong smell from the brakes, and even some smoke, is normal.
After the last near-stop, accelerate back up to speed and cruise for a while, using the brakes as little as possible. The brakes need only a few minutes to cool down. Try not to become trapped in traffic or come to a complete stop while the brakes are still very hot.
During Steps 1 & 2, a de-gassing process occurs which may produce an odor coming from your pads as they complete the break-in cycle. This odor is normal and is part of the process your pads must go through to achieve their ultimate level of performance. The odor will go away after allowing your braking system to cool for approximately 30 minutes.
As with any new set of pads, do not tow a trailer or do any hauling during the break-in period.
Full seating of your new brake pads normally occurs within 1,000 miles.
