D2 RS coilovers

Forum for Infiniti M35 and M45, and Nissan Fuga owners.
User avatar
svard75
Posts: 1564
Joined: Mon May 11, 2009 3:26 am
Car: 06 M35x
Location: Toronto, Ontario, Canada

Post

Installation of D2 RS Coilover kit for 2006 Infiniti M35x AWD
(Done in May 2013. Kit and/or instructions may change)

Tools used
Electric Impact drill (Reversible, 7.5A, 1/2" drive)
Impact 6-point socket set 10-22mm long and short 1/2" drive
1/2" drive extension pieces long and short
24" breaker bar 1/2" drive
Hydraulic jack
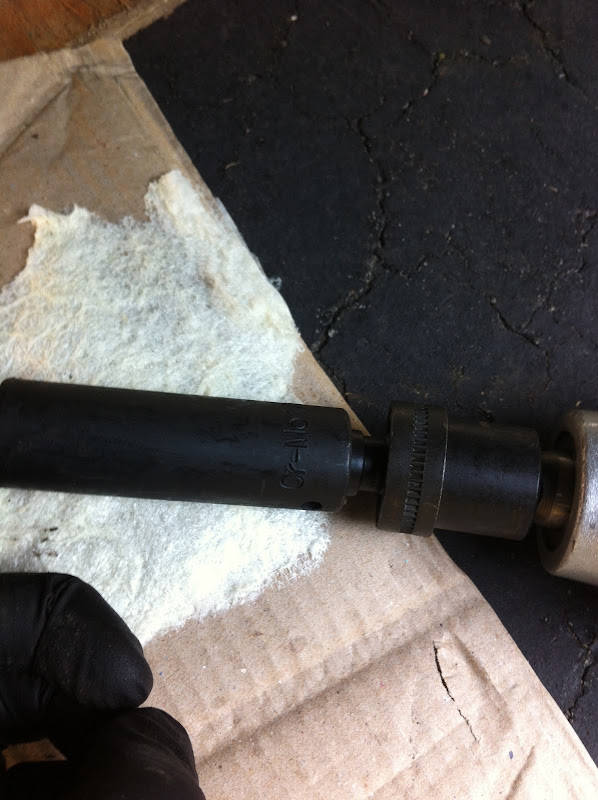
Nice to have 1/2" drive impact grade U-Joint (Flex joint) adapter F to M.
Adjustable wrench
Drill and assorted bits for steel
Rubber mallet
Steel head hammer

Safety Parts used
Jack Stands (1 tone or greater)
Safety blocks (to prevent car from moving)
Mechanics gloves or disposable gloves (Preferably gloves that have textured fingers)
Knee pads or cushion while working on the ground

Liquids/Sprays used
PB Blaster
Rubberized Undercoating spray (Used to coat parts to protect from the elements)
Copper anti-seize paste (Applied to all bolts/nuts prior to installation)

Parts not included in kit
Silicone baking sheets (I used these as new gaskets)
M16 (5/8") x 80mm (3-3/16") Grade 8 or higher bolt, lock washer and nylon locking nut or similarly sized bolt/nut for rear lower stut mounting
Large diameter hose clamp > 3-4" diameter (I used this as a solution to the brake block mount on the new struts)

D2 RS Coilovers (Boxed Up)
Image

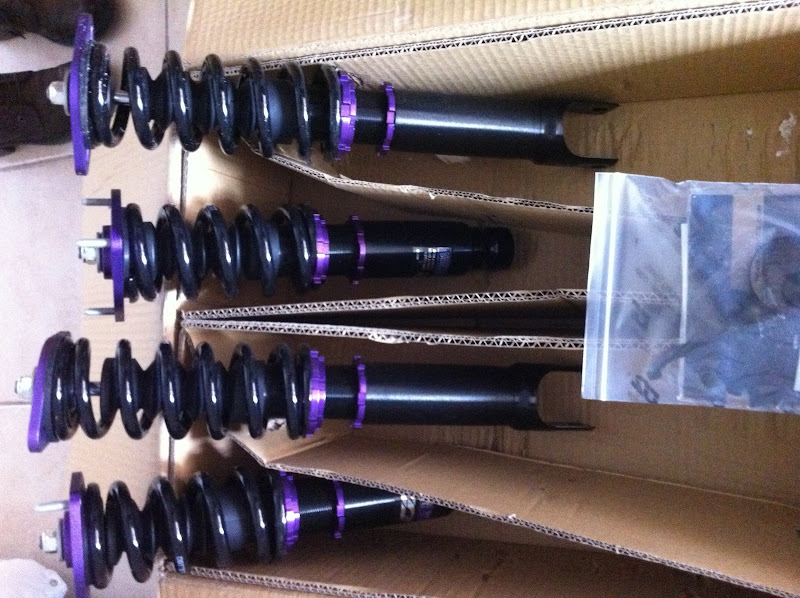
D2 RS Coilovers (Opened Up)
Image

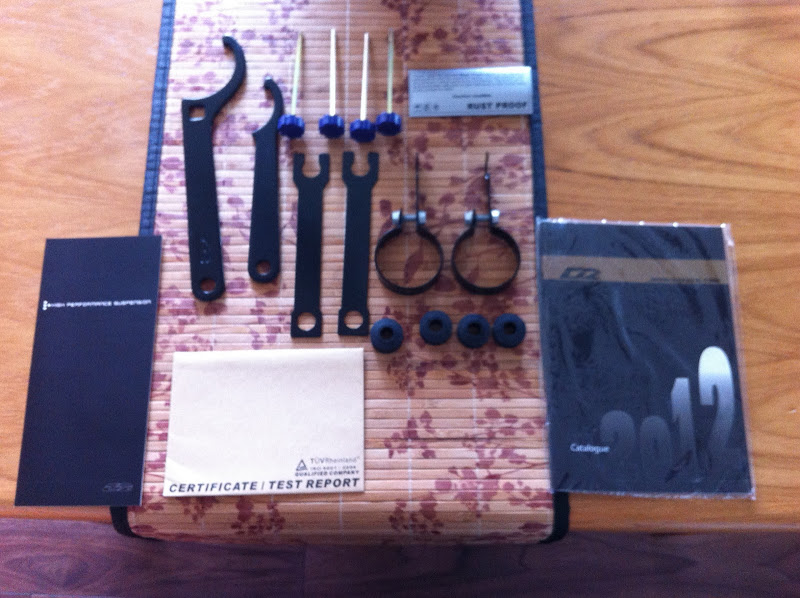
D2 RS Coilovers (Accessories)
Image

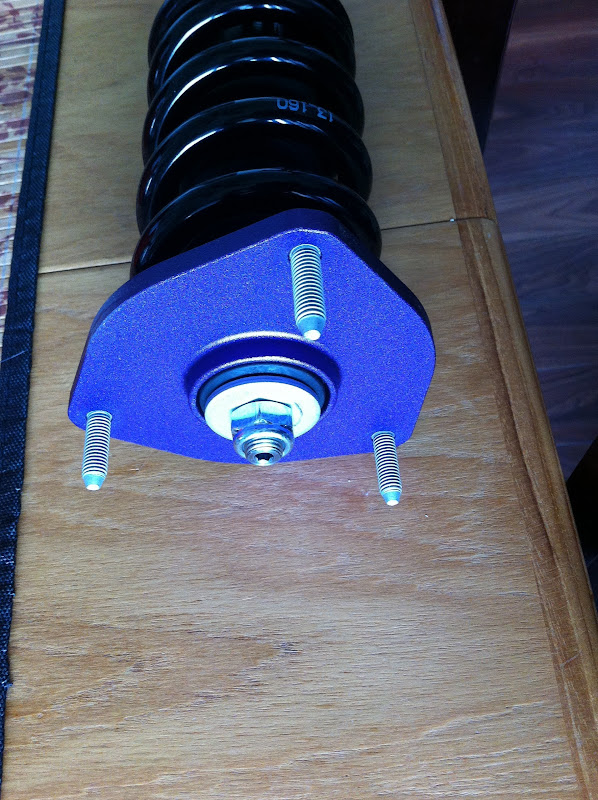
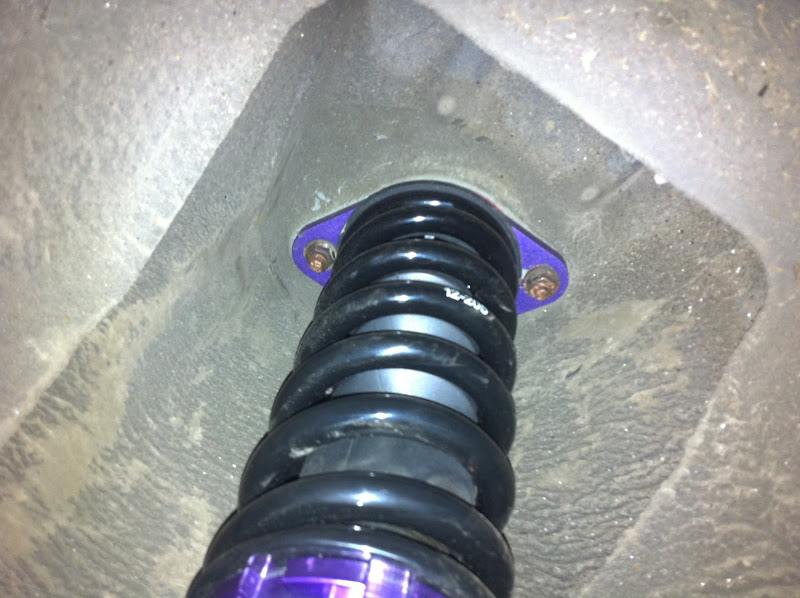
D2 RS Coilovers (Fronts top view Infiniti M35x AWD)
Image

D2 RS Coilovers (Rears top view Infiniti M35x AWD)
Image

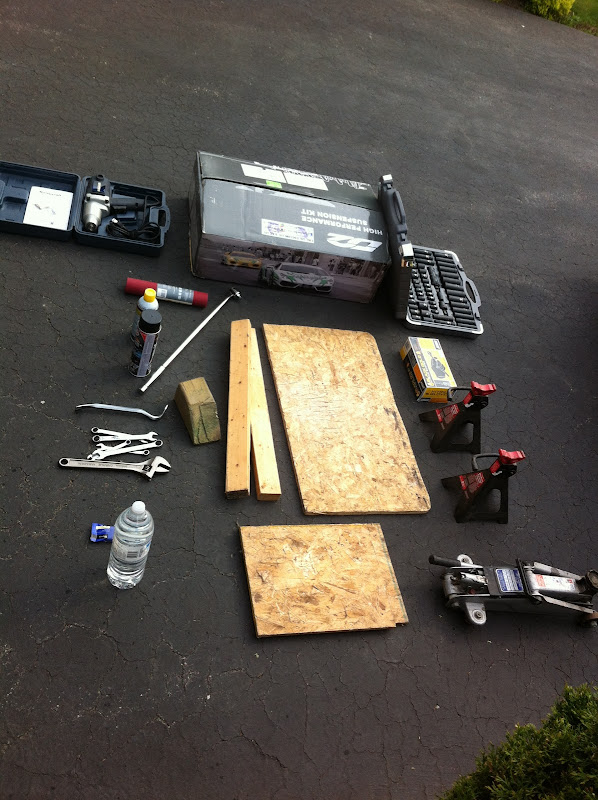
Some Of The Tools I Used Layed Out
Image

Preparing The Coilovers For Installation.

Find a flat place to park the car and using a measuring tape measure all four corners from the ground to the wheel well. Write those numbers down on paper.
Prepare the coilovers for installation by setting the preload on the springs. The coilovers come with three collars. Since I don't know the official names for each of them I will simply call the top one collar 1, collar2, etc. Loosen collar 2 and loosen collar 1 so the spring moves freely between the top mount and collar 1. spin collar 1 up to the spring and tighten by hand. Using the larger spanner tool tighten collar 1 one full turn. Spin collar 2 up to collar 1 and using the two spanner wrenches tighten them as much as possible by hand. Remember to tighten in opposing directions to they are tight against each other. Preload complete!
Next set the predetermined (Estimated) shock height. Feel free to use my numbers as a starting point (3.5" front bottom of collar 2 to top of collar 3 and 3.75" rear) This gave me 26 14/16th" from the ground to the fender for the fronts and 27 2/16th" from the ground for the rears.

Removing The Old Struts

Place the safety wheel blocks on the rear wheels and apply the parking brake as far down as possible.
Image
Remove the front wheel covers and loosen all 5 wheel bolts. Using a jack raise the front drivers side up by the outer subframe mount.
Image
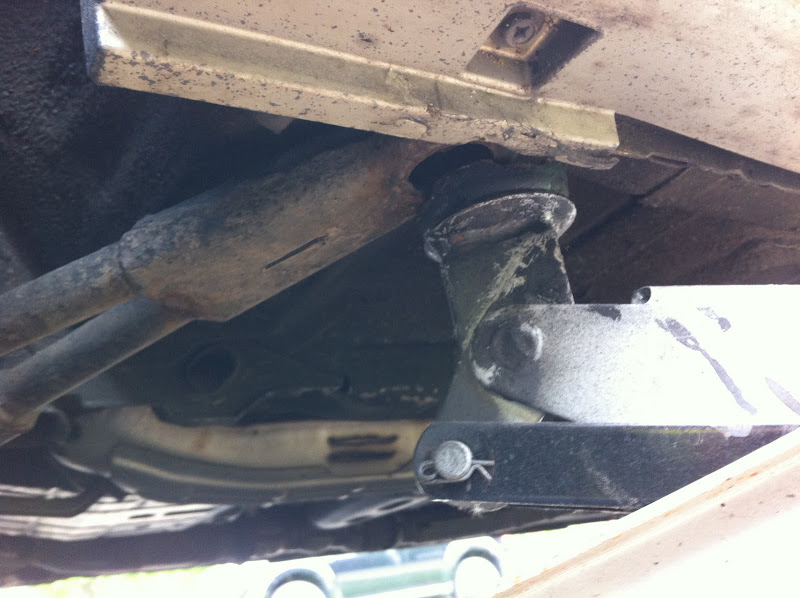
Once the front wheel leaves the ground place the drivers side jack stand onto the outer subframe area
Image
Remove the jack and repeat on the passenger front wheel. Both front wheels must be off the ground in order for the sway bar to be removed. Do not attempt to remove it with one wheel on the ground as you could injure yourself!

Remove the front wheels. Spray pb blaster on the sway bar nut (Underneath the lower control arm in the middle, only seen from underneath the car)

spray the lower suspension wishbone bolt and nut, spray the upper wishbone bolt and around the strut mounting area of the wishbone
Image
Image
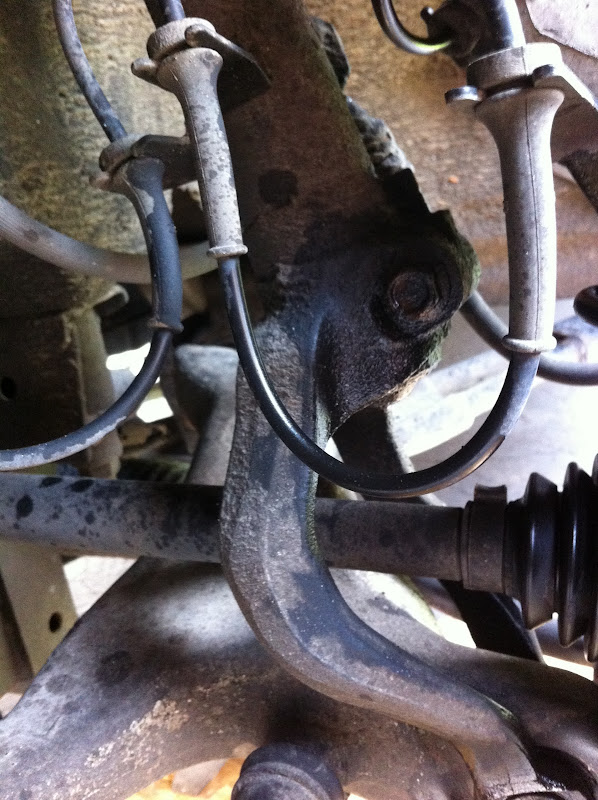
spray the rear retainer bolts as well, and spray the brake block nut.
Image

Spray both the drivers and passenger side and let sit for 30 minutes. I used a piece of wood underneath my spray areas to catch the drips and prevent damage to the driveway.

Remove the sway bar bolt. You'll need to use a wrench on the front side holding the nut in place while you remove the rear nut I believe it is a 19mm nut (The U-Joint impact bit helped)
Image
Bang the sway bar link bolt out of the lower control arm.
Image
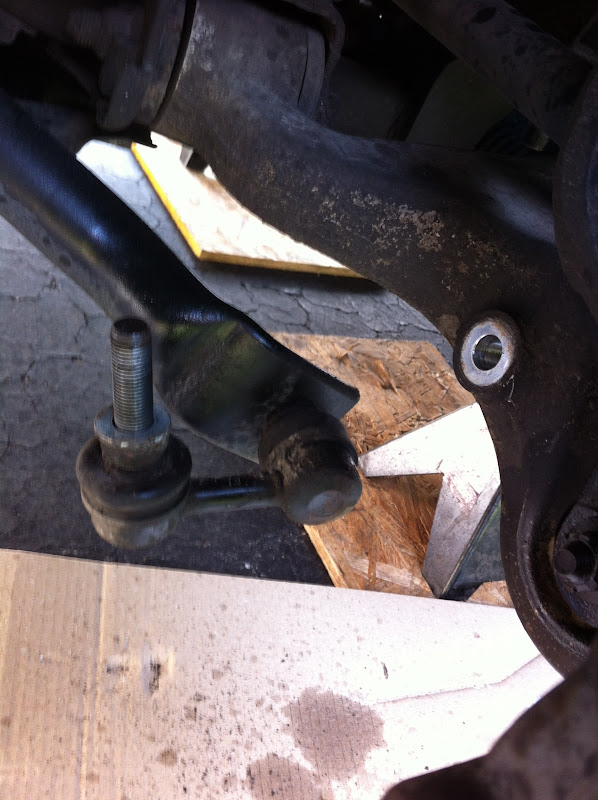
Remove the lower strut wishbone nut and bolt (the bolt and nut are also19mm I believe). Remove the nut while holding the bolt head with an adjustable wrench.
Image
Bang the bolt out towards the rear. The steering linkage is in the way to completely remove the bolt but you can lower it just enough to pull it out.
Image
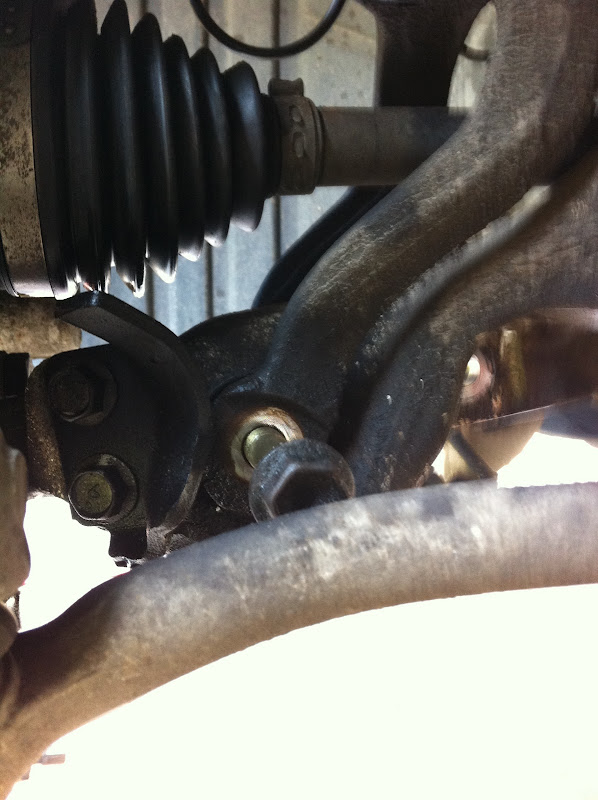
Remove the two 17mm retainer bolts. I had to use an extension and rotate the steering just enough to fit the extension between the steering linkage end links and my impact drill.
Image

Remove the upper wishbone bolt (17mm). Using a pry bar, place in between the joint of the upper wishbone strut mount and pry away while pushing down on the wheelhub. This should free the strut from the lower wishbone. Keep working on it until the wishbone can be removed.
Image
I completely removed the wishbone it and cleaned it up.
Remove the brake block nut and remove the brake block off the old shock body. Remove the ABS lines off the front of the old shock body.
Image
Remove the 3 upper strut mount bolts in the engine bay (12mm) while holding the strut
Image
(It may help to remove the AC line retainer ahead of time and rotate it upwards so it's out of the way)
Pull out the old struts.

Installing Front Coilovers

Remove the old strut upper red gasket and use it as a template to cut out new gaskets out of the silicone baking sheet. Place the new gasket on the top mount of the front strut, using copper anti seize apply liberal amounts to the three bolts. Install one of the 4 supplied adjustment knobs into the top of the strut. Install the strut into the upper mount and screw the bolts down (Don't tighten the nuts yet). Apply copper anti seize into the upper wishbone strut mount area and push the strut as far down as possible (Do not install the Bolt at this time). Don’t worry if the strut does not completely seat into the wishbone we'll deal with that later. Lubricate the lower wishbone bolt and nut with copper anti seize and install (Tighten to spec). Lubricate the retainer bolts with copper anti seize and Install the retainer (Tighten to spec). Place the jack under the lower control arm and push up until the shock drops fully into the wishbone seat. You may have to use the rubber mallet to give the wishbone a few wacks. Using the D2 supplied long "I" bracket run the upper wishbone mounting bolt through this bracket and install (Tighten to spec).
Image
Remove the jack. Do not install the anti sway link yet. Tighten the 3 nuts on the top strut mount to spec.

Repeat this process on the passenger side without removing the sway bar.

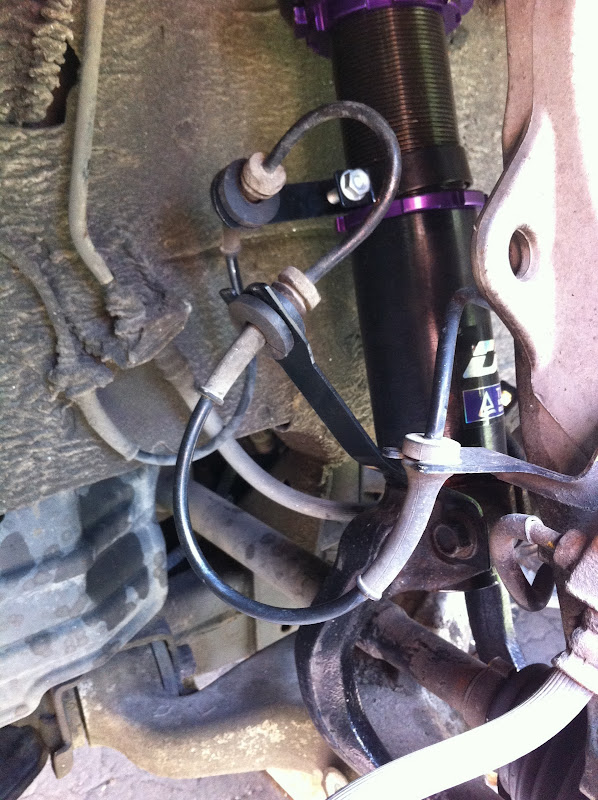
Lubricate the sway bar end link bolt with the copper anti seize and re-install (Tighten to spec). Install the second ABS clamp and using the rubber grommets put the ABS lines in and push into the grooves. For the clamp bracket ensure you have them on the correct sides of the car. The opening in the U mount must face up.

Note: I did not remove any of the OEM rubber mounts rather just added the supplied grommet around the OEM mount and pushed it into the supplied brackets.

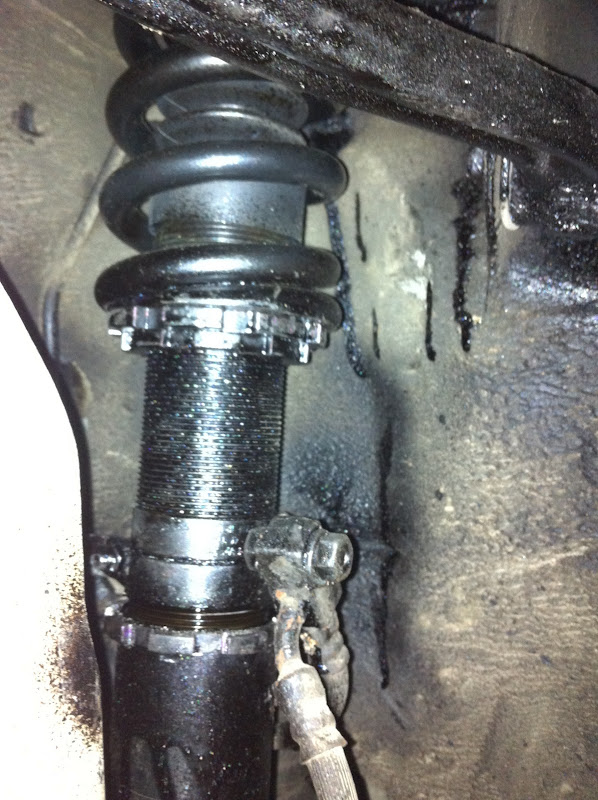
For the brake block I used a large hose clamp and drilled a hole for a bolt. Mounted the brake block to this and clamped it onto the thread body of the new strut. Do not tighten these brackets yet. Height adjustment must happen before these are tightened down.
Image

Install the front wheels and use only 2 nuts (Tighten to spec). Lower both fronts. Roll the car back 10 feet and forward 10 feet to allow to settle. Measure from the ground to the fender in the middle of the wheel. Write it down and compare. If one side is higher than the other you will have to rotate the shock into or out of the lower mount to lower or raise as needed.

You don't have to raise both fronts to adjust the ride height again, just ensure you roll the car back 10 feet and forward 10 feet after putting it down each time you raise it up.

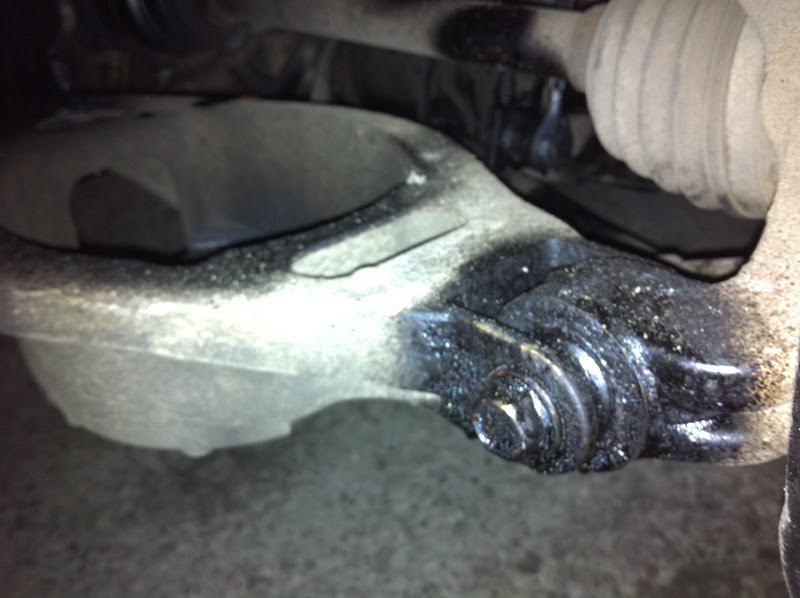
Once you have the height set lock the collar 3 as tight as possible to the lower strut body and using a drift and steel head hammer hit the lock collar 3 a few times to ensure it's snug. At this point you can tighten the ABS clamp and Brake block clamps. I used the Rubberized undercoating to blast the area for a few reasons. I live in a cold climate where things rust from the bottom up so this will protect the suspension against corrosion and seizing of the collars or bolts. It will also prevent the collars and retainers from coming loose over time. This stuff remains pliable so I can re-adjust as needed.

Removing The Rear Strut/Coil

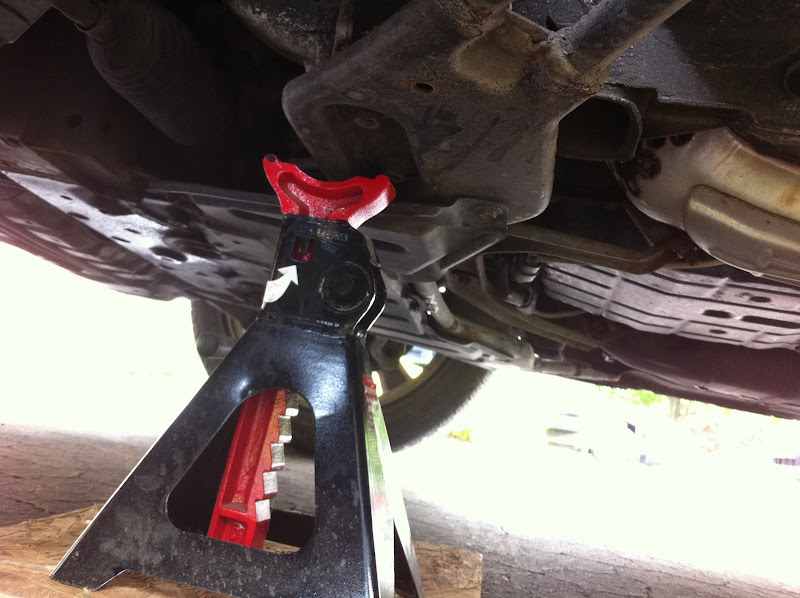
Place the safety wheel blocks on the front wheels. Find the jack points at the rear of the car
Image
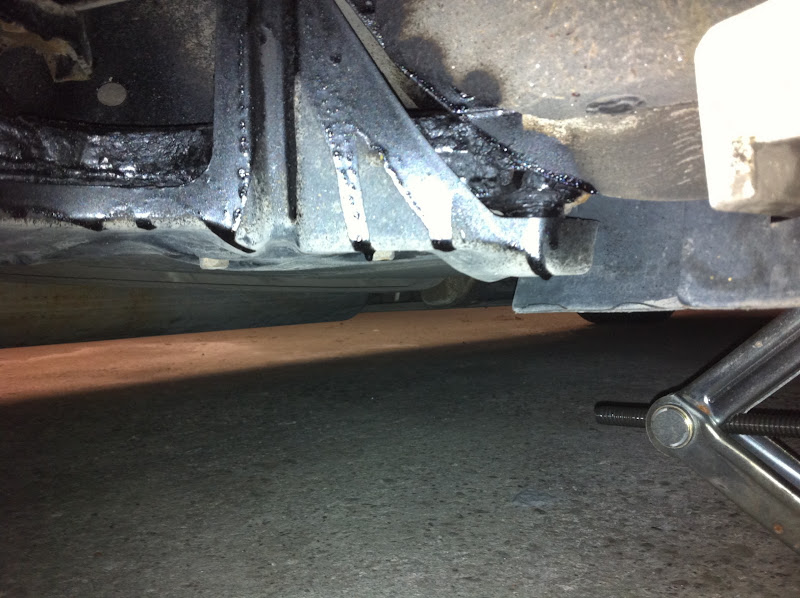
This is the best location for both the jack and the jack stand. It's the rear subframe assembly. Remove the wheel caps and loosen all nuts. Raise both sides and install jack stands. Remove the wheels.
Using a 17mm socket remove the lower shock bolt and remove.
Image
The shock will raise up slightly but there isn't a huge amount of pressure so don't worry about getting injured here.
Remove the two 12mm nuts from the upper shock mount (Hold the shock as you remove these nuts).
Image
Remove the shock.
Using the jack raise the lower control arm (Lower Spring Perch) just enough to release some of the pressure. Ensure you are not raising too high so the car lifts off jack stand. Remove the 17mm bolt and nut off the lower control arm (I used an adjustable wrench for one side)
Image
Using the impact drill and the adjustable wrench I placed it between the bolt head and the control arm and pulled the bolt out while spinning the bolt. Lower the jack slowly to relieve the spring pressure. Press down hard on the lower control arm and remove the spring, lower bushing and upper spring isolator. I sprayed a liberal amount of rubberized underguard where the upper and lower isolators sat to prevent any corrosion. Re-install the lower control arm to the wheel hub. I had to fight this back into place using a screw driver to align the holes (Tighten the nut/bolt to spec).

Installing The Rear Coilovers

Take the old shock gasket and cut a new one out of the same silicone baking sheet. Install the new gasket but just prior to installing the rear coilover understand that the adjustment knobs are not accessible from the inside of the car so set the coilovers to a reasonable setting prior to installation. I started with 18 clicks from full S.
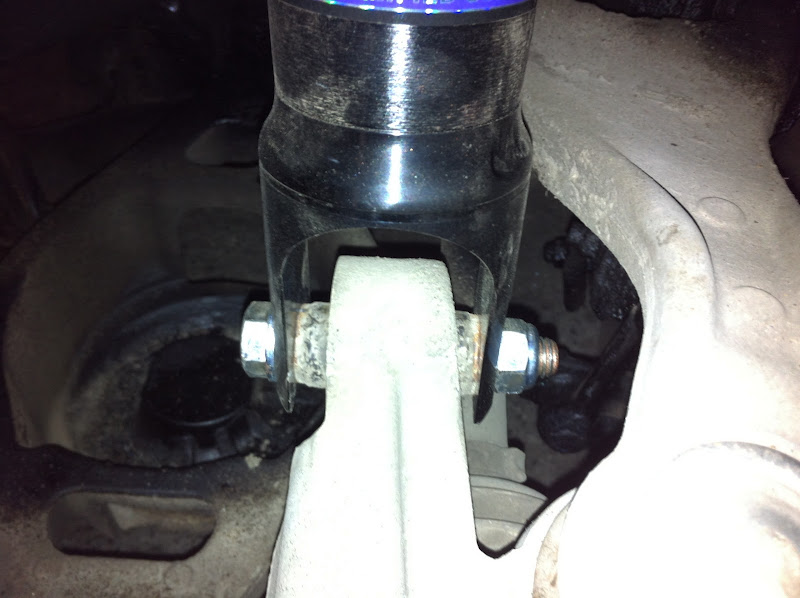
Install the upper nuts but do not tighten to spec yet. Using the bolt and nut you bought mount the lower shock mount to the wheel hub and tighten to spec.
Image
Tighten the upper nuts to spec. Repeat with the other side.

Install the wheels using just 2 nuts and lower the car to adjust height. Once again remember to roll the car forward 10 feet and backwards 10 feet each time to raise the rear to adjust the height. Once height is adjusted as needed remember to use the drift and steel head hammer to secure the collar 3 in place against the lower shock mount. Drop the car and install all wheel nuts and tighten to spec.

At this point I would not take the car to an alignment shop because the suspension needs time to settle. Drive it for a week or so then get it aligned. Don’t go too long as you’ll wear the inside of your tires down.

Before lowering photo
Image

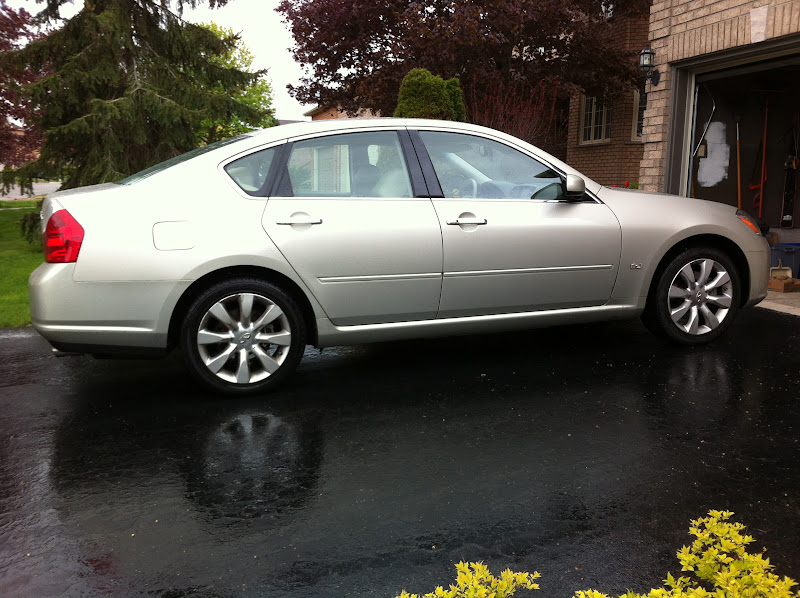
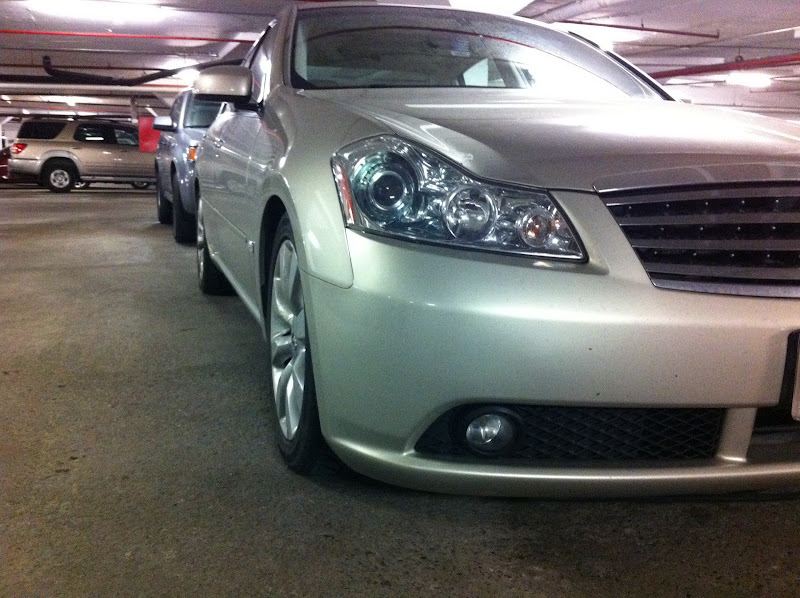
Car after installation
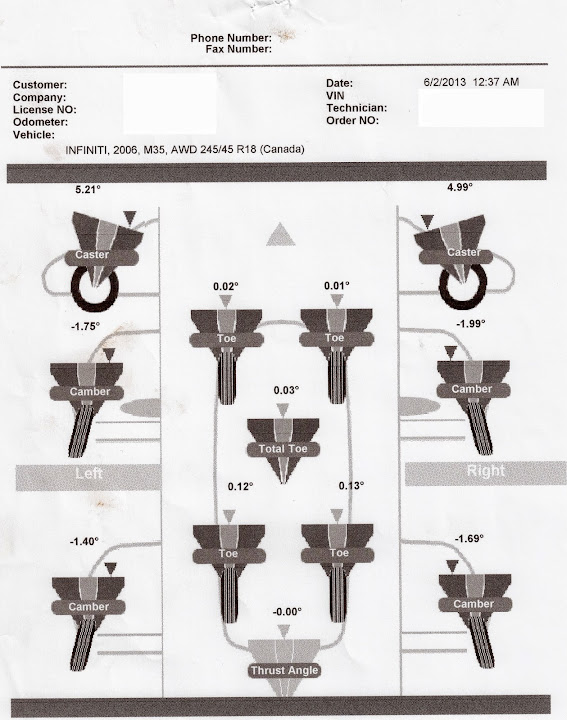
Image

Front Camber Check
Image
Last edited by svard75 on Tue May 21, 2013 9:14 am, edited 6 times in total.


User avatar
svard75
Posts: 1564
Joined: Mon May 11, 2009 3:26 am
Car: 06 M35x
Location: Toronto, Ontario, Canada

Post

Hmm anyone know how to post actual photos not links?

Edit: Figured it out.

06M4.5
Posts: 2478
Joined: Thu Sep 09, 2010 6:04 am
Car: 2006 M45
Location: Florida

Post

Great job with great pics :dblthumb:

Alignment should be done after 1,000 miles or about 45 days after final adjustments are made

User avatar
svard75
Posts: 1564
Joined: Mon May 11, 2009 3:26 am
Car: 06 M35x
Location: Toronto, Ontario, Canada

Post

Thanks. I'll wait a month and do the alignment. As it is now I have to raise the front another 1/2" . I was wondering why ppl were installing spacers. Now I know lol.

06M4.5
Posts: 2478
Joined: Thu Sep 09, 2010 6:04 am
Car: 2006 M45
Location: Florida

Post

spacers should also be done after alignment too, Alignment will correct some of the camber which most of the time pushes the top of the tire out.

Not worth getting spacers if your looking for aftermarket wheels & tires.

GQM45s
Posts: 497
Joined: Thu Nov 03, 2011 12:14 am
Car: 2008 Infiniti M45 Sport Tech Pkg, Advance Tech Pkg, Mobile Entertainment Pkg
Location: Oklahoma City, OK

Post

now that was a beautiful write up, i think i shed tears just reading it like romance novel :rotflmao

User avatar
svard75
Posts: 1564
Joined: Mon May 11, 2009 3:26 am
Car: 06 M35x
Location: Toronto, Ontario, Canada

Post

lol I know it's not pro but I know if I found this writeup before attempting this project I probably would have jumped on the D2's a while ago and would have been better prepared.

User avatar
svard75
Posts: 1564
Joined: Mon May 11, 2009 3:26 am
Car: 06 M35x
Location: Toronto, Ontario, Canada

Post

Hate to resurrect this thread again but wanted to share some insight. I am finding the car to be really bouncy and so began by adjusting the shocks first 10 clicks from full S, then added 6 more, then 4 more, now 5 more for a total of 25 clicks from full S. I think it's getting better but as I mentioned earlier I have to raise the front.

What are people with coilovers adjusting their fronts vs rears? Do you have the fronts stiffer than rears or are they all different and if so what technique did you use to adjust them?

On our terrible wobbly and tar wave ridden roads here in the GTA, Ontario I am scraping the crap out of my engine shield.

Also on a similarly related topic of spacers, I am not planning on buying new wheels as 18" seems to be a good size and look for the car. I will be buying wheel spacers and noticed that 15mm seems to put the wheels right at the edge of the body after lowering. What's the general consensus on wheel spacer size if I want the make the wheel flush with the top of the fender?

06M4.5
Posts: 2478
Joined: Thu Sep 09, 2010 6:04 am
Car: 2006 M45
Location: Florida

Post

Most people remove the front eng shield as it gets lower with time because of the heat.

I have 25front with 20rears (M45)

I Think 18" wheels are to small for an M, 20's look best.

User avatar
merlinq2
Posts: 343
Joined: Sun Oct 24, 2010 8:30 am
Car: 2007 Infiniti M35x
Location: Mississuga Ontario Canada

Post

So MSVARA- the ride is not to your liking? Do you find yourself being thrown around? That is disappointing.

When I had my car dropped (replacing the springs only) the car never scraped while driving across severe road impressions. My drop was 2 inches in the rear and 2.5 in the front. Even at this drop, much respect must be given to speed bumps and some drive way entrance.

User avatar
svard75
Posts: 1564
Joined: Mon May 11, 2009 3:26 am
Car: 06 M35x
Location: Toronto, Ontario, Canada

Post

merlinq2 wrote:So MSVARA- the ride is not to your liking? Do you find yourself being thrown around? That is disappointing.

When I had my car dropped (replacing the springs only) the car never scraped while driving across severe road impressions. My drop was 2 inches in the rear and 2.5 in the front. Even at this drop, much respect must be given to speed bumps and some drive way entrance.
Quite a bit more than stock, however remember my old suspension was at 160k kms. I am going to raise the front 0.5" more and my H&R spacers are on their way. It might not correct the stiffness but I probably won't have to worry about scraping the bottom as much.

User avatar
Ilya
Moderator
Posts: 9803
Joined: Fri Apr 23, 2010 11:20 pm
Car: 2011 M56x but I spend a lot of time on my 2015 Kawasaki Vulcan S. Former owner of a 2007 M35x. Also take care of my wife's 2016 QX60.
Location: Charlotte, NC
Contact:

Post

Adding the post at the top to the HowTo FAQ.

User avatar
svard75
Posts: 1564
Joined: Mon May 11, 2009 3:26 am
Car: 06 M35x
Location: Toronto, Ontario, Canada

Post

Quick update. I changed the settings to 30 front 20 rear and its much better now. No more bouncy. Thanks to 06M4.5 for the advice!

User avatar
merlinq2
Posts: 343
Joined: Sun Oct 24, 2010 8:30 am
Car: 2007 Infiniti M35x
Location: Mississuga Ontario Canada

Post

Let us know how the before and after alignment changes when you get it aligned. Nice job and I do hope you enjoy the enhancement,

User avatar
svard75
Posts: 1564
Joined: Mon May 11, 2009 3:26 am
Car: 06 M35x
Location: Toronto, Ontario, Canada

Post

merlinq2 wrote:Let us know how the before and after alignment changes when you get it aligned. Nice job and I do hope you enjoy the enhancement,
Will do. Cheers :toast:

06M4.5
Posts: 2478
Joined: Thu Sep 09, 2010 6:04 am
Car: 2006 M45
Location: Florida

Post

msvara wrote:Quick update. I changed the settings to 30 front 20 rear and its much better now. No more bouncy. Thanks to 06M4.5 for the advice!
Good to hear

Always here to help :dblthumb:

User avatar
svard75
Posts: 1564
Joined: Mon May 11, 2009 3:26 am
Car: 06 M35x
Location: Toronto, Ontario, Canada

Post

Here are my results pre alignment
Image

Post alignment
Image

They had to install shims and did a best effort, unfortunately I will either need chamber arms or rotate my tires more frequently. Like I said before I may raise my height once I get sick of the ride but for now I'm happy.
Last edited by svard75 on Sun Jun 02, 2013 7:15 am, edited 2 times in total.

User avatar
mexillis
Posts: 2418
Joined: Wed May 27, 2009 2:28 am
Car: M45s
Location: SOVA

Post

Where did they install shims? Camber specs look the same even after alignment.

User avatar
svard75
Posts: 1564
Joined: Mon May 11, 2009 3:26 am
Car: 06 M35x
Location: Toronto, Ontario, Canada

Post

Good question. I'll take a quick look with my flashlight and see if anything is actually there.

User avatar
merlinq2
Posts: 343
Joined: Sun Oct 24, 2010 8:30 am
Car: 2007 Infiniti M35x
Location: Mississuga Ontario Canada

Post

Well good news- sounds like alignment is not to bad.

User avatar
svard75
Posts: 1564
Joined: Mon May 11, 2009 3:26 am
Car: 06 M35x
Location: Toronto, Ontario, Canada

Post

mexillis wrote:Where did they install shims? Camber specs look the same even after alignment.
I couldn't see any shims installed. I may buy the adjustable front and rear chamber arms next year. I want to see how badly the tires will wear as is. I've actually exhausted my splurging budget for this year so that's another reason :chuckle:

User avatar
merlinq2
Posts: 343
Joined: Sun Oct 24, 2010 8:30 am
Car: 2007 Infiniti M35x
Location: Mississuga Ontario Canada

Post

Hey MSVARA- i dropped the car with springs only and my tires are badly cupped and now I have tire conicity - the car wanders to right not matter how much they tweak my alignment. So tire wear will present you with the feeling that your car is wandering. If you plan to drive the car and never return it to stock, you should by the adjustable camber arms. That is what the suspension shop told me. Nice tires are expensive so are the camber arms. Let us know what you decide

User avatar
Ilya
Moderator
Posts: 9803
Joined: Fri Apr 23, 2010 11:20 pm
Car: 2011 M56x but I spend a lot of time on my 2015 Kawasaki Vulcan S. Former owner of a 2007 M35x. Also take care of my wife's 2016 QX60.
Location: Charlotte, NC
Contact:

Post

I am just going to try and rotate every oil change or roughly 5kmi. Trying to avoid buying any additional parts as I no longer will be doing anything to my M. The way she is now is how she will stay other than break/fix/maintenance. I am saving for a bike.

User avatar
svard75
Posts: 1564
Joined: Mon May 11, 2009 3:26 am
Car: 06 M35x
Location: Toronto, Ontario, Canada

Post

merlinq2 wrote:Hey MSVARA- i dropped the car with springs only and my tires are badly cupped and now I have tire conicity - the car wanders to right not matter how much they tweak my alignment. So tire wear will present you with the feeling that your car is wandering. If you plan to drive the car and never return it to stock, you should by the adjustable camber arms. That is what the suspension shop told me. Nice tires are expensive so are the camber arms. Let us know what you decide
Chamber arms are a good idea. Ichiba front and rear adjustable chamber arms together would cost me $600. Naturally I would install them myself but the alignment would run me another $170. My tires cost me $1500 if I replace all 4 at once but only $700 to replace 2 and the 2 front's need to be replaced sooner than the rears. I may have to replace all 4 next year because of the chamber and that's where it get's expensive. Spend $770 now (overbudget) on chamber kit, and $700 next year for 2 new tires or spend $1500 for all four new tires+$770 for chamber kit next year. What would you guys do?

Yes, the car does wander especially on the sections damaged by truck axles but this happened prior to my lowering it's just more pronounced.

What would you guys do?

User avatar
merlinq2
Posts: 343
Joined: Sun Oct 24, 2010 8:30 am
Car: 2007 Infiniti M35x
Location: Mississuga Ontario Canada

Post

I got a flyer from Milton Nissan they are offering a Pot Hole Special- 90 bucks for front wheel alignment and 125 for all four wheels, all wheel drive included.

Call Nissan they are cheaper and the techs are trained at the same facility at the 410 and 401 area.

IMO, I would do the work and get it right -

User avatar
svard75
Posts: 1564
Joined: Mon May 11, 2009 3:26 am
Car: 06 M35x
Location: Toronto, Ontario, Canada

Post

merlinq2 wrote:I got a flyer from Milton Nissan they are offering a Pot Hole Special- 90 bucks for front wheel alignment and 125 for all four wheels, all wheel drive included.

Call Nissan they are cheaper and the techs are trained at the same facility at the 410 and 401 area.

IMO, I would do the work and get it right -
Hmm I will have to think about it. I may be opening a can of worms here. I knew when the car was bought that it was involved in a front side driver impact where the drivers front wheel was impacted. What I don't know is if the body was completely corrected and aligned. I could buy the front camber arms and find that the side where the impact occurred is badly mis-aligned forcing me to have that fixed first (Big $$$).

User avatar
svard75
Posts: 1564
Joined: Mon May 11, 2009 3:26 am
Car: 06 M35x
Location: Toronto, Ontario, Canada

Post

I discussed the situation with the tuner and he suggested I not get the chamber arms. The reason is chamber arms tend to have a stiffer bushing which translates to more suspension noise in the cabin. For a car like ours who would want that?

So my decision is to raise the car 1" all around and reduce the suspension stiffness.

He did also mention something of concern with regards to D2 coilovers. He's used them in the past for tracking his Z350 http://www.onpointdyno.com/?p=1033. When the weather reaches below 7 degrees the piston seals fail. He did say that it was an early set he tested so I'm hoping this version doesn't. :gotme

User avatar
svard75
Posts: 1564
Joined: Mon May 11, 2009 3:26 am
Car: 06 M35x
Location: Toronto, Ontario, Canada

Post

Update: found the car to be way too stiff and raised all 4 corners 0.5". Loosened the front by 5 clicks to 25 from S. much much better. The car is more compliant with the uneven road and it feels more comfortable in the cabin. Less suspension noise too. It still looks great and lowered from stock too.

Final settings

Front and rear were measured from the top of the rim to the fender.

4" 15/16
Front damper settings 25 from full S
Rear damper settings 20 from full S

M4point5
Posts: 119
Joined: Fri Jun 07, 2013 9:19 am
Car: M Forty Five

Post

Nice...coilover install is much easier than my air install. Only issue with coilovers for me is the fact that the roads are complete crap around here. Looking good though on those coilovers

User avatar
svard75
Posts: 1564
Joined: Mon May 11, 2009 3:26 am
Car: 06 M35x
Location: Toronto, Ontario, Canada

Post

Thanks. 3" exhaust!! Lol


Return to “Infiniti M35 and M45 Forum”