im goin for it!i bought one red and one blue.
i want to be like fueler and have a rainbow gauge

Changed the Dash Lights
-
Holidazed
- Posts: 154
- Joined: Sat Jan 10, 2009 5:27 pm
- Car: 2001 Nissan Pathfinder SE
- Location: BC, Canada
Re: Changed the Dash Lights (rhd itr)
KLL: I want to replace the middle LEDs also just like you did except fr with blue bulbs. behind the bose unit and heater controls.
can you please tell me how you did it? where are the bulbs located and what do i have to take apart to get to them?
thanks!
can you please tell me how you did it? where are the bulbs located and what do i have to take apart to get to them?
thanks!
-
slickroger
- Posts: 919
- Joined: Sun Jan 06, 2008 12:33 pm
- Car: Nissan Pathfinder 2001
- Contact:
Re: Changed the Dash Lights (Holidazed)
i am also going to go blue so this information would be very helpful.
thanks
thanks

Re: Changed the Dash Lights (slickroger)
be careful when you remove the dash board. All information are transferred from sensors are collected inside the PCB, located under speed gauge. There is a ribbon cable with lots of pins i think 20 leads,if you broke it, tear it, or as if you dropped a CA glue on it, you may say to whole gauge byebye . At first try, my temperature and gas gauge were dead. on seond try my tachometer was dead. Fortunatelly, i managed to clean all glue droppen insde little socket, and i fitted the ribbon cable back. here is a little trick, there is a cap for that ribbon cable top of gauge. if you will remove you will need that hole to push it back to its place.
I installed 10 leds with calculated resistors inside gauge by glueing them to surface on gauge bottom and they are all sanded to give a light without a focus point. as i mentioned al are white leds. flux type. you may use any kind of white ultra bright leds. your illumination wil be blue. If i can find a white face gauge, i will replace mine, i do not like the blue tint.
if you are brave enough, you can sand the blue tint under gauge faces, but i couldnt remove needles
---------
holidazed:that is the easiest job in this modification. you need to remove the middle dash frame,by removing two screws at bottom. and you will see the double din cd player and AC control. remove screws and control part will be loose, remember that there is asteel cable behind. firmly holding and pulling it with force to up, you will release the control unit. there are two cables for illumination, AC and Airvent buttons has own bulbs so no need to change them. just remove connection.
when you remove knobs by pulling hard and removing its face, you will see only a white bottom. what you will do is to use again sanded flux leds or wide angle white leds and fixing with CA or melted silicon. I installed 6 white leds and 1 blue 1 red for coloring the tint on temperature deal. remember to use resistors for each led and make all leds parallel. Then you can solder leads coming from leds them to bulb sockets. Throw old bulb related things.
Again, for buttons for rear window resistance or hazard signal, i removed bulbs inside and soldered white and yellow leds with resistors again.
About main unit, CD player,(unit is a Clarion but has BOSE brand)you need to fit smallest leds you can find with smallest resistance componets. I used short headed, 5 mm leds, but if you are good on soldering SMS leds, you can use them too. That is a though job to fit LEDs with only soldering to PCB board by removing broken bulbs inside, use a high wattage soldering iron and use it quick to prevent giving damage to PCB of main unit. Calculate the space between the face of main unit and check for buttons if they are stuck.
-
Holidazed
- Posts: 154
- Joined: Sat Jan 10, 2009 5:27 pm
- Car: 2001 Nissan Pathfinder SE
- Location: BC, Canada
Re: Changed the Dash Lights (KLL)
KLL:
wow that sounds complicated to add the LED lights behind the heater and radio controls. I was hoping that I could just unplug the old bulbs and replace with LED lights from ebay that are the same size. I don't want to have to do any soddering or adding resistors as I do not know enough about electrical work to do this.
On the 2001-2004 model pathfinder, to change the gauge lights to blue leds, we can simple unplug the old bulb and replace with the same size LED. no sodering or boards or extra wiring involved. I am hoping it will be the same way for our heater controls. I geuss I will have to just take the dash apart and see what its like.

Re: Changed the Dash Lights (Holidazed)
ankara??? holy s*** you must have the best pathfinder in all of Turkey!!!
Re: Changed the Dash Lights (fueler)
well, actually no. i saw several pathfinders which are in mint condition. especially there are nice 2001 makes.
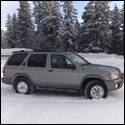
this is what i own now, i try to maintain it, and i think i will use some wheel spacers and install offorad style bumpers.
this is what i own now, i try to maintain it, and i think i will use some wheel spacers and install offorad style bumpers.
Re: Changed the Dash Lights (Holidazed)
you can do that way of course, but light distribution will not be equal on every part of face. give it a try? if you can find good leds which can illuminate its surroundings, lets call this very wide angle leds, as bulbs are, you will be fine. if you will use several leds nfortunatelly you will need a new wiring and little effort.Holidazed wrote:KLL:
wow that sounds complicated to add the LED lights behind the heater and radio controls. I was hoping that I could just unplug the old bulbs and replace with LED lights from ebay that are the same size. I don't want to have to do any soddering or adding resistors as I do not know enough about electrical work to do this.
On the 2001-2004 model pathfinder, to change the gauge lights to blue leds, we can simple unplug the old bulb and replace with the same size LED. no sodering or boards or extra wiring involved. I am hoping it will be the same way for our heater controls. I geuss I will have to just take the dash apart and see what its like.
I wish that i could find good led bulbs for gauge itself. It didnt satify my expectations. Light distribution is not so good. you can see this on red markings on tachometer surface and on needles
-
slickroger
- Posts: 919
- Joined: Sun Jan 06, 2008 12:33 pm
- Car: Nissan Pathfinder 2001
- Contact:
Re: Changed the Dash Lights (KLL)
i have a 2001 and as sson as i get a chance i will be pulling my climate control unit out and trying to replace the bulbs. i pulled out the seat warmer buttons those look easy to replace just gonna need some really small LEDS and check the resistance.
i will be soldering everything, its the only way to know its never coming out.
thanks for the info
i will be soldering everything, its the only way to know its never coming out.
thanks for the info
-
Holidazed
- Posts: 154
- Joined: Sat Jan 10, 2009 5:27 pm
- Car: 2001 Nissan Pathfinder SE
- Location: BC, Canada
Re: Changed the Dash Lights (slickroger)
success!
I just finished installing the all 4 of the blue led's in my dash
I used the same 3-led matrix bulbs that slickroger used. looks great and super easy to do this mod. took 15 mins.
I just finished installing the all 4 of the blue led's in my dash
I used the same 3-led matrix bulbs that slickroger used. looks great and super easy to do this mod. took 15 mins.
-
slickroger
- Posts: 919
- Joined: Sun Jan 06, 2008 12:33 pm
- Car: Nissan Pathfinder 2001
- Contact:
Re: Changed the Dash Lights (Holidazed)
Nice looks great
-
bigballerhanh

- Posts: 24
- Joined: Fri Feb 27, 2009 1:47 pm
- Car: 2001 nissan pathfinder
Re: Changed the Dash Lights (pathfinder9035)
Did you get your red bulbs in yet? I am in Harrisburg too.
Re: Changed the Dash Lights (bigballerhanh)
Man Im happy I got my 04 platinum, I love my dash lights. I would def be afraid to take apart my gauge work. If something started smoking on me, it would probs depress me for the day.
Re: Changed the Dash Lights (slickroger)
roger-thanks for the write-up and info on this deal. i did this last night but as soon as i hit the lights smoke started rolling off the back of the gauge cluster and the fuse blew! i got an email in to the people b/c im wondering if one of the leds was bad? i couldnt get either of them to light whatsoever so after trying the leds in all combinations of new/old bases and ploarity and 4 fuse replacements, i stuck the old ones back in and called it good for now.
-
longhornsqx4
- Posts: 587
- Joined: Wed Jan 14, 2009 9:39 pm
- Car: 2001 Nissan Pathfinder 3.5L VQ35DE
Re: Changed the Dash Lights (02pathfinderle)
Does anyone know what bulb is needed for a 01+ qx4 gauge cluster to make it all blue? Im trying to keep it to stuff I can get off ebay
I pulled my gauge cluster, but I have no idea which bulbs are for what and how many of each I would need to change the illumination to blue
I pulled my gauge cluster, but I have no idea which bulbs are for what and how many of each I would need to change the illumination to blue

Re: Changed the Dash Lights (longhornsqx4)
EmptyV tried it, he couldnt figure it out I guess the 01+QX4's have a tube type lighting. search the forums he did a writeup about it
-
longhornsqx4
- Posts: 587
- Joined: Wed Jan 14, 2009 9:39 pm
- Car: 2001 Nissan Pathfinder 3.5L VQ35DE
Re: Changed the Dash Lights (Qxxx4)
I checked all empty v's old threads, and he only madea thread on the center console display leds, nothing about the gauge cluster
I would LOVE to change my cluster over to BRIGHT a** blue
I would LOVE to change my cluster over to BRIGHT a** blue
Re: Changed the Dash Lights (timmack)
fyi i got my smoking issue resolved, like roger said the polarity does mater with these leds. not sure why i couldnt get it right the other night but i took a set of test leads and got the leds to work off the battery so i knew they were good. so i pulled the dash and popped them again and they worked right the first time, looks hella good. props to roger and all others who took time to post on this.
Re: Changed the Dash Lights (timmack)
Hi, I bought the same #74 3 LED matrix lights from autolumination.com. After removing the gauge cluster and attempting to install them, they are too small to fit into the bases, and leave way to much room to wiggle around... Did anyone else have this problem? what size bulbs do fit into the stock bases?
-
slickroger
- Posts: 919
- Joined: Sun Jan 06, 2008 12:33 pm
- Car: Nissan Pathfinder 2001
- Contact:
Re: Changed the Dash Lights (Dippy)
i bought the #74 matrix 3 LEDs and they fit in the original bases very tight.
you might wanna try buying the bases of autolumination if your bases seem to be too big, or you could take other bulbs out and switch bases around and hopefully you have some tighter bases in the cluster gauge. remember polarity matters for the LED's
you might wanna try buying the bases of autolumination if your bases seem to be too big, or you could take other bulbs out and switch bases around and hopefully you have some tighter bases in the cluster gauge. remember polarity matters for the LED's
-
Pwnin O'Brien

- Posts: 1717
- Joined: Wed Jun 24, 2009 1:10 pm
Re: Changed the Dash Lights (slickroger)
slickroger:
Do you remember the polarities for the black twist bases in relation to the PCB board? I pulled out my cluster today to put in new LED's and I didn't remember the orientation of each base. Also, if I reverse the polarity of the new LED's accidentally will this ruin anything? I see the dude whose cluster started smoking and I do not want that.
Also, has anybody purchased and installed the tri-power bulbs from autolumination? I would love to see a pic of the cluster with those installed. I'm really stuck as what kind of LED's to buy.
-
miamiheat3332
- Posts: 1211
- Joined: Wed Aug 13, 2008 12:43 pm
- Car: 2002 Nissan Pathfinder SE - 2006 BMW X5 4.8is - 2001 Audi A4 1.8T Quattro Sport
Re: Changed the Dash Lights (Pwnin O'Brien)
pwnin, i bought the tri- whatever bulbs they are from autolumination and they are good, search for my post titled" My pathfinder ", i have a picture near the end with my ins. cluster.
-
Pwnin O'Brien
- Posts: 1717
- Joined: Wed Jun 24, 2009 1:10 pm
Re: Changed the Dash Lights (miamiheat3332)
Hmmmm....
I'm so torn between which LED bulb to purchase for my cluster. I need something that outputs light around the sides, not really out the top of the bulb. It has to light up that thick clear plastic piece behind the gauges which lights them up. I'm just not sure which will do the best job doing that. The Matrix 3 LED's seem to do a really great job and they have LED's on the sides which is great. The Tri-power says it has a really wide viewing angle, but the site specs them at 140 degrees, which is alright but for this application I need 180 degrees. I wanted to do my own LED setup, but that would require pulling the needles off the cluster and that's not something I really want to do, it seems like a massive pain in the a**.
I'm also needing new LED bulbs for my HVAC dials (the manual type HVAC). I know that also uses #74 bulbs but I don't really know which ones are best for that either. Has anybody replaced the bulbs in their HVAC controls and have pictures? I would really like to see what that looks like.
This is a pretty tough decision
-
slickroger
- Posts: 919
- Joined: Sun Jan 06, 2008 12:33 pm
- Car: Nissan Pathfinder 2001
- Contact:
Re: Changed the Dash Lights (Pwnin O'Brien)
ive now used the Matrix-5 and Matrix-3 infact both are in my dash and you cant tell which one is which so there is really no difference.
I have the auto type HVAC and im trying to find out bulb sizes right now.
I have the auto type HVAC and im trying to find out bulb sizes right now.
-
ascdesigns
- Posts: 21
- Joined: Sat Jul 18, 2009 4:22 pm
Re: Changed the Dash Lights (slickroger)
OK. I have the 3-knob HVAC control panel in my Pathy and just replaced my stock #74 bulbs with the Autolumination Matrix 3 bulbs. Based on the room in there, I'm pretty sure it would fit the Tri-Powers. The only problem I see with the Matrix 3 or Matrix 5 bulbs would be that one or two of the LEDs on the side of the PCB (printed circuit board) would be blocked since they are facing directly upwards into the plastic. The Tri-Powers may disperse the light better, but I can't be certain. Sorry, no pics.
The DIY install is really easy (15-30 min depending on your mechanical ability):1) remove radio/HVAC bezel, two phillips screws on bottom, tug and disconnect the electrical connectors.2) gently pry knobs off using a small thin flathead screwdriver under the wide end of the knob 'grip', i.e. the side opposite the lighted end.3) gently lift up on the plastic tabs holding the HVAC bezel, two on top, three on bottom.4) pull away the black plastic sheet with the graphics. You'll see the two #74 bulbs just sitting there.5) don't bother trying to twist the bases out. Just grab the bulb and pull it out.6) insert your new LED bulbs. Test each one by turning on your lights. If they don't turn on, then pull it out, turn it 180-degrees and re-insert. Test again.7) reassemble everything and you're done!
Thanks,
Al
-
Pwnin O'Brien
- Posts: 1717
- Joined: Wed Jun 24, 2009 1:10 pm
Re: Changed the Dash Lights (ascdesigns)
That was EXACTLY what I was looking for. That was the perfect description. Thank you so much for your help. I have one last question about the HVAC controls. So most of the light needs to exit the top of the LED's to get the best lighting of the dials? It looks like the tri-power would probably be best for that.ascdesigns wrote:OK. I have the 3-knob HVAC control panel in my Pathy and just replaced my stock #74 bulbs with the Autolumination Matrix 3 bulbs. Based on the room in there, I'm pretty sure it would fit the Tri-Powers. The only problem I see with the Matrix 3 or Matrix 5 bulbs would be that one or two of the LEDs on the side of the PCB (printed circuit board) would be blocked since they are facing directly upwards into the plastic. The Tri-Powers may disperse the light better, but I can't be certain. Sorry, no pics.
The DIY install is really easy (15-30 min depending on your mechanical ability):1) remove radio/HVAC bezel, two phillips screws on bottom, tug and disconnect the electrical connectors.2) gently pry knobs off using a small thin flathead screwdriver under the wide end of the knob 'grip', i.e. the side opposite the lighted end.3) gently lift up on the plastic tabs holding the HVAC bezel, two on top, three on bottom.4) pull away the black plastic sheet with the graphics. You'll see the two #74 bulbs just sitting there.5) don't bother trying to twist the bases out. Just grab the bulb and pull it out.6) insert your new LED bulbs. Test each one by turning on your lights. If they don't turn on, then pull it out, turn it 180-degrees and re-insert. Test again.7) reassemble everything and you're done!
Thanks,
Al
Thanks!
-
Empty V
- Posts: 2308
- Joined: Mon Jan 21, 2008 10:53 am
- Car: 2001 Infiniti QX4, 1982 Corvette C3 Shark
Re: Changed the Dash Lights (Pwnin O'Brien)
If it's anything like my 01 QX4 gages then you're F$#ked. Well I'm sure there's a work around but it doesn't rank that high on the list for me. In my cluster there is a tiny compact florescent that lights up the tach and speedo. Here's a few pics:Pwnin O’Brien wrote:Hmmmm....
I'm so torn between which LED bulb to purchase for my cluster. I need something that outputs light around the sides, not really out the top of the bulb. It has to light up that thick clear plastic piece behind the gauges which lights them up. I'm just not sure which will do the best job doing that. The Matrix 3 LED's seem to do a really great job and they have LED's on the sides which is great. The Tri-power says it has a really wide viewing angle, but the site specs them at 140 degrees, which is alright but for this application I need 180 degrees. I wanted to do my own LED setup, but that would require pulling the needles off the cluster and that's not something I really want to do, it seems like a massive pain in the a**.
I'm also needing new LED bulbs for my HVAC dials (the manual type HVAC). I know that also uses #74 bulbs but I don't really know which ones are best for that either. Has anybody replaced the bulbs in their HVAC controls and have pictures? I would really like to see what that looks like.
This is a pretty tough decision
Billy
-
Pwnin O'Brien
- Posts: 1717
- Joined: Wed Jun 24, 2009 1:10 pm
Re: Changed the Dash Lights (Empty V)
Fortunately there's no fluorescent tube or anything, just two small #74 bulbs which light the dials and one which lights up the odometer. Although I'm sure your cluster lights up pretty bright with the florescent tube. I hate how dim the cluster is with the standard incandescent bulbs in.
-
slickroger
- Posts: 919
- Joined: Sun Jan 06, 2008 12:33 pm
- Car: Nissan Pathfinder 2001
- Contact:
Re: Changed the Dash Lights (Empty V)
did you place that fluorescent tube in there yourself or did it come like that. is there a pic from the front that shows what exactly that tube lights up
-
Empty V
- Posts: 2308
- Joined: Mon Jan 21, 2008 10:53 am
- Car: 2001 Infiniti QX4, 1982 Corvette C3 Shark
Re: Changed the Dash Lights (slickroger)
That's how it came stock. It lights up all of the gages which sucks because I really wanted to go pioneer blue. All the other tungsten lamps are for warning lights, brights, brake and turning signals. So all of those are blue except for my brake light, wanted to keep that red so I put in a 3-LED red lamp.slickroger wrote:did you place that fluorescent tube in there yourself or did it come like that. is there a pic from the front that shows what exactly that tube lights up
Billy
Find Your Forum!