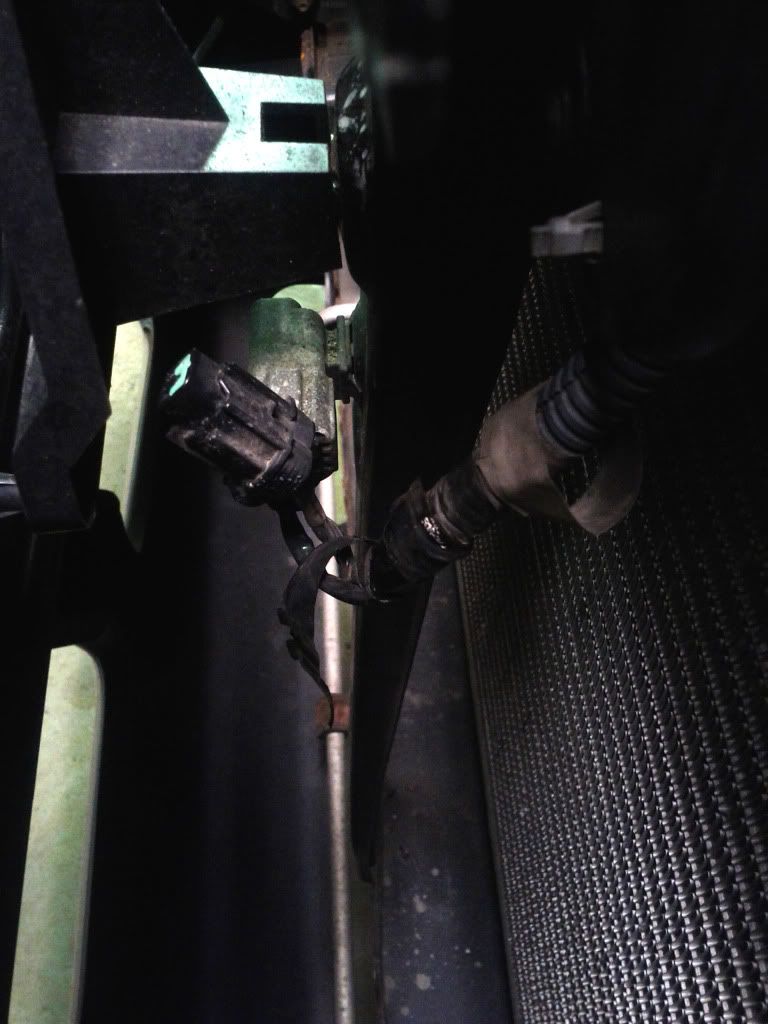
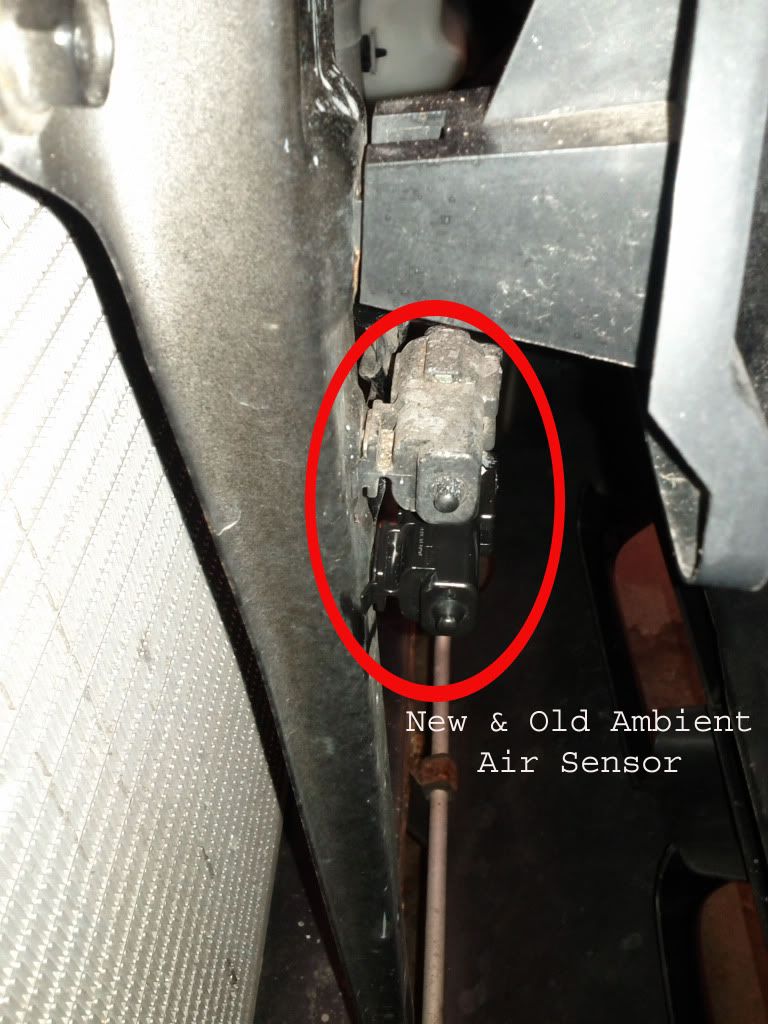
First I purchased the overhead console on ebay. Average cost is about 50 bucks. From what I can tell, the consoles all look the same from 1996-2004. Mine came from a '02 so I don't know if earlier years will work but I suspect they might.Next is to inspect your car for wiring and the ambient air sensor. Most cars are prewired for this option but some are not. In the front of the radiator under the hood, you should see where the air sensor for climate control is.If you are lucky there might be a second one for the display unit. This was not the case for me but you should see the extra electrical plug for it. Fortunately you can buy the part (part # 27710-31U00). I did see this on ebay but I got it for less at autozone (part # SU6102) for 40 bucks.
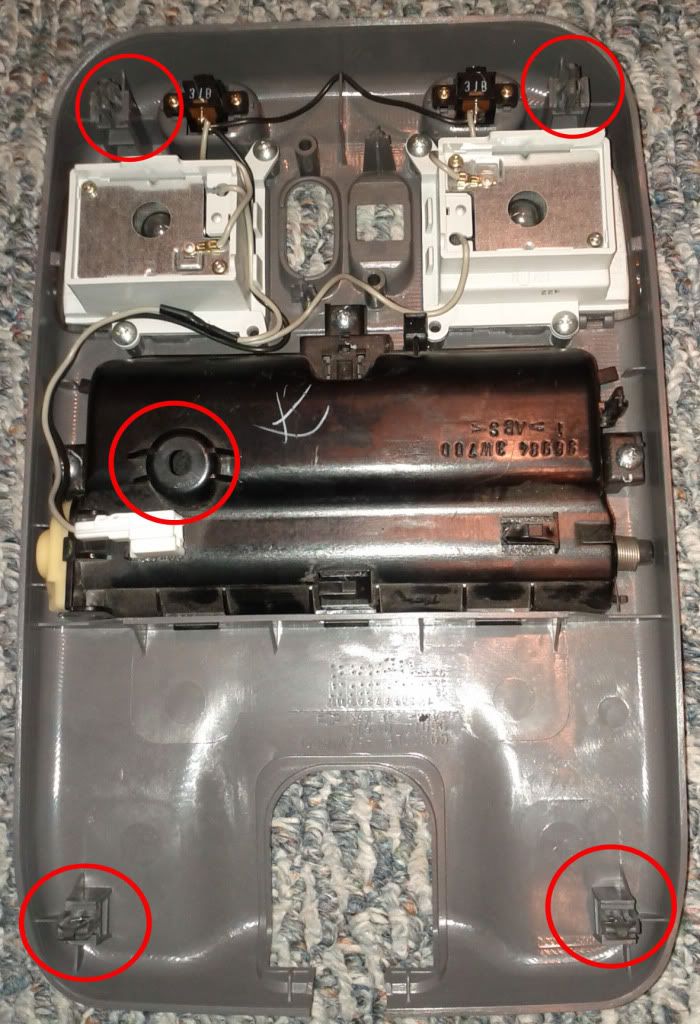
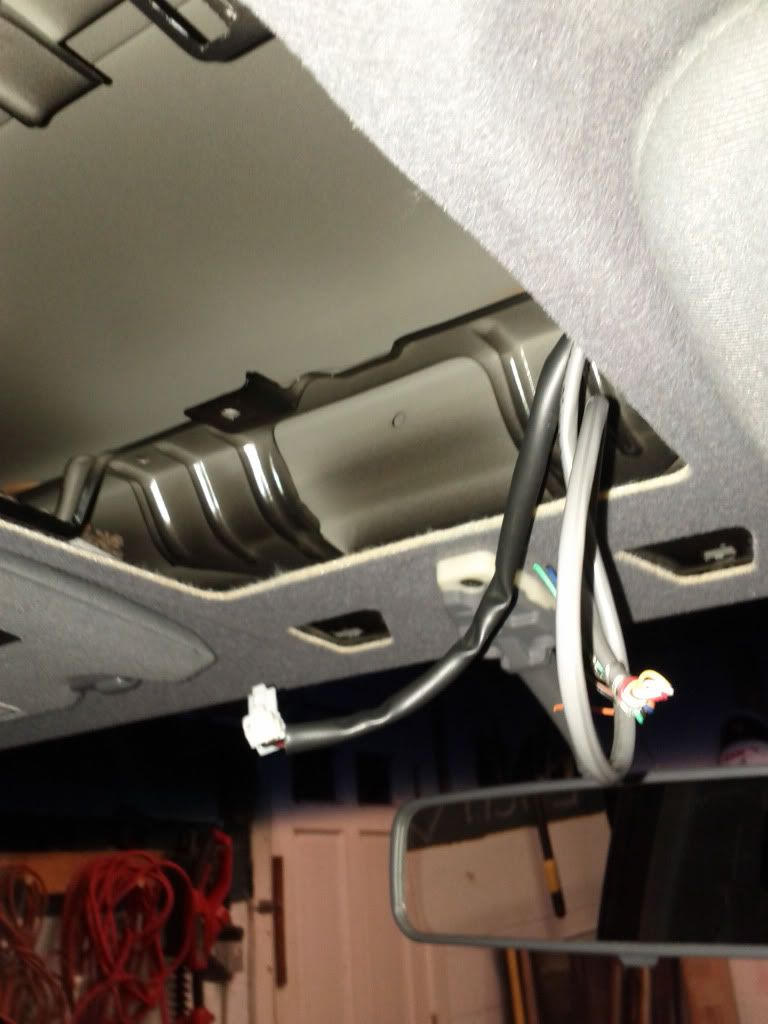
Next you will need to check for the wiring the runs to the roof where the console is. Remove the overhead console, there is a screw in the sunglasses compartment. Each corner is held in by 4 snaps ,so gently pull down to pop them out.If you are lucky you will see and extra 8-pin connector there. Mine was not wired. You may be able to find the extra harness from a junk yard or something but the odds are slim nor do I know the part number for it.
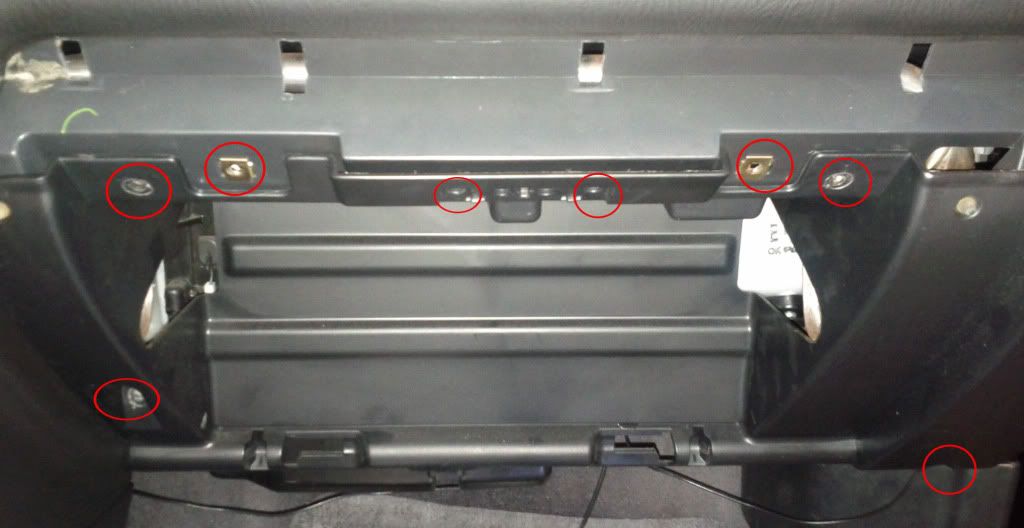
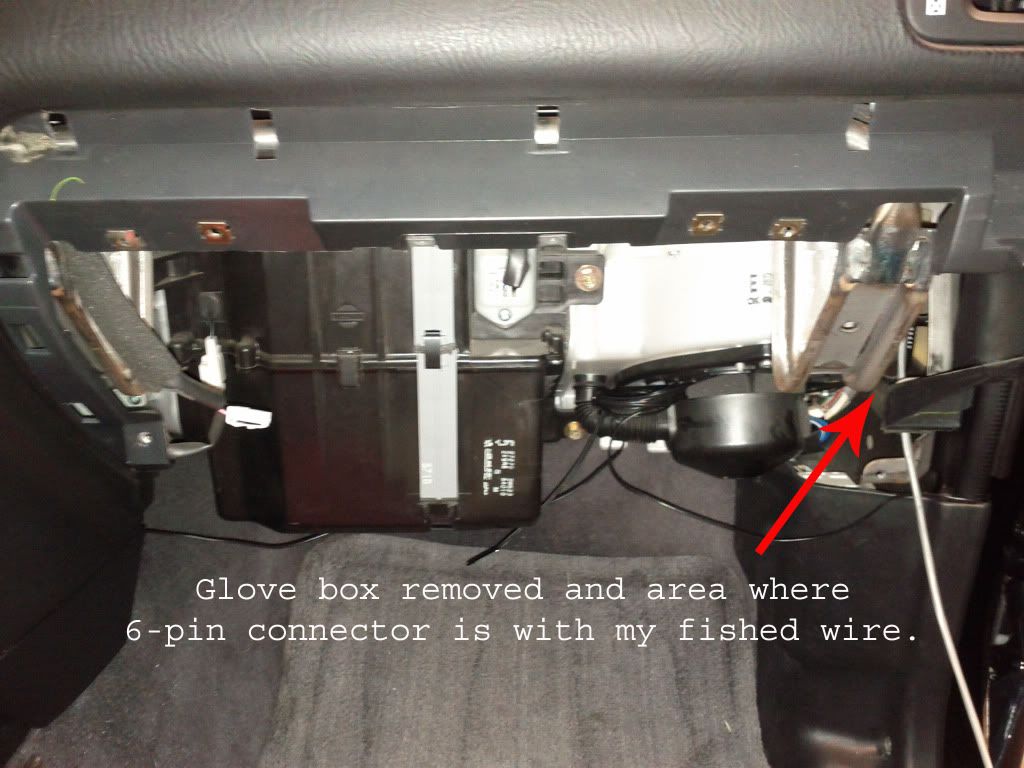
Next,there should be a 6-pin connection for the display unit behind the glove box off the main harness. To find it, remove the bottom pivot pins to pull the glove box out and then remove the screws for the front trim molding on the dash and the golve box housing.About 8 screws in all.
By taking the glove box off, I found the 6-pin connector. You may have to look real hard. There were two other unused sockets as well. One had about 10 pins in it, the other was 3 pins. I dont know what they were for but you want the 6 pin connector which I almost overlooked because it was clipped onto the firewall just where the power runs up around the dash to the a-frame. I was able to get that off so I could now run the wire to it. One thing to note: on my '04, the 6 pin connector only had 5 wires inside of it (White w/Blue Stripe,2x Green w/ Red Strip, Pink w/Green Stripe, Blue w/Black Strip). But the compass/temp unit requires 6 wires. The missing wire appears to be the black wire for ground which you can tap off of from the lights in the overhead console.
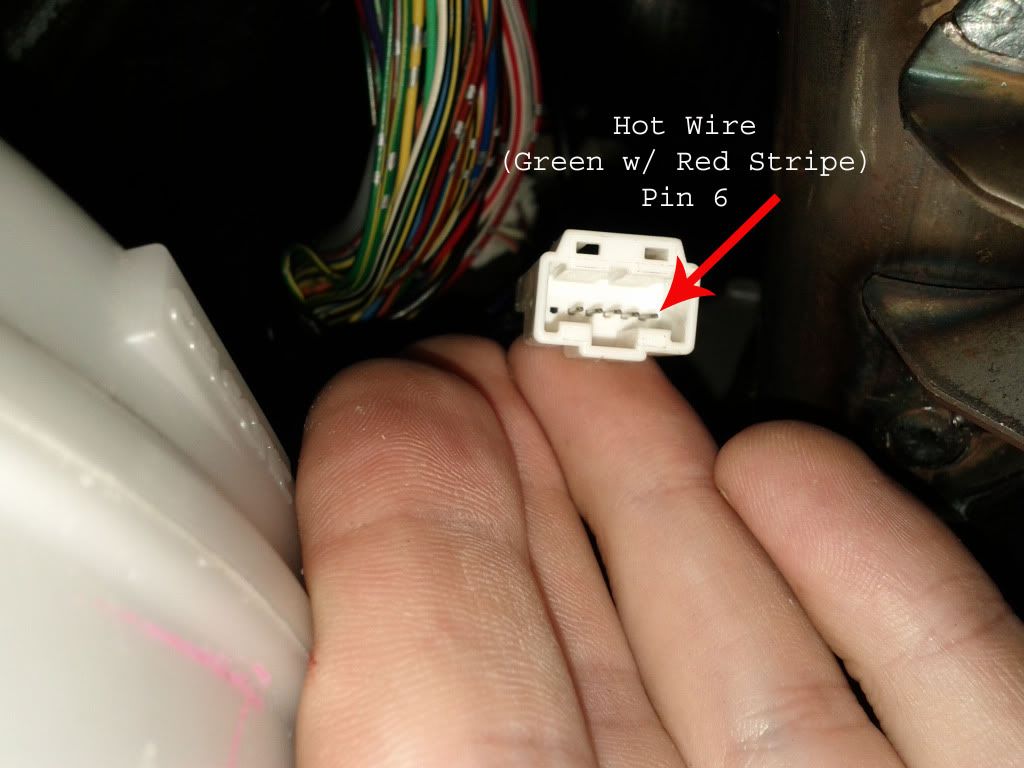
It should be noted that one wire in the original harness from the console changes to Green w/Red Stripe. So you will see two wires that are the same at the 6-pin connector. Since one of them is the main power. I double checked it with the multimeter with the ignition on and found the proper Green w/Red stripe that was hot. When looking at the connector the hot wire was all the way to right on the end.I believe the hot wire is on pin 6. If you do not get power from either of the green wires, be sure to check that you have a 10a fuse that is required in #9 of the block. Lastly since the one wire is missing, you will need a ground to go to the display. You can either tap in off the ground from the extra 3 pin connector behind the glove box or just use the ground up by lights in the console. That was the option I took.

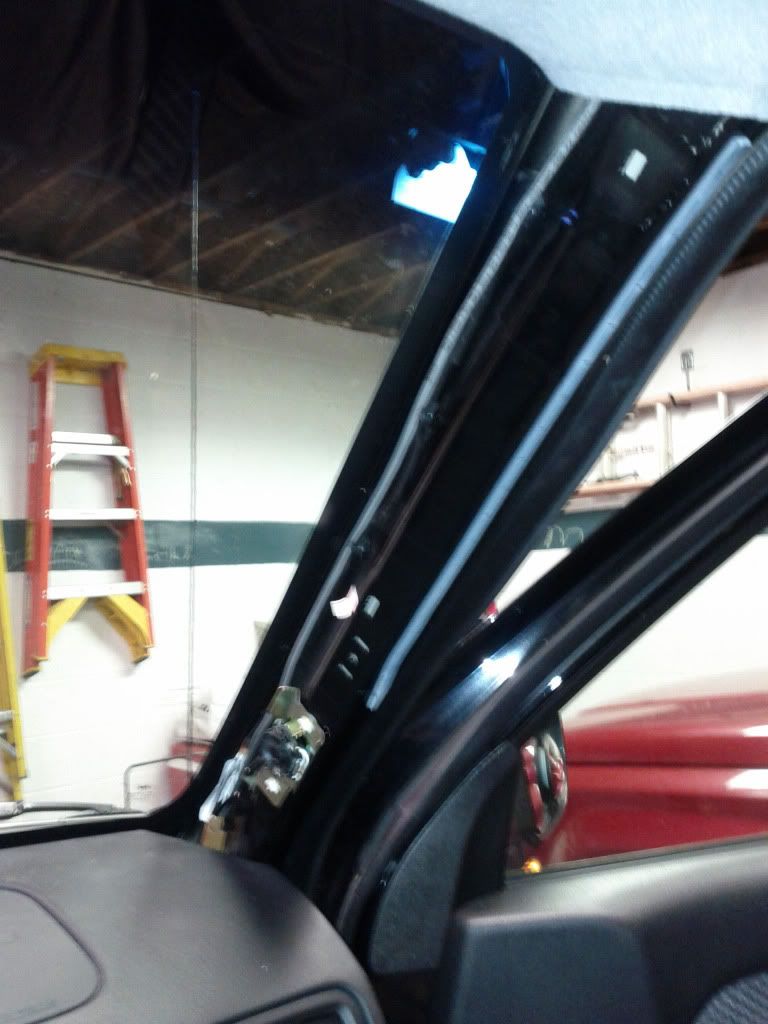
Now you will need to remove the cover for the a-frame and fish 5 small gauge wires (I ran a 8 conductor wire) from console area to the a-frame, then down along the a-frame to the glove box. You can easily pop the cover off the a-frame, its held in by two pins.
Next step is to splice in your wires. Splice the proper colors from the 6-pin below at the glove box to the correct pin locations on the display unit connector and thats it. Splicing in under the dash for me was a royal pain since I used Scotch Locks and took the longest time.If you can find a proper female connector to use with your new wire then do it and save the time. At the console location, I used quick disconnect butt connectors. I cut the connector off by cutting each wire individually and labeling the pin number for each wire. Do not cut all the wires at once. This is important if you cut the connector off since all the wires are black and there is no easy way to know which one is which.
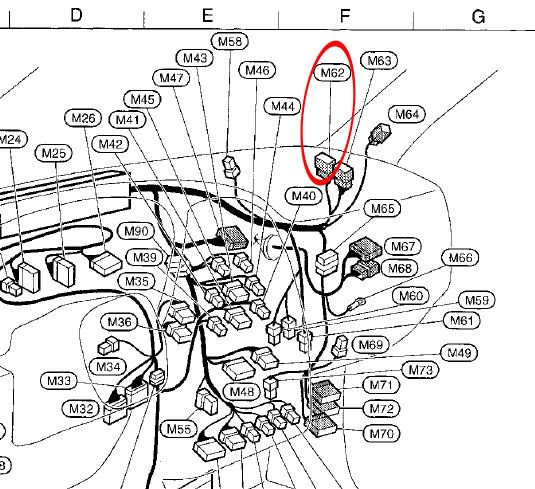
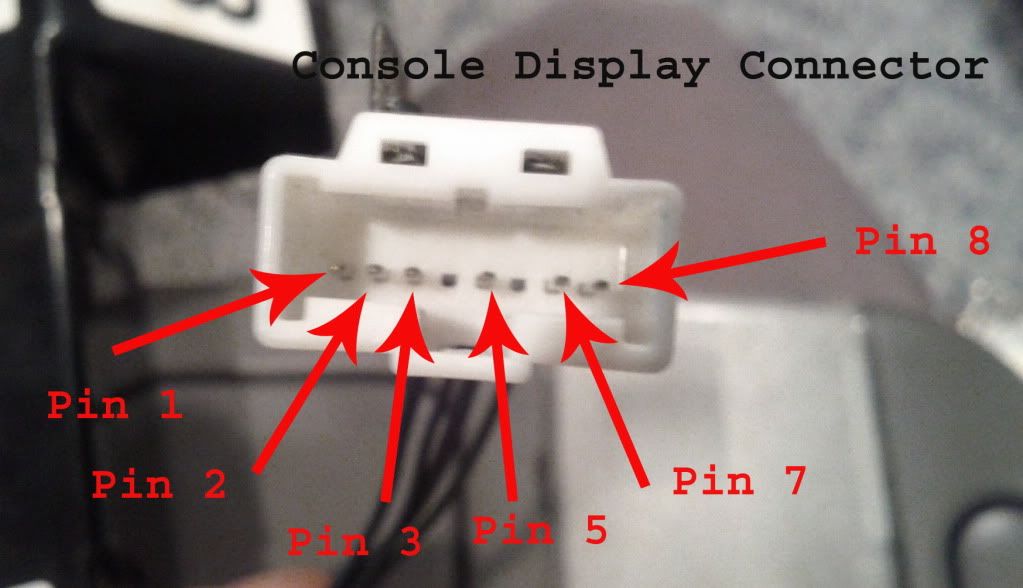
According to the FSM electrical diagram, downloadable from here, these are the wires that connect at to the display unit connector:
On the display unit which has 6 black wires is a 8-pin plug (2 pins missing):
Pin 1 = White w/Blue Stripe - to Speed Sensor, I believe
Pin 2 = Black - Ground (Not present in the 6-pin connector at the glove box area)
Pin 3 = Yellow w/Black Strip > Green w/ Red Strip - Air Sensor (color changes in the original harness from the to console to glove box)
Pin 5 = Pink w/Green Stripe - Illumination
Pin 7 = Green w/Red stripe - Ignition Power On (from pin 6 on the connector behind the glove box)
Pin 8 = Blue w/Black Strip - Air Sensor
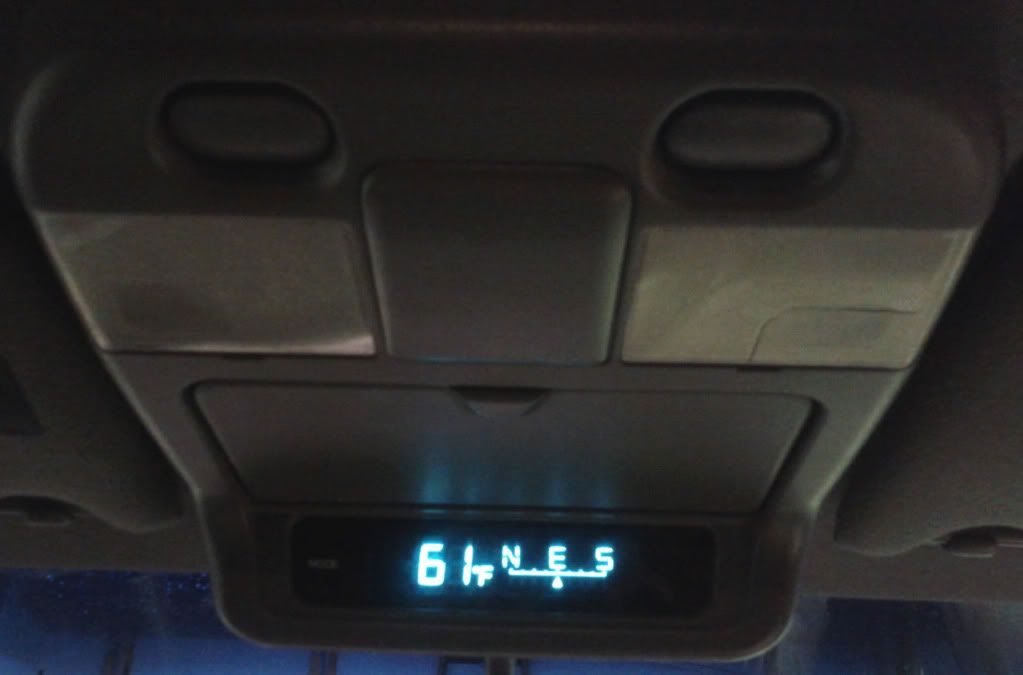
Lastly, test it all out. It make take an hour for the temp to be proper and the compass can be calibrated as well by holding the mode button for 5 seconds and selecting the right area you area in. You'll need the FSM manual to find the proper number for your area. Put everything back together and you are done. The only other thing I did was remove the sunroof buttons, since I dont have one, and put the plastic cover plate from my old console to cover up where the buttons go and that's it. Hope this helps you out. Please post your thoughts, results, comments, or suggestions if this does help.