"any monkey can take something apart, it's putting it back together that takes skill" Iv'e taken apart my KA24DE-T out of my 1997 after it started knocking. My third cylinder popped a ringland, i determined this with a compression test followed by a leak-down test. Im in college and am on a pretty tight budget. Time for an OEM rebuild.I just picked up my block from the local machine shop. I had the block end hot tanked and honed. I got the crankshaft polished and all measured to be within specifications. Hot-Tanked Block! Reconditioned Rods
Silly Kitty also loved them Crankshaft Looks Brand New Oil Squirters cleaned Had the machine shop grind my rings to spec. It was cheaper to get them to grind the rings then for me to buy the tool. I got NPR Pistons and Rings shipped out of Japan for a decent price. I know I should have gotten forged but my budget was real tight. These pistons will hold good for my power goals anyways. I compared them side-by-side with the OEM pistons and found them to be very similar. Left Piston is NPR right is OEM I got TopLine bearings, Iv'e had excellent experience with them and I've heard lota of positive feedback on them. Now that I have all the essentials, Im starting to build the bottom end.I dont have a garage:( and it's been pissing rain out for days and weeks to come The downsides of living in BC, but hey atleast it grows us our BC bud So this is my indoor workspace. Sooooo small, but it sure beats the cold and rain I am following the Nissan FSM for torque and specs! I started by cleaning the block with warm soap and water and a toilet scrubby
After it was free of lint I installed the fresh oil squirters, torqued to 30 Ft. Lb I used brake Kleen and wiped down the bearing cups on both the block and griddle.I installed the TopLine bearings
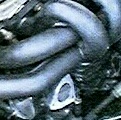
I used a plastigage on every bearing about 1/4 in off centerGently placed the crank over the lower bearings. If you are doing this DO NOT SPIN THE CRANK!I placed 5 more plastigages on the main crank journals and torqued the griddle in to 18 Ft. Lbthen 38 Ft. Lb. (Put new Motor oil on the main bolts!) Took off the bearing griddle in the reverse order.The plastigages are squished and all ly within spec.It it important that the clearances are consistent I washed off the plastic with brake cleaner and a lint free cloth.I used Lucas Assembly Lube throughout the build. It works great.Lubed up all ten crank bearings. And Torqued the crank in to FSM spec. At this point make sure the crank spins freely by hand. I double checked every ring's end gap from the machine shop.Every one was within spec. I aligned the rings so the end gaps are facing the way nissan wants them to face I made tick markes at 1/8th increments to help align rings
Workspace! Installed Put the pistons on the rods, kitty double checked everything was good Snap rings
Clean and lube the threads before installing for accurate torque I places hoses on the ends on the connecting rods to prevent damage to the cylinder wallsduring installation. I cleaned the surfaces with brake cleaner and installed the bearings in the rods and caps.Make sure to align the bearing oil holes with the connecting rods. I Did a final wipe down to clean off any lint.Lubed up the rod bearingsLubed up the rings and placed each piston in a ring compressor.Made sure all the pistons were facing the right direction and used the rubber end of a hammer and tapped the piston/rod assembly into their cylindersUsed a plastigage on each rod cap (not lubed) All bearing clearences measured within spec.Cleaned off reminense of the plastigage with brake cleaner.I torqued the caps down to 10 Ft. Lband the 30 ft. Lb After all the repetitivenessI had an assembled Short block. Hope this is useful to anybody looking to rebuild their short block.I will bump this thread later on when the long block/ timing chain is complete. From Victoria BC, Canada.
Modified by 240dx at 10:28 PM 11/24/2009
240dx Short Block Rebuild. With Pixxxx
240dx Short Block Rebuild. With Pixxxx
Last edited by 240dx on Sat Mar 03, 2012 2:38 pm, edited 1 time in total.
-
nissangirl74

- Moderator
- Posts: 13910
- Joined: Sat Jan 17, 2009 1:15 pm
- Car: 2014 Xterra Pro4X, '12 Titan 4x4, '98 240sx, '89 Pao, '77 620, '72 240Z w/RB25, '68 510, '67 WRL411, '67.5 SPL 311, '63 Bluebird, '63 NL320
Re: 240dx Short Block Rebuild. With Pixxxx (240dx)
Awesome build thread! Well done.

Re: (asoomal)
hah, yeh it terrible being trapped on this island.I got my hands full with mine buddasoomal wrote:Now do mine
I'll pay for your ferry =)

Re: (240dx)
is that a pink bra?
-
duffman1278
- Posts: 6816
- Joined: Sun Apr 01, 2007 3:09 pm
- Car: 89 240sx Hatch, the wildcats!
-
Didderson

- Posts: 2567
- Joined: Sat Mar 18, 2006 4:05 pm
- Car: 1990 Nissan 240SX FB
'88 Nissan Hardbody pickup
'74 Datsun Z - Location: Nor-Phillerdelph
- Contact:
Re: (asoomal)
I used these pistons on my ka rebuild before I went SR. One of their snaprings came out and there went my wrist pin into the cyl wall..I went SR. Not sure if I fuxed it up somehow because it was my first rebuild... Following yours to see haha!
Re: (duffman1278)
Jdm piston kitty
Re: (Didderson)
In that case im going to get some better snap rings.Thanks for the tip man.Didderson wrote:I used these pistons on my ka rebuild before I went SR. One of their snaprings came out and there went my wrist pin into the cyl wall..I went SR. Not sure if I fuxed it up somehow because it was my first rebuild... Following yours to see haha!
Last edited by 240dx on Fri Jun 10, 2011 1:02 pm, edited 1 time in total.
-
s13 iDRIFT

- Posts: 675
- Joined: Mon Aug 25, 2008 12:59 pm
- Car: White s13 Hatch
- Contact:
Re: (240dx)
nice thread, im sure itll help alot of people when in need!
-
StandardProspect
- Posts: 1181
- Joined: Thu Feb 14, 2008 4:41 pm
- Car: '93 Nissan 240SX
'98 Infiniti Q45
Re: (s13 iDRIFT)
nice work, this thread will come in handy some day
Re: (240dx)
lmao. most girls would be pissed.240dx wrote:
In that case im going to get some better snap rings.Thanks for the tip man.
And yeh brah thats my g.f's bra
-
Future_gohan
- Posts: 1297
- Joined: Thu Nov 27, 2008 5:57 pm
- Car: 91 240sx, 91 vert
Re: (jeff420)
She probably don't know about it :ojeff420 wrote:
lmao. most girls would be pissed.
-
ChampionSound
- Posts: 96
- Joined: Sat Dec 13, 2008 6:19 pm
- Car: 1993 Coupe LE
Re: (240dx)
gf and you live in victoria!?!?!?!??!?!?!?!
man she must be a hell of a catch for a guy to not stay single over in vic
(for those of you who dont know, vic is pretty much filled with girls and rabbits. no f***ing joke. i couldnt believe how amazing that place was)
and nice build. cant wait to see it done/ hear it running
man she must be a hell of a catch for a guy to not stay single over in vic
(for those of you who dont know, vic is pretty much filled with girls and rabbits. no f***ing joke. i couldnt believe how amazing that place was)
and nice build. cant wait to see it done/ hear it running
-
troskinatior

- Posts: 1228
- Joined: Thu Apr 23, 2009 1:26 pm
- Car: A Two Tone Piggy Coupe
- Location: Jersey Shore Bish
Re: 240dx Short Block Rebuild. With Pixxxx (240dx)
Jdm kitty aproves240dx wrote: Put the pistons on the rods, kitty double checked everything was good
-
bryantkalagian

- Posts: 127
- Joined: Thu Aug 13, 2009 6:38 am
- Car: 96 240sx
-
240sxJoe91

- Posts: 474
- Joined: Mon Sep 28, 2009 10:26 am
- Car: 1991 240sx Ka24de
Re: (240dx)
Coming along nicely...Nice little workspace in your room lol...

Re: 240dx Short Block Rebuild. With Pixxxx (240dx)
I See Pink Bra
-
Lonismos14

- Posts: 1351
- Joined: Fri Sep 18, 2009 5:35 am
- Car: 1995 Nissan 240sx, 1999 Chevy Hoe, 1996 Saturn Sl2
Re: (240sxJoe91)
Hey thanxs for the knowledge man. s*** looks like you can eat off it.
By the way thats a nice sig you got there. Its so tru....
By the way thats a nice sig you got there. Its so tru....

Re: (Lonismos14)
This is actually very informative, well done! I remember back when I rebuilt my engine I had no pictures to look at, just the FSM and what I could find on google.
For everyone else reading this, PROTIP: Make sure you assemble everything pointing the right direction. Rod caps can be installed backwards, but only work when installed in the proper direction. Not paying attention means rod knock within like 20 minutes. Trust me, a freshly rebuilt engine knocking is not fun.
For everyone else reading this, PROTIP: Make sure you assemble everything pointing the right direction. Rod caps can be installed backwards, but only work when installed in the proper direction. Not paying attention means rod knock within like 20 minutes. Trust me, a freshly rebuilt engine knocking is not fun.
Re: (Chris28)
thank you err' body.I will be picking up the cylinder head from the machine shop tuesday.Ill document my progress untill the engine is complete.

Re: (Razi)
im doing the same!!! XD
i also think that our motor blew because of the same reason ... o.O
just wondering ... where did you get your pistons set from??? o.O
i also think that our motor blew because of the same reason ... o.O
just wondering ... where did you get your pistons set from??? o.O
-
spooled240

- Posts: 6487
- Joined: Sat Jan 20, 2007 8:45 pm
- Car: kouki s14
This happened to me as well but i popped the 4th piston. Bad walbro caused fuel pressure to be in the teens while at 12 psi of boost OMFG..
I just freshened the motor up tho, changing the rod bearings since those have the most stress, sending the head out for a valve job and a resurface and basically changing all the rings, seals and gaskets for OEM replacement parts.
Make sure you follow the FSM word for word, I kinda skipped on it doing the timing chain thinking I knew what I was doing and I didn't line up the chain links with the sprockets so my motor was a tooth off=loping like a mofo at idle.
GL with the build man, it's GREAT experience
~Blood, Sweat n' Beers...KA-T for life~
-
spank044

- Posts: 518
- Joined: Sat Apr 29, 2006 3:56 am
- Car: 1992 240sx with a Supercharged 350Z VQ for a HEART!
Re: (Didderson)
I have never seen anyone use RTV on freeze plugs, I use red loc-tite. Am I the only one?
Did you know that snap rings are directional? They have a flat side and a rounded side. The flat side goes against the pressure seat so it has the most flat contact surface area.Didderson wrote:I used these pistons on my ka rebuild before I went SR. One of their snaprings came out and there went my wrist pin into the cyl wall..I went SR. Not sure if I fuxed it up somehow because it was my first rebuild... Following yours to see haha!
Re: (spank044)
got the OSK timing chain from FRsport.Waiting on Oil pump Valve set from Nissan.Should be here Tues.Ill post continue to post my build when the engine is together

Re: (ChampionSound)
pics of such placeChampionSound wrote:gf and you live in victoria!?!?!?!??!?!?!?!
man she must be a hell of a catch for a guy to not stay single over in vic
(for those of you who dont know, vic is pretty much filled with girls and rabbits. no f***ing joke. i couldnt believe how amazing that place was)
and nice build. cant wait to see it done/ hear it running
your gf wouldn't like if you say you are rebuilding an engine and she finds you fapping to her lingerie.....mad props if she's down with that.awesome thread
Re: (safin)
[quote="safin"]
pics of such place
pics of such place
Last edited by 240dx on Fri Jun 10, 2011 1:03 pm, edited 1 time in total.

Re: (240dx)
WELL we all know you have pics of x gf!!!!