Has been officially installed. Firm ride, less body roll in corners and less squatting under hard/moderate acceleration. Ride height didn't change much at all from the z/coupe spring coupe with oem sport suspension I was currently running. I recommend the revised z suspension to those looking for a moderate drop and better handling. I picked up this suspension for 225 shipped with only 900 miles on it.
Just thought I would give everyboyd a heads up.
2006 350z suspension (Write Up and Pics Added)
Re: 2006 350z suspension (RED_DET)
Hey Mike...where did ya pick that up??
-
BigWill

- Posts: 557
- Joined: Sun May 07, 2006 9:21 pm
- Car: Gone, but not forgotten-2004 G35 Coupe-5AT-Graphite Now-2008 Black Saphire IS 250
Re: 2006 350z suspension (RED_DET)
That's sweet... did you do the install yourself?

Re: (RED_DET)
Any pics, Before and after? Does it tend to high center more than the stock height? This sounds like a real nice find. Input on this would mod would be awesome.
-
BigWill
- Posts: 557
- Joined: Sun May 07, 2006 9:21 pm
- Car: Gone, but not forgotten-2004 G35 Coupe-5AT-Graphite Now-2008 Black Saphire IS 250
Re: (WESIDE)
Absolutely... and maybe an installation write-up?WESIDE wrote:Any pics, Before and after? Input on this would mod would be awesome.
-
RED_DET
- Vendor
- Posts: 5335
- Joined: Tue May 13, 2003 5:07 pm
- Car: 2004 Infiniti G35 Sedan 6 spd
2011 Infiniti G37x
1992 Nissan Sentra SE-R SR20DET
Chevrolet Corvette Z06 - Location: Louisville, KY
- Contact:
Tools needed:Jack standsfloor jack1/2" ratchet (3/8")misc 1/2" extensions (3/8")17mm socket12mm socket19mm socket17mm box end wrenchpower tool is VERY helpful in removing front strut from springtorque wrench (if you are as paranoid as I am)spring compressor
Jack up car and USE jack stands. Remove wheel and tire. Now place floor jack below the rear lower link that the coil spring is located in and use the jack to hold the spring in place, raising it up a 1/8" or so. Refer to the picture I have provided and remove the nut and bolt to the rear lower link (blue arrow). Remove bolt from bottom of strut mount (red arrow). Picture is from above looking down.NOTE: There is NO need to remove the bolt depicted in red if you are only installing springs.
Work out bolt, it will come out without damaging the threads. Now slowly lower the rear lower link, watch the floor jack to see when this suspension part stops going down, make sure the floor jack keeps on touching it.
To get the coil spring out. Loosen the nut in the green arrow, NOT the bolt. The bolt is fixed. It does NOT need to be removed. Once it is loose, you should be able to lower the floor jack and remove the rear spring.
If removing the shock as well, there is also (2) 12mm nuts holding the top of the shock on in the inside of the fender well at the top.
Install in reverse order. HINT #1: Use your floor jack to raise parts up to match up various bolt holes. Repeat process on other side of rear suspension. Hint #2: Compared to the OEM spring, the upper part of the new spring is not flush(if using other oem springs from a 350z/G35 this doesn't apply). Hint #3: Just ensure the spring is properly seated in the bottom of the suspension member. Hint #4: You WILL NEED to bang things around because everything fits snugly, ie. the rear lower link connection to the "wheel?" Hint #5: Here are the torque specs for the bolts involved:
1) Bolt depicted in blue: 48-59 ft/lb2) Bolt depicted in green: 48-59 ft/lb3) ONLY for those removing the strut, bolt in red: 74-88 ft/lb
FRONT:
Unbolt the 3 12mm upper strut mount bolts from under the hood, set them aside as to NOT misplace them.Unbolt the 12mm bolt holding the brake line on the strut, set nut aside and pull brake line off the strut. Look at pic with red arrow for brake line location.
Remove the speed sensor line from the strut in the 2 places it attaches to the strut via compression fittings (just pull)(blue arrow) Remove the nut and bolt from the bottom of the strut(red arrow) It will come out, but will be difficult. Use floor jack to line things up. Remove the bolt holding the swaybar end link to the suspension arm(green arrow) NOTE: The bolt for the end link will NOT come out yet, DO NOT TRY!
Use floor jack to compress suspension upwards to relieve pressure on the sway bar end link bolt, you goal it to push the bolt out of the suspension arm.
Look up at the bottom of the upper A arm that's closest to you. See the cotter pin in it. Remove that pin, your not going to be able to reuse it, replace it with a 3/32" by 1" pin on reasembly.
With the cotter pin out loosen the nut above it and turn it about 3 turn's. Since the A arm usually sticks in place on that bolt, you'll need to tap or whack the A arm with a rubber mallet to pop the bolt free. Once you get it free now take the nut off all the way. BUT be carefull once you do, the entire suspension will flop free and to the side, don't get hurt.
Now pop the hood of the car if you haven't already done so. Break free the 3 nuts that secure the top shock mount, removing only 2 nuts. On the 350Z IIRC you might have to remove the strut tower bar, though I could be wrong. Reach into the wheel well with one hand and grab the shock/spring assembly and push upwards while with the other free hand you undo the last upper shock mount bolt.
Guide the shock/spring assembly out of the car. Be very carefull at the fender lip, easy to scratch. I found it easy to hold the upper A arm up as you pull the top of the strut to clear as you pull it out towards you.
Now at this point, if you are replacing the front suspension with a complete suspension already assembled like I did, then just re-install everything in reverse order. Keep in mind the jack is your best friend, use it wisely to raise and lower the suspension to line things up properly.
Torque Spec for bolts on front:
1)3 12 mm upper strut mount bolts: 26-30 ft/lb2)12 mm bolt for nrake line: Can't find, but probably 10 ft/lb3)Bolt from bottom of strut (Pic 4 red arrow): 52-62 ft/lb4)Bolt connect sway bar end link to suspension arm (Pic 4 green arrow): 59-70 ft/lb5)Center bolt of strut/spring assembly: 40-47 ft/lb
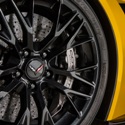
Pic with coupe wheels had oem sedan sport shocks/struts with z springs in front and coupe springs in rear.
Pics with z track wheels has 06 suspension.
Right click on pic and view and they will shop up bigger.
As you can see there isn't much difference in the drop, maybe a 1/2" in the rear, but hardly noticeable.
Here is a pic of the car stock.
Jack up car and USE jack stands. Remove wheel and tire. Now place floor jack below the rear lower link that the coil spring is located in and use the jack to hold the spring in place, raising it up a 1/8" or so. Refer to the picture I have provided and remove the nut and bolt to the rear lower link (blue arrow). Remove bolt from bottom of strut mount (red arrow). Picture is from above looking down.NOTE: There is NO need to remove the bolt depicted in red if you are only installing springs.
Work out bolt, it will come out without damaging the threads. Now slowly lower the rear lower link, watch the floor jack to see when this suspension part stops going down, make sure the floor jack keeps on touching it.
To get the coil spring out. Loosen the nut in the green arrow, NOT the bolt. The bolt is fixed. It does NOT need to be removed. Once it is loose, you should be able to lower the floor jack and remove the rear spring.
If removing the shock as well, there is also (2) 12mm nuts holding the top of the shock on in the inside of the fender well at the top.
Install in reverse order. HINT #1: Use your floor jack to raise parts up to match up various bolt holes. Repeat process on other side of rear suspension. Hint #2: Compared to the OEM spring, the upper part of the new spring is not flush(if using other oem springs from a 350z/G35 this doesn't apply). Hint #3: Just ensure the spring is properly seated in the bottom of the suspension member. Hint #4: You WILL NEED to bang things around because everything fits snugly, ie. the rear lower link connection to the "wheel?" Hint #5: Here are the torque specs for the bolts involved:
1) Bolt depicted in blue: 48-59 ft/lb2) Bolt depicted in green: 48-59 ft/lb3) ONLY for those removing the strut, bolt in red: 74-88 ft/lb
FRONT:
Unbolt the 3 12mm upper strut mount bolts from under the hood, set them aside as to NOT misplace them.Unbolt the 12mm bolt holding the brake line on the strut, set nut aside and pull brake line off the strut. Look at pic with red arrow for brake line location.
Remove the speed sensor line from the strut in the 2 places it attaches to the strut via compression fittings (just pull)(blue arrow) Remove the nut and bolt from the bottom of the strut(red arrow) It will come out, but will be difficult. Use floor jack to line things up. Remove the bolt holding the swaybar end link to the suspension arm(green arrow) NOTE: The bolt for the end link will NOT come out yet, DO NOT TRY!
Use floor jack to compress suspension upwards to relieve pressure on the sway bar end link bolt, you goal it to push the bolt out of the suspension arm.
Look up at the bottom of the upper A arm that's closest to you. See the cotter pin in it. Remove that pin, your not going to be able to reuse it, replace it with a 3/32" by 1" pin on reasembly.
With the cotter pin out loosen the nut above it and turn it about 3 turn's. Since the A arm usually sticks in place on that bolt, you'll need to tap or whack the A arm with a rubber mallet to pop the bolt free. Once you get it free now take the nut off all the way. BUT be carefull once you do, the entire suspension will flop free and to the side, don't get hurt.
Now pop the hood of the car if you haven't already done so. Break free the 3 nuts that secure the top shock mount, removing only 2 nuts. On the 350Z IIRC you might have to remove the strut tower bar, though I could be wrong. Reach into the wheel well with one hand and grab the shock/spring assembly and push upwards while with the other free hand you undo the last upper shock mount bolt.
Guide the shock/spring assembly out of the car. Be very carefull at the fender lip, easy to scratch. I found it easy to hold the upper A arm up as you pull the top of the strut to clear as you pull it out towards you.
Now at this point, if you are replacing the front suspension with a complete suspension already assembled like I did, then just re-install everything in reverse order. Keep in mind the jack is your best friend, use it wisely to raise and lower the suspension to line things up properly.
Torque Spec for bolts on front:
1)3 12 mm upper strut mount bolts: 26-30 ft/lb2)12 mm bolt for nrake line: Can't find, but probably 10 ft/lb3)Bolt from bottom of strut (Pic 4 red arrow): 52-62 ft/lb4)Bolt connect sway bar end link to suspension arm (Pic 4 green arrow): 59-70 ft/lb5)Center bolt of strut/spring assembly: 40-47 ft/lb
Pic with coupe wheels had oem sedan sport shocks/struts with z springs in front and coupe springs in rear.
Pics with z track wheels has 06 suspension.
Right click on pic and view and they will shop up bigger.
As you can see there isn't much difference in the drop, maybe a 1/2" in the rear, but hardly noticeable.
Here is a pic of the car stock.
-
BigWill
- Posts: 557
- Joined: Sun May 07, 2006 9:21 pm
- Car: Gone, but not forgotten-2004 G35 Coupe-5AT-Graphite Now-2008 Black Saphire IS 250
Re: (RED_DET)
Thanks very much Mike... excellent write up!
Re: (RED_DET)
Awesome write up and a great picture of the 2nd street Bridge!!!
Re: 2006 350z suspension (RED_DET)
Great write up...have you noticed a huge difference?
-
RED_DET
- Vendor
- Posts: 5335
- Joined: Tue May 13, 2003 5:07 pm
- Car: 2004 Infiniti G35 Sedan 6 spd
2011 Infiniti G37x
1992 Nissan Sentra SE-R SR20DET
Chevrolet Corvette Z06 - Location: Louisville, KY
- Contact:
Re: 2006 350z suspension (G_whizz)
The stiffer springs in the rear made a huge difference. Even the wife noticed as a passenger. Car squats less under acceleration and more stable in corners.
Re: 2006 350z suspension (RED_DET)
Nice write up Red. Does it bottom out as easy on bumps? Probably does. And would you recommend this set up on a coupe? Wes
-
RED_DET
- Vendor
- Posts: 5335
- Joined: Tue May 13, 2003 5:07 pm
- Car: 2004 Infiniti G35 Sedan 6 spd
2011 Infiniti G37x
1992 Nissan Sentra SE-R SR20DET
Chevrolet Corvette Z06 - Location: Louisville, KY
- Contact:
Re: 2006 350z suspension (WESIDE)
The only real problem I had with scraping was when I still had the damn splash guards on the front that hung down 2". Took those off and its all good. You could run this setup on the coupe, the drop would be about a .5" more.
-
BigWill
- Posts: 557
- Joined: Sun May 07, 2006 9:21 pm
- Car: Gone, but not forgotten-2004 G35 Coupe-5AT-Graphite Now-2008 Black Saphire IS 250
Re: 2006 350z suspension (RED_DET)
Boy, I would LOVE to do that to my Coupe, but the belly already scrapes a little bit going in and out of my garage!
-
g35sedanlover
- Posts: 285
- Joined: Sat Mar 17, 2007 7:09 am
- Car: 03 Infiniti G35 Sedan
Re: (RED_DET)
Hey,
Do yo know what the tint rating is that you have? I am looking to have mine done and I like the look of yours.
Aaron
Do yo know what the tint rating is that you have? I am looking to have mine done and I like the look of yours.
Aaron
-
RED_DET
- Vendor
- Posts: 5335
- Joined: Tue May 13, 2003 5:07 pm
- Car: 2004 Infiniti G35 Sedan 6 spd
2011 Infiniti G37x
1992 Nissan Sentra SE-R SR20DET
Chevrolet Corvette Z06 - Location: Louisville, KY
- Contact:
Re: (g35sedanlover)
20% all the way around. nothing on windshield.
Re: (RED_DET)
Do you still have the 350Z suspension?? selling those?
-
RED_DET
- Vendor
- Posts: 5335
- Joined: Tue May 13, 2003 5:07 pm
- Car: 2004 Infiniti G35 Sedan 6 spd
2011 Infiniti G37x
1992 Nissan Sentra SE-R SR20DET
Chevrolet Corvette Z06 - Location: Louisville, KY
- Contact:
Re: (SiMoN604)
z suspension sold.
-
deanfootlong
- Posts: 13
- Joined: Wed May 02, 2007 8:29 pm
Re: (RED_DET)
so, was it worth it to buy the stock 350z suspension and put it on? I'm contemplating doing it for my g35 coupe. wondering if its worth the 100 or so bucks for a used 350z suspension.
Questions:
1. how much lower is the stock 350z suspension (installed on a g35 coupe) compared to the stock g35 coupe ride height? (how much does installing the 350z suspension lower a g35 coupe?)
2. was the swap worth it in terms of handling and ride comfort?
Questions:
1. how much lower is the stock 350z suspension (installed on a g35 coupe) compared to the stock g35 coupe ride height? (how much does installing the 350z suspension lower a g35 coupe?)
2. was the swap worth it in terms of handling and ride comfort?
-
RED_DET
- Vendor
- Posts: 5335
- Joined: Tue May 13, 2003 5:07 pm
- Car: 2004 Infiniti G35 Sedan 6 spd
2011 Infiniti G37x
1992 Nissan Sentra SE-R SR20DET
Chevrolet Corvette Z06 - Location: Louisville, KY
- Contact:
Re: (deanfootlong)
Well the g sedan and coupe suspensions are similar except the fact the coupe suspension will lower the sedan .5". The z suspension lowers the sedan 1". So the z suspension would lower the coupe another .5". I noticed a difference in handling on the sedan, especially with the revised z suspension which offers a stiffer rear spring. So if you are lowering the coupe with unrevised z springs, you probably not going to notice much of a difference as the spring rates are the same and the ride height is going to change slightly. I would suggest some tein H techs for a z which should get you about a 1" drop all the way around.
-
Tampa G35 Sedan 6MT
- Posts: 3238
- Joined: Sun Sep 30, 2007 4:50 pm
- Car: 2006 Infiniti G35 Sedan 6MT Black w/ Premium & Areo Pkg
1989 Jeep Cherokee 4X4 Lifted and Old School!
Re: (RED_DET)
Red... I am going to be doing this to my car... Is their any way I can get the Pictures?
DJ
DJ
-
RED_DET
- Vendor
- Posts: 5335
- Joined: Tue May 13, 2003 5:07 pm
- Car: 2004 Infiniti G35 Sedan 6 spd
2011 Infiniti G37x
1992 Nissan Sentra SE-R SR20DET
Chevrolet Corvette Z06 - Location: Louisville, KY
- Contact:
Re: (Tampa G35 Sedan 6MT)
I don't believe I have the pictures. It is a very simple install, the back will be a cake walk. Just make sure to mark the toe bolt before you loosen it to lower the control arm. In the front, you will have to undue the upper control arm to get the strut housing completely off the car. Be careful though, the control arm will pop up/off after you take the nut off the ball joint.
-
Tampa G35 Sedan 6MT
- Posts: 3238
- Joined: Sun Sep 30, 2007 4:50 pm
- Car: 2006 Infiniti G35 Sedan 6MT Black w/ Premium & Areo Pkg
1989 Jeep Cherokee 4X4 Lifted and Old School!
Re: (RED_DET)
All I can say is WOW...
It took me about 2.5 hours to do everything with a food brake and rolling the rear fenders lol.
It looks sweet and Drives even better...
Now I feel like I am driving a 350z. The new suspension also feels smoother but tighter too!
One thing I did different than you Red is I Didn't remove the cotter pin on the A arm.. I went to the auto parts store and rented a strut compressor (The rental is only a deposit ). I used the jack to bring the spring up as tight as possible. Then I installed the strut compressor. Then I let the jack down and I was able to get the strut out in one shot. Then the new Struts were a little shorter than the compressed ones and I just slipped them in.
It was a blast and very easy with a few tools... Oh what did you use a 17mm box wrench for? I didn't buy one and I didn't need one?
Anyway, Thanks for the Great write up! It really helped!
DJ
Return to “G35 and G37 Suspension, Brakes, Wheels and Tires”