Upgrading my TT...running journal (Updated!)

The Nissan 300ZX (Z32) general community discussion forum
User avatar
DCaff300ZX
Posts: 4229
Joined: Sun Jun 14, 2009 8:18 am
Car: .
1993 CRP TT- Modified
Location: Tacoma, Washington

Post

OK, so I figured that since I am fundamentally unable to not upgrade my Z's that I may as well have a running journal of what happens...as it happened.

So it all began 12/24/12, I purchased a '93 CRP TT in San Francisco located about 10 minutes from where I was born...I made all the arrangements and flew down, and drove her back to Tacoma, Washington the same day.
My plan at the time was to have the TT as my DD and do few if any mods to it, with my NA as my project car...but that all changed quickly as you will see.

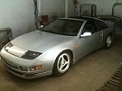
Here is the original ad pic.
Image

Unfortunately, within a month the stock brakes got fired after they were unable to stop fast enough one morning when this idiot completely stopped on the freeway in front of me for no reason, and nearly no one around, and I inserted a low-slung trailer hitch 8" into my front bumper... :facepalm:
This shot is of my fit mockup after initial repairs, but shows the damaged areas best.
Image

This stirred things around a bit, thankfully mostly cosmetic and replaceable pieces. I put the NA back into service and snagged a treasure trove of parts off a couple of Z's I amazingly found close to me and from a couple of other sources, and did all the repairs myself because I trust almost no one to do quality work and especially in this arena.

Here she is with everything repaired and painted before re-assembly, larger pieces removed for paint. I used a Duplicolor OEM match paint that was pretty close, but not perfect although for this area of the car it really isn't noticeable.
Image

She got some upgrades along the way of course, an Earl's oil cooler...
Image

...Jspec bumper and "crash bar", and single POP (for now).
Image

I prefer and installed the '90 nose panel, and finally after about 3 months everything is all together again and she's on the road.
Image

So then the NA went down for good, and major parts swapping began. My GTR Brakes from the NA went in first to combat no-stoppee-fastee along with my 18" Enkeis, and Hankook Ventus tires.
Image
Same pads are on the brakes as when I got 'em in '09, and the Hankook's are going past 24K miles (on the TT...they took on at least 5K on the NA) with only the fronts worn down bad enough to replace soon. The rears are 70%! The Ventus V12's (255/35/18 front, 275/35/18 rear) work as well as anything else in the rain and I have no complaints, especially for the price.

While the car was down I had added dash rings...
Image

...and I also did the switched injector voltage mod and brake booster brace, and added a few pieces such as the mud guards and a few other items I had snagged at the junkyard- here is how she was after all of my repairs and upgrades, but no paint yet.
This was my sig pic for quite awhile.
Image
I have had nothing but bad experiences with paint jobs and would need to do some research for a quality painter and save, as I had depleted every single cent I had saved for Z work...almost 2 grand.

I enjoyed the car from there until I finally saved enough $ for paint in February 2013, and found a painter whose work I could trust. Turned out to be a guy I knew pretty well whose shop is next door to a shop I worked in as a kid, it was cool to have an old acquaintance do the paint work 20+ years later.
For the record, there was NONE of the overspray/runs/bad masking/lousy paint BS I had from a crappy MAACO insurance paint job years back on my NA, my only complaint on this job was taken care of in a half hour while I had lunch. Doug also did some touchup painting around my repair work to finalize that as a quality job top to bottom.

Here she is frickin' glassy-fresh from the shop, Darnell's in Tacoma...DEFINITELY recommended!
Image

So, having done very little to the car for many months this got me going again freshening everything up in front, starting with painting in the jspec body the stock gunmetal color...
Image

Image

...and also the side body lines.
Image

Image

I repainted the front cowls and lower side window trim that was getting faded or tarnished. The gunmetal color I used for my OEM gunmetal paint areas is just a tad light and sparkly for these areas I feel though, and I may re-shoot them later a darker color and with a satin finish instead of semigloss.
Image

Image

Image

Image

Additionally, the replacement headlights I installed after the accident were not so great as one was fogging up, and they finally got the boot when a rock knocked a large chunk out of the cover of the other one. I had kept the original units, as the only problem with them was the plastic case mounts were broken, so I decided while all this was going on to rebuild the four units I had into two "new" units.

I peeled the perfect glass of the originals along with all of the useful bits like the mount base and adjusters...
Image

...then set about working on the junkyard units, a HELLACIOUS task that took me three solid days of screwing around cleaning butyl and painting the inner liners, resealing and reassembling the units, and changing over the good adjusting mechanisms off the broken units onto the good replacement bodies so I could correctly adjust my headlights finally.

Ready to disassemble and paint.
Image

I painted the liners a gunmetal color, the one on right is the OEM color.
Image

Finished, ready to seal up!
Image

I was planning on doing a how-to on this process but it was SO troublesome and inconsistent that instead I can advise anyone interested in the details via PM or otherwise, but can offer no guaranteed solutions.

Next, I also painted the jspec grille gunmetal and added my Z logo- the result I think was worth the effort.
Image

Image

So here are some updated car shots, I had some trouble with lighting and my brother's fancy camera so I will have to get some better shots later and these will do for now.
Image

Image

Image

Image

Image

Image


And the new sig shot!
Image

And, some even newer shots.
Tacoma Narrows Bridge in the background...
Image

...and some pics on the grounds of Chambers Bay Golf Course, Puget Sound in the background.
Image

I like the way this shot looks even though the color is messed up.
Image

I've also played around with the interior a little, something I'm sure will not be the most popular move with many but is something I like which is what it is all about.
As many of you may know my NA was the Super White/Red interior combo which I really like and miss, and I also bought a near-complete red interior when I bought the TT.
Since the red is nearly a perfect match for CRP I have had a sketchy plan in mind for my interior that will be very different, and I have put a few pieces in place to see how it feels.
The idea is to possibly put my red dash from the NA in along with the other installed red pieces you see, sort of having the CRP color cascading into the car. I have been getting the feel for how this would look and just may give it a shot some time this summer.

Here's how the interior looks at this time.
Image

Image

Image

So at this time the goals for the rest of 2013 are to decide what to do with the interior and do it, replace the front tires and add camber adjustment (FUCA's) until I do something about the suspension, and maybe buy some new wheels.
Future exterior plans for the TT will be a TwinZ 2 rear bumper and possibly side skirts, and after that to paint in the rest of the car same as I did the front.
Power mods will be minimal and geared towards about 400HP/450TQ- dual selin intake, upgraded ECU, Sport 500 BB turbos whenever the stockers finally go, and perhaps Stillen intercoolers.
Should I do all of that, a brake upgrade will also have to be in the works as the GTR brakes will probably not be enough any longer, and I will also upgrade the exhaust a little when the stock setup finally rots out which so far is still down the road awhile- MAYBE a SZ catback, but probably just a 2.5" aluminized straight-through catted/resonated Flowmaster setup like I have on the NA for half the price, and a lifetime warrantee.
Dream plans are to add a high quality coilover suspension with both compression AND rebound damping and the new active EDFC, and perhaps a traction control system.
I'll try to keep this updated as I go, thanks for looking!
Last edited by DCaff300ZX on Sun Apr 28, 2013 6:27 pm, edited 3 times in total.


User avatar
zswap0429
Posts: 398
Joined: Sat Dec 15, 2012 7:39 pm
Car: 1990 Nissan 300zx N/A (sold)
1990 Nissan 300zx Twin Turbo. (sold)
1993 Nissan 300zx N/A Convertible (sold)
1991 Nissan 300zx N/A (Project)
2009 Nissan Altima 3.5 SE 6spd.
Location: Newnan, Ga

Post

Looks good. I cant wait to get mine looking as clean as yours. The headlights look awsome btw.
Where did you get the cf ducts from? I want some now They look good on it.

User avatar
addicted4life
Posts: 550
Joined: Sun Jul 29, 2012 1:30 pm
Car: RHD '93 Fairlady 2+2, 3076s, Haltech, & Hoosiers. Go baby, go.
Location: Moncton, NB

Post

Nice man, always liked how clean your car was :)

User avatar
DCaff300ZX
Posts: 4229
Joined: Sun Jun 14, 2009 8:18 am
Car: .
1993 CRP TT- Modified
Location: Tacoma, Washington

Post

zswap0429 wrote:Looks good. I cant wait to get mine looking as clean as yours. The headlights look awsome btw.
Where did you get the cf ducts from? I want some now They look good on it.
Thanks!
The cf ducts are from Powertrix, and they do make a really nice addition to the front especially by subtraction of the fogs, which IMO look weird on our cars.
addicted4life wrote:Nice man, always liked how clean your car was :)
Thanks man, keeping her clean and neat is a tough job so I enjoy the positive feedback!

User avatar
DCaff300ZX
Posts: 4229
Joined: Sun Jun 14, 2009 8:18 am
Car: .
1993 CRP TT- Modified
Location: Tacoma, Washington

Post

Updated with more current pics! :bigthumb:

User avatar
Ace2cool
Posts: 12672
Joined: Sun Apr 20, 2008 5:21 pm
Car: 1991 Nissan 300ZX TT
1966 Datsun Fairlady 1600
2005 Suzuki GSX-R 600
1974 Honda CB550 Four
2009 Ford F150 Lariat
Location: Murfreesboro, TN

Post

:dblthumb:

User avatar
300ZXttZMAN
Posts: 7807
Joined: Mon Nov 22, 2010 4:07 pm
Car: 1990 300zx Twin Turbo 5 spd pearl white.

My Daily: 2008 Frontier NISMO package, 4x4 Crew Cab.
Location: Sulphur, LA 70665
Contact:

Post

Looking good Dave!

I'm going to add it to the sticky at the top.

User avatar
Z-owned
Posts: 3487
Joined: Fri Aug 29, 2008 8:56 pm
Car: 93 N/A Z32
90 VW Corrado
01 mr2 spyder
Location: Auburn, WA.

Post

We need to get some proper pics of your car lol maybe a little crp twin action as well. :naughty:

User avatar
DCaff300ZX
Posts: 4229
Joined: Sun Jun 14, 2009 8:18 am
Car: .
1993 CRP TT- Modified
Location: Tacoma, Washington

Post

Z-owned wrote:We need to get some proper pics of your car lol maybe a little crp twin action as well. :naughty:
Agreed! :yesnod
She will be able to take wax after 2 months, so about 6 weeks from now.
300ZXttZMAN wrote:Looking good Dave!

I'm going to add it to the sticky at the top.
Sounds good, thanks!
I should also have some more/better pics as the weather keeps staying nice, and I can finally wax and detail it all...and maybe as Chris suggests some Z on Z action... :naughty: :crazy: :chuckle:

User avatar
Z-owned
Posts: 3487
Joined: Fri Aug 29, 2008 8:56 pm
Car: 93 N/A Z32
90 VW Corrado
01 mr2 spyder
Location: Auburn, WA.

Post

pff who needs wax for photo's!

User avatar
DCaff300ZX
Posts: 4229
Joined: Sun Jun 14, 2009 8:18 am
Car: .
1993 CRP TT- Modified
Location: Tacoma, Washington

Post

True, lol.
Well, hit me up when you're good...next weekend is open so far

User avatar
Z-owned
Posts: 3487
Joined: Fri Aug 29, 2008 8:56 pm
Car: 93 N/A Z32
90 VW Corrado
01 mr2 spyder
Location: Auburn, WA.

Post

Probably not next weekend lol I am on call and need to get the Z in for an alignment. You should come to the next exotics@rtc though when the weather is good again.

User avatar
DCaff300ZX
Posts: 4229
Joined: Sun Jun 14, 2009 8:18 am
Car: .
1993 CRP TT- Modified
Location: Tacoma, Washington

Post

Gotcha on next weekend, but exotics sounds cool and count me in!
Anyone else going you know of?

User avatar
DCaff300ZX
Posts: 4229
Joined: Sun Jun 14, 2009 8:18 am
Car: .
1993 CRP TT- Modified
Location: Tacoma, Washington

Post

UPDATE-
I did a "little" work this week (vacation) on the Z- relocated my PTU up front, installed chrome coil brackets and hardware plus the 278 pc. SS bolt set (thanks Zinister!), did some misc. paint here and there on some brackets and such as I went, then the biggie: I replaced all of the injector and coil connectors, cleaned and re-wrapped everything.
Here's after all of the wiring and wrapping

Image

And all back together, if a little dirty

Image

More to come as I get her cleaned up!

User avatar
DCaff300ZX
Posts: 4229
Joined: Sun Jun 14, 2009 8:18 am
Car: .
1993 CRP TT- Modified
Location: Tacoma, Washington

Post

-UPDATE-
So this weekend all the rest of my maintenance and dress up stuff came in so bored as usual, I got to work.
New silicone boost hoses replaced the crumbling stockers, and while doing that the TB bolts got replaced and the timing covers got painted, along with many other minor/not so minor pieces to complete a engine bay dress up on the cheap. That and a quite a few hours or elbow grease cleaning up the hard areas and masking.
Overall I spent about $75 on Duplicolor paint plus paint supplies and about $250-$300 on dress up bolts, boost hoses, all new vacuum hoses, coil and injector connectors and wiring wrap and miscellaneous crap...plus another $50 or so on Automotive Touchup paint in CRP and clear for the mirror repaint to come next.
I think the money was well spent...
Image

...although strangely, much like with the window trim, the gunmetal paint took to the TB covers differently than the throttle cover which I may have to adjust later
Image

Image

I also got the cowls and window trims the color I wanted, here's the latest shots!
Image

Image

Image

Replacing all of the fuel lines and clamps is next weekend as well as clean up the rear of the engine wiring/hose/connector Pit-O-Hell, as well as the mirror repaint and maybe even new front tires...

User avatar
DCaff300ZX
Posts: 4229
Joined: Sun Jun 14, 2009 8:18 am
Car: .
1993 CRP TT- Modified
Location: Tacoma, Washington

Post

-SMALL UPDATE-
So after a busy Friday and Saturday where I was unable to do my planned work on the Z, I was bored early Sunday and got a few small things done that had been hanging around waiting for "idle time" such as today.
Someone stepped on my Powertrix cf vent covers in a back room where they were waiting to be installed and cracked the black OEM covers, so I swapped the cf onto my red vent covers...
Image

...and re-installed them.
Image

I also found a home for some of the leftover SS screws from my SS bolt kit...
Image

...and painted a battery hold down setup I removed from the NA, after checking in on her.
Image

Hopefully I will get to my fuel line repairs next weekend, then I can try to finalize the under hood area and get final shots!

User avatar
DCaff300ZX
Posts: 4229
Joined: Sun Jun 14, 2009 8:18 am
Car: .
1993 CRP TT- Modified
Location: Tacoma, Washington

Post

-UPDATE-
OK, so I finally have finished off all of my maintenance work under the hood with the fuel line replacement, I also had a new FPR and dampner laying around that went in and actually fixed a small idle shake that I had...now you almost can't tell she's running, hear it OR feel it.
Here's the new setup ready to go in...
Image

...and I also cleaned and painted the gas cap area and back of the fuel door, Automotive Touchup CRP paint and clear...
Image

Image

...I was happy to find that some of the leftover SS coil bolts worked to remount the fuel door, need to add the bumpers
Image

Saw this on another Z and really liked it, so I also blacked out my side markers today...

Image

...they look really dark, but still light up
Image

So, after a thorough detailing stem to stern here is how she will be looking for the most part from here on out- not too many major projects planned for the near future, and just some small details that won't show much left to deal with.

Finished engine bay:
Image

Image

Image

Interior- I removed the red console piece, and have put any further red interior thoughts on hold for now as I have definitely decided to revive the NA some day, and therefore do not want to leave it without an interior.
Here's the interior for now, detailed:
Image

Image

And finally, the car itself!
Image

Now I just need to get the updated sig shot to come out right, should be able to get that soon.
Last edited by DCaff300ZX on Sat Jun 22, 2013 2:19 pm, edited 1 time in total.

User avatar
zswap0429
Posts: 398
Joined: Sat Dec 15, 2012 7:39 pm
Car: 1990 Nissan 300zx N/A (sold)
1990 Nissan 300zx Twin Turbo. (sold)
1993 Nissan 300zx N/A Convertible (sold)
1991 Nissan 300zx N/A (Project)
2009 Nissan Altima 3.5 SE 6spd.
Location: Newnan, Ga

Post

Looks great like always.

User avatar
raremotive
Posts: 3581
Joined: Sun Oct 07, 2007 8:54 pm
Car: 04 G35
Location: Stuck in the middle.

Post

Looks good Dave. I like your attention to detail. :dblthumb:

If I still had my interior I would FedEx you those black vent pieces.

User avatar
DCaff300ZX
Posts: 4229
Joined: Sun Jun 14, 2009 8:18 am
Car: .
1993 CRP TT- Modified
Location: Tacoma, Washington

Post

Thanks Darrin, good to hear from you! So what's been going on?

I actually still have the original charcoal vent covers and kicks, etc., the ones on the car are from the extra red interior I bought so they can go either way.
I just like the splash of red down low, and how the vent covers make it look like the dash and body are connected. I miss my red interior... :frown:

User avatar
raremotive
Posts: 3581
Joined: Sun Oct 07, 2007 8:54 pm
Car: 04 G35
Location: Stuck in the middle.

Post

DCaff300ZX wrote:Thanks Darrin, good to hear from you! So what's been going on?

I actually still have the original charcoal vent covers and kicks, etc., the ones on the car are from the extra red interior I bought so they can go either way.
I just like the splash of red down low, and how the vent covers make it look like the dash and body are connected. I miss my red interior... :frown:
Been doing well.

Now that you mention it. The vent covers do make the dash and body connect. Nice touch. :chuckle:

User avatar
300ZXttZMAN
Posts: 7807
Joined: Mon Nov 22, 2010 4:07 pm
Car: 1990 300zx Twin Turbo 5 spd pearl white.

My Daily: 2008 Frontier NISMO package, 4x4 Crew Cab.
Location: Sulphur, LA 70665
Contact:

Post

Looking fresh Dave!

User avatar
H1tman
Posts: 136
Joined: Wed Mar 14, 2012 3:38 pm
Car: '90 300zx 2+2 Azure Blue
Location: Temecula, CA

Post

oOoOo good progress. red/red would look interesting, are planning on following through with the idea of swapping a red interior into it?

There should be more threads like this.

User avatar
DCaff300ZX
Posts: 4229
Joined: Sun Jun 14, 2009 8:18 am
Car: .
1993 CRP TT- Modified
Location: Tacoma, Washington

Post

H1tman wrote:oOoOo good progress. red/red would look interesting, are planning on following through with the idea of swapping a red interior into it?

There should be more threads like this.
Honestly I DO have a curiosity to see a red/red combo!
The guy I got my second red interior from in Redding, Ca. had a CRP TT, and he said he didn't like the red/red and so I got it, minus door panels unfortunately...but I KNOW I've never seen that combo, and didn't dream it existed until he mentioned it while we were e-mailing back and forth about details.
This does make me think it could be cool some bored weekend to swap in the red interior...just for s*** and grins! Only downside is my NA ds door panel isn't that great although the ps is, but they also have the two tone insert that I did because the tweed was shot...I'd have to go try and find some stock-looking red suede to get back to the original look and re-do my old red seats I still have...but now you got me thinking! :gapteeth:

User avatar
DCaff300ZX
Posts: 4229
Joined: Sun Jun 14, 2009 8:18 am
Car: .
1993 CRP TT- Modified
Location: Tacoma, Washington

Post

raremotive wrote:
DCaff300ZX wrote:Thanks Darrin, good to hear from you! So what's been going on?

I actually still have the original charcoal vent covers and kicks, etc., the ones on the car are from the extra red interior I bought so they can go either way.
I just like the splash of red down low, and how the vent covers make it look like the dash and body are connected. I miss my red interior... :frown:
Been doing well.

Now that you mention it. The vent covers do make the dash and body connect. Nice touch. :chuckle:
Thanks, I also like the small touch and reminder of the color- it really did just feel good driving the car seeing the color in the cabin, not that I feel bad driving the TT with charcoal...just hard to explain other than I really miss the red interior.

So you still working with Toyota?
And, any news on your project??? :biggrin:

User avatar
DCaff300ZX
Posts: 4229
Joined: Sun Jun 14, 2009 8:18 am
Car: .
1993 CRP TT- Modified
Location: Tacoma, Washington

Post

300ZXttZMAN wrote:Looking fresh Dave!
Thanks Mark, so how's YOUR baby been treating you? Mine's never been better than now, and I imagine yours has got to be the same... :yesnod

User avatar
raremotive
Posts: 3581
Joined: Sun Oct 07, 2007 8:54 pm
Car: 04 G35
Location: Stuck in the middle.

Post

DCaff300ZX wrote: So you still working with Toyota?
And, any news on your project??? :biggrin:
What? When did I start working for Toyota? :chuckle:

No news.. the big secret is that I have obligations to a significant other... and a wedding. :ohno:

But other news includes that I will be buying a welder sometime next year and maybe a second Z32 to be a test mule. :yesnod

User avatar
DCaff300ZX
Posts: 4229
Joined: Sun Jun 14, 2009 8:18 am
Car: .
1993 CRP TT- Modified
Location: Tacoma, Washington

Post

OOooooo, wedding...that will set your priorities! :crazy:
Congratulations!!

Sounds good with the welder, to bad you way over there because I got this NA that would LOVE to be the test mule and become anything like what you are planning! :chuckle:

User avatar
DCaff300ZX
Posts: 4229
Joined: Sun Jun 14, 2009 8:18 am
Car: .
1993 CRP TT- Modified
Location: Tacoma, Washington

Post

Well, the time came to do something about my peeling and lumpy TBL sticker...turns out that the sticker was delaminating from the adhesive from water soaking in, and that the spoiler was not rotting.
WHEW!
So, time to strip it off and paint in a new one, cheaper and more durable.
Ebony black Duplicolor paint with Automotivetouchup clear, just removing the masking
Image

I had a little CRP left, and colored the black brake light trim piece
Image

Installed
Image

Still need to do a little touchup and detailing, plus new Fairlady Z and TT stickers after everything dries for a few days, but looking pretty good
Image

Image

Since I needed to do something while waiting for paint to dry, I began making a template for a one piece splitter I have been thinking about making...I bolted the cardboard to the underside where I want to attach, then marked the shape plus area to fold up sides for zero-to-1/2" +/- "wings". The unit will be spaced down about 1/2" with a light material to provide depth, front bumper impact absorption, and room for the wings to finish at the bottom edge of the bumper sides at the wheels plus compensate for the fact the front end curves up a little. The template does not include any extra width which can be added later, I went for just the strict shape at this point and will add anything extra when I transfer it to a better template piece (1/8"/1/4" mdf/similar) later.
Image

I also want to make some splitter-type "side skirts" in a similar style to the TwinZ ones, some time in the near future!

User avatar
Ziggy1621
Posts: 1205
Joined: Sun Jun 10, 2012 5:57 pm
Car: '90 Z32 TT (Shibui)
'90 Z32 2+0 NA
'68 311 Roadster
2004 Rx330
2011 BMW 550i (TT)
Location: Cocoa, Florida
Contact:

Post

So either the TT has been acting stellar, or your camera broke! Time for an update Homie! :mike


Return to “300ZX (Z32) General”