Tein H-Tech Lowering Springs Install Write Up

Forum for Infiniti M35 and M45, and Nissan Fuga owners.
User avatar
yosM45
Posts: 495
Joined: Fri Jul 25, 2008 12:20 pm
Car: 2006 M45 Sport Twighlight Blue

Post

Did my spring install this weekend, and took some pictures so figured I share them in case someone wanted to try this at home.

I STRONGLY RECOMMEND TWO PEOPLE FOR CERTAIN STEPS.

1) Jack the car up and remove the wheel.
Image

2) Disconnect the brake line attached to the strut, on both sides. No need to disconnect the one on the steering knuckle.Image

FOR ME...Only jacking the car up on one corner was the most beneficial because. It allowed me to turn on the car and turn the steering wheel to access certain bolts.

3) Turn the wheel slightly, and remove the steering stop. In the pic with the two bolts.
Image

4) This was the most difficult part. Remove the lower strut bolt. You need to brace both sides, and use a breaker bar on the nut side. This nut is stuck on there for me. I HIGHLY RECOMMEND a 6 point socket, so the bolt won't strip and some liquid wrench sprayed on there. You will need to turn the steering wheel again to move the sway bar link out of the way.
Image

5) Remove the three top strut bolts. PAY ATTENTION to the yellow bolt, it will always point outwards of the vehicle.Image

6) Take a small piston jack, and insert it above the upper control arm. Jack it down just a couple of times, just to get the top three strut bolts out and unseated, and then wedge the lower part of the strut/camber bolt forward.

The strut will not come out yet, all your doing relocating the strut from all of it's aligned holes for the next step.
Image

YOUR GOING TO NEED TWO PEOPLE HERE...

7) Your going to remove the top steering knuckle bolt. Once you do, the steering knuckle is going to fall over, so have someone else holding it to keep it from doing so.
Image
Once it's disconnected, your partner is going to push down on the rotor/steering knuckle. This will give you enough play to move the the lower part of the strut over the it's mount on the lower control arm. Once that's up and over and loose from the mount, just slide the strut out. BE CAREFUL! Don't break a brake line.
Image
You can insert the bolt to keep the steering knuckle in place while you begin compressing.
Last edited by yosM45 on Sun Jul 15, 2012 5:07 am, edited 2 times in total.


User avatar
yosM45
Posts: 495
Joined: Fri Jul 25, 2008 12:20 pm
Car: 2006 M45 Sport Twighlight Blue

Post

8) Attach your spring compressors, and start torquing them down. You can do it by hand, I just happen to have air tools.
Image
Image

9) Once it's compressed enough, remove the top nut on the strut. Then remove the compressed coil.
Image
Image

10) Decompress the OEM coil, and compress the new (Tein) coil.
Image
Image

11) Once the new coil is compressed enough, tighten the top strut bolt. MAKE SURE THE YELLOW BOLT IS FACING OUTWARDS. It would suck to decompress the coil and find out the top plate was on wrong.
Image

12) Using the procedure in reverse, With the help of a partner, reinsert the strut.
Image

13) Reverse everything thing else. And begin on the other side. Be sure to use a LOW PROFILE JACK, since your car will be lower after the install.

Rears next.
Last edited by yosM45 on Sun Jun 05, 2011 8:29 pm, edited 1 time in total.

User avatar
yosM45
Posts: 495
Joined: Fri Jul 25, 2008 12:20 pm
Car: 2006 M45 Sport Twighlight Blue

Post

Rears...

1) Remove the wheel and place a small jack under the spring well. Once the bolt that is shown is removed, the housing will drop, so have a jack in place to support it. Once the downward pressure is supported, remove the marked bolt.
Image

The bolt can be a PITA to take out once the nut is removed. I tried to hammer it out, but I as soon as I realized that the it was threaded in, all I had to do is keep turning it. Off in 2 mins.

2) Use the smaller jack to lower the well and remove the OEM spring.
Image

3) Remove the bumper stops from the OEM springs, and place them on the new springs. PAY ATTENTION TO THE ARROW ON THE LOWER BUMPER STOP. The arrow should point to the inside of the vehicle.
Image
Image

4) Mount the spring in the well and use the jack to raise the spring, and reinsert the bolt.
Image

That's it. 30 minutes per each rear side, and 1.5 hours for each front side.

FYI...JUST IN CASE YOU WANT TO REPLACE THE REAR STRUT...don't remove the spring well bolt, remove the lower strut bolt instead, then the upper strut nut. To reinstall, bolt the rear strut top nut, and then use the jack to raise the control arm up so you can reinsert the lower strut bolt. Very easy.
Last edited by yosM45 on Sun Jun 05, 2011 8:34 pm, edited 2 times in total.

User avatar
yosM45
Posts: 495
Joined: Fri Jul 25, 2008 12:20 pm
Car: 2006 M45 Sport Twighlight Blue

Post

Before and after pics...

Before Passenger
Image
After Passenger
Image


Before Drivers
Image
After Drivers
Image

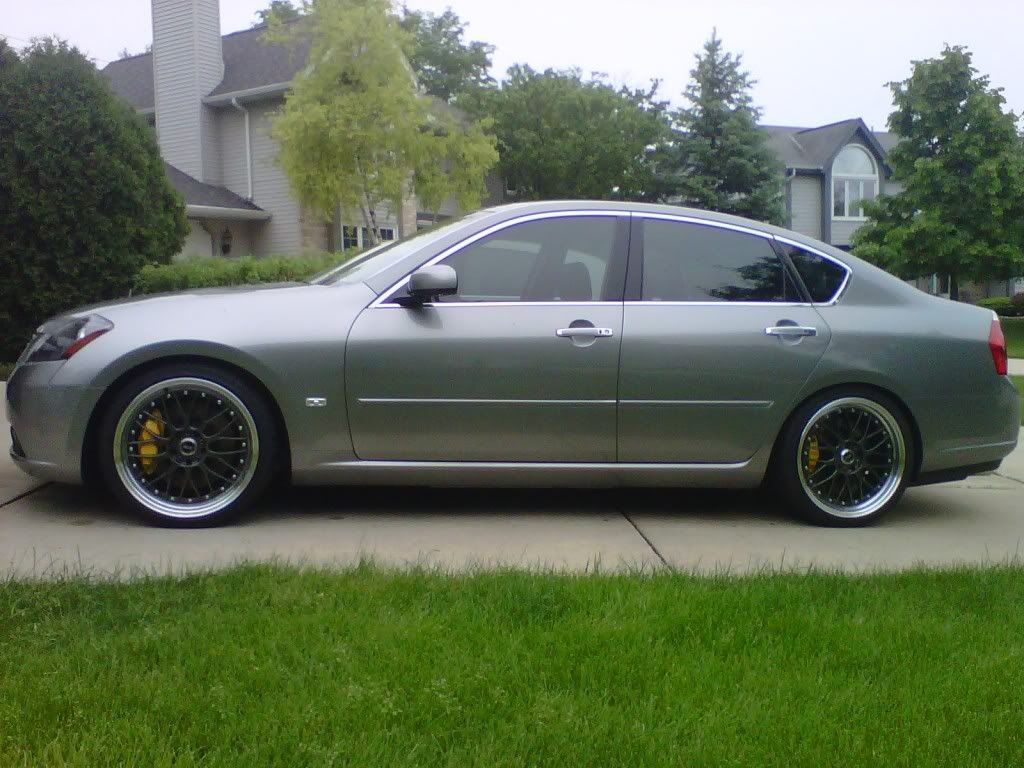
Mild drop. But it eliminated the front wheel gap and I'm level now at 27" all around. I'm hoping they settle a bit more. But I'm good with it. The ride is slightly softer than stock. Not as harsh.

The whole job should take about 4-5 hours.

IMPORTANT TORQUE SPECS>>>>>>>>

Front:

Upper Steering Knuckle Bolt 41 ft. lbs.
Steering stop Bolt 54 ft. lbs.
Lower Strut Bolt 79 ft. lbs.
Top Strut Bolts 29 ft. lbs.

Rear:

Outer Spring Well Bolt 53 ft. lbs.
(In Case) Top Strut Bolt 22 ft. lbs.
(In Case) Lower Strut Bolt 70 ft. lbs.


Here is the alignment right after. Might need camber bolts to get it perfect, but this was pretty close.

Image
Last edited by yosM45 on Sun Jul 15, 2012 5:39 am, edited 2 times in total.

User avatar
a.blanco0905
Posts: 2538
Joined: Mon Dec 20, 2010 7:49 pm
Car: 2006 Infiniti M45
91 300zx TT
07 Kaw ZX6R
Location: Killeen, TX
Contact:

Post

Great write up Yos & the difference is incredible, I dont even remember what my car looked like on 4x4 mode, lol... very tasteful mods on the wheels, bbk, aero kit & the mild drop... I have dibs on the BBK if you sell ur car!!! lol...

@Ilyakol... sticky?

User avatar
yosM45
Posts: 495
Joined: Fri Jul 25, 2008 12:20 pm
Car: 2006 M45 Sport Twighlight Blue

Post

a.blanco0905 wrote:Great write up Yos & the difference is incredible, I dont even remember what my car looked like on 4x4 mode, lol... very tasteful mods on the wheels, bbk, aero kit & the mild drop... I have dibs on the BBK if you sell ur car!!! lol...

@Ilyakol... sticky?
Thanks Blanco. I got the rear window spoiler on order, and that will be pretty much for me.

User avatar
sunoco
Posts: 343
Joined: Thu Mar 17, 2011 8:17 pm
Car: 2007 M35 Sport
H-Techs
C-Mod Grille
Location: Atlanta, GA

Post

Love it dude!

I've seen everyone's drops and guess I got the fever.

yosM45 - how much you pay for the h-techs?

Whats a good price for them and the best place to get them?

User avatar
a.blanco0905
Posts: 2538
Joined: Mon Dec 20, 2010 7:49 pm
Car: 2006 Infiniti M45
91 300zx TT
07 Kaw ZX6R
Location: Killeen, TX
Contact:

Post

I actually sold them to him Sunoco & I can probably get u a good price brand new from an ebay seller, PM me if and when you REALLY want them, so I can email them and see what's the best price they can give me this time. I buy a lot of stuff off them for my M and my Z that's why they usually hook me up.

User avatar
yosM45
Posts: 495
Joined: Fri Jul 25, 2008 12:20 pm
Car: 2006 M45 Sport Twighlight Blue

Post

I got them from another member on here, so they were used, but I've seen them on multiple websites from $200 to $250 for the H-Techs.

jhuerto23
Posts: 560
Joined: Mon Apr 26, 2010 8:14 am
Car: 2006 Infiniti M45
Location: Northern Cali
Contact:

Post

Nice write up. I really like how you put up the Torque specs. Are you planning to get an alignment done?

User avatar
yosM45
Posts: 495
Joined: Fri Jul 25, 2008 12:20 pm
Car: 2006 M45 Sport Twighlight Blue

Post

Yeah. Im going to let it sit for a week our so first, before I get one done.

bicsintegra
Posts: 531
Joined: Fri Apr 03, 2009 4:35 pm
Car: '06 Infiniti M35
'06 Infiniti G35 coupe
'11 Ford F-150 FX4
'13 Ford Edge Sport

Post

i wish i would have had your write up when i dropped my m last year, i am sure it will help plenty of m owners who want to drop their car.

BigBokey
Posts: 15
Joined: Sat Jul 15, 2006 2:57 pm
Car: 2008 Infiniti M35s

Post

Excellent write up man, thanks! This will come in handy when I'm ready to drop mine. Love the wheels and brakes too!

User avatar
CPJ LB
Posts: 1026
Joined: Sat Aug 28, 2010 4:06 pm
Car: 12 G37X Sedan- stealthy modded
14 Altima 2.5
08 Tahoe
06 M35 S (gone)
14 Versa 4dr (gone)
Location: CA 2 CT

Post

great job Yos.....nice work.

H-techs baby!!!! say goodbye to that 'stock wheel/fender gap' :biggrin:

User avatar
mexillis
Posts: 2418
Joined: Wed May 27, 2009 2:28 am
Car: M45s
Location: SOVA

Post

Nice write up Yos, off topic question for you. Are you using the oem lines that are on step 2 or just left all that connected?

User avatar
CPJ LB
Posts: 1026
Joined: Sat Aug 28, 2010 4:06 pm
Car: 12 G37X Sedan- stealthy modded
14 Altima 2.5
08 Tahoe
06 M35 S (gone)
14 Versa 4dr (gone)
Location: CA 2 CT

Post

^^ damn Mexillis....I love your ride...sits well and the kit is top notch...also love that color..... sorry to hi-jack....LOL..

User avatar
yosM45
Posts: 495
Joined: Fri Jul 25, 2008 12:20 pm
Car: 2006 M45 Sport Twighlight Blue

Post

mexillis wrote:Nice write up Yos, off topic question for you. Are you using the oem lines that are on step 2 or just left all that connected?
I only disconnected the stainless line on the one side of the strut, and the rubber grommets that holds the line on the other side of the strut.

So the only section of the brake line I left connected was the single connection that's on the steering knuckle.

If I understood your question correctly...

SdotSdotS
Posts: 148
Joined: Mon Apr 05, 2010 1:28 pm
Car: 2007 Infiniti M35 Sport
Location: Plantation, FL

Post

They will definitely settle... I remember being not so thrilled when I first went to pick my car up thinking I should have gone with Eibachs. After driving around for a while, a few days later I came outside and could tell the difference. Even my brother and dad noticed that the car was lower without me telling them, which was reassuring.

User avatar
mexillis
Posts: 2418
Joined: Wed May 27, 2009 2:28 am
Car: M45s
Location: SOVA

Post

Thx CPJ, Yos idk if you answered my question either lol but maybe this will help. With my BBK install I removed all that stuff on step 2 and was wondering if u just left it on there but not in use. My lines are connected from the caliper straight to the brake line attached to the inside of the wheel well.

User avatar
yosM45
Posts: 495
Joined: Fri Jul 25, 2008 12:20 pm
Car: 2006 M45 Sport Twighlight Blue

Post

You know something...they may sound dumb, but I don't know. I thought all those lines were functional, but I did not do the brake install, Steve did.

Maybe he can chime in.

StevetheTech?

I'm out of town until Tuesday, but when I get back, I'll get under there and look closer.

User avatar
bbs350z
Posts: 507
Joined: Tue Oct 06, 2009 5:41 pm
Car: 350z built tt
350z st track whore
m35x daily
evo 8- 30r sold

Post

not trying to hijack, it looks as though the tein h-techs lower rwd m's about as much as s-techs do to awd m's.

i recently installed s-techs and our ride height looks similar.
Image

only thing i dont like is how the front looks to sit higher than the rear, same was the case with my g35 sedan on s-techs

SdotSdotS
Posts: 148
Joined: Mon Apr 05, 2010 1:28 pm
Car: 2007 Infiniti M35 Sport
Location: Plantation, FL

Post

I though mine had a front rake at first (rear higher) but after driving around they appear to have evened out once settled. Mine is RWD Sport btw.

User avatar
yosM45
Posts: 495
Joined: Fri Jul 25, 2008 12:20 pm
Car: 2006 M45 Sport Twighlight Blue

Post

What was your height before and after the drop (measured from the ground to the edge of the fender).

My front gap was bigger then my back, but based on the. Based Htech drop amounts I knew the it would close the gap.

All I really cared about was closing my gap, the drop was a bonus.

Is it because the s tech is softer. Is your drive way angled down.

User avatar
bbs350z
Posts: 507
Joined: Tue Oct 06, 2009 5:41 pm
Car: 350z built tt
350z st track whore
m35x daily
evo 8- 30r sold

Post

^yea its downward, but everywhere i park its like that. was the same with my old g35. evo and both z's had coils so it was an easy fix. im going with coils next spring so ill deal with it lol.

EniGmA1987
Posts: 2257
Joined: Tue Apr 28, 2009 5:13 am
Car: '06 Infiniti M35 Sport

Post

S-Tech springs are somewhere around 0.6kg stiffer spring rate than the H-Tech springs are.
From what I remember, the AWD is higher up than the normal models. So this fits perfectly to what you said

AWD model w/ S-Tech = sport model w/ H-Tech. That would mean the AWD is dropped lower than the non-AWD to achieve the same height. WHich goes with the springs saying that the S-Tech's drop more and with the part about the AWD model rides higher in the first place.

User avatar
sunoco
Posts: 343
Joined: Thu Mar 17, 2011 8:17 pm
Car: 2007 M35 Sport
H-Techs
C-Mod Grille
Location: Atlanta, GA

Post

Hey yos - did the h techs settle alot after a while? Can you post a recent pic.

Thanks again for the write up, I got my H-techs in the garage, and plan to use this infor very soon!

User avatar
yosM45
Posts: 495
Joined: Fri Jul 25, 2008 12:20 pm
Car: 2006 M45 Sport Twighlight Blue

Post

sunoco wrote:Hey yos - did the h techs settle alot after a while? Can you post a recent pic.

Thanks again for the write up, I got my H-techs in the garage, and plan to use this infor very soon!
Honestly, since installing the springs, I drove the M for about 3 days and got shipped out for work. I just got back in to town today so I'll give it about another week and remeasure.

I'll give keep you updated.

User avatar
GreenQ45a
Posts: 704
Joined: Wed Mar 31, 2004 7:39 pm
Car: 2012 Altima 3.5 SR CVT - Dark Slate w\Black Leather Sport\Tech\Premium

2010 Pathfinder 4.0 SE Auto - Red w\Grey Cloth Towing Pkg\Tech 1
Location: DFW Tx

Post

Did you guys trim your Bump Stops?

I am currently installing Tein S-Tech's and the installation guide says to trim .8 off the tip, it shows to use fig.1 or fig.a. that example show it being trimmed off the lower part with the plastic ring.

The question is there will not be anything left for the plastic ring to hold on to after the trim.
So does the plastic ring get removed? or Pushed back?

User avatar
yosM45
Posts: 495
Joined: Fri Jul 25, 2008 12:20 pm
Car: 2006 M45 Sport Twighlight Blue

Post

GreenQ45a wrote:Did you guys trim your Bump Stops?

I am currently installing Tein S-Tech's and the installation guide says to trim .8 off the tip, it shows to use fig.1 or fig.a. that example show it being trimmed off the lower part with the plastic ring.

The question is there will not be anything left for the plastic ring to hold on to after the trim.
So does the plastic ring get removed? or Pushed back?
I really dont know anything about trimming.

I didn't trim anything on my htechs. But the stechs are more of a drop than the htechs.

Lets see if anyone else chimes in.

06M4.5
Posts: 2478
Joined: Thu Sep 09, 2010 6:04 am
Car: 2006 M45
Location: Florida

Post

I cut my front bump stop and I'll cut the rear when I get new replacemnets.


Return to “Infiniti M35 and M45 Forum”