I've seen the video on how to dismantle half the car to gain access to the power supply and dread doing it.
Since it is now working about 70% of the time and is likely to start if I cycle the light switch, I am suspecting moisture getting in to the supply area.
Has anyone tried to spray the power supply with the moisture excluding silicon sprays?
Come to think of it, I haven't seen the stuff in years. Is it still available?
My Driver's HID is failing intermittently
-
maxnix
- Posts: 22627
- Joined: Mon Jul 22, 2002 8:11 pm
- Car: 1995 Infiniti Q45
1995 Infiniti Q45t
2000 Infiniti Q45
Re: My Driver's HID is failing intermittently
Ballasts on some F50 are problematic.
Re: My Driver's HID is failing intermittently
Agree Brian, clue is you can get it to sometimes work by cycling on/off switch....the most demanding and stressful period of operation of an HID based system is initial lighting of bulb, as it requires a much higher power to ignite the arc- check ballast,then bulb.
-
djwarner
- Posts: 407
- Joined: Sat Jan 23, 2010 6:07 pm
- Car: 1971 240Z Series I
2006 350Z - Location: Central Florida
Re: My Driver's HID is failing intermittently
I understand both the history and dynamics of the the ballast. Considering that it did not do this when new, something has aged. Usually, high voltage components develop current leaks around cracks in insulation. That is why I was asking about the water excluding spray. I figure I can get at the ballast by removing the inner fenderwell and not disassembling the entire front end.
Infinitis Scottsdale are quoting a new ballast at $447, thus I am looking for a more reasonable alternative.
Infinitis Scottsdale are quoting a new ballast at $447, thus I am looking for a more reasonable alternative.
Re: My Driver's HID is failing intermittently
highly doubtful that water intrusion is the source of your issue.....yes ballasts {and bulbs} age, and cause the exact symptoms you are experiencing. simple to swap left and right ballasts and see if problem follows or says on the same side.....then do the same with the bulbs to isolate issue before throwing $$$$ at parts
-
djwarner
- Posts: 407
- Joined: Sat Jan 23, 2010 6:07 pm
- Car: 1971 240Z Series I
2006 350Z - Location: Central Florida
Re: My Driver's HID is failing intermittently
Well, the driver's side finally went out permanently. Did some research and found a Xentac kit on Ebay for $35 including two ballasts, two D2S bulbs and wiring. Got it this evening and I will be installing them tomorrow. I'll take some pictures to show the install.
BTW they also offer HID bulbs to replace other common headlight bulbs, so it might be a reasonable upgrade for some of the earlier Q's.
BTW they also offer HID bulbs to replace other common headlight bulbs, so it might be a reasonable upgrade for some of the earlier Q's.
-
djwarner
- Posts: 407
- Joined: Sat Jan 23, 2010 6:07 pm
- Car: 1971 240Z Series I
2006 350Z - Location: Central Florida
Re: My Driver's HID is failing intermittently
New lights are in and working. Specs are the same as OEM. Did require some local fabrication so I didnot complete the reinstallation. Photos and details tomorrow.
Re: My Driver's HID is failing intermittently
djwarner wrote:Well, the driver's side finally went out permanently. Did some research and found a Xentac kit on Ebay for $35 including two ballasts, two D2S bulbs and wiring. Got it this evening and I will be installing them tomorrow. I'll take some pictures to show the install.
BTW they also offer HID bulbs to replace other common headlight bulbs, so it might be a reasonable upgrade for some of the earlier Q's.
Hate to say it, but for $35 for a kit with ballasts,bulbs,and wiring.....you bought worthless chinese junk.
Installing a "hid kit" in ANY older car designed for halogen bulbs is never an "upgrade" as the optics are not designed for it. see here to learn why http://www.danielsternlighting.com/tech ... sions.html
-
djwarner
- Posts: 407
- Joined: Sat Jan 23, 2010 6:07 pm
- Car: 1971 240Z Series I
2006 350Z - Location: Central Florida
Re: My Driver's HID is failing intermittently
Thanks for the heads up qship96. I read the link you gave and it contains some useful information. Fortunately, none of it applies to my '02 Q which came with HID lamps from the factory.
Also the OEM bulb was a D2S Xenon and I replaced it with a bulb that optically looked identical except for the socket portion. It came with pigtails and connectors to match the balast.
Considering the entire kit cost less than an OEM bulb, I took a flyer on it. So far i have no complaints.
Also the OEM bulb was a D2S Xenon and I replaced it with a bulb that optically looked identical except for the socket portion. It came with pigtails and connectors to match the balast.
Considering the entire kit cost less than an OEM bulb, I took a flyer on it. So far i have no complaints.
Re: My Driver's HID is failing intermittently
Let us know how it holds up!
-
Lokim
- Posts: 681
- Joined: Mon May 10, 2010 12:47 am
- Car: 1994 Infiniti Q45 acquired 4/25/10 w/192K
Now at 222K and going strong! - Location: Seattle, WA
- Contact:
Re: My Driver's HID is failing intermittently
I've had that worthless Chinese junk on my Q for over a year (high beams, low beams, and fogs) and have had no problems other than one fog lamp bulb burnt out (it got wet) and occasionally I have to re-start the headlights on initial start-up because one may not ignite properly.
-
djwarner
- Posts: 407
- Joined: Sat Jan 23, 2010 6:07 pm
- Car: 1971 240Z Series I
2006 350Z - Location: Central Florida
Re: My Driver's HID is failing intermittently
Here is a link to the promised pictures:
https://skydrive.live.com/redir.aspx?ci ... aCC!Avc%24
Here are a few extended comments on the photos:
1. Murphy's Law corollary: The more you try to isolate any one thing, the more you find it connected to the whole world. Nissan Engineers wholely subscribe to this.
2. Head lamp assemblies after removal, one upside down to show the location of the ballast.
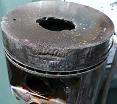
3. Ballast un mounted showing the internal routing of the high voltage cable and intergral moisture seal.
4. The OEM connector and bulb. Since the kit came with different connectors, I cut off the connector to facilitate removal.
5. The kit as delivered including bulbs, ballast, power connectors, tie wraps, two sided mounting tapes, and useless instructions. Supplier does have a good video on YouTube.
6. While the new cable was long enough to run internally per OEM, sealing the hole was going to be difficult.
7. To ease installation, I fabricated a block that mounts in place of the old ballast allowing an RTV seal of the old hole and a flat mounting surface for the new ballast. I drilled a new hole close to the bulb so I could run the high voltage cable externally. Mounted the ballast with the doublesided tape and spliced the new power connector to the old wires. OEM Green (+12v) to red and OEM white to black.
After making the mounting blocks, installation was straight forward and went without a hitch. Output voltage and power of the new ballast matches the spec.s labeled on the OEM ballast. So far so good.
https://skydrive.live.com/redir.aspx?ci ... aCC!Avc%24
Here are a few extended comments on the photos:
1. Murphy's Law corollary: The more you try to isolate any one thing, the more you find it connected to the whole world. Nissan Engineers wholely subscribe to this.
2. Head lamp assemblies after removal, one upside down to show the location of the ballast.
3. Ballast un mounted showing the internal routing of the high voltage cable and intergral moisture seal.
4. The OEM connector and bulb. Since the kit came with different connectors, I cut off the connector to facilitate removal.
5. The kit as delivered including bulbs, ballast, power connectors, tie wraps, two sided mounting tapes, and useless instructions. Supplier does have a good video on YouTube.
6. While the new cable was long enough to run internally per OEM, sealing the hole was going to be difficult.
7. To ease installation, I fabricated a block that mounts in place of the old ballast allowing an RTV seal of the old hole and a flat mounting surface for the new ballast. I drilled a new hole close to the bulb so I could run the high voltage cable externally. Mounted the ballast with the doublesided tape and spliced the new power connector to the old wires. OEM Green (+12v) to red and OEM white to black.
After making the mounting blocks, installation was straight forward and went without a hitch. Output voltage and power of the new ballast matches the spec.s labeled on the OEM ballast. So far so good.
-
maxnix
- Posts: 22627
- Joined: Mon Jul 22, 2002 8:11 pm
- Car: 1995 Infiniti Q45
1995 Infiniti Q45t
2000 Infiniti Q45
Re: My Driver's HID is failing intermittently
Good luck! It is difficult to understand why if the ballast meets specifications, why do not the connectors? Not a standard D2S either?
The whole bumper having to be removed is just flat insulting.
The whole bumper having to be removed is just flat insulting.
-
djwarner
- Posts: 407
- Joined: Sat Jan 23, 2010 6:07 pm
- Car: 1971 240Z Series I
2006 350Z - Location: Central Florida
Re: My Driver's HID is failing intermittently
I meant power specifications not physical. As far as the bulbs go, the mount, glass, color temperature and gas chamber were identical. I would assume the same elements were used in all bulb number variations offered by the company by only changing the plastic section that matched the bulb mounting socket.
Like I said, at less than the cost of an OEM bulb, I'll replace the whole package again if it fails.
Like I said, at less than the cost of an OEM bulb, I'll replace the whole package again if it fails.
-
maxnix
- Posts: 22627
- Joined: Mon Jul 22, 2002 8:11 pm
- Car: 1995 Infiniti Q45
1995 Infiniti Q45t
2000 Infiniti Q45
Re: My Driver's HID is failing intermittently
It is interesting that the FGY33 ballasts have never been a problem. Wonder what changed?
Re: My Driver's HID is failing intermittently
cost cutting,across all makes and models. Old over-engineered parts studied and made less robust to save costs.....remember how old {1980s} Mercedes were so over-engineered and would last almost your lifetime if properly cared for? No more- our 1997 E420 was a perfect example,many things on that car literally fell apart way before their time as compared to earlier MB products.
-
Q451990

- Moderator
- Posts: 11030
- Joined: Tue Jul 23, 2002 8:21 am
- Car: 1990 Q45 - 118K, 2022 Toyota 4 Runner, 2004 Frontier M/T - 108K, 2012 Xterra (Mom's), 2023 Rogue (Inlaws)
- Location: Columbia, SC
- Contact:
Re: My Driver's HID is failing intermittently
I noticed a '97 E series at the pull-a-part last week. Since you're knowledgable about those cars, is there anything in particular on that car that would be valuable if it's in good shape for ebaying purposes?qship96 wrote:No more- our 1997 E420 was a perfect example
Heath
Re: My Driver's HID is failing intermittently
almost every normal wear item you can get your hands on that is in good shape,as there were a ton of them produced {including the 6 &8 cylinder sedans and wagons} therefor the market for used parts is much greater than for the Q.
-
djwarner
- Posts: 407
- Joined: Sat Jan 23, 2010 6:07 pm
- Car: 1971 240Z Series I
2006 350Z - Location: Central Florida
A final report
I've been driving with the Chinese replacement HIDs for a while now.
The major difference in performance is that the lights are slow to come to full brightness, perhaps 30 secs. Reminds me of the compact fluorescent lightbulbs the government is forcing on us. If you use the automatic headlight setting and buckle your seatbelt after starting the engine, you might be hard pressed to notice it. My wife drives a G25 and the difference between the two is apparent.
Overall brightness is about the same as OEM once warmed up.
One point I overlooked during the conversion. For the F50, before removing the ballast or bulb, turn the aiming control to the full down position. This moves the headlamp module to give more room for the power cable and eases dis-assembly.