[4th Gen] Knock Sensor Replacement Pictures

The club for Nissan Maxima and Infiniti I30 / I35 owners, and the official home of Maxima Club of America!
OwnerCS
Posts: 1771
Joined: Thu May 27, 2010 4:34 am

Post

This weekend I was able to replace the failed knock sensor. This was my 2nd attempt to replace the knock sensor, so I want to share some tips for success in the pictures and information listed below.

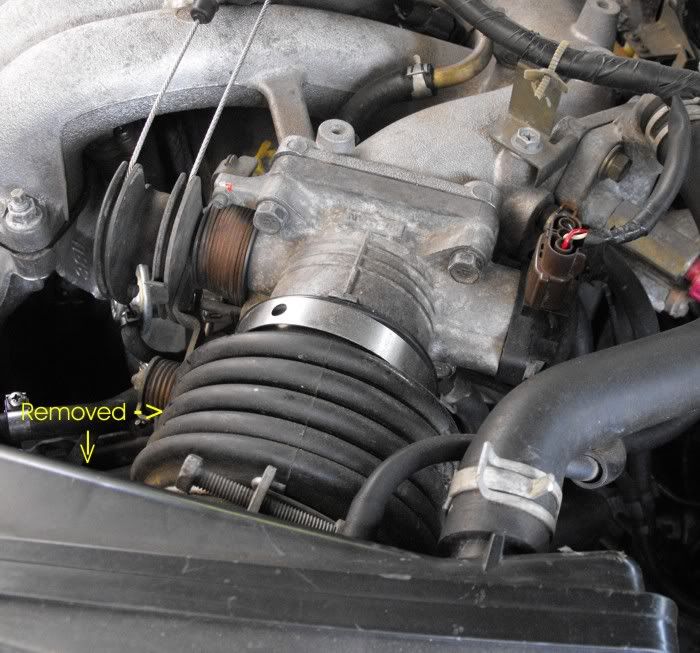
1) The air inlet box between the air cleaner and the throttle body was removed for ease of access. The knock sensor is located in the black hole just above the word “Removed” in the picture.

Image

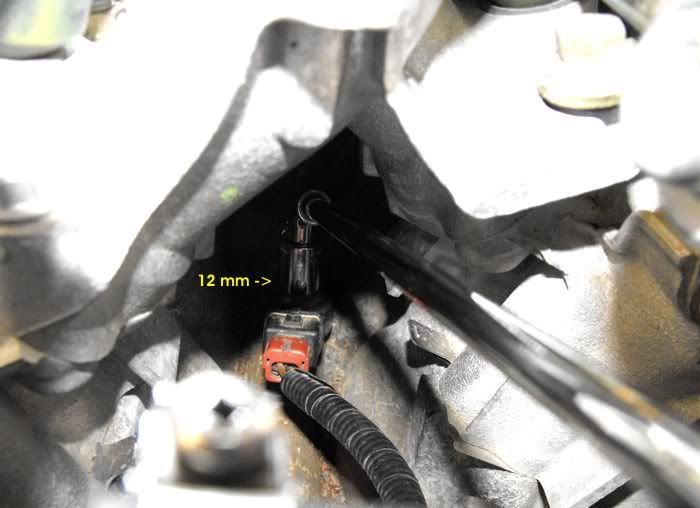
2) To reach under the plenum a 12 or 14-inch socket wrench extension is needed. My first attempt at using a universal joint with a 3/8-drive extension was unsuccessful. The “no name” universal joint was too loose and it would twist off of the bolt when I applied torque. I was about to give up on the whole operation when I decided to go to Sears to look into different tools. As it turned out, I purchased a 14-inch ¼ drive extension and ¼ inch universal joint. I already had a 12mm ¼ drive socket in my toolbox. The universal joint seemed to make a big difference. The Sears joint is not too easily moved. It could be positioned at the exact angle needed to remove the bolt without wobble. The universal joint and extension are pictured below.

Image

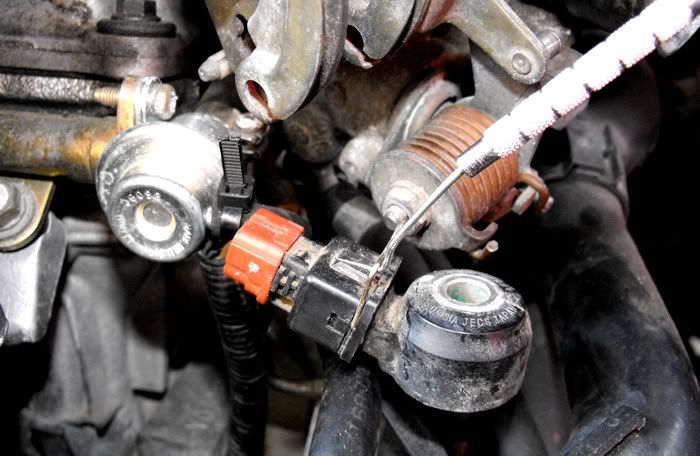
3) A pick (dentist looking tool) that I purchased from Harbor Freight was used to release the knock sensor plug clip as shown in the following picture.

Image

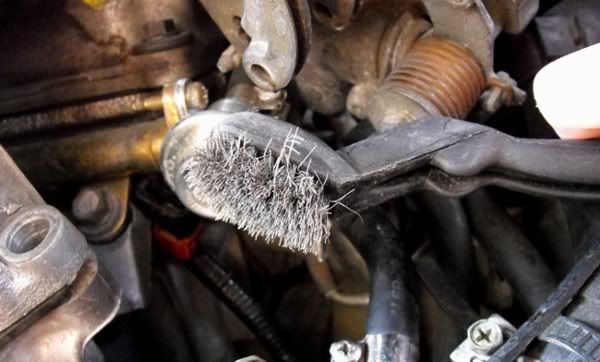
4) The knock sensor block mounting area was brushed to remove any corrosion. The angle-handled brush in the following picture was used to clean the mounting area.

Image

1995 Maxima Check Engine Code 34
Last edited by OwnerCS on Wed Jun 15, 2011 5:39 pm, edited 1 time in total.


User avatar
loystock
Moderator
Posts: 2144
Joined: Sun Sep 21, 2003 9:12 pm
Car: 10 Pilot, 97&03 Q45s, 97 I30 and 06 M35 Sports (04 G35 & 99 I30-RIP)
Location: San Jose, CA

Post

Good job! Nice pictures.

KS removal is less difficult with Federal configuration as opposed to CA configuration (an extra valve in the way). I used a 16-inch extension and U-joints. A 3/8 U-joint does not bend at 90 degrees whereas a 1/4" U-joint can. A strong magnet pickup will come handy if you drop something in that 'hole.' Always use a 6-point socket or you can round the head of the mounting bolt (requiring intake plenum removal). But a good dose of WD-40 on the mounting bolt (M8, 1.25mm Pitch, 30mm Long, 12mm Head) will ease the removal process. In my case, I didn't find it necessary to remove the TB. A very small screw driver can loosen the clip on the KS connector. For the 97 I30, once the mounting bolt is loose, I used my 9-year old grandson to remove and install the KS. Gave him $5 and made him very happy. With the 'special tool,' the job took less than 30 minutes.


For the 99 I30 CA-Configuration, removal of the mounting bolt was not difficult but installation is almost impossible unless you modify it. I converted the original 30mm mounting bolt into a self-aligning one by grinding the tip. However, due to limited thread depth after grinding, the KS became loose in less than a week. I bought a longer bolt, 40mm but with 13mm head and converted it into self-aligning bolt. Installation was much easier. BTW, if you are going to make a self-aligning bolt, make sure you buy a matching nut so you know the bolts still works after grinding. You don't want to strip the thread on the engine mount.

OwnerCS
Posts: 1771
Joined: Thu May 27, 2010 4:34 am

Post

Thanks Loy for the additional comments. I appreciate the information.


Return to “Maxima Forum & I30 / I35 Forum”