I did this about 2 weeks ago and am pleased with the results. First all of TAKE YOUR TIME when you're doing this. If you can't live without your car for a tleast a whole day I wouldn't recommend doing this until you can. I tried cutting a couple of corners myself and although they still came out fine I wish that I would've taken a little more time with a few things. I apologize for the quality of the pics but my digital camera battery was dead when I started this so I took all of the pictures with my Blackberry. Okay, now with that said, lets get started.
*********************
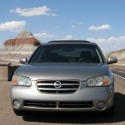
First of all the headlights have to be removed, I would recommend having the car on ramps if you do this but I was able to do it without so it's your choice.
Under the front of the car, starting from the bumper cover back you will see splash shields. I removed all of them just to make sure I have enough room, they will all have push clips like the following in them aside from a few places that you will find 10mm bolts.
All of these push clips require the same procedure to come out, the center part of them has to be lifted slightly and they will pull out with very little effort(in most cases, I had a couple that were difficult).
Once you have removed all of these and the bolts from the splash shields, everything should be able to be removed for access to the inside of the bumper cover, once doing this on each side (insde the bumper cover in front of the wheels) you will be able to look up in there and see where the bottom headlight support connect to the body, there is a 10mm bolt that attaches it that you will have to feel for. I was unable to get a picture of it myself but I used a small rachet with a socket on it and was able to work it out. This is the most difficult part of removing the headlights.
**********
Next you will need to remove the remaining two bolts on the top of the headlights.
Both 10mm bolts as well, after doing this the headlight assembly should be able to be moved out
Once doing this you will need to remove all bulbs from the lights(which twist out), I would recommend taking the sockets off of the high and low beam bulbs before removing them and most importantly DO NOT TOUCH the high or low beam bulbs on the glass part of them(most people know this but just wanted to make sure to remind everyone).
Now you should be able to remove the headlight assemblies completely.
Next you will need to remove the rubber grommets in the back of the headlights.
They all pull out pretty easily but be gentle with them regardless.
Next you will need to turn on your oven, preheat it to 350 deg, make sure wife isn't home. I used a large cookie sheet and wrapped any parts that would be touching the pan generously with tin foil. I put them in the oven for 6 min and kept a close eye on them while they were in there. I didn't get any pictures of this part because it went pretty quickly.
Now remove you headlights from the oven and be ready with something to pry them apart with(I used a pretty large flat head screwdriver but mainly you need something that you can get between the lens assembly and the back part of the headlight to separate them). I would recommend having some sort of gloves on when you do this because the headlights are going to be hot obviously. Using the screwdriver and your hands start to go around the headlight, working the lens off of the back of the headlight. Once you get it separated it will look something like this:
Next of course you will need to remove the piece you will be painting from the lens, which is of course the chrome piece attached to it.
You will see two screws in it which can be removed with a philips head screwdriver
Next pull the chrome piece out of the housing and use a scotch brite pad to scuff them up.
Ok now you're ready to paint them, I used Brite touch Grey Primer and Satin Black spray paint but you can use whatever is best for you in this case. Coat them with 2-3 coats primer and then the color of your choice.
Once doing this let them dry for atleast 2-3 hours if you're impatient like me or overnight if possible.
Next you will need to re-assemble everything. First of all re-attach the pieces you have painted back to the lens. Then heat the oven back up to 350 and put the back of headlight in for 4-5min to get the glue heated back up. Once doing this remove it and run a bead of clear silicone around it to help seal everything back together. Next press the lens and back of headlight back together as firmly as possible.
Allow everything to cure for a 1-2 hours and then you can put them back in the car. Everything goes back in just as it came out. Again take your time while you're doing this and you will be pleased with the results.
Hopefully this write up will be able to help some of you out in doing this. I do apologize if it's not the best quality but hopefully it's not too shabby for my first How To write up. I was not able to find any info on even how to go about removing the headlights on the I30/I35, much less taking them apart so read some write ups on how to disassemble the headlights and figured the rest out myself. Let me know if you have any questions in case I may have left something out. Thanks
How To: Blackout or paint inside of headlights on 00-04 Infiniti I30/I35
-
Kompresshun

- Administrator
- Posts: 3633
- Joined: Sun May 10, 2009 7:41 am
- Car: 2020 Nissan Pathfinder SV 4x4, 2017 Ford F150 4x4 SuperCab 3.5L Ecoboost/10AT, 2005 Nissan Pathfinder SE Offroad 5AT
- Location: Louisville, KY
- Contact:
-
Kompresshun
- Administrator
- Posts: 3633
- Joined: Sun May 10, 2009 7:41 am
- Car: 2020 Nissan Pathfinder SV 4x4, 2017 Ford F150 4x4 SuperCab 3.5L Ecoboost/10AT, 2005 Nissan Pathfinder SE Offroad 5AT
- Location: Louisville, KY
- Contact:
Re: (maxhopper97)
Thanks! Sure, lets make it "Don Nismo". Can it be changed in the future if I get tired of that?
Re: How To: Blackout or paint inside of headlights on 00-04
I fully recognize this is an old thread, and for that I apologize, I am considering doing this mod to my 2000 I30 and was wondering if there was any effect on the light output?
Great writeup!
Thanks in advance
-Daniel
Great writeup!
Thanks in advance
-Daniel
-
tigersharkdude

- Posts: 2636
- Joined: Mon Mar 12, 2007 7:14 am
- Car: 1999 Nissan Maxima
- Location: Nashville, TN
Re: How To: Blackout or paint inside of headlights on 00-04
It shouldn't have any effect on output as you are painting the trim and not the reflector. FWIW you may want to use heat resistant paint because inside the housing its going to be hot. Thats just my opinion, and what Ive always read to use when doing thisDCZC wrote:I fully recognize this is an old thread, and for that I apologize, I am considering doing this mod to my 2000 I30 and was wondering if there was any effect on the light output?
Great writeup!
Thanks in advance
-Daniel
-
Kompresshun
- Administrator
- Posts: 3633
- Joined: Sun May 10, 2009 7:41 am
- Car: 2020 Nissan Pathfinder SV 4x4, 2017 Ford F150 4x4 SuperCab 3.5L Ecoboost/10AT, 2005 Nissan Pathfinder SE Offroad 5AT
- Location: Louisville, KY
- Contact:
Re: How To: Blackout or paint inside of headlights on 00-04
To answer your question, no it didn't affect my light output at all on my car.
I didn't use heat resistant paint either, I just used Valspar Satin Black paint and Satin Clear primer from Lowes. It's been over a year now and the inside of the housings still look just as good as they did then.

The main thing I can't recommend enough is to make sure they're sealed up really well, mine started fogging up and leaking by the first rain so I had to go back and reseal them. It's best to get it right the first time but if you don't somehow, I went back with over both housings some flowable clear silicone(meant for resealing windows and ect) where the lens and housing meet up and that did the trick.
I didn't use heat resistant paint either, I just used Valspar Satin Black paint and Satin Clear primer from Lowes. It's been over a year now and the inside of the housings still look just as good as they did then.
The main thing I can't recommend enough is to make sure they're sealed up really well, mine started fogging up and leaking by the first rain so I had to go back and reseal them. It's best to get it right the first time but if you don't somehow, I went back with over both housings some flowable clear silicone(meant for resealing windows and ect) where the lens and housing meet up and that did the trick.