An Australian company known as GKTech has been developing some roll center correction knuckles for the front of the S-chassis for some time. These units are very impressive on paper. The basis of them is that there is a 40mm drop in the position of the front ball joint. This in effect raises the roll center, reducing the bad handling vibes the long roll couple will do. To give an idea of how it doesn't take much to over lower an S chassis, I took measurements for all the suspension pickups for the front, comparing them to the FSM. I welcome anyone to take a look at my measurements to ensure that I do have the proper lengths put into my drafting program.
The first picture is of a factory ride height S13. I took the measurement for the apex of the wheel arch on the fender and compared it to the FSM's dimension on page FA-15. This allowed me to reposition the frame rails.
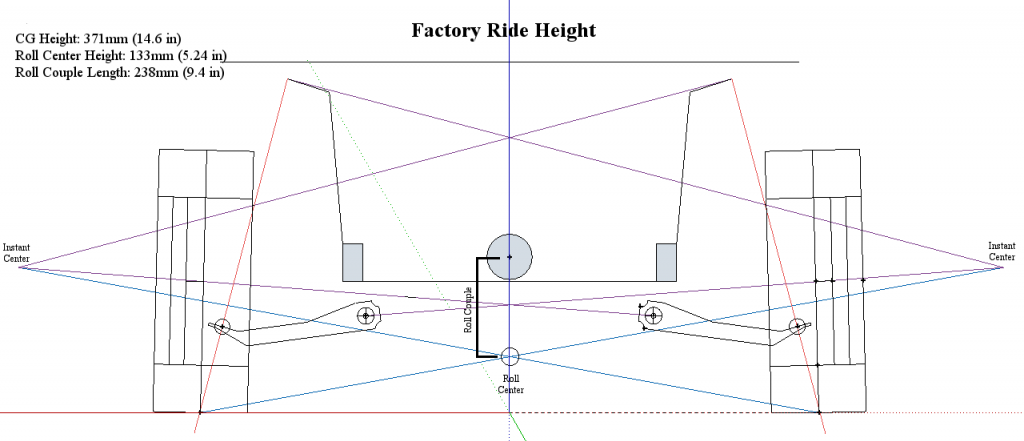
Assumptions I made are accepted assumptions. The Center of Gravity is assumed around the height of the crankshaft. I used the track width and tire width of my car, which is a 225/55r16. The roll center is at 133mm off the ground and the roll couple is 238mm long.
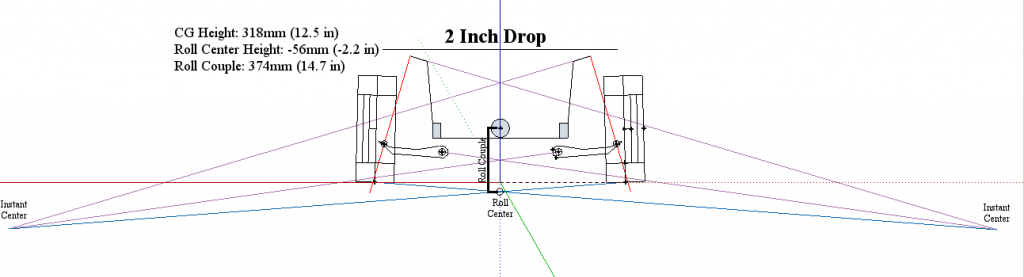
This is where my car currently sits. A modest 2 inch (50.8 mm) drop from factory. As you can see it didn't take much to put the lower control arms at an improper angle, which in turn put my instant centers below ground. This causes the roll center to sit 56 mm below ground! Even with a two inch drop of the CG, the far more radical drop of the roll center makes the roll couple well over a foot long. My car is considered to be of a high ride height by most S chassis owners!
There are quite a few solutions to this predicament. One is to run stiffer springs to fight the urge for body roll. Another is to run a larger sway bar to combat the roll as well. While these help fight the physical aspect of the car rolling over, it still doesn't help that the suspension geometry is already past its optimum locations for travel. Even in a car that rolls heavily, the physical aspect of rolling the car doesn't necessarily mean that the car is doing a lot of dynamic weight transfer. The biggest concern here is that the suspension is undergoing compression and rebound travel. Limiting roll limits the suspension travel, which allows the wheels to retain optimal contact patches. Also, by utilizing a shorter roll couple, softer springs can be used instead of the stiffer springs required to limit roll.
Another consideration we have to take is that with the MacPherson strut design, the suspension will gain negative camber at the beginning of the compression travel arc, but it will lose negative camber after a bit. By overlowering the car, you're putting the suspension closer to the point that it loses negative camber in its travel arc. By correcting the roll center, you've put the suspension back into a static configuration where it will gain negative camber under compression again. Complimenting a corrected roll center with a properly sized sway bar is a much better way to control body roll than using stiffer springs on the dampers. Stiffening the suspension only prevents the dampers from doing their job; keeping the tires in contact with the tarmac.
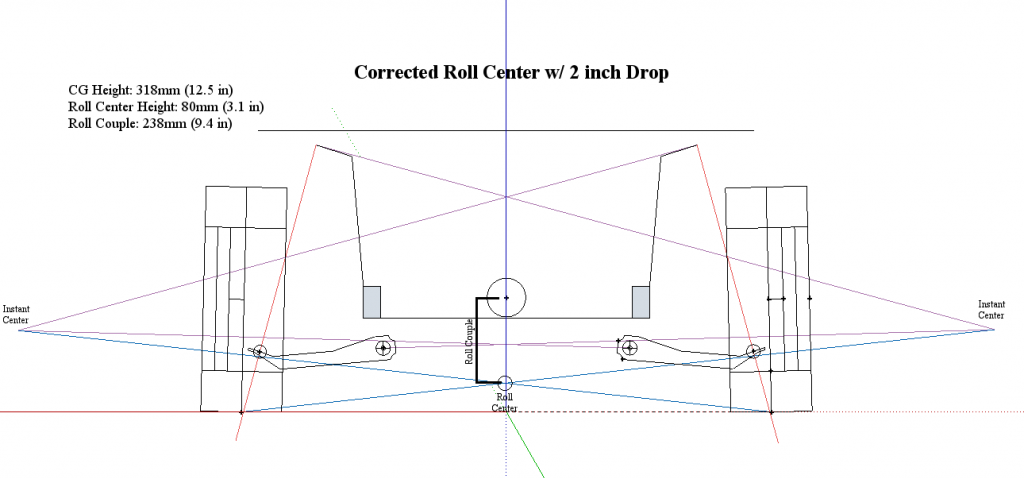
This is the suspension at the same height of a two inch over factory drop but with the 40mm corrected roll center of the GKTech knuckles. As you can see the instant centers have returned above ground and the control arms are back into a near factory configuration. The roll center has also returned above ground and reduced the roll couple back to the stock dimension of 238 mm. This will help the car gain the benefit of the lower CG for weight transfer while reducing body roll substantially.
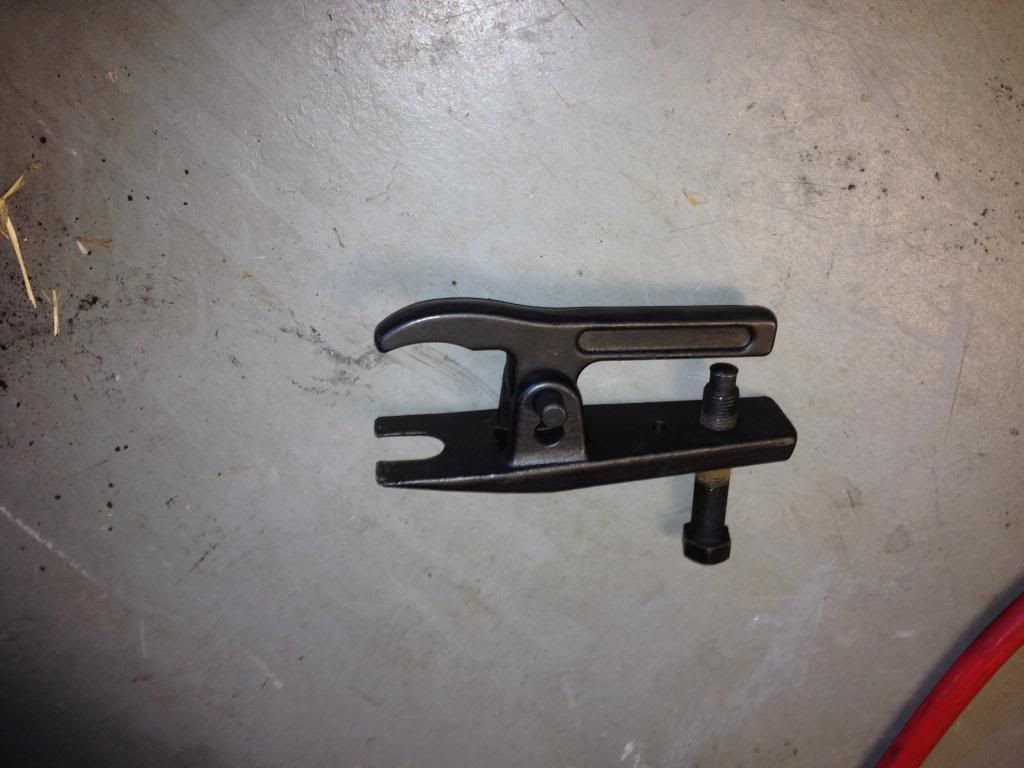
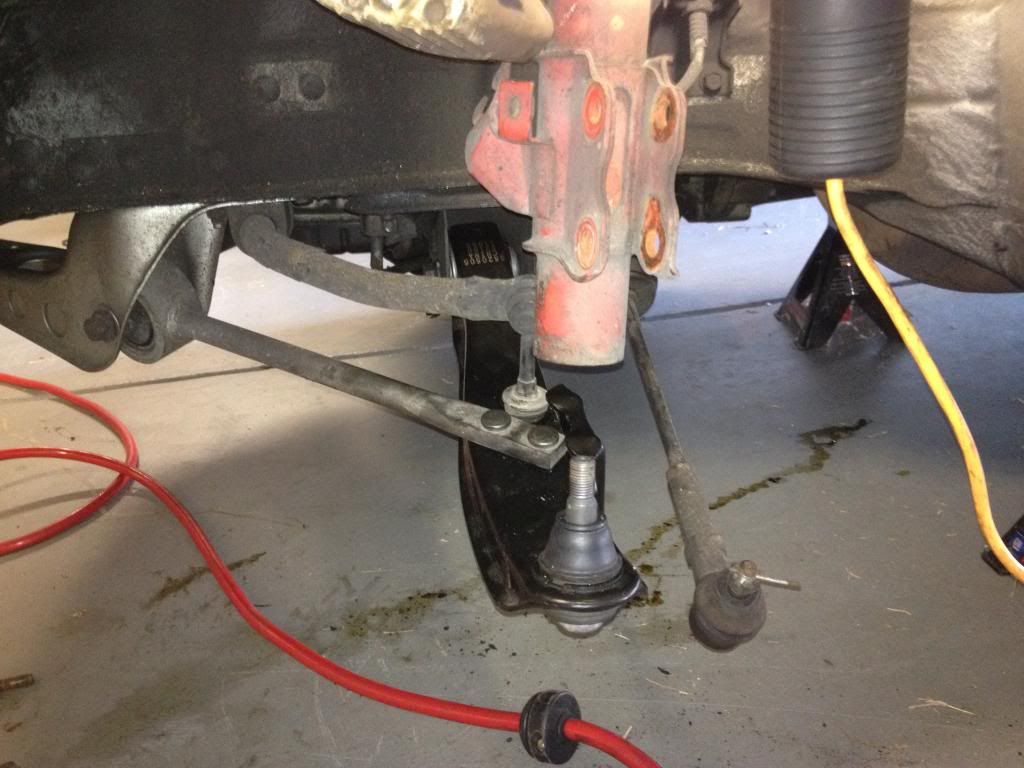
Don't be fooled by relocated ball joints sold by Megan Racing or Moonface. I've looked at them, and all they do is space the control arm which amounts to a hill of beans. To properly raise the roll center, you have to move the ball joint itself, which would require a longer shanked ball joint to drop the center of the ball joint down. I don't believe I've seen any off the shelf ball joints that do this.

=These do nothing to correct roll center. Image courtesy of FRSport
The GKTech knuckles promise to not only raise the roll center as I have shown, but they also have built in a bunch of other, very interesting features:
1) The entire knuckle is made of 7075 T6 aluminun. A billet block is CNC machined to spec, which gives a substantial reduction in unsprung weight. GKTech claims a reduction of 25% over the factory units. The rest of the bits are made from chromoly steel, which ensures that they'll be tough enough to handle more than the factory units. Fundamental elemental analysis was performed on a set at GKTech's cost and it was found that these knuckles beat the factory units in durability.
2) Modularity was a key piece I was glad to see. YOu can order these in a number of configurations. You have Ichiba conversion hubs already and want to keep running them? You can order them with S13 sized spindles. You have an S14 or are thinking of upgrading to OE 5 lug hubs on your S14? You can order them with S14 sized spindles. You can have them include inserts sized for S13 or S14 strut mounting bolts, and the ball joint seat can be chosen to fit either an S13 or an S14 ball joint taper.
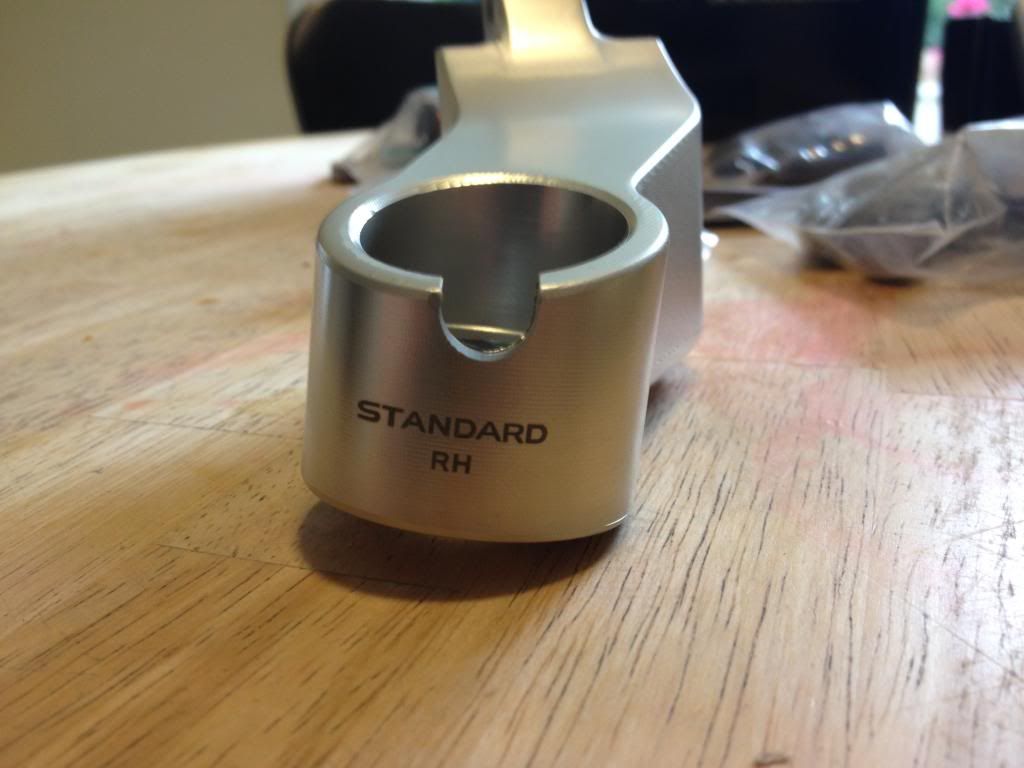
3) Adjustability is a major plus to these knuckles. You can control camber up to +/- 1-4 degrees by using different eccentric inserts in the top of the knuckle to offset the way the damper bolts on. This can allow you dial in your king pin inclination and your scrub radius without compromising ideal camber. Or for the stance people on our boards, you can get an additional 4 degrees of negative camber on top of your camber plates. The steering arm is also modular. GKTech offers a few different styles of arms when you purchase: standard arms, zero ackerman arms, JP arms, and extreme lock arms. Each has its pro and con. There are also pre-drilled adjustment holes to mount the arms and partially correct bump steer. Having adjustable tie rods would be more effective, but this is a nice feature none-the-less.
4) Brake caliper brackets aren't a huge worry for most S chassis owners as we tend to run calipers that bolt right up. GKTech still offers two different brackets. The standard bracket is spaced to run the usual calipers found on the S chassis with their corresponding rotors. The second bracket is designed to space the caliper out to use R33 GT-R rotors.
The price is steep. GKTech currently charges $751 plus shipping from Australia for the knuckles. You can order them through FRSport or Enjuku for about $850 shipped so pick your poison. A lot of people will probably pass over these knuckles due to price, but if you're really wanting to get deep into your pockets for some top of the line parts to fine tune your suspension, you can't do better.
When I decided I was going to be overhauling my suspension with top of the line parts, these knuckles were very quickly added to my shopping list and purchased.
Hands On and Unboxing
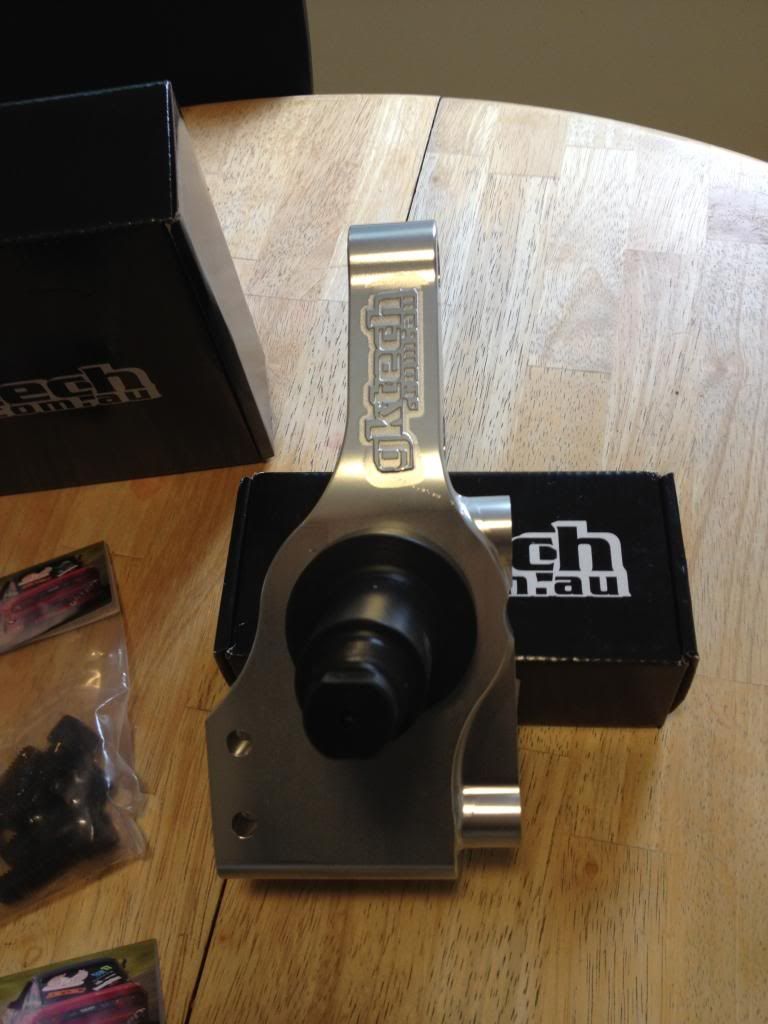
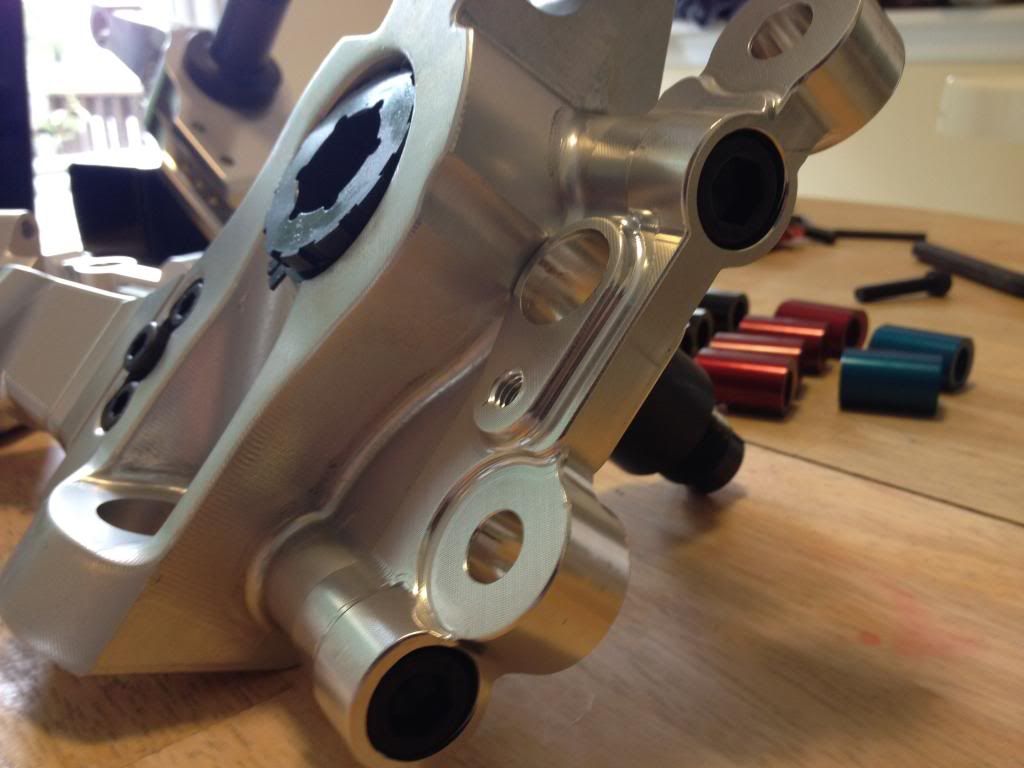
When the box arrived with my knuckles, I was taken aback by the quality of the packaging. I think in this day and age, many companies forget that the first impression of a company is shown in their ability to pack their product. GKTech chose a sleek, matte black boxing with their logo in white. The strut inserts, the ball joint seats, and all the bolts and nuts were bagged and boxed in their own smaller, black boxes. The caliper brackets were wrapped in bubble wrap and boxed in their own boxes as were the steering arms. The main body of the knuckles were encased in a self-forming foam packing material. Pretty awesome stuff, I thought.
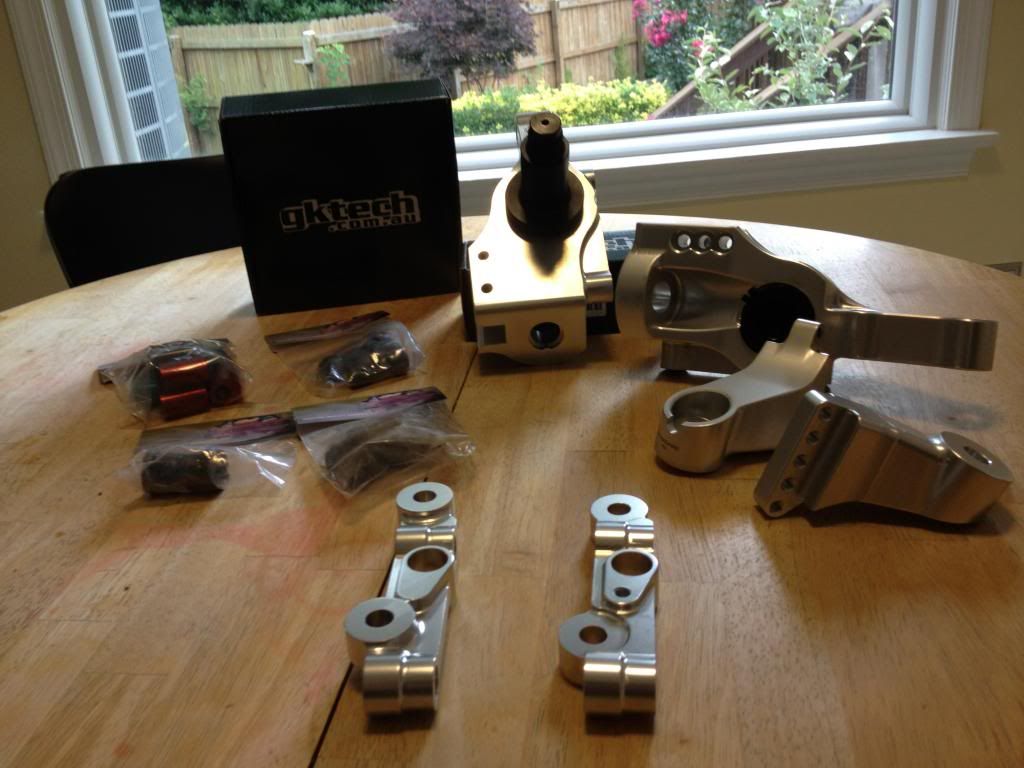
-The entire package laid out.
-The nose of the stub axle. These pieces are made of chromoly steel and are very tough.
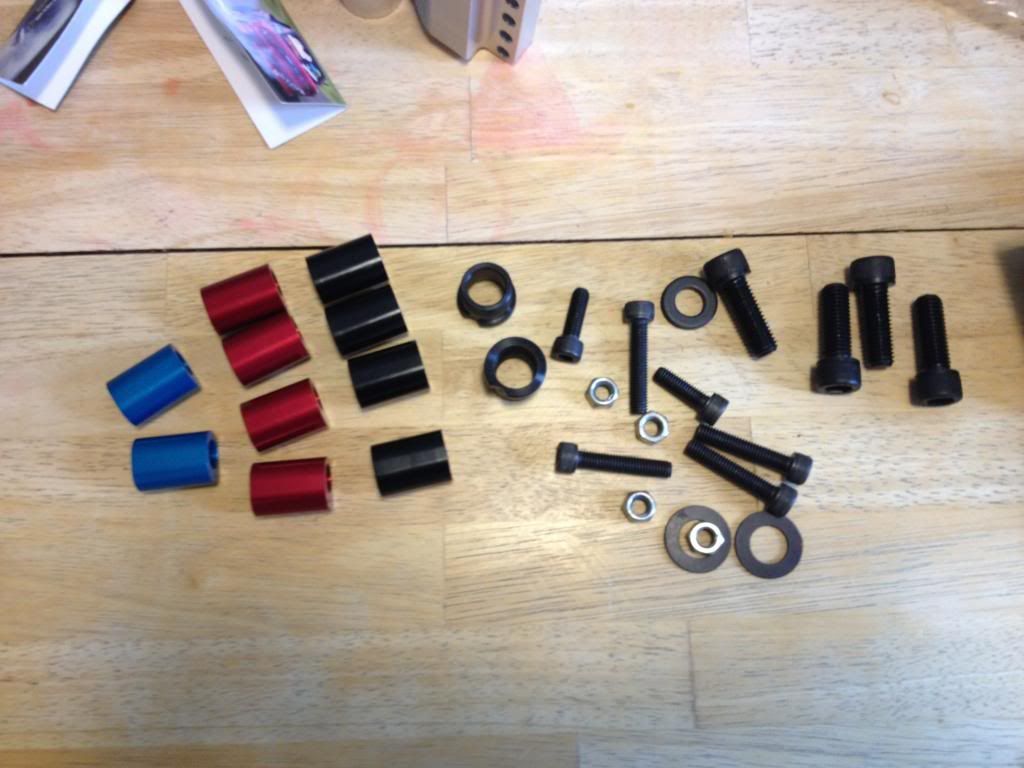
-Here is all the hardware. The bolts and washers are hardened metric bits that have been coated. The inserts are color coded as well, and there are enough to set the camber for a decent range of setups.

-The black inserts are 0*, the blue are 1* and the red are 2*. This allows a setup of 0*, +-1*, +-2*, +-3*, and +-4*. Note that there are only 2 1* inserts.
-The arms can be spaced up and down ~.5 of an inch of bump steer correction. This is really not an ideal way to correct bump steer, but it does allow the arms to be placed closer to ideal, requiring less shimming to fine tune bump steer correction with correctable tie rod ends.
-GKTech offers a multitude of steering arms to tune the Ackermann angle. This is really beneficial for drifters as it can help increase the angle which the wheels can move. For grip drivers, trying to maintain better Ackermann geometry is better than going for the greater steering angle I think. It will cut down on scrub on the outside wheel, which should increase overall traction mid-turn.
-GKTech has all the arms labeled to keep them organized should you decide to get a slew of them.
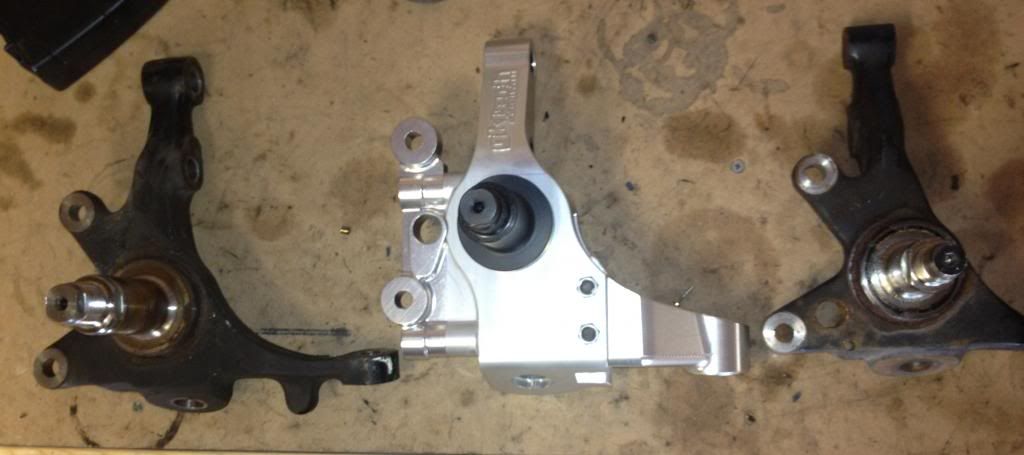
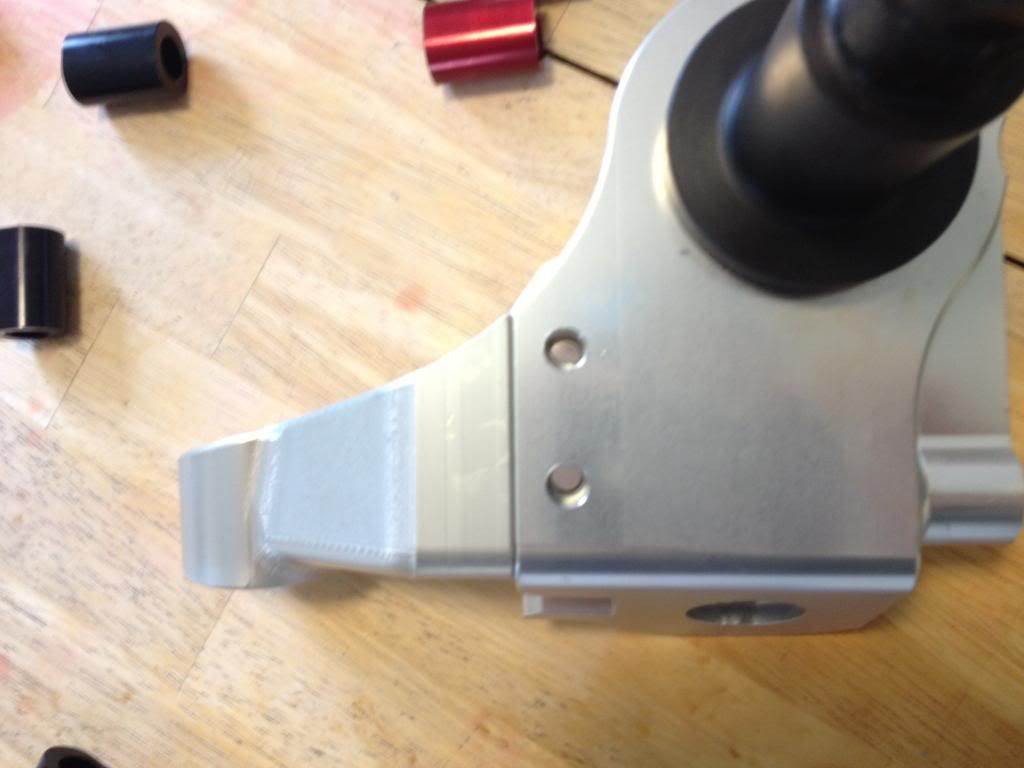
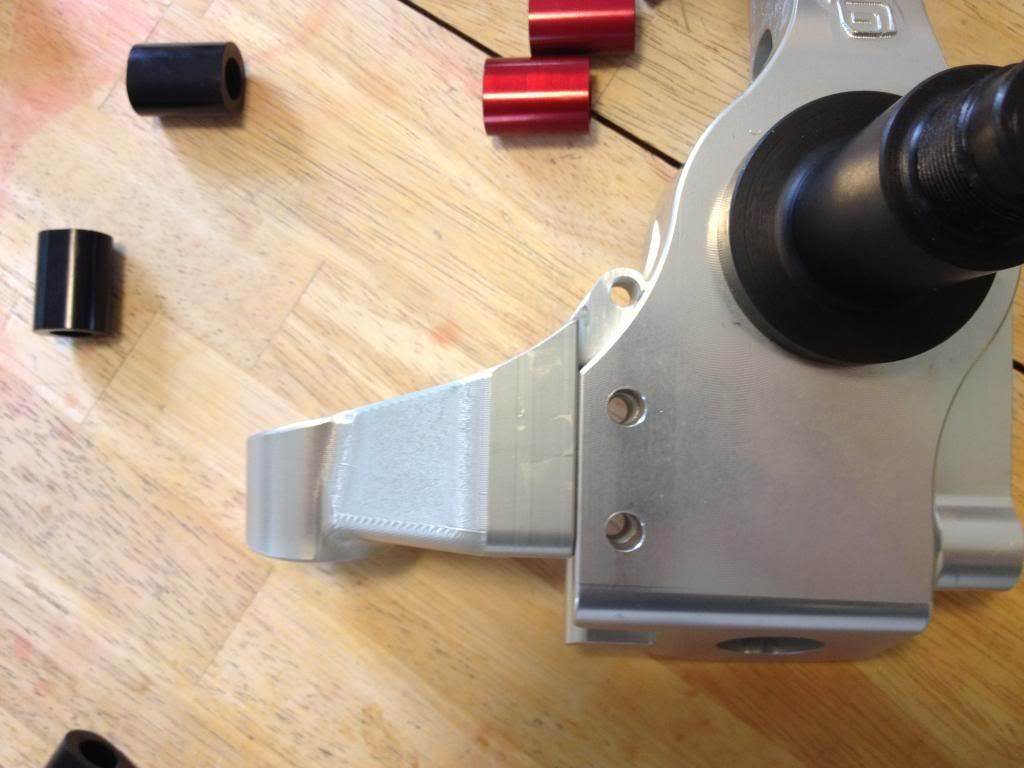
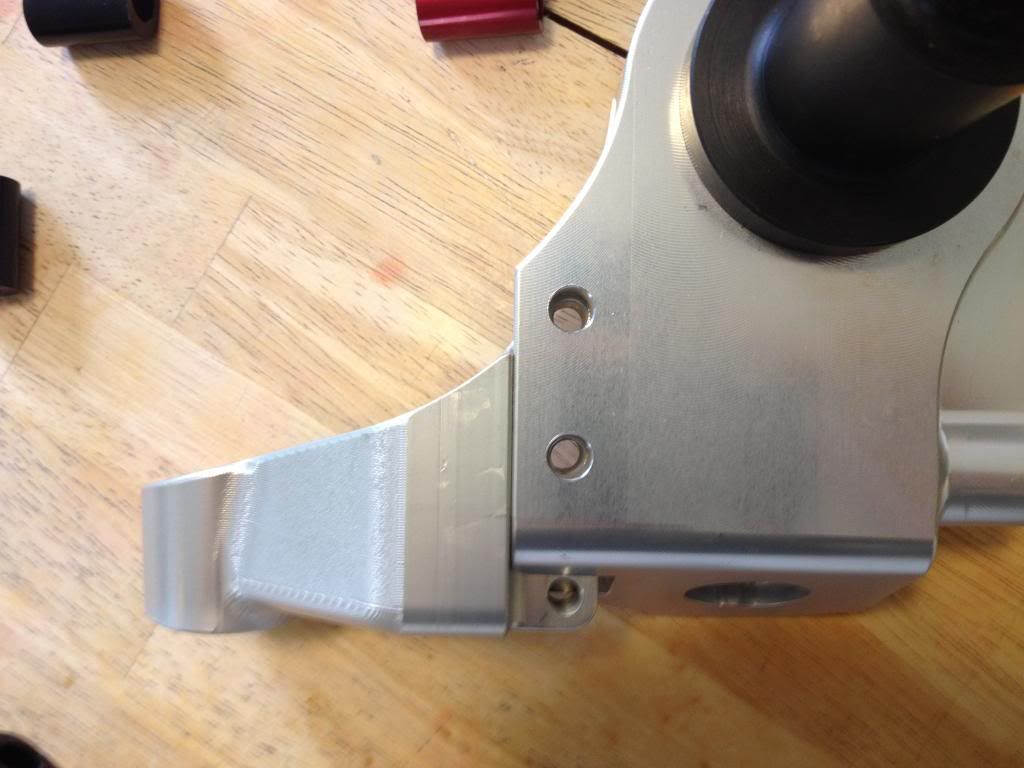
-A comparison with a factory S13 and S14 knuckle. You can clearly see the repositioning of the stub axle to drop the ball joint seat's position in space.
Before installing the knuckles, I recommend taking a once over the assembly to ensure everything is fitted and tightened properly. I have read reports of many people receiving their knuckles with the retaining nut for the spindle barely hand tight. I contacted GKTech and was assured that the assembly process had been corrected on their end and future orders shouldn't have this problem. The retaining nut is there as a failsafe in case to keep the spindle from working loose. The spindle itself is installed cold to shrink it, then when it expands, it bites into the aluminum. GKTech told me that during all of their testing with Australian drifters, they never had a failure on the spindle even without the retaining nut.
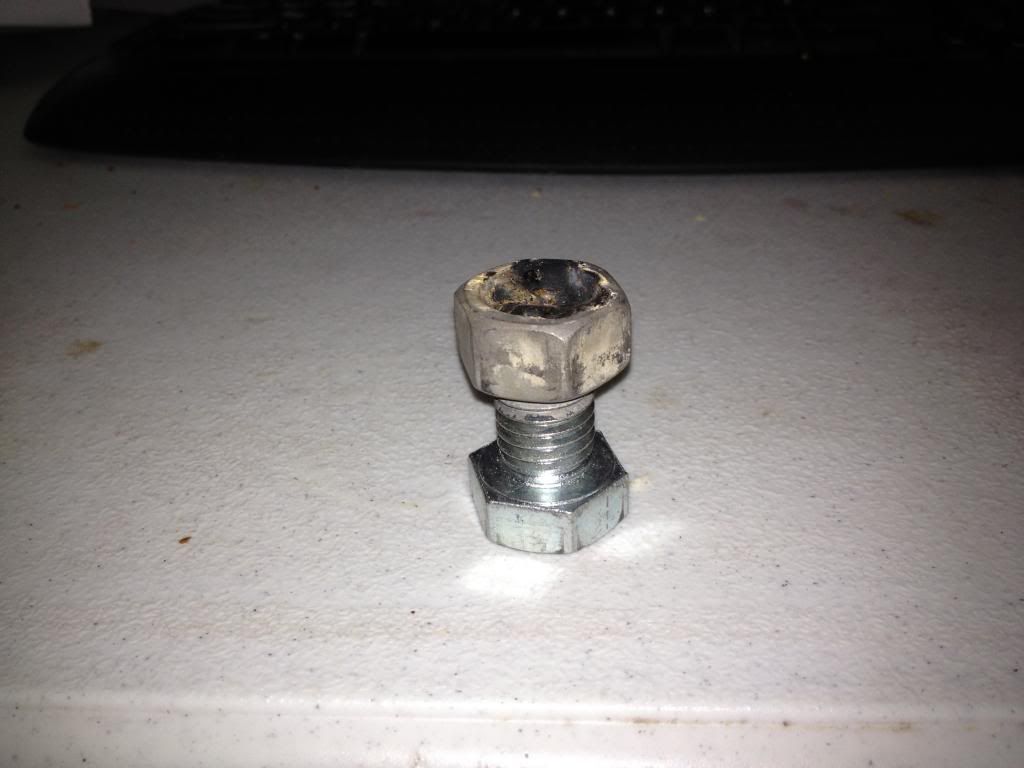
To fix the issue, you have to have a 24mm hex bit, or make a tool to fit. I chose the latter route as it was cheaper. I took a properly sized bolt and nut and welded the nut to the end of the bolt to create something like this:
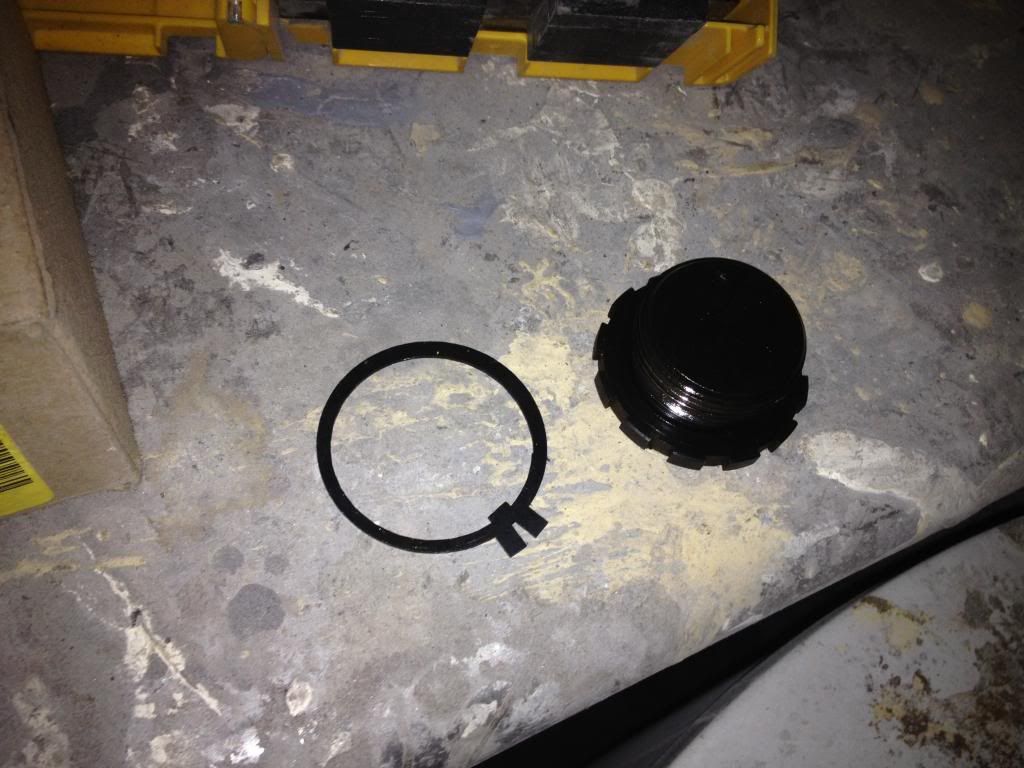
-The retaining nut and its lock washer. The washer is installed under the nut, and once the nut is torqued into place, tighten it just a hair more to line up the tabs of the lock washer with one of the channels on the rim of the nut. Then bend the nut up into the channel to ensure it won't remove. The washer is keyed to the spindle to keep it from moving there as well.
-The keyway for the lock washer.
The torque spec is 120-150 N*m (89-110 lb*ft).
Final assembly of the knuckles is pretty easy. The brake caliper and steering arm need to be assembled. The included instruction will give the torque spec for the hex bolts, but you will need a 10mm hex for the brake calipers and a 6mm hex for the steering arms. I used blue loctite to keep vibrational forces from backing the bolts out.
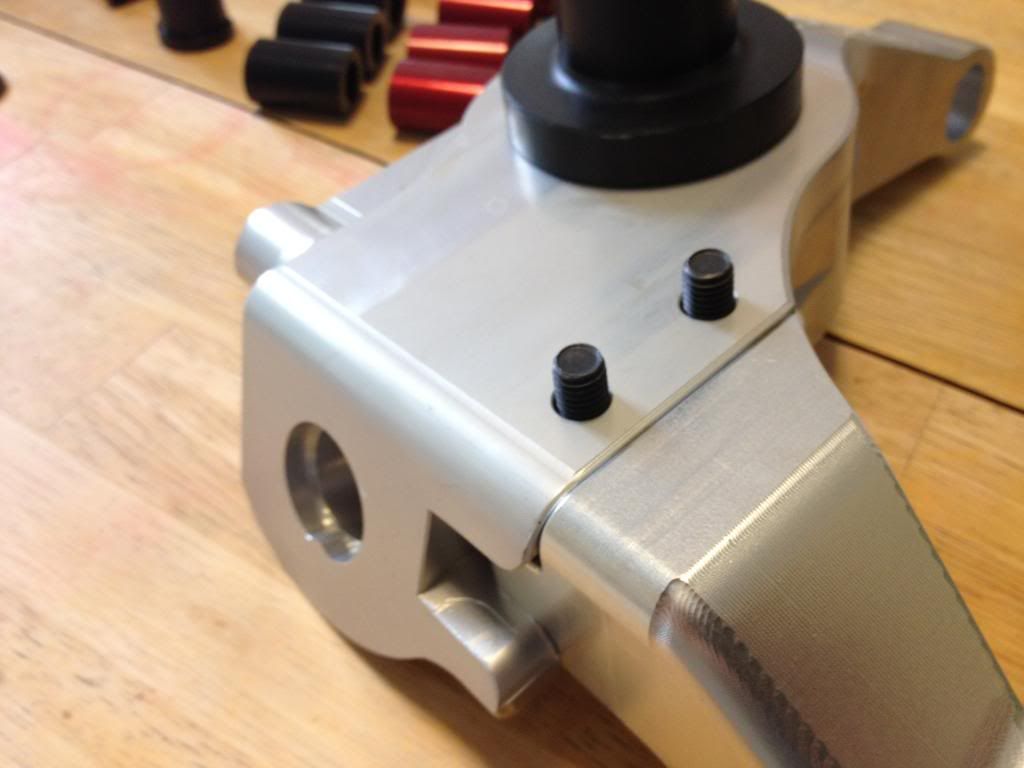
-Torque these two bolts first, and then add the included nylon lock nuts.
-There's a middle bolt meant for added strength and placement for the two longer bolts.
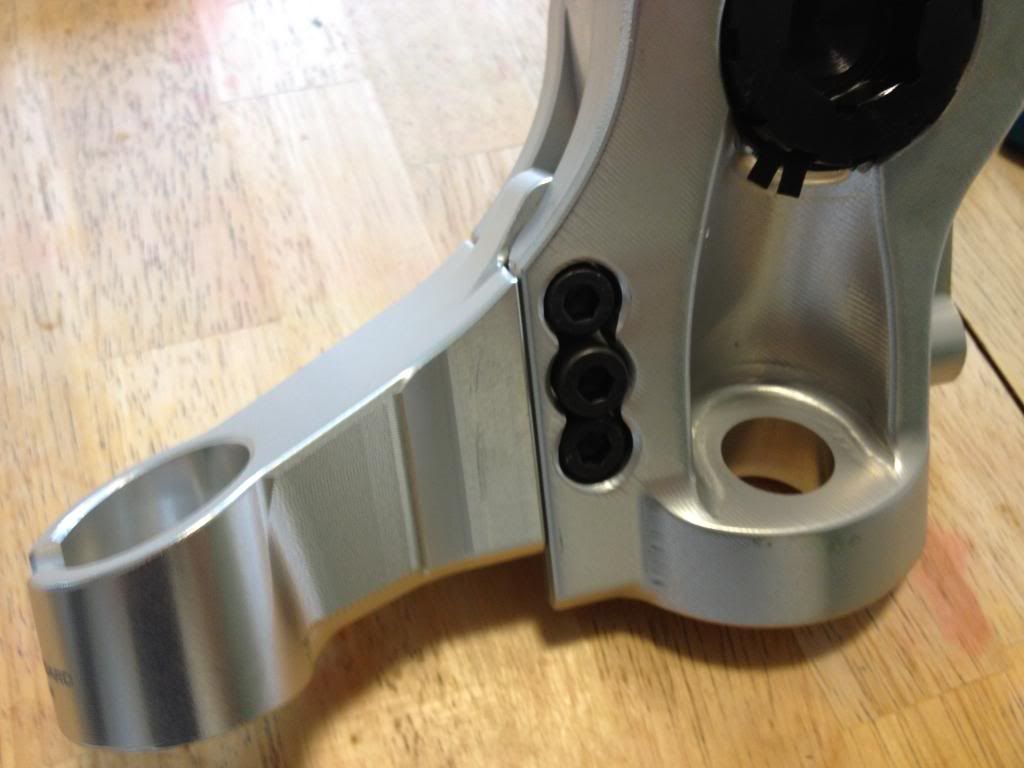
-These will be hard to access once the brakes are installed, hence why I tossed the loctite on them.
To aid in installing the strut inserts, I froze them. The tolerance between them and the knuckle is so tight, they won't slide in otherwise. Changing these will require a makeshift press.
I did get a chance to take these to the physics lab at my school to use some of the scales to get some measurements of the GKTech knuckle and the factory S13 and S14 knuckles. The S13 knuckle came in at 3.30 kg (7.28 lb). The S14 knuckle weighed in at 3.57 kg (7.87 lb). The GKTech knuckles weighed in at 3.01 kg (6.64 lb). That makes them 9% lighter than S13 knuckles and 17% lighter than S14 knuckles. I included all hardware for the GKTech knuckle. Bolts, inserts, ball joint seats, washers, and nuts. It's a bit aways from the claim of 25% lighter, but it's still a drop in unsprung mass, which is always a good thing. I didn't include the weight of the dust shield as I had stripped them off my factory knuckles already, but they wouldn't have accounted for much extra.
Installation
These knuckles require coilovers. This is not stated by GKTech as I guess they assume anyone buying these already have coilovers installed on their cars. The overall outer dimensions of the knuckles are kept in line with the factory units. Only the position of the stub axle is changed. This effectively moves the wheel further up. On cars equipped with like factory struts such as the KYB AGX struts I have can not run these. The wheel and spring perch will occupy the same space. I have coilovers on stand by to finish this review, however I wanted to get my initial hands on feeling posted with install pictures.
One thing to note on installing these knuckles, USDM S14s have a keyway for a keyed washer underneath the axle nut. Non-USDM kouki S14s dropped this part, so GKTech designed their S14 stub axle around this fact. I contacted GKTech for clarification on this, and was informed of the difference between zenki and kouki S14s. S15s use the same front hubs as five bolt S14s, and they don't have the keyed washer either. I also double checked the torque rating on S15s, and it's identical to USDM S14s. Nissan North America also ditched using the keyed washers across their line up in the mid 90s, it just seems our S14s were a holdover. So, just install the hub without the washer.
Step 1: Place the car in gear (or park if you have an automatic) and engage the parking brake. Raise the front and secure the car with jackstands. Remove the front wheels.
Step 2: Remove the brake hardware. Secure the caliper by hanging it from some wire attached to the coil spring (zip ties also work).
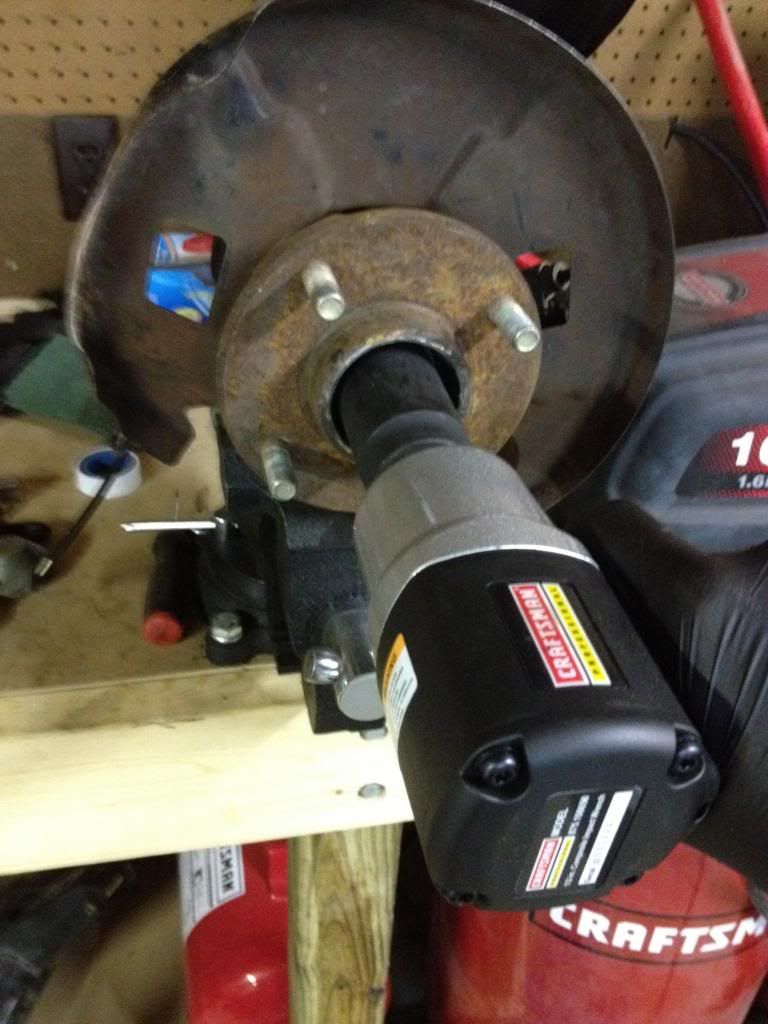
Step 3: You can skip this step if you don't plan on reusing your hubs and instead have brand new hubs. I plan on using some junk yard S14 4 lug hubs until I can get new wheels to use my new 5 lug S14 hubs. I performed these sub-steps on my work bench with a spare set of S13 knuckles, but it's the same steps still attached to the car.
Step 3a: Remove the dust cover from the hub. It can be a pain in the butt. Take a chisel or a flat head screwdriver and pound away with a mallet. Sometimes you can split it from the hub and work it out, other times, destroying the damned thing is necessary.
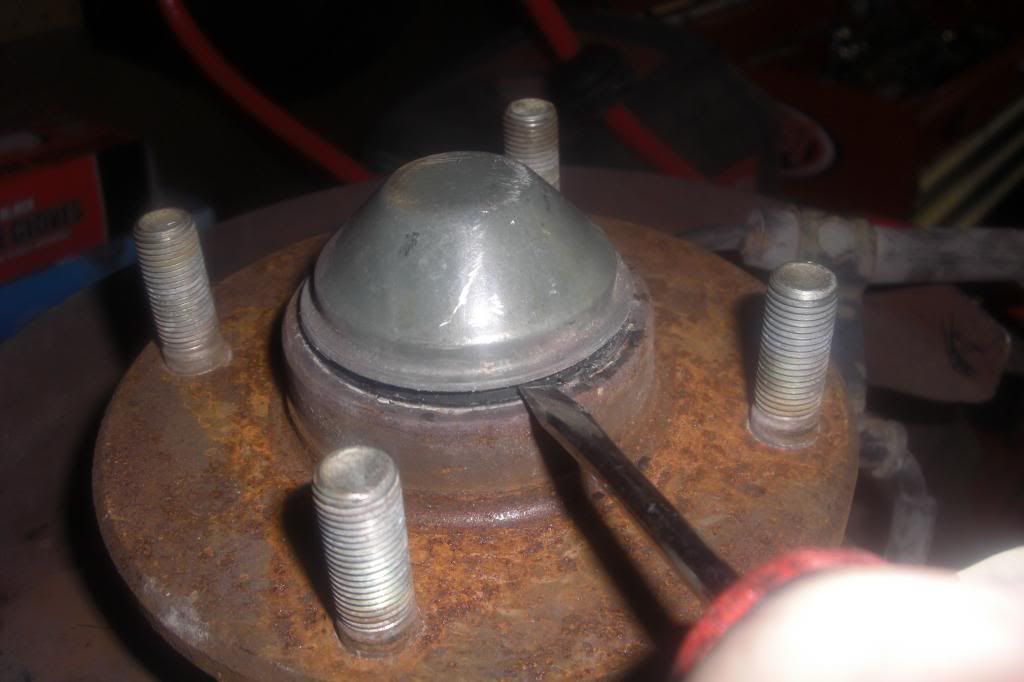
Step 3b: For S13s, you'll need to remove this cotter pin.
For S14s, the nut is staked to a flat spot on the stub axle. You'll need to stretch the metal of the nut back to get the staking clear of the circumfrence of the stub axle.
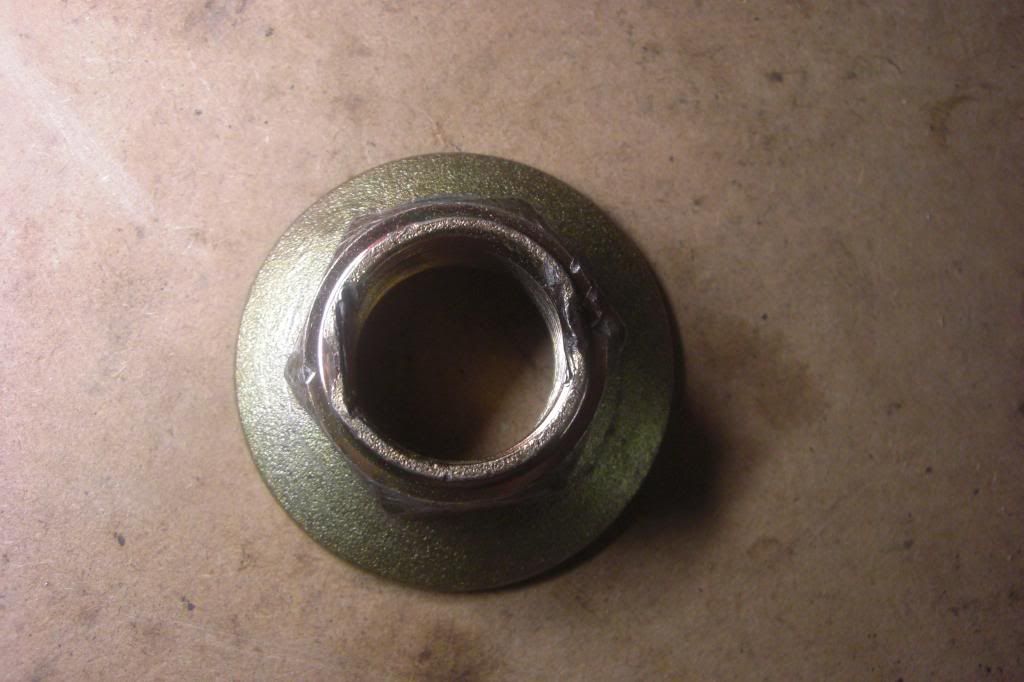
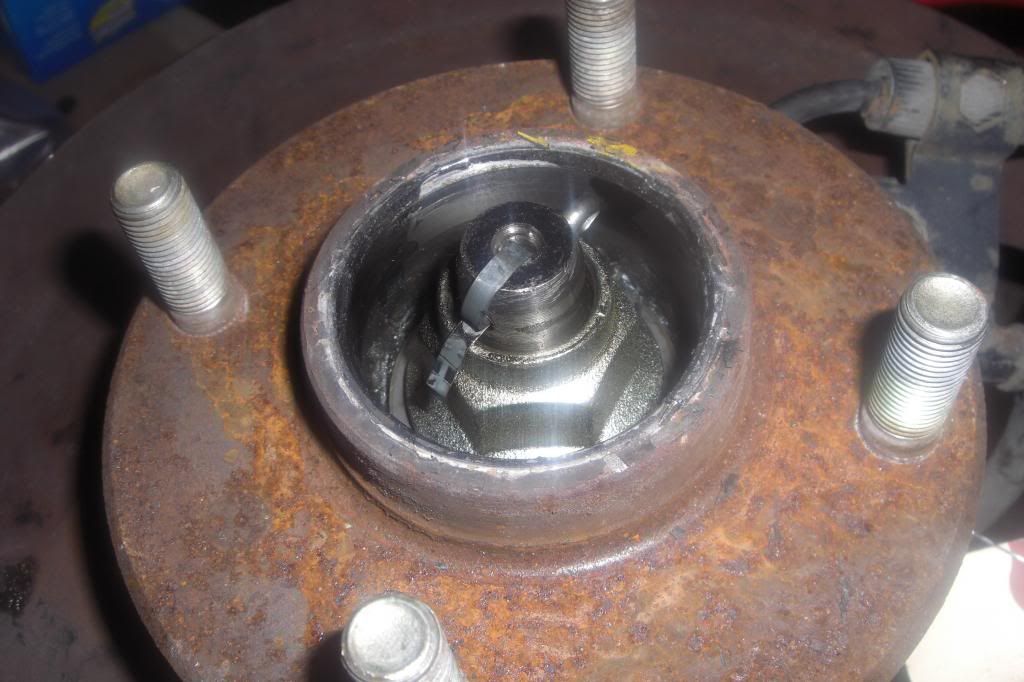
-S14 axle nut already removed, you can see where the nut was deformed to stake it. I recommend using a metal chisel if you have one. I ruined a screwdriver trying to work one of these out.
Step 3c: Once you have access to the nut and it can come off, remove it. Air tools are always great, but a breaker bar can get the job done too. S13 axle nuts are 30mm, and S14 axle nuts are 32mm.
Step 3d: The hub slides off pretty easily from most 240s I've worked on, including salvage yard cars. However, in one of those rare instances the thing really doesn't want to come off, you can use a 2 or 3 jaw puller.
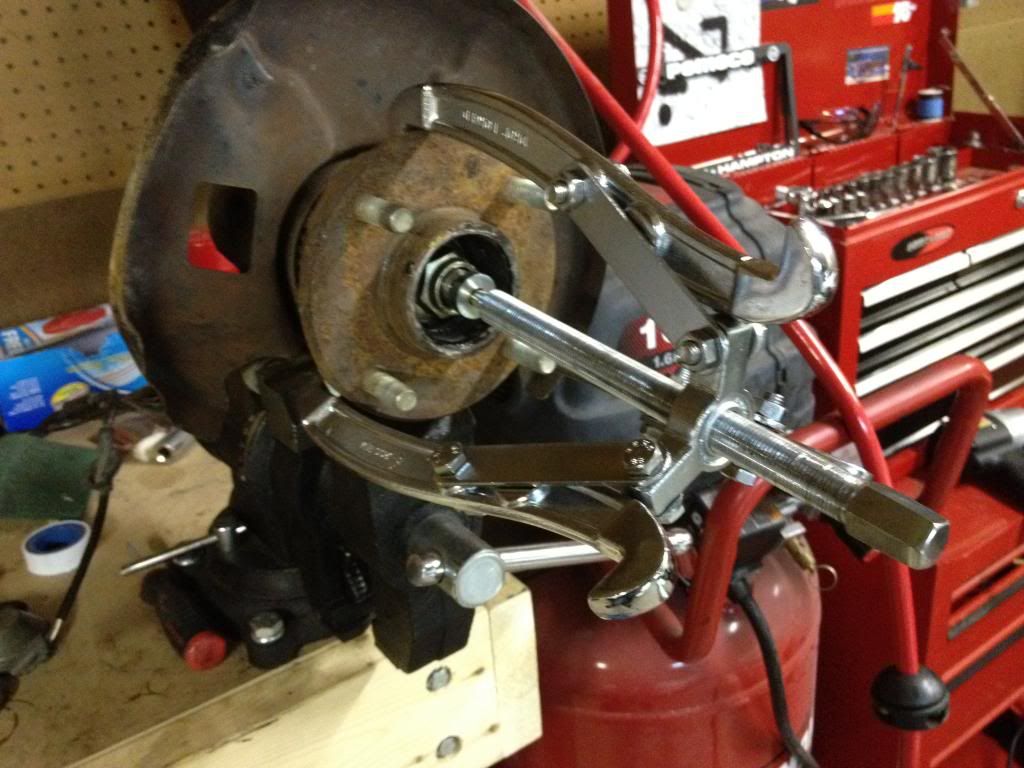
-Mine came off easily, but I mocked the puller up anyways.
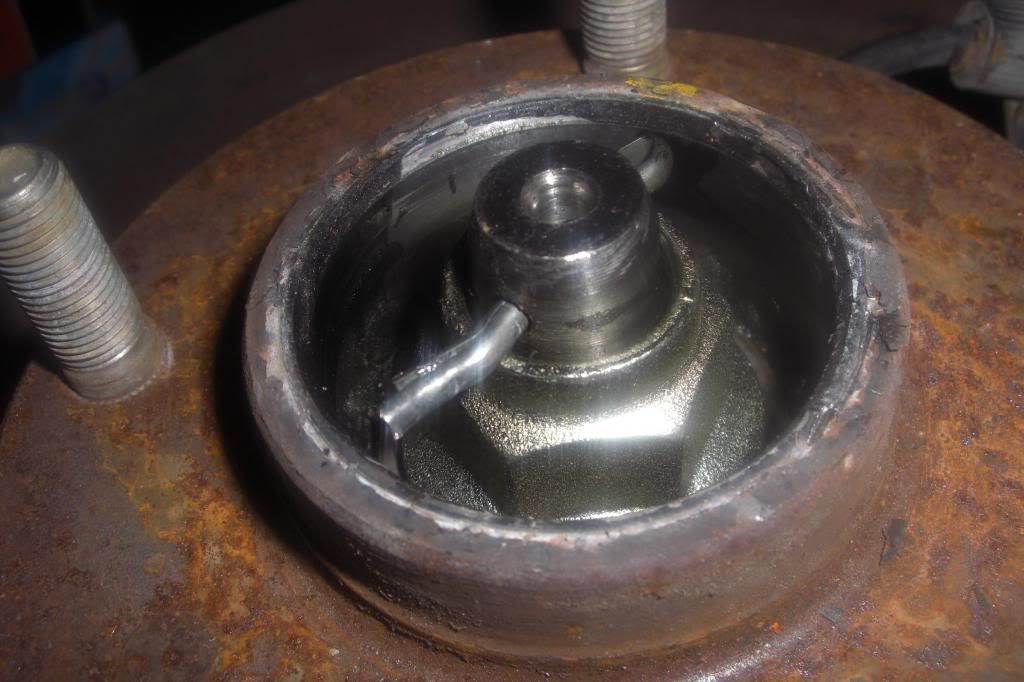
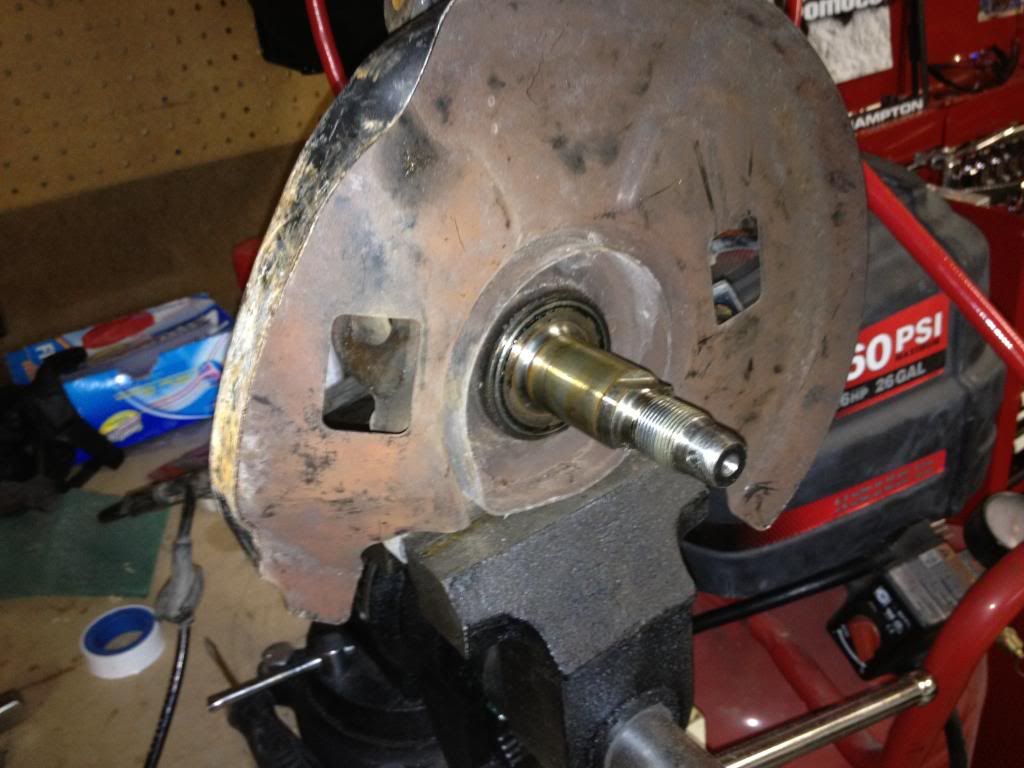
Step 3e: Admire that shiny stub!
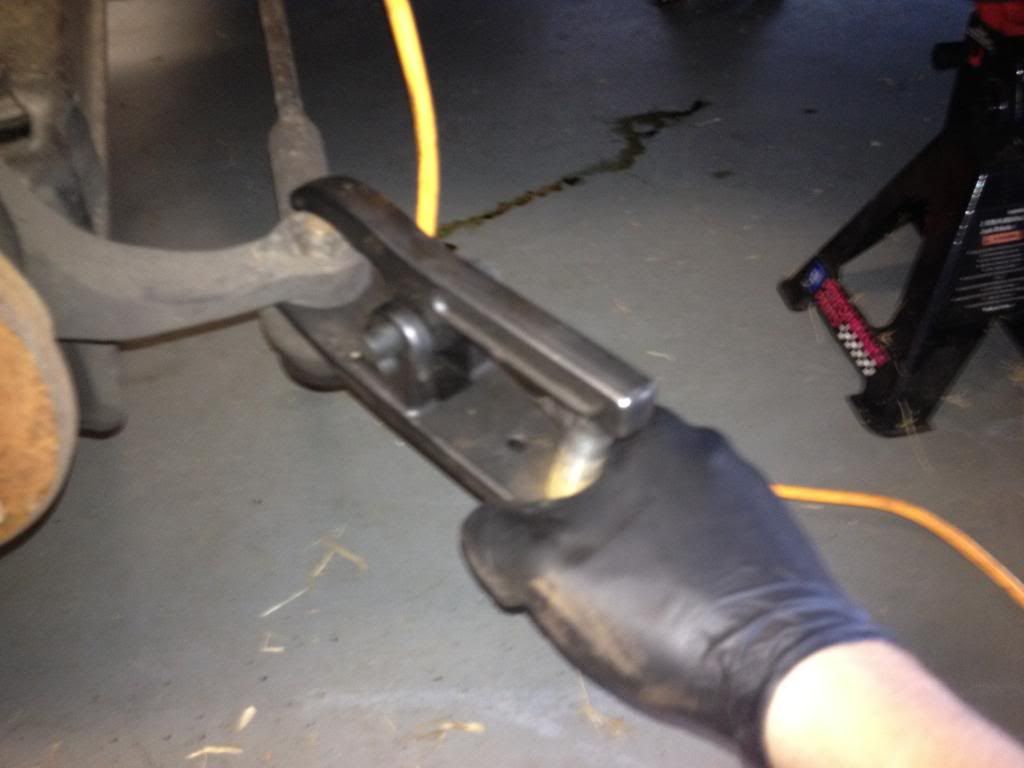
Step 4: Disconnect the tie rod end. It's a 19mm nut. Harbor Freight has an excellent ball joint removal tool that is also great at removing tie rods from the steering arms. I highly recommend using one as it doesn't tear up the tie rod end the way a pickle fork can.
Step 5: Remove the bolts holding the strut to the knuckle. The bolt and nut are 17mm.
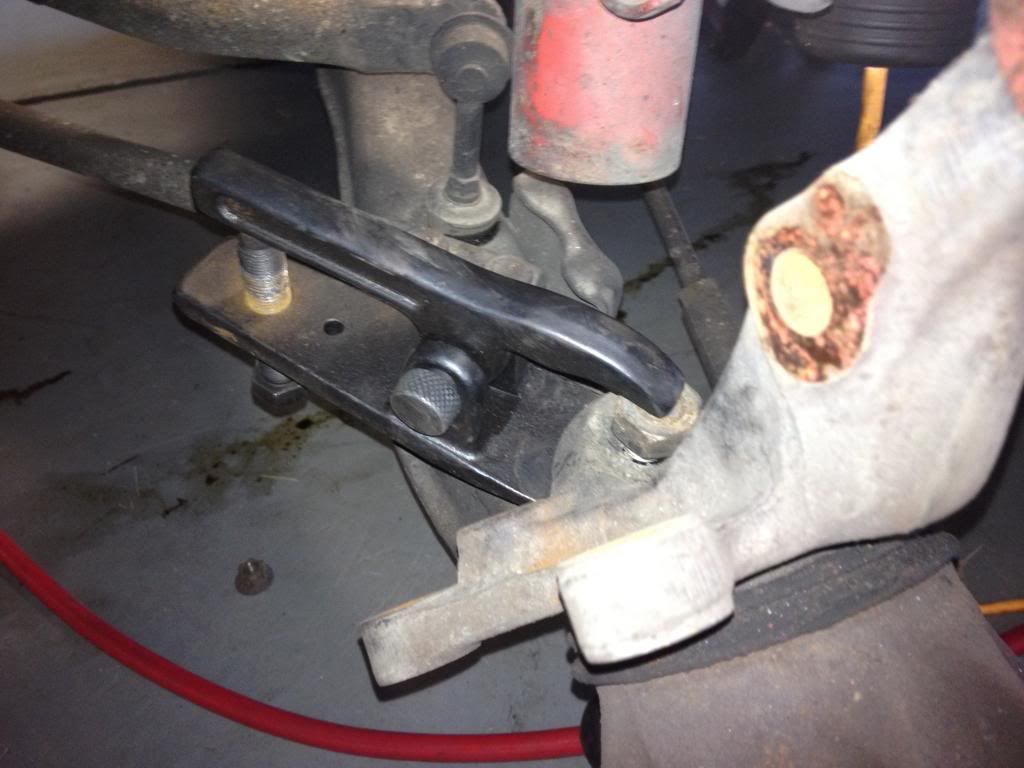
Step 6: Remove the ball joint. It's a 22mm nut. First remove the cotter pin and then remove the castle nut. Again, the tool I mentioned comes in really handy on these. A lot of times the ball joint will be fused to the knuckle, so once you get some good compression with the popper on the ball joint, a few whacks with a mallet will usually get it to pop loose.
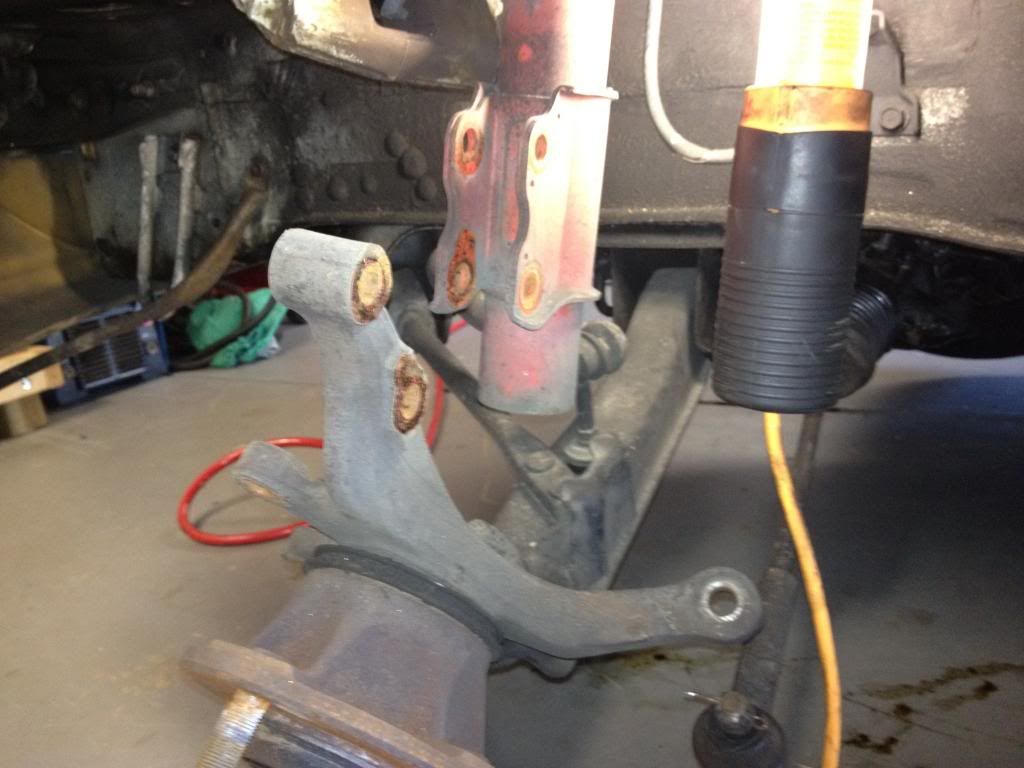
Step 7: Remove the knuckle.
Installation is the reverse of removal at this point. Put the new GKTech knuckle on the lower ball joint, and begin reattaching all the parts. Be sure to use the hardened washers with the castle nuts for the ball joint and tie rod end as the nuts can damage the aluminum
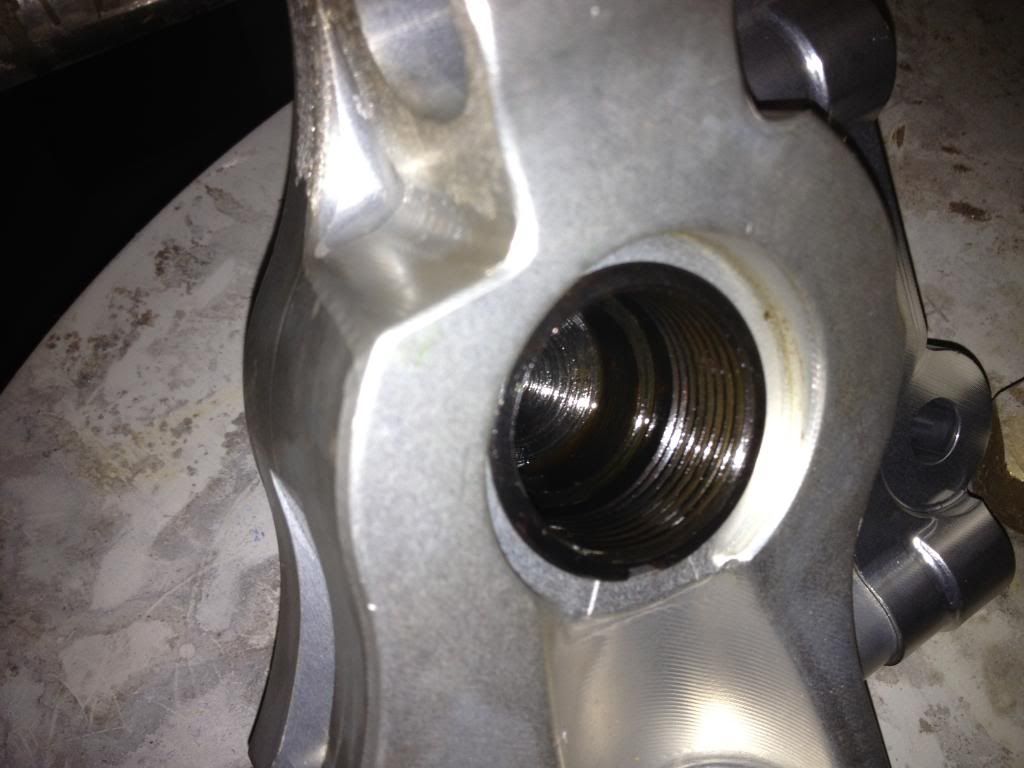
-The ball joint seat. Notice the key way to keep it from rotating when the steering wheel is turned.
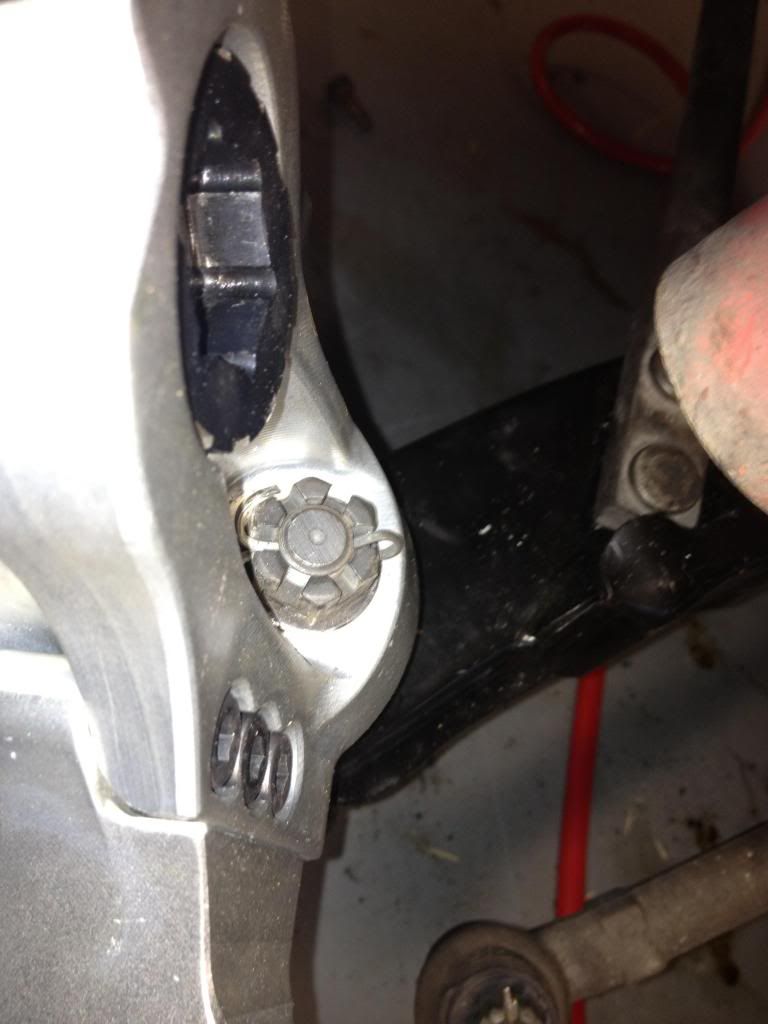
-The ball joint nut looks hard to get to, but with a long enough extension, it's actually really accessible.
Special note: The S13 and S14 hubs have different torque ratings. This is important to note as undertorquing the S14 hub can lead to a failure. Dave Coleman wrote a great article on what happened to his S13 with S14 hubs when he torqued them down to S13 specs. The Official Guide to Not Screwing Up Your Wheel Bearings Like I Did. Also of note, it's better to go to at least the middle of the torque range on these than the lower range. I've read stories where the bearings still died because the nuts were torqued on the low end of the range.
When installing the hub on the GKTech spindle, it's best to grease up the spindle first. GKTech ships them dry, but if you notice when you remove your hubs from the factory knuckle, they slide right off and have lubrication under them. If you don't lube up the GKTech spindles, the hubs will have a difficult time going on.
Finally, take the car in for an alignment to make sure the toe is set properly.
Final Thoughts
These knuckles are expensive. However, when compared with comparable offerings from PBM and other aftermarket shops, what you get for the price is greater I feel. The adjustability and lightweight materials are ideal. Installation is a snap, and everything goes together a just like factory. I'll update this article with my driving impressions once I have coilovers installed to be able to run these.
Resources
Mike Kojima's Ultimate Guide to Suspension Handling
Project Silvia the Official Guide to Not Screwing Up Your Wheel Bearings Like I Did
GKTech
Race Car Vehicle Dynamics