E-1 Engine Rebuild - Parts Info

1962-1965 Datsun L320 and NL320 forums - The truck that started it all in the US. All 320-specific topics and discussion can be found here.
User avatar
Li'l Truckie
Posts: 555
Joined: Thu Jan 02, 2014 9:28 am
Car: 3 x '65 PL 320
1 x '64 PL 320
1 x '63 PL 320
1 x '62 PL 320 - parts :(
1 x '60 PLG-222
and many more Datsuns from 48hp to over 500hp
Location: Leavenworth, KS

Post

Hey there 320 Fans,

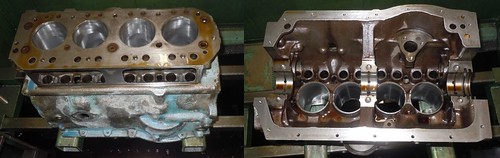
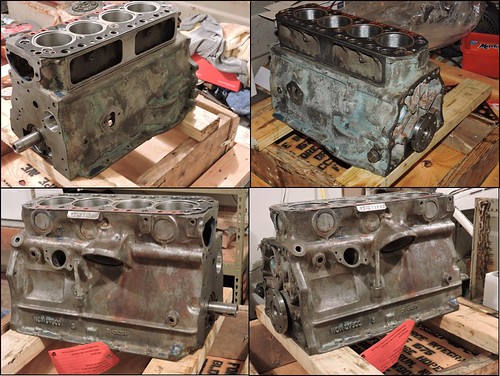
I know, I know, another thread, but I thought I would pull this part thread out of the 320 Clutch Replacement as we will focus only on an engine rebuild. And at least for know just the block. Sorry, but I have a rebuilt head that came with the '62 320 parts truck, so we are looking to cut cost and not corners and will use this over one over rebuilding the '64s head.
Image
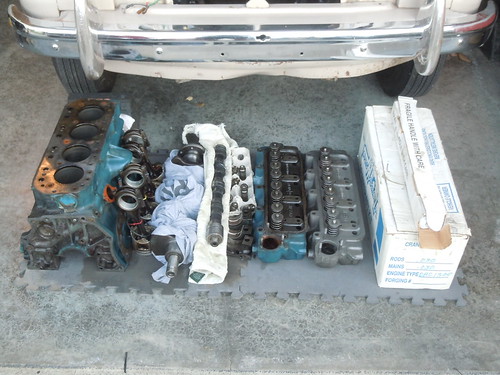
So a busy week on the phone, on line, and braving the crazy holiday traffic here in KCKS and KCMO. So let's concentrate on the parts list with supporting references. I have some info, but not all so here's the list starting from the head gasket down to the pan -

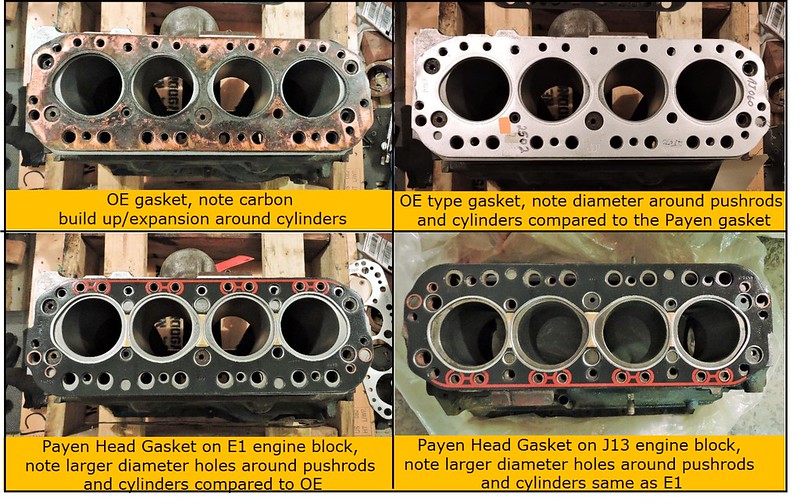
Head Gasket - from eBay with a 320 engine gasket set or VB(1-732)/MM (I'd recommend the Payen HG from MM on this one, very nice!)

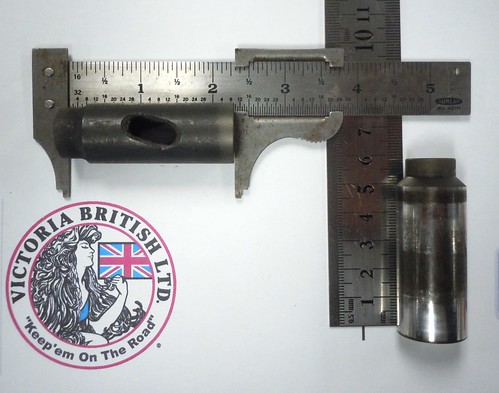
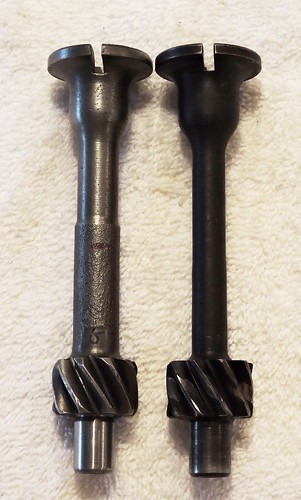
Head Studs - going with what I have, measured and within tolerance. The studs from the MGA or 3 Main Bearing MGB should work, pretty sure the are all the same 3 or 5 main bearing. 6 1/4 and 4 1/2 are the same measurements. Just make sure you measure/inspect before reassembly.

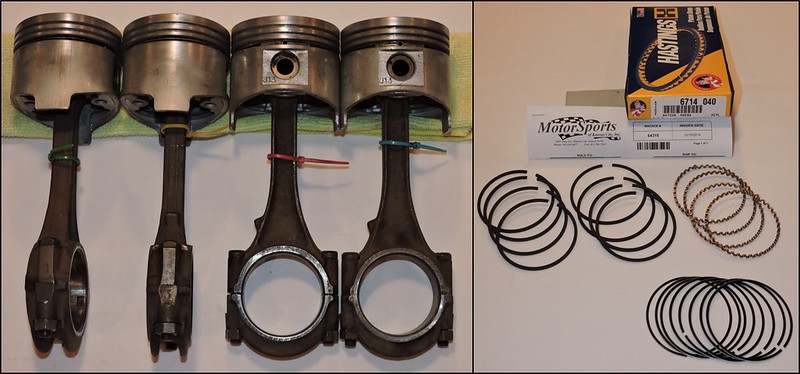
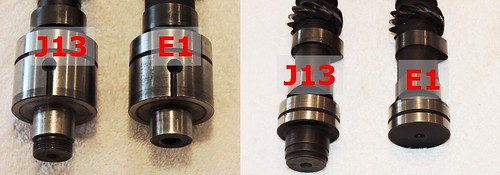
Pistons - keeping what I have, some time in the past someone put in J13 pistons. Ted at the machine shop said mine are fine and is cleaning these up. Farm net Mason Datsun does list a few alternative sources for pistons - link at bottom of thread.
Image
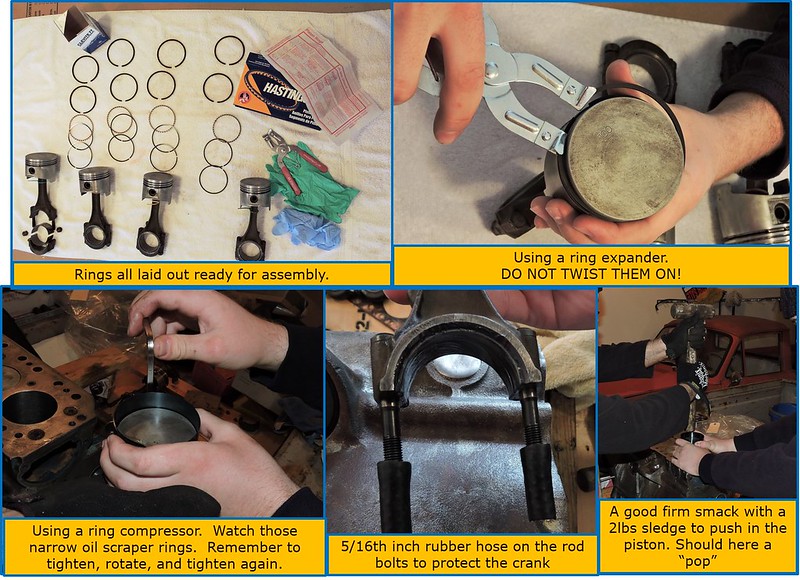
Rings - See Hasting links below. The short- Yes available, new, no issues. The Loooooong....Called and talked to Dawn at Hasting up in Michigan. Yes, all E1 rings are available, new, and still made in all sizes STD, .010, .020, .030, .040, and .050. She gave me the number to a parts distribution warehouse - Jobber (JPW), know it well, here in KCMO. Talked to Austin, who confirmed everything from Dawn at Hastings. He in turn gave me a POC for couple of Hasting's dealers in KC area. Called and talked to Brad at Motorsports Kansas City, gave him the part number and credit card info....they should be in on Tuesday of next week.
-----Part number info-----
2C6714 is for chrome coat rings. I was told not to get these as the eventfully will start flaking. Soooooo went with part -
6714 this is for the cast iron rings. Heads up...You will need to add the 0x0 for the correct oversize ring set. I ordered 6714040, with the end three digits being the oversize of .040/.75mm. 6714 is the STD size part number.
Rods - keeping what I have and have not researched this one, sorry. Farm.net Mason Datsun does not list as an alternate source.
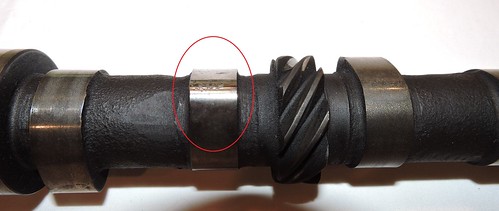
Rod Bearings - Available new through Clevite. Just need the size from Ted.
Main Bearings - Going with the ones from VB at .010 or .25mm. Supporting reference is from Farm.net Mason Datsun excerpt below and link at bottom of post.
Main Bearings - Alternate Sources
Datsun J13 engine Datsun 411 1965-1969
Datsun 520 1965-1969
Datsun 521 1965-1969 Identical
MG MGA 1600 MK1 1961-1962 Identical
MG Magnette MK4 1961-1962 Identical
Austin A60 1962-1969 Identical

Note that Clevite only has STD Main Bearings listed on page 566. With this we had to research compatible/alternate parts. So Clevite to Farm.net Mason Datsun for a little help and then to the VB catalog -- pick'n up the parts Tuesday. :crazy: Only had to have my crank polished so going with .010 or .25mm.
Thrust washer - available through Clevite, but going with VB on this one too.
Timing Chain Tensioner - should be available at your local auto parts store, Napa for sure, or you can stay with VB or MM. You might have to tell you local parts store to look up a tensioner for a 520.
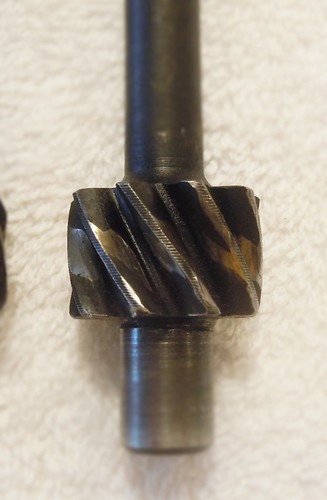
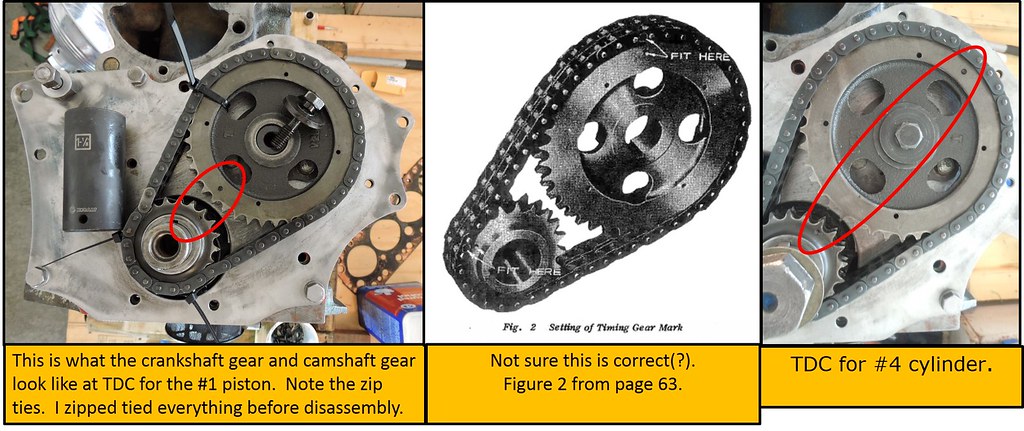
Timing Chain and Sprockets/Gears - again, available locally, ie Napa. And of course do not forget to tell them to look up a 520/J13 if they do not have a listing for a 320, which is highly likely. Napa does sell the sprockets and the chain separately.
Rear Graphite Rope - this is what the rear crank seal is/called. Should be available locally or at your industrial type distributor. You want to as for 3/8 inch graphite rope. It's sold by the foot or at least at Hanna Rubber here in KCMO.
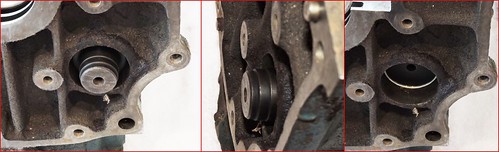
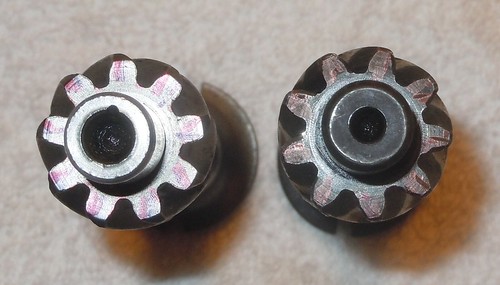
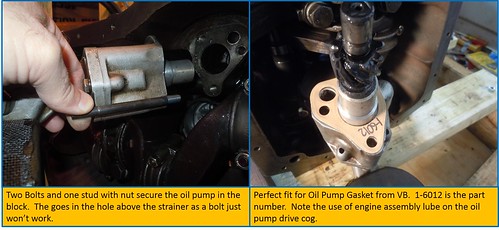
Oil Pump - yes a MGA / 3 main bearing MGB pump will work. Only difference is the oil pump neck to the strainer. OE is a side mount while the MGA is a top mount.
Image
Front and rear main seals available on eBay with the complete engine gasket set for a 320 or 520 or you can get the two small short ones for the back and the long front one through either VB or MM.

External Links -

Farm.net Mason Datsun - http://www.farm.net/~mason/datsun/datsun-parts.html

VB = Victoria British - http://www.victoriabritish.com/icatalog/csc/t.aspx

MM = Moss Motors - http://www.mossmotors.com/Shop/ViewProd ... exID=36470

Clevite/Mahle - http://www.mahle-aftermarket.com/mahle_ ... e-bearings from here you'll need to click on the "download" link or try this direct link -

http://www.mahle-aftermarket.com/c12579 ... -10-07.pdf from here go to page 563 for Nissan. The E1 is listed in the measurement reference up front and then pages 565 and 566 list the bearing info for the E1.
NOTE the Main Bearing Set is only available in STD, so this where Farm.net/Mason/Datsun cross-reference is so important.

Hastings - http://www.hastingsmfg.com/RingFinderMa ... OCD=NISSAN Cars & Trucks&AddText=

Hasting on line pdf catalog - http://www.hastingsmfg.com/Master_Catal ... er2012.pdf from here go to page 176 for Piston Ring Number of 2C6714 and 6714. Page 309 list dimension and other auto applications for Part # 6714. Might take a look at the Do's and Don'ts up front in the online catalog - lot's of good information

Well that's about a week's worth of research, running around, and parts verification so hope this helps.

cheers
Li'l Truckie


User avatar
Li'l Truckie
Posts: 555
Joined: Thu Jan 02, 2014 9:28 am
Car: 3 x '65 PL 320
1 x '64 PL 320
1 x '63 PL 320
1 x '62 PL 320 - parts :(
1 x '60 PLG-222
and many more Datsuns from 48hp to over 500hp
Location: Leavenworth, KS

Post

Hey there 320 Fans, a quick update for this evening,

A productive day plying the roadways of KCKS/MO this morning/afternoon. So some good news, but more research is required -

VB had the .010in or / 25mm Main Bearings and STD Thrust washers so we picked those up along with a few crush washers, chain tensioner :frown: and gasket and a new crank pulley bendable tab washer.
- Chain Tensioner - will probably return this ($6.95), sorry. I guess I did not pay to close attention to this, but the "kit" came without the spring or gasket. Was tracking the separate gasket, but not the spring. Oh, well.
-Okay, a few parts that do not work from the 1500/1600 MGA and 1800 3xmain bearing MGB. Tappets, Pushrods, and freeze plugs. Tappets are more of the J13 style and smaller in diameter.
Image
Pushrods-short, from the MGA are still too long. And the freeze plugs from the MGA, MGB, Sprite/Midget and Triumph (anything) are not the correct size (correct size is 1 3/8 for the side/rear welch plugs and 1 3/4 for the cam in the back). Appreciate Bob's help on trying to find a like/compatible freeze plug but will have source these from somewhere else, obviously. However, Tappets are a concern at this time as two of my Cam lobs are a little scored along with the respective tappets in the number 2 and 6 position :frown: . These will need to be machined along with the cam.
Image
After leaving Bob at VB it was East on I-435 to see Ted at the machine shop. Dropped off the MBs and thrust washers and talked a little bit about the block and crank. Block is in good shape. Cylinders only needed to be honed - they are already at .040in/.75mm, so this saves a little money. As you can see from the photo I did not have the brass oil gallery plugs removed, but all welch/freese plugs were removed.
Image
Crank is also good to go, only needs to be polished. This will save quite a bit of money and more importantly - time. About 3 weeks saved due to the holidays, vacations, and shipping time. Pistons are rods are back so the son and I will put the rings in over the weekend and oil them down with ZDDP. Ted also informed me there is no change to the rod bearings at .010in/.25mm that he plucked out of the rods. These are already on order from Clevite via the local auto parts store.
Image

Looking to dismantle the two oil pumps (one from this motor and a NOS pump from the crate-o-parts) tomorrow and compare the two. Would like to stay with the one from this motor and save the NOS for another project/emergency/failure. A box from eBay arrived this evening so we will also compare the Datsun E1 distributor drive cog to the MGA cog....hopefully I did not waste away $20 bucks on this purchase.

Well that's about it for this evening. If you have any questions let me know.

v/r
Andy

User avatar
Li'l Truckie
Posts: 555
Joined: Thu Jan 02, 2014 9:28 am
Car: 3 x '65 PL 320
1 x '64 PL 320
1 x '63 PL 320
1 x '62 PL 320 - parts :(
1 x '60 PLG-222
and many more Datsuns from 48hp to over 500hp
Location: Leavenworth, KS

Post

Okay 320 Fans busy week researching and verifying specs and compatible parts, so let's go over what we have learned -

- I think I am over my state of denial for the cam and accept, rather reluctantly, the cam will at the very least need to be ground. 90+ pic are here over on Flickr if you would like to compare cams and lobs to good and bad. Pay special attention to cam lobs 1 and 6, yes there is a little bit of scoring on a few of the other ones, but 1 and 6 are the worse.
https://www.flickr.com/photos/113742723 ... 831237931/

After talking rather extensively to a couple of local Muscle Car enthusiasts and few camshaft specialty machine shops on the west coast and up in B.C. I think all we need is to have the cam re-ground and no need to weld on new material and go through the re-hardening process.
However, that being said, I like to keep some options on the table. If for nothing else to keep cost and downtime to a minimum. So working with the difrangia, down in Merle Haggard Land, on some E1 and J13 flywheel compatibility, so I thought I'd pulled out the cam from the J13 and see how close it is to an E1 cam. Good news is the E1 and J13 both have the same cam profile -
Image
And if you know how and remember how to find the duration (open + close + 180 = duration ) and since we are dealing with exact numbers between the two cams, all is the same. Even the 9 count distributor drive on the camshaft, yes 9 and not 10. Sooooo, a J13 cam is a no cost option as I have one in the crate-o-parts. But do not start jumping for joy just yet ----
Image
Notice the differences? Not too concerned about the front of the camshaft. A bolt on the E1 versus the nut on the J13. Again, not concerned (yet), the Sprite/Midget has the nut and I have yet to peruse the nut and bolt aisle at the hardware store or visit Fastenal.
Now look at the pic on the right side, that is a concern. I'm a little lost on the back stub on the J13 cam. Do not know if this is for a tachometer drive or someone forgot to mill this off???? I do not recall any 520 or 411 coming equipped with a tachometer :confused: And here is what the J13, left two pics, and the E1, right, look like in the block -
Image
Obviously a welch plug is not going to work :confused: :confused: An O-ring/oil seal....maybe? The weekend is not over yet so the son is pulling the back plate off of the complete J13 in the garage so we can have a look at it. I have a strange hunch the J13 in the garage is like the E1 cam with no back stub.
So more to follow on this particular fitment issue. For now we have two viable options - Option 1(preferred) - Re-grind the E1 cam if all check out okay.
Option 2 - mill off the back of the J13 cam, only if option 3 is way to expensive
Option 3- add new material and heat treat the E1 cam

Okay, on to the distributor drive. Mine is a little worn as you can tell from this pic -
Image
So pressing my holiday luck I picked up a MGA distributor drive cog from eBay as this is not sold by Victoria British and the one from Moss Motors is over $70, a little much for my budget at this time.
Image
As you can see the MGA distributor drive on the left is and exact match to the E1 distributor drive on the right. All the same specs and yes the E1 distributor fit in the MGA distributor drive cog and vice versa. And here is a pic of the teeth -
Image
Trying to research why a couple of website list the E1 MKI and MK II engines as having 10 teeth when this picture clearly shows only 9 teeth (I've counted them numerous times with a black, green and red marker and the number did not change. hmmm.... :rolleyes:)

Well that's about it for now, going to see how the son is doing with the back plate.
Let me know if you have any question and of course please share any info you might have on camshaft issue or the distributor drive cog teeth count.

cheers,
Li'l Truckie

User avatar
Li'l Truckie
Posts: 555
Joined: Thu Jan 02, 2014 9:28 am
Car: 3 x '65 PL 320
1 x '64 PL 320
1 x '63 PL 320
1 x '62 PL 320 - parts :(
1 x '60 PLG-222
and many more Datsuns from 48hp to over 500hp
Location: Leavenworth, KS

Post

THE BLOCK IS BACK, THE BLOCK IS BACK :mike

That's right, picked up the block last week, a little to cold to work on it this past week, but tomorrow should be another nice day for a father/son tag-team effort to get caught up.

So here is the block combo pic -
Image
What you see here, so far, is just over $280 worth of parts and labor. I had the shop put in new cam bearing, main bearings. thrust washers, and install the crank with new graphite rope seal. So yes, this did increase the cost some. Here's the breakdown for some cost comparisons.

$40 Main Bearings at .040 (King from VB)
$10 Thrust washers std (VB)
$21 cam bearing install
$35 cam bearing, std. (Clevite parts store)
$21 main bearing, thrust washer, graphite rope, and crank install
$90 tank and deck block
$60 hone cylinders, polish crank, clean up pistons
and then add a few dollars for tax and environmental charges.

Some more good news! The Payen head gasket a came in last week and I think we will go with it -
Image
I was a little nervous when I first compared the Payen head gasket to the original copper and the OE type after market. As you can see from the combo pic the Payen head gasket has larger diameter holes around the pushrod holes and larger diameters for the cylinders. Should not be an issue.

And that's where we are at. Tonight the son and I will work on the rings and pistons and also install the rod bearings. So more on that later.

If you have any questions on parts or prices (parts or labor), or need info on where to purchase just leave a reply or shoot me a PM.

cheers
Li'l Truckie

User avatar
Li'l Truckie
Posts: 555
Joined: Thu Jan 02, 2014 9:28 am
Car: 3 x '65 PL 320
1 x '64 PL 320
1 x '63 PL 320
1 x '62 PL 320 - parts :(
1 x '60 PLG-222
and many more Datsuns from 48hp to over 500hp
Location: Leavenworth, KS

Post

Hey, Hey, 320 Fans,

Class is over and Li'l Truckie has been doing some spring cleaning Datsun 320 style and turning the wrenches and sockets....maybe a little too furious as we will see.

If you are interested, Spring cleaning or rather hauling and working pics and videos are here -
https://www.flickr.com/photos/113742723 ... 334668329/

So we'll post some pics and put together some combo pics tonight and work on the narrative over the next day or so. Looking below I think we are good for pics.

Pistons and Rings -
Image
Okay, no major issues with the assembly of the rings and pistons. Insure you use a ring expander tool to expand the rings and bring over the top of the piston. You do not want to twist and pull the rings apart with your fingers or two separate pair of pliers. Instructions are pretty simple - just follow them. Compression ring with no dot and without bevel is the top ring. The ring with dot and bevel is the second ring with the bevel side facing down. I offset the two compressor rings at the 10 and 2 position with 12 o'clock being the front of the engine.

When your are ready for the ring compressor use extreme caution when tightening as those thin oil scraper rings are not cooperative. Get the compressor almost snug and check the scraper rings before getting the compressor tool snug. Once snug check those oil scraper rings again to insure they are seated properly. At this time rotate the piston in the ring compressor and tighten one last time. The ring compressor should click one or two more positions.

After putting on the scrap 5/15 fuel line hose over the rod bolts we were ready to push the piston into the block. Make sure you only use oil on the cylinder walls and then use engine assembly lube for the crank and rod bearings. We aligned the rod in the same position as we removed it and carefully placed it into the top of the cylinder. For this we also kept the crankshaft perpendicular to the piston and rod. I did not want to take a chance, however remote of damaging the crank or rod bearing as we smacked the piston into the cylinder.

This was a two person job here. The son held the piston in the compressor tight against the top of the block while I use the handle portion of the 2lbs sledge to firmly smack the piston into the block. Use caution when installing the pistons. It took a couple of tries per piston as the very bottom oil scraper ring kept coming out between the top of the block and the ring compressor. This is why the piston needs a vigorous smack. To light of a hit or simply trying to push the piston ring in results in that oil scraper ring slipping out between the bevel around the top of the cylinder and the ring compressor tool.

Once the piston was in we rotated the crank into position and bolted on the rod cap and rotated the crank into position for the next piston and rod.

Oil Pump -
Image
Had to hunt for the bolts and the one stud for the oil pump. Did not tag and bag them so a little confusing in which stud to use as the oil pump stud and the rocker arm assembly studs that go through the valve cover are somewhat similar. But a quick look at the parts manual and a quick count 1 stud for the oil pump and two for the valve cover, I identified the correct stud.

A quick look inside the oil pump revealed no issues so some engine assembly lube on the pump it was bolted back together using plenty of engine assembly lube inside the oil pump and on the oil pump drive gear that matches up with the camshaft gears. As this engine is a MK II there is no oil relief valve on the oil pump like the later MK III and MK IV E1 and their oil pumps. This is a plus as the oil pump from an MGA is a perfect fit for the MK I and MK II E1 engines. And another bit of good news is VB now sells the oil strainer. The only difference in the two oil pumps is how the strainer attaches to the neck. OE Nissan is on the side while the one from VB and Moss is on the top of the oil strainer.
Image

Back Plate -
Image
No issues beyond the one M8/14mm head bolt, no idea. Guess the previous owners may have stripped out the OE 3/8 in bolt and decided to re-thread it for a M8 bolt. The rear plate gasket from Victoria British (1-782) or Moss Motors (297-500) is a perfect fit and yes I did use a little gasket sealant on the gasket - probably not necessary. For the lock tabs I found is best to hammer them flat and then use a good pair of pliers or crescent wrench to make a small forward bend in the lock tab ends to make it easier to tap them upright against the bolt, thus locking it in place.

Front plate -
Image
Okay, got over easy on this one. Before you torque down the bolts (1,2,3) that affix the front plate to the block, I would highly recommend you screw in a few of the other ones as well (4-10). The first attempt I did not - just bolts 1,2,and 3. I later discovered the errors of my way when the two timing chain tensioner bolts were a little too hard to torque down, but that did not phase me. It was only when I could not screw in the 3 x large timing cover bolts, with the 1/2 inch head, that I realized I would need to remove the timing chain along with the crankshaft and cam gears, the timing chain tensioner, and loosen those first three bolts to align everything. What a pain in the butt - having to undo everything all over again. So lessen learned and yes the timing chain tensioner bolts were stripped and required replacement. Luckily the hole in the block were fine. Front plate gasket is 1-781 for VB and 296-000 from Moss.
Cam -
Image
Was simple enough after the front plate issues where sorted out. I had the machine shop install the new bearings which I sure is the most difficult task for the cam. Just remember to align the oil holes in the bearing with the oil holes in the block if you are installing the cam bearings yourself. The rear freeze plug for the cam is a Dorman 555-059. Install was pretty simple. Insure you use engine assembly lube on the cam bearings in the block and all of the shiny bits on the camshaft to include the oil pump and distributor drive gears. As a precautionary step I did install the cam wit the front retainer and then place a large washer between the cam and the freeze plug to insure I did not push the freeze plug to far in. Once I had a same ring of gasket sealant around the freeze plug hole I used a large socket inside the freeze plug I simply hammer it home. Once I was comfortable with the depth I removed the three bolts on front cam retainer, pulled the cam forward, and dropped out the large washer.

I think that is about is for now. I'll reread this and edit as necessary. If I forgot anything or if you have questions, please ask as it has been some time since I completed the install of the pistons, cam, back and front plates.

cheers
Li'l Truckie

Upcoming post will cover setting the distributor drive in place with the #1 piston at TDC. So plenty of pics you will want to save.

User avatar
Li'l Truckie
Posts: 555
Joined: Thu Jan 02, 2014 9:28 am
Car: 3 x '65 PL 320
1 x '64 PL 320
1 x '63 PL 320
1 x '62 PL 320 - parts :(
1 x '60 PLG-222
and many more Datsuns from 48hp to over 500hp
Location: Leavenworth, KS

Post

Hey, Hey 320 Fans,

This is probably the most informative post for this thread. So at the very least save the pics to your computer or hit print and add this to one or both of your 320 Manuals for that brighter day as you start the re-assembly for your E1 engine.

Special thanks to Steve in OK for the assist and confirmation on how "things" are supposed to look as I did not want to get this wrong. And neither do you once you get to this stage of your rebuild.

Okay so let's work on uploading the photos tonight and see how far we get with the narrative.

Cam and Crank pic
Image
Okay, let's go from left to right on the above picture combo. You will note in the first picture we have place the timing chain assembly on the cam and crank shaft.

So let's back up a few months quickly cover the zip ties. At the beginning of the disassembly I set the engine to TDC for the #1 piston and zip tied everything in place. So a pat on the back for this and all of the pictures considering we are at month 5 of the rebuild. What I forgot to do was look at the position of the distributor drive cog in the distributor well, note the position, and take a few pictures. So do not forget to take a picture of this prior to removing the distributor drive cog.

Now 5 months later we are at the re-assembly and setting the timing. It took a day to find the 3 woodruff keys, but I located them. The two on the crank are the same size while the camshaft key is a bit narrower. Once the cam and rear crank woodruff key are firmly in place I made a rough adjust to the two based on the position of the key slots on the two gears. From here I used a large socket to light tap the crankshaft gear into place while pay close attention to the crank gears position so as not to go to far without placing the cam gear into position. After a small adjustment to the camshaft the cam gear was aligned. I made a few light taps back and forth between the two in order to get the cam gear just past the woodruff key. At this time I used the camshaft bolt to pull the camshaft into the gear while still using the large socket to tap the crankshaft gear into position. After more than a few taps and tightening of the bolt the tow gears were in place and the zip ties clipped and removed.

As far as the center pic from the 320 manual, I just don't know. I messed around a little and placed the crank and cam indent dots in this position and they were all in the center of the cylinders - not a one at TDC. What else did not make since was setting these gears in this position and then setting they distributor drive cog in position as described in Figure 3 on page 63. These two just did not make since to me. Last picture is simply TDC for the #4 cylinder.

Setting Drive Cog -
Image
With the crankshaft and camshaft set at TDC for the #1 piston it's time to set the distributor drive cog. As you can see from the picture below the cog slot for the distributor runs from approximately 11 to 5 with the rotor pointing to about the 2-2:30 position. And that is what we are doing in the first upper left hand picture - a rough alignment of the distributor and cog in those positions. Pretty simple so far.

Next we remove the distributor, place it to the side, and while still holding the cog in position, screw in the 6in long 5/16 x 24 thread bolt to help us set the cog in position. Yes, the distributor cog has a hole that is probably still filled with grease, oil and grim, even if you cleaned it, is threaded to help you set the timing properly.

*If you are setting drive cog with the oil pan off then you can probably pass on the large washer. However, if you are aligning the drive cog for a different distributor with the engine still in the truck and the oil pan still filled with oil - I highly recommend you place a large enough washer on the bolt to keep the cog from falling into the pan. YES, it can fall down in there pass the cam gears if you miss the hole in the block. So use the washer and save yourself a catastrophic headache. And if you left handed like me, you know that stupid stuff happens to left handed people in the right handed person's world.

So screw the bolt in firmly and start stabbing the distributor drive cog as seen in the bottom two pictures. It took me a couple of tries, but I found it best to rotate the cog to the 1 o'clock position, push in, and rotate to the left/counter-clockwise as the spiral threads line up. Once the cog is in place in the 11 to 5 position, simply remove the bolt, place the distributor cog retainer plate in place and check the alignment of your distributors rotor. It should be at the 2-2:30 position. And that's it :)

Final alignment -
Image
And this is what it should look like :dblthumb:

Now that we know how to align the crankshaft and camshaft at TDC for #1 piston, it should be a lot easier to change out the original Hitachi D406 distributor with something a little more modern from a later model Datsun 620 or possible a new Lucas type distributor. Which is what we will attempt here in a couple of weeks once we get Shroom running and back on the road.

Let me know if you have any questions. More pics are here - https://www.flickr.com/photos/113742723@N07/

Cheers,
Li'l Truckie

63 320
Posts: 14
Joined: Fri Jun 06, 2014 9:35 pm
Car: 1963 Datsun 320 pickup

Post

Lil Truckie I appreciate the enthusiasm in your posts
have you looked int the possibility of using the crank and rods and possibly pistons from a mgb 1800 3 bearing engine?
I would like to try this but I don't have any way of verifying the crank would fit the 1200 block or that the block could be bored to fit the 1800 pistons
i believe someone posted here they used a cam from the 1800 so it seems likely the crank would work
even if just the crank and rods were usable it appears it would increase to a 1600 cc which would be great.

User avatar
Li'l Truckie
Posts: 555
Joined: Thu Jan 02, 2014 9:28 am
Car: 3 x '65 PL 320
1 x '64 PL 320
1 x '63 PL 320
1 x '62 PL 320 - parts :(
1 x '60 PLG-222
and many more Datsuns from 48hp to over 500hp
Location: Leavenworth, KS

Post

63 320,

Some good questions that would require further research, purchase of a BMC manual for the 3-bearing BMC B motor for the MGA early MGB and more than a conversation or two with a BMC expert.

Off hand I do not know if this would work. Just because the bearings are the same does not mean the rest of the crank from a 3-bearing BMC B motor is the same as that of a Nissan E1. I would defer this to a machine shop to take the necessary weight/measurement/balance to see if the BMC B crank is an exact fit.

Bore - wow, that might be too much. Bore on the 1800 B-motor is 80.26. Pretty sure the advantage of the BMC B-motor over the E1 is the stroke - a tall 89mm for the B-motor and stubby 71mm on the E1. So I do not think the con-rods would work.

Pistons - Those of the 1500 MGA might work (73.03mm) might work in the E1, but again I would defer to a machine shop and have them compare pistons to pistons. I do not think the 1600 or 1800 pistons will work - just too big.

Cam - caution on this one. The BMC-B motor has a 9 cog cam. So yes, might work with the early E1 MK I and II, but the cams on the later E1 MK III, IV, and J13 have 13 gears. So if you change out the latter you will also need to source a distributor and oil pump drive cog, but they are available. Also the duration on the BMC-B cam is totally different from that of the E1 and J13 so do not know how it would run.

I think your best bet might be to just source a BMC-B motor from a MGA or MGB. And if you go this route then you might want to look for a 5 main bearing engine from a '67(?) MGB as they are more abundant, and less expensive. The 5 bearing is just a better engine.

Though a race prepped, bored and stroked 1800cc BMC B motor with a roller rocker head, and a Judson supercharger in a 320 with a Fairlady rear end and upgraded brakes would give any modern car a run for its money.

Li'l truckie

Jhogie
Posts: 19
Joined: Wed Oct 12, 2016 5:43 pm
Car: 79 kc
70 521

Post

Hey there li’l truckie. I’ve read through a bunch of your threads and I’m wondering if you’ve ever used any of the MGA valves parts on your E1? Specifically valves, guides, seals, and springs?

I’m planning to do a full rebuild on my numbers matching E1 and I can’t seem to find a thread of first hand experience of someone using MGA parts to do head work on an E1.


Return to “Datsun 320”