Vehicle info:
'08 Rogue SL AWD
89,000 miles
Did a coolant drain and fill at 40,000 miles
Difficulty:
I would rate this about as difficult as an oil change, just takes longer.
Items used:
#2 Philips screwdriver
10mm socket
pliers
Flathead screwdriver or specialized tool
5 gallon oil container to hold used coolant
oil Collector
1 Gallon of Nissan Coolant (Green concentrate)
Funnel
6 Gallons of Reverse Osmosis water
(Service Manual suggests doing this with a cold engine. I will admit I am not patient enough to do this 4 times and letting the engine cool all the way down each time. Be aware that coolant will get all over you when you remove the drain plug so be careful.)
Step 1: Remove Engine under cover. It is a plastic shroud that is held in place by about 8 plastic tabs. For me this is always a challenge. The plastic gets very brittle here in AZ so many break. This time only one did. At least 2 of them are smaller and a bit different so make sure to keep track of which holes they came from. I think they are the only 2 that snap into metal rather than plastic and are on the holes closest to the wheels and furthest from the bumper.
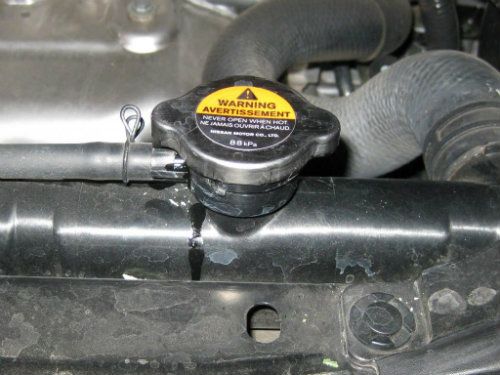
Step 2: Remove Radiator Cap. Just a half turn counter clock-wise will loosen it up. Pop it off. This will cause the coolant to drain much quicker.
Step 3: Remove drain plug. This is a plastic screw with an o-ring found inside of the opaque rubber tube directly underneath the radiator. Mannual says to replace the o-ring. It was in fine shape so I left it.
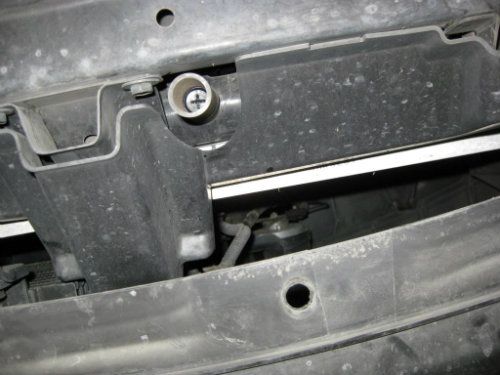
Step 4: Remove Reservoir screw with 10mm socket. Pop out the left part of the reservoir that is wedged in the sheet metal. Once you get that out you can wiggle the reservoir up and out.

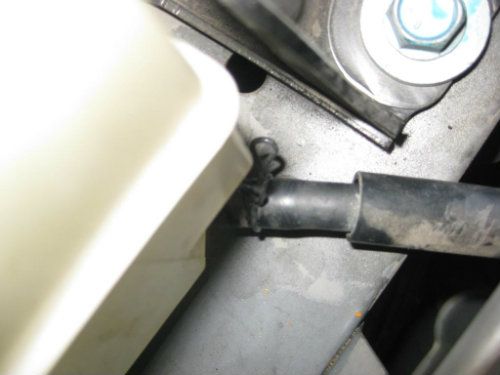
Step 5: Once the reservoir is freely moving, tilt the side with the hose attached up (to avoid spilling after next part), slide back the clamp with your hand and remove the hose. Drain reservoir and clean it up. Once cleaned put it back in its area, hook the hose back up, but don't pop it back in or reattach the nut since it will be removed and drained each time you do this.
Step 6: The manual says to remove the air intake assembly and move the throttle body acuator to the side. After that you detach a heater hose and raise it 4 inches.
EDIT: I did not do this with the correct hose. This is not a step in the FSM for another car of mine so this may be overkill by Nissan (similar to the cabin filter replacement instructions, I'm hoping some more experiences people chime in on the importance of this step). This will also be a placeholder for pics/instructions on this step if deemed necessary.
Step 7: reinstall Radiator drain plug after fluid has drained.
Step 8: Slowly fill radiator (through radiator cap) with Distilled water. I used Reverse Osmosis water because I have a system in my home. While not "distilled" it is very close (10-20ppm TDS) Each time you flush it takes about 1.5 Gallons. It required 4 times for the water to get nearly clear. I suggest buying at least 6 gallons. That will also give you several good containers for disposal.
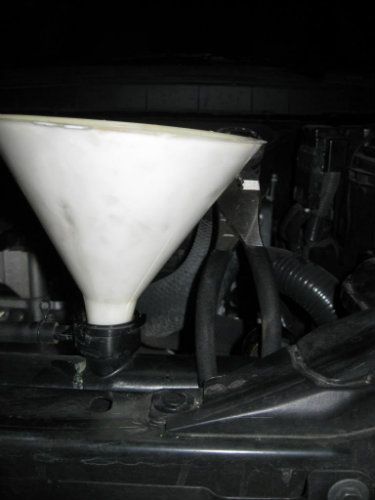
Once water starts coming out of the area where you disconnected the hose from, reattach the hose and clamp and continue filling the radiator. You will hear some burping along the way. The slower you go, the less air you will get trapped in it. Once it is full reinstall radiator cap.
Step 9: put some water in the reservoir tank. This won't really factor in much but fill it up to the MIN line and call it good. Put the cap back on.
Step 10: Start Car and turn the heat on (knob all the way to the right) and Bring it up to operating temp. You will notice this by the radiator kicking on. I let that cycle a few times on and off. Service manual then says to rev the engine under no load 2 or 3 times. I did that and then turned it off.
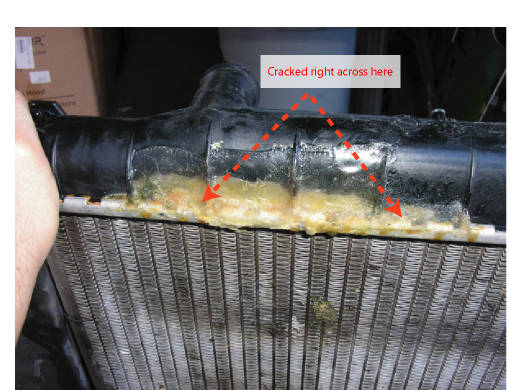
Step 11: For each time you want to flush repeat steps 2, 3, 5, 6, 7, 8, 9, 10. I drained it 4 times total. Here is a pic of what the fluid looked like after each draining.
1st through 3rd (from L to R):
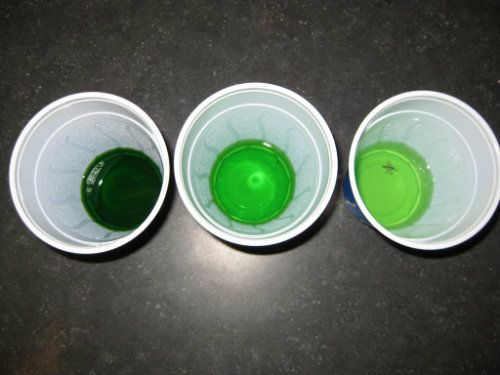
4th Flush:

Step 12: Once you have decided it is clean enough for you and have done steps 2, 3, 5, 6, and 7 for the last time; you will do steps 8 & 9 with coolant. the '09 manual states the entire coolant system holds 7.75qts (including the .75qt reservoir). To ensure the 50/50 mix you will need to add half of that in concentrate. Comes out to a shade under a gallon. Once you add that to the radiator, fill it up the rest of the way with water. If you want, you can mix half of the gallon with water or rotating some water in as you add coolant. Whatever you choose will probably work fine.
Tip: When I did this, I wound up only filling the reservoir with water since I already added the amount of coolant I wanted to add. I suggest pouring a bit of concentrate in there so that mix is pretty close too.
Step 13: Pop reservoir back into it's area and reattach nut.
Step 14: Reinstall engine under cover.
Observation: When I slowly drove around the block I noticed the temp go up a bit, and then back down. My guess is some air passed by the temp sensor or maybe a mix of more water than coolant passed by it. Once I pulled into the driveway and let it continue to cycle it came back down to a where it normally is.
Verdict: Judging by the sediment in the fluid (may edit this thread to show picture of a coffee filter that I poured the liquid through to catch the particles) I would say I should have done the flush at 40k rather than just a drain and fill. Even the 4th draining still has sediment. Fluid may last forever but if it has metal and crud suspended in it than it is time to change it IMO. At only $20 in fluid it really is a very inexpensive maintenance task. But it takes time. The last few flush and fills I had moved onto the final phase... beer and cigar. Since it is 90% water it was very easy to clean up and go back inside to watch sit back and relax while the car cooled off.