BartZ32tt's "Scavenger" build thread!

The Nissan 300ZX (Z32) general community discussion forum
User avatar
bartZ32tt
Posts: 850
Joined: Mon Mar 09, 2009 8:12 pm
Car: 1990 300zx twin turbo, 1996 7.3 powerstroke
Location: Des Moines, IA

Post

After much searching, I bought the new (rolling chassis) Z! I currently have a VERY busy life so this thread may be a little slow-going. I have quite the background story but I'm not sure if I want to share all of that (lots of drama). So for now, just enjoy the obligatory pic-whoring!

Old:
Image

Image

Image
New:
Image

Image

Image

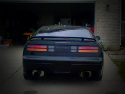
got matching front wheels with rotted out tires - which is the reason for the stockers up front. While I'm looking for a set of 5-spoke deep-dish wheels, these don't tickle my fancy
Image

Not sure what to do with the interior yet.
Image
It’s a HUGE step down from my previous Z’s interior
Image
Still got all the pieces so I may swap it, but not sure how well it’d look with red. Or I’ll sell it. Dunno.

Got parts? I do, hence my build thread name.
Image

Goal: very reliable, super quick spooling, fun street car and almost daily driver (only during nice weather) with full deletes for easier maintenance and increased reliability with the looks to back it up. Somewhere between “show” and “go” but mostly “go”. I care more about low-end power but since everyone’s going to ask, I suppose I’m aiming for about 425 rwhp/425 rwtq – a huge limiting factor is the crappy 91 octane around my area. Red isn’t my favorite color so I will be painting it many years down the road or selling it all-together to buy a different candidate when I decide to go with an all-out performance build...unless the color grows on me. But for now, I want to get it on the road to enjoy for summer, and then spend time powder coating engine parts while it’s parked for winter.
Current mentionable mods:
Ash planar inlets for my dual MAFs
JWT Sport 500 turbos
Nismo 740’s in OEM rail
3” downpipes/testpipes
ASP underdrive crank pulley
Bernie waterpump pulley
Howe radiator
socketed ECU
short shifter
ACT clutch (might sell and buy an RPS street max or 5-puck)
chromoly pivot ball
1 piece ss clutch line
Powertrix coilovers
solid aluminum rear subframe bushings
urethane differential and steering rack bushings
Blitz SBC ID Spec R
Greddy turbo timer
crappy generic adjustable suspension components (came with car, will be replacing with Powertrix/SPL)

Must buy/do list:
overhaul r134a a/c system
MSP manifolds (maybe) + port-match heads
BDE OEM-replacement engine mounts
trans mount
SZ custom chip
Wideband with datalogging
upgraded oil cooler
SPL HICAS delete toe rods or HICAS block plate
HD clutch fork
Zspeedperformance solid shifter
BDE shifter bushings
3” resonated H or X pipe
3” exhaust..either B&B quad oval or Labree quad round
segmented flywheel (maybe)
1-piece driveshaft (maybe)
Powdercoat engine stuff when parked for winter
install BDE half-moon cam seals when valve covers are PC’ed
etc

Long-er term goals:
repair weather stripping
replace 3rd brake light vinyl cover or paint it black
replace rotted hatch spoiler
replace worn seats and rewrap steering wheel
black out the roof
J-spec tail lights
Evo 8/9 brake calipers/rotors
Ash 2.5” intercooler piping
Ash Massive SMICs
bigger throttle bodies with port-matched upper/lower plenums
REEIMS
E85 + supporting mods
after next timing belt job: upgrade cams, replace valve seals, install Ramey Z idler pulley studs
Last edited by bartZ32tt on Wed May 29, 2013 3:49 pm, edited 3 times in total.


User avatar
bartZ32tt
Posts: 850
Joined: Mon Mar 09, 2009 8:12 pm
Car: 1990 300zx twin turbo, 1996 7.3 powerstroke
Location: Des Moines, IA

Post

In the spirit of simplicity, the very first thing I did work-wise to my Z was remove the useless hatch weight:
Image
For those that don't know, this thing weighs like 5 lbs and serves absolutely no necessary purpose. I'm aware the rear passenger corner is the lightest spot on the Z, but I plan to do a proper battery relocation in this spot later on in the future (sealed inside, vented outside battery box with circuit breaker). Plus, now my weak hatch struts can hold the hatch freely :)

My first priority is to get the engine bay ready for the new engine. I will take a picture when complete, but this involves: replacing all a/c o-rings, install steering rack bushings, complete HICAS/hardline removal, install my high psi power steering hose with new copper crush washers, install ASHSpec 2.5" planar inlet piping.

I may do an in-depth write-up on an a/c overhaul later. The P.O. had the a/c converted to R134a by a shop that typically does good work, but apparently there is a leak in the system (unkown where). This is the part I am dreading most, but I have decided to replace every single o-ring, flush all components, and replace a few components (drier, expansion valve, etc).

Here's a quick tip for "clocking" the a/c lines. before you separate any of the hardlines, mark their orientation using a paint marker or similar (in white): Image

I just placed an order today (5/29) for new o-rings, r134a-compatible thread locker and o-ring lube, r134a-compatible ester oil, and expansion valve. I still need to buy new tar insulator tape for the expansion valve and a drier.
Last edited by bartZ32tt on Tue Jun 18, 2013 7:52 am, edited 4 times in total.

User avatar
bartZ32tt
Posts: 850
Joined: Mon Mar 09, 2009 8:12 pm
Car: 1990 300zx twin turbo, 1996 7.3 powerstroke
Location: Des Moines, IA

Post

Due to budget restrictions, I've decided to upgrade every bolt-on that is only accessible with the engine out, then later replace the remaining bolt-ons whenever budget allows. With that said, I installed my 2.5" AshSpec planar inlet pipes which route underneath the headlights. I don't know of anyone else who has done just the inlets and not the intercooler piping, but please note: grinding of the stock recirc mounting brackets are required! I don't think the inlet piping was designed with stock intercooler piping in mind, which I can understand.

Image

Image

I bought the inlet piping second-hand so you can see where the drivers side pipe got a tad bent. These things fit TIGHTLY in place - not a lot of wiggle room! Prior owner must've lost patience and forced it out. Oh well, shouldn't affect flow.

I will later assess whether the recircs will fit in stock orientation but cutting/clocking may be required.

I removed the high pressure power steering pump line in preparation for the new one. I can't imagine having to do that with engine in - it required some creative angling to finagle it out. Need to buy copper crush washers to install the new high psi line.
Last edited by bartZ32tt on Thu May 30, 2013 6:24 am, edited 2 times in total.

User avatar
bartZ32tt
Posts: 850
Joined: Mon Mar 09, 2009 8:12 pm
Car: 1990 300zx twin turbo, 1996 7.3 powerstroke
Location: Des Moines, IA

Post

reserved

User avatar
300ZXttZMAN
Posts: 7807
Joined: Mon Nov 22, 2010 4:07 pm
Car: 1990 300zx Twin Turbo 5 spd pearl white.

My Daily: 2008 Frontier NISMO package, 4x4 Crew Cab.
Location: Sulphur, LA 70665
Contact:

Post

Awesome! Glad to see you started a build thread!

User avatar
bartZ32tt
Posts: 850
Joined: Mon Mar 09, 2009 8:12 pm
Car: 1990 300zx twin turbo, 1996 7.3 powerstroke
Location: Des Moines, IA

Post

300ZXttZMAN wrote:Awesome! Glad to see you started a build thread!
Thanks, I'm excited! Things will come together much quicker once I get the a/c sorted out. Trying to find the easiest way into the evap box..some have said it can be done without pulling the dash but I tried it on my rolling chassis Z with completely stripped interior and it was STILL a b*tch to do!

User avatar
BigTDogg (MA)
Posts: 4322
Joined: Wed Aug 29, 2007 8:26 am
Car: 1990 300ZX Twin Turbo
Location: Boston MA

Post

Subscribed!

Looking forward to checking in on this every now and then!

User avatar
DCaff300ZX
Posts: 4229
Joined: Sun Jun 14, 2009 8:18 am
Car: .
1993 CRP TT- Modified
Location: Tacoma, Washington

Post

Nice, love to see a guy getting down and dirty with the guts of his Z.
Oh, and I'd see how your old interior looks with your new car, it may not be too bad as I think white interior works well with red paint...try it and post some pics!
I have been thinking about the planar intake as well, glad you posted all of that so I can take that into account...maybe the full kit is the best way to go.

User avatar
bartZ32tt
Posts: 850
Joined: Mon Mar 09, 2009 8:12 pm
Car: 1990 300zx twin turbo, 1996 7.3 powerstroke
Location: Des Moines, IA

Post

BigTDogg (MA) wrote:Subscribed!

Looking forward to checking in on this every now and then!
Thanks for stopping in Tony. We should have a lot of the same mods minus meth injection. What psi did you set your waste gates to?

DCaff300ZX wrote:Nice, love to see a guy getting down and dirty with the guts of his Z.
Oh, and I'd see how your old interior looks with your new car, it may not be too bad as I think white interior works well with red paint...try it and post some pics!
I have been thinking about the planar intake as well, glad you posted all of that so I can take that into account...maybe the full kit is the best way to go.
Yea, full kit is the best option but honestly the grinding wasn't too bad - my angle grinder made pretty quick work of it. It's just a minor annoyance. Looking at the stock piping I honestly don't foresee any huge gains from using the planar inlet over stock. I think the real significance comes from the super restrictive intercooler piping but that can be done with engine in at a later time. However, it's still worth doing IMO if you have the engine out and plan to go full breather mods in the future.

I'm leaning towards swapping the white suede interior in but that'll be a winter project. I think you're right - red/white/black should look good.

Well guys, I upgraded phones and this one's camera crashes within seconds of opening it so I currently can't take pics :mad:

But I routed the ss clutch line behind the heat shields, removed my glovebox in preparation for the dreaded expansion valve o-ring swapout, and deleted more HICAS hardlines. Also, superglued some split silicone vacuum line on the edge of the heatshield where the clutch line contacts it to prevent a possible rubbing failure. Still waiting on my a/c parts to get here before things get really interesting. Stay tuned!

User avatar
300ZXttZMAN
Posts: 7807
Joined: Mon Nov 22, 2010 4:07 pm
Car: 1990 300zx Twin Turbo 5 spd pearl white.

My Daily: 2008 Frontier NISMO package, 4x4 Crew Cab.
Location: Sulphur, LA 70665
Contact:

Post

Hey also, bump the build compilation thread. With your info so we can get it added in.

z32-build-compilation-t548931.html

User avatar
bartZ32tt
Posts: 850
Joined: Mon Mar 09, 2009 8:12 pm
Car: 1990 300zx twin turbo, 1996 7.3 powerstroke
Location: Des Moines, IA

Post

Time for a quick update.

I've added ES polyurethane steering rack bushings (old ones were super busted) and removed the old high psi p/s line. My $85 worth of miscellaneous bolts/gaskets and hardware from the Nissan dealership arrived (rape), so I'll be installing the new high p/s line soon. Here's a quick snapshot of my engine bay from a couple days ago. stuff has already changed a bit but you get the idea.
Image

Installed my front Powertrix coilovers. I had the rears installed on my old Z but it only sat outside for 1.5 yrs; didn't drive the Z with them on. Both boots are already torn - kind of upset about how cheaply made those boots are but oh well. Here's a pic: Image

Here's the old Eibach/KYB setup from previous owner:
Image
The crappy generic rusty front tension rods have got to go. Will be addressing them later. Also, I've got brand new drilled/slotted rotors that will be replacing the existing rusty blank rotors. I've heard that drilled/slotted rotors are tough on brake pads but they were free with the car. I will at least try them out for a little while and change them if a problem develops.

New:
Image

Notice the caliper relocation bracket for 350Z rotors. Unfortunately only the driver's side one was provided (that I have found so far) so at this point it'll just be a paperweight :( hope I can find one for the other side somewhere on the car.

I started on the rears but the lower spring perch on the strut gets hung up on the RUCA - man I wish I had SPL RUCA's right about now. So I'll be addressing that after work today.

Does anyone know what brand of short shifter this is?
Image
I'll need to know when I order my solid shifter kit from Zspeedperformance.

Also forgot to mention - the P.O. provided a nearly-new new-style EFI harness already installed that you can see in pics. Jackpot! I might be selling the one that I had purchased years ago that is still in box. I could use another $400 for more parts :naughty:

User avatar
bartZ32tt
Posts: 850
Joined: Mon Mar 09, 2009 8:12 pm
Car: 1990 300zx twin turbo, 1996 7.3 powerstroke
Location: Des Moines, IA

Post

Oh yea, I forgot one major thing. I BOUGHT MSP MANIFOLDS!!!

They're expected to arrive early next week. You'd better believe there will be pics :)

User avatar
bartZ32tt
Posts: 850
Joined: Mon Mar 09, 2009 8:12 pm
Car: 1990 300zx twin turbo, 1996 7.3 powerstroke
Location: Des Moines, IA

Post

One more mini-update before bed. I got done switching out the rear coilovers. Had to unbolt 1 RUCA nut on each side in order to slip the strut through but very easy job once that was done. The coilovers are a much more compact design which makes installation more simple. Discovered the PO cut each rear brake line but luckily my rolling chassis is still here, so I can use the one from that. At least he installed what looks to be a new set of ebrake shoes.

User avatar
bartZ32tt
Posts: 850
Joined: Mon Mar 09, 2009 8:12 pm
Car: 1990 300zx twin turbo, 1996 7.3 powerstroke
Location: Des Moines, IA

Post

Welp, got a lot done today. I need to train myself to take more pics as I go - not used to that :)

I bought my MSP manis used from a reputable guy on the forums. He had never even mounted them; only stored them on a shelf for a couple years. Unfortunately, cast iron has a tendency to form surface rust, so it's ugly but still 100% functional. So I won't post a ton of manifold pics for you guys but ill share this interesting size comparison vs stock - it really is very substantial:
Image

I used a wire wheel on every gasket mounting surface which easily did the trick. I don't care about how these look - nobody will ever see them anyways. Otherwise I might've tried de-rusting the whole shebang.

Anyways, the manis are mounted. Next, I began prep on my turbos. Still lots to do but I took one stud out of each turbo so that my Random Technology 3" bellmouth downpipes will fit. They use 1 extra-long screw instead of the threaded stud/nut.
Image
Just soak with pb blaster and tighten 2 nuts together to screw out the stud.

I'll take more pics once the sport 500's are mounted. I mocked up the downpipes and found out I ordered the wrong sized screws from RT so now ill have to place another order :(

Image

Stupid question(s) time:
EDIT - Received answers from TT.net:
1. Why is there 1 hole drilled in both of my waste gates?
It's normal
2. Will the slight bend on the crimp in the wastegate shown in the above pic cause a leak? Should I fix it?
I will verify it doesn't leak by adding slight air pressure with my air compressor to the wastegate.
3. Do the waste gates need to be synced? I assume they're factory oem.
They're non-adjustable.

User avatar
bartZ32tt
Posts: 850
Joined: Mon Mar 09, 2009 8:12 pm
Car: 1990 300zx twin turbo, 1996 7.3 powerstroke
Location: Des Moines, IA

Post

No mo' HICAS
Image

All that's left to do with it is HICAS delete bar or toe rods. Although the SPL toe rods are sweet looking, I'll probably just get the delete bar since its like $300 less.

I also swapped out the cut rear brake lines on the new Z with the good brake lines from the old Z. And I found the other 13" front caliper relocation bracket!

Anyone know how to remove the rear axle? FSM doesn't really help. Already unbolted from the differential and removed cotter pin and axle nut. Any help is appreciated.

User avatar
DCaff300ZX
Posts: 4229
Joined: Sun Jun 14, 2009 8:18 am
Car: .
1993 CRP TT- Modified
Location: Tacoma, Washington

Post

Looking good man, you've been busy! :mike

User avatar
bartZ32tt
Posts: 850
Joined: Mon Mar 09, 2009 8:12 pm
Car: 1990 300zx twin turbo, 1996 7.3 powerstroke
Location: Des Moines, IA

Post

Well lookie what I found: Image

I am missing a knock sensor...joy :facepalm:

Can someone tell me the bolt spec I need to put it in stock location?

While I'm at it, if anyone can help me source a replacement injector bolt spacer, that'd be awesome. here's a pic of what I mean:
Image
Image

Not much new to report. I will be ordering some parts and tackling the a/c this weekend. Also need to do some soldering due to some crappy wiring work I found for the a-pillar gauges I removed. Nothing too crazy, just sloppy/unnecessary crimping.

User avatar
bartZ32tt
Posts: 850
Joined: Mon Mar 09, 2009 8:12 pm
Car: 1990 300zx twin turbo, 1996 7.3 powerstroke
Location: Des Moines, IA

Post

Image

Passenger side sport 500 with MSP manifold ala mode :)

Man, clearance is so tight on these engines. I had to hammer in the manifold heat shield slightly in preparation for the AshSpec inlet but motor mount grinding not required on that side. Before I can install the inlet, I'll need to install the motor mounts first and buy new inlet/compressor outlet gaskets. That's also what's holding me up on the driver's side before I can install the turbo. Grinding of drivers side engine mount is required for the AshSpec inlets. Also the dealer jipped me a copper crush washer so now I've got to wait for that as well.

Stuff on order: steering rack long bolt, det sensor bolt, turbo crush washers, turbo inlet/compressor outlet gaskets, fan clutch nut, and random technology long bolts for 3" bell mouth downpipes.

Placing order soon for: BDE billet motor mounts, det sensor and sub harness, SZ custom EPROM, upper plenum gasket, throttle body gaskets, ATE Super Blue brake fluid.

User avatar
bartZ32tt
Posts: 850
Joined: Mon Mar 09, 2009 8:12 pm
Car: 1990 300zx twin turbo, 1996 7.3 powerstroke
Location: Des Moines, IA

Post

Oh, lookie what I found:
Image

User avatar
Ace2cool
Posts: 12672
Joined: Sun Apr 20, 2008 5:21 pm
Car: 1991 Nissan 300ZX TT
1966 Datsun Fairlady 1600
2005 Suzuki GSX-R 600
1974 Honda CB550 Four
2009 Ford F150 Lariat
Location: Murfreesboro, TN

Post

Dat dual MAF translator.... :drool:

User avatar
bartZ32tt
Posts: 850
Joined: Mon Mar 09, 2009 8:12 pm
Car: 1990 300zx twin turbo, 1996 7.3 powerstroke
Location: Des Moines, IA

Post

Ace2cool wrote:Dat dual MAF translator.... :drool:
:naughty:

User avatar
300ZXttZMAN
Posts: 7807
Joined: Mon Nov 22, 2010 4:07 pm
Car: 1990 300zx Twin Turbo 5 spd pearl white.

My Daily: 2008 Frontier NISMO package, 4x4 Crew Cab.
Location: Sulphur, LA 70665
Contact:

Post

So glad to see your build taking off! MSP manifolds are beautiful!

User avatar
bartZ32tt
Posts: 850
Joined: Mon Mar 09, 2009 8:12 pm
Car: 1990 300zx twin turbo, 1996 7.3 powerstroke
Location: Des Moines, IA

Post

Got the drivers turbo mounted.
Image

The passengers turbo upper compressor outlet pipe on passengers side needed to be installed BEFORE turbo installed, so I had to loosen that turbo, put the pipe on, then tighten back up. Was a pain but all good now.

Here's a tip for flattening the turbo nut retainer tab in the back close to the block. Using a slide-hammer with a nail-puller attachment on the back side made pretty easy work of an otherwise cumbersome task. The other 3 tabs are easy to access with just a flathead screwdriver which you can tap with a mallet. Image

Both engine mounts also installed. Now need to buy some wastegate hoses and hose clamps - any recommendations?

Also got ethanol-compatible fuel line. I'll be running 91 octane until I can attend a Specialty Z live tuning session - at which time I'll be making the switch to E85.

I'm in the process of deleting the fuel tank evap line that runs clear to the engine bay. Just not necessary and it's rather space inhibiting.

I've got a couple more exciting things in the works so stay tuned!

User avatar
bartZ32tt
Posts: 850
Joined: Mon Mar 09, 2009 8:12 pm
Car: 1990 300zx twin turbo, 1996 7.3 powerstroke
Location: Des Moines, IA

Post

I was previously mistaken - driver's side manifold heat shield DOES require massaging to fit the 2.5" inlet pipe. Quite a bit actually.
Image

Was kind of a pain, had to remove the engine mount to do it. but now the a/c compressor bracket, engine mount, turbo, and inlet pipe on that side are installed.
Image

I also replaced the "bastard hose" with ethanol-compatible fuel line and spring clamps - HIGHLY recommend using spring clamps in all locations, ESPECIALLY the "bastard hose" (bridge between both fuel rails). If I can figure out how to route the fuel lines to my liking, I'll be getting an aeromotive or fuelab FPR. Otherwise, I'll just use the stock FPR and dampener.

I'm 90% decided on an engine bay color scheme so now I'm starting to think I should take the water pipes and timing covers off to sand/paint everything. That'd set me back a little bit but I think the end result would be worth it. Ugh, decisions.

User avatar
bartZ32tt
Posts: 850
Joined: Mon Mar 09, 2009 8:12 pm
Car: 1990 300zx twin turbo, 1996 7.3 powerstroke
Location: Des Moines, IA

Post

Got brakes mounted. I really like this pic: Image

Unfortunately, the fronts are using my old drilled rotors. I'll use these until I can upgrade to a bigger front brake. Now I need to get the girlfriend over to pump the pedal so I can bleed the ATE Super Blue fluid :)

User avatar
300ZXttZMAN
Posts: 7807
Joined: Mon Nov 22, 2010 4:07 pm
Car: 1990 300zx Twin Turbo 5 spd pearl white.

My Daily: 2008 Frontier NISMO package, 4x4 Crew Cab.
Location: Sulphur, LA 70665
Contact:

Post

Looking good! Call SZ for the silicone hose. I bought like 36 feet or so a while back haha.

Did yall finish bleeding the brakes?

User avatar
bartZ32tt
Posts: 850
Joined: Mon Mar 09, 2009 8:12 pm
Car: 1990 300zx twin turbo, 1996 7.3 powerstroke
Location: Des Moines, IA

Post

I ended up just buying some 1/4" fuel line for the wastegates and gonna use spring clamps to hold em. Might buy some heat reflecting tape for the inlets and wastegate hoses. but there's literally about 1/8" gap between the inlets and the heat shield!

Haven't bled them yet - I got done bolting them on at around 10:30 last night lol. But she's already agreed to help :gapteeth:

User avatar
bartZ32tt
Posts: 850
Joined: Mon Mar 09, 2009 8:12 pm
Car: 1990 300zx twin turbo, 1996 7.3 powerstroke
Location: Des Moines, IA

Post

I solved my fuel line routing dilemma. As far as I know, nobody else has used this method but I think it's a very good solution. Since I plan to run an aftermarket ethanol-compatible FPR (with a built-in damper), I needed a way to reroute the lines without breaking the bank (300 degree rails with braided lines).

First thing I needed to do was bend the passenger fuel line the opposite direction:
Image

That allows me to use a portion of the stock fuel rail:
Image

Now I can shave down the drivers side fuel and vacuum hardlines:
Image

Which means I no longer need the bottom vacuum nipple:
Image
Image

I may weld it later on.

Now I've got a lot of things to shave on the plenum. I'll be smoothing it down for powder coat too:
Image

I'll be cleaning up the fuel rail hardline further. My FPR is located next to the clutch master as seen in earlier pics.

User avatar
bartZ32tt
Posts: 850
Joined: Mon Mar 09, 2009 8:12 pm
Car: 1990 300zx twin turbo, 1996 7.3 powerstroke
Location: Des Moines, IA

Post

No turning back now. Disassembled my plenum and did some grinding/deletes:
Image

No more fuel damper mounting bolt holes:
Image

Or FPR mount holes:
Image

Some crude smoothing on the side:
Image

Also grinded down some aluminum above injector screws for easy access later on. Next ill be getting a pneumatic orbital sander to hit up the whole top/sides of the plenum. Then it's off to acid dip and powdercoat! There will be other parts sent to powdercoat as well.

Dremel with carbide bit doesn't do sh*t. Had to break out the 4 1/2" angle grinder. Made so much aluminum dust that got all over my skin and clothes. Awesome if you want to be like a Twilight vampire sparkling in the sunlight. Not awesome otherwise.

In other news - I bought a Jecs knock sensor (exact same as oem) on eBay for $40 shipped. Hell of a lot cheaper than anywhere else I've seen.

User avatar
bartZ32tt
Posts: 850
Joined: Mon Mar 09, 2009 8:12 pm
Car: 1990 300zx twin turbo, 1996 7.3 powerstroke
Location: Des Moines, IA

Post

Got my detonation sensor installed. No real problems, my gear wrench is worth its weight in gold right now. Here's a pic of the invoice, highly recommend the seller "Bridgewood Motorsports Store"

Image

Both coolant pipes and upper timing covers are off. Next up is more shaving, prep, then paint/powdercoat.


Return to “300ZX (Z32) General”