
Anyone change their own oil yet???

Anyone change their own oil yet???
out of curiosity has anyone changed their own oil yet i am going to in a day or two and was curious if regular or synthetic is the trend and i hear their is a washer that is needed for drain plug.
-
dividedhighw

- Posts: 1021
- Joined: Tue Apr 22, 2008 10:55 am
- Car: 2008 EX35 AWD (Technology Pkg)
- Location: Ottawa, ON, CA
- Contact:
Re: Anyone change their own oil yet??? (Punjab)
Mine has just hit the point where it needs an oil change. Since I'm going to the dealer for a number of other things (tomorrow, in fact), I was going to get them to do it.
Yes, I'm leaning towards synthetic, but would be pleased to hear other opinions.
Cheers,David
Yes, I'm leaning towards synthetic, but would be pleased to hear other opinions.
Cheers,David
-
Happy2Drive
- Posts: 18
- Joined: Tue Jul 29, 2008 5:40 am
- Car: '08 Infiniti EX Journey AWD Dark Currant w/Chestnut Interior, Lux Elite, Premium, Nav & Tech Pkgs
Re: Anyone change their own oil yet??? (Punjab)
Just went to Infiniti of Bedford (Cleveland, OH area) this morning for my first oil change. Inquiring about synthetic oil, the service manager stated it'd be close to $100 for it, which I think would be crazy, even if it doesn't need changing as often. He emphasized that he sticks to Infiniti's recommendations of using Mobil's 5W30 conventional motor oil. (I wouldn't expect to hear otherwise from him.) With coupon, the oil change/check-up came to around $40.
FYI, referring to other threads in the forum, he stated he hasn't had to replace a fuel pump on any EX35--and there's no TSB out on it either-- and has only had to repair one steering column motor.
FYI, referring to other threads in the forum, he stated he hasn't had to replace a fuel pump on any EX35--and there's no TSB out on it either-- and has only had to repair one steering column motor.
Re: Anyone change their own oil yet??? (Happy2Drive)
happy2drive
I am going to call bedford to address my fuel pump hum, i haven't as of yet. I have the tech bulletins from infinitihelf.com... If you dont mind me asking where did you snag the coupon for the oil change.
I am going to call bedford to address my fuel pump hum, i haven't as of yet. I have the tech bulletins from infinitihelf.com... If you dont mind me asking where did you snag the coupon for the oil change.

Re: Anyone change their own oil yet??? (Punjab)
I think the best way to do it is use a conventional oil on the first oil change.
You really want to make sure everything is seated (eg. piston rings etc.)
3.7 K miles is still pretty low to use a synthetic oil. Synthetic is very slippery.
(I just hope you didn`t baby your car during the breakin period as most
people do). You have to break the car in hard (but not redlining it) or revving
it while the engine is cold) . My only advise is use a synthetic at around 5k-7k
miles or the 2nd Oil change. I`LL stick with ROYAL PURPLE Synthetic!
Regarding the TSB for fuel pump. You have to print that TSB from
infinitihelp.com? and give it to the service advisor and they`ll take care of
you. Pls. don`t call them bec. didn`t no SHI...! about it...
-
Happy2Drive
- Posts: 18
- Joined: Tue Jul 29, 2008 5:40 am
- Car: '08 Infiniti EX Journey AWD Dark Currant w/Chestnut Interior, Lux Elite, Premium, Nav & Tech Pkgs
Re: Anyone change their own oil yet??? (Punjab)
Punjab
$5 coupon came through mail with Infiniti of Bedford printed as the sender.
$5 coupon came through mail with Infiniti of Bedford printed as the sender.
Re: Anyone change their own oil yet??? (Punjab)
I just changed the oil on the EX35. Pretty easy except that the underbody cover has a million bolts to remove and that the oil filter was on really really tight, and doesn't come off using an Autozone oil filter cap wrench. I had to use one of those loop things to get it off.
One curious thing to me. There wasn't a washer on the drain plug as far as I can tell. I didn't have one handy, so I just put it back on after draining without it. Hopefully that won't cause a big problem?
This was the first oil change on the car after the factory fill. Did it at 3300 miles because most of the trips are around 2 miles in the car, so I think I should change more often. I used regular oil... maybe synthetic after 10K miles or so.
Anybody else change theirs for the first time and saw no washer as well?
Re: Anyone change their own oil yet??? (sirkfc)
Have changed it a few times now and i do have a copper crush washer, I change it every time and use synthetic..
Going to do filters in and out soon
Going to do filters in and out soon
Re: Anyone change their own oil yet??? (Punjab)
how do you jack the car up? I had to use ramps to get the car up high so i can crawl under.
Re: Anyone change their own oil yet??? (ramprun)
I used ramps as well. If you are not afraid of relatively confined spaces (and you shouldn't be, given you drive an EX...), then ramps give you more than enough room.
Now I'm paranoid about not installing a washer with my drain plug... should I redo my oil change or just take care of it next time?
Now I'm paranoid about not installing a washer with my drain plug... should I redo my oil change or just take care of it next time?
Re: Anyone change their own oil yet??? (sirkfc)
if you are worried about oil leaking out, you could check it every day before starting your car.
Re: Anyone change their own oil yet??? (ramprun)
I wouldn't mind checking, except that we have a huge under-carriage tray that is a pain to remove and would hide all leaks... I guess I'll just check my engine oil via dipstick.
Re: Anyone change their own oil yet??? (sirkfc)
How many quarts did the car take for the oil change?
-
Thorshammer

- Posts: 105
- Joined: Fri Jul 10, 2009 2:35 pm
- Car: FX35
Re: Anyone change their own oil yet??? (Punjab)
Yes I have changed my oil a few times.There is a cover with about 16 to 20 bolts attached to the lower engine bay. Once you remove this the rest is basic.I use the recommended oil by Infiniti.I drive my FX pretty hard so I change my oil frequently.I don't have a washer on my oil pan plug.No problems with leaks.Removing and replacing the lover engine bay cover is a drag but its beneficial to the engine bay by reducing the contamination from road debris.
-
Mark Booth

- Posts: 161
- Joined: Fri Oct 05, 2007 5:51 pm
Re: Anyone change their own oil yet??? (Punjab)
I change the oil in my EX35 and find it quite an easy process. Here are a few "tips" that might help others with the oil change...
First off... The oil sump on the EX35 runs perpendicular to the motor. Meaning, the sump runs east/west while the motor and transmission run north/south. Also, the sump is located near the very front of the engine (completely hidden under the bottom pan). Because of the location of the sump, the EX35 must be level when you drain the oil (or be slightly pointed downhill -- nose slightly lower than the tail). This means you can't drive the EX35's front wheels up onto ramps on level ground to drain the oil. The rear of the engine could end up being lower than sump and, thus, you might not drain all of the old oil.
Frankly, the EX35 sits off the ground enough that it is possible to squeeze under the car enough to change the oil without jacking it up. But I prefer more room to maneuver so here's my procedure:
1) I back the EX35 into my garage. I then pull forward just to the point that I can open the driver's front door without hitting the side of the garage opening. This positions the front wheels in the driveway and the rear wheels in the garage. I then place my ramps (Rhino Ramps) in front of the front wheels and then drive the EX35 up onto the ramps. The result is my EX35 is positioned so the rear wheels are just at the spot where the slopped driveway meets the level garage floor and the front wheels are on the ramps. Since my driveway slopes downhill away from my garage, the top of the ramps are just a tad bit lower than the level spot where the rear wheels are positioned. The EX35 is then almost level, with a very slight tilt downhill at the nose. PERFECT for changing the oil. And, thanks to the ramps AND the downhill slope of the driveway, I have PLENTY of room to get under the front of the car. In fact, there's almost too much room because the used oil has a bit of distance to free-fall.
2) I open the hood and remove the oil filler cap.
3) Move to under the car and use a 10mm socket on my battery-powered electric drill/driver motor to remove the bolts around the circumference of the bottom splash pan. (NOTE: The four bolts along the BACK of the splash pan are slightly different than the rest of the bolts around the circumference... be careful to put those four back in the right spot when reinstalling the pan.) At this point, the splash pan is still held in place by three push-pin type of fasteners across the center of the pan. Using a slot screwdriver, gently pry out the center pin of the left and right push-pin fasteners and pull the fasteners from their holes. Now you'll have a splash pan that is perfectly balanced in place by a single push-pin fastener. Gently remove the middle push-pin fastener and remove the splash pan from under the car.
NOTE: With a battery drill/screwdriver, removal of the splash pan takes less than 2 minutes! It's a piece of cake!! And Infiniti's use of the push-pin fasteners across the middle makes it VERY easy to remove and reinstall the pan! Excellent!
4) The rest is standard procedure... Place a oil drain pan under the sump (the east/west black pan with the bolt in the end of it that faces the front passenger-side wheel), remove the drain plug bolt, and drain the oil. You'll see the oil filter is VERY easy to access. On the RWD models, it's directly above the oil drain plug. A mere few inches above! Very convenient! You don't even have to move the oil drain pan to catch the oil draining from the oil filter. (Be careful, the oil has a tendency to spray out of the filter bottom fairly quickly as you loosen the filter.) If you have an AWD model, the oil filter isn't the same side as the drain plug. Rather, it is on the front of the engine pointing toward the radiator. But it is still located nice and close to the bottom of the engine near the sump. Once all the oil is drained, clean up the area around the filter with a shop rag, including carefully wiping the surface where the oil filter mounts. Lubricate the O-ring on the new filter with some fresh oil (yes, this step is VERY important as it prevents the O-ring from binding and possibly breaking when installing the filter) and screw the new filter in place. Tighten it HAND TIGHT. Meaning, as tight as you can get it with your bare hand as long as it is at least 3/4 of a turn from the spot the filter O-ring first contacts the base but not more than 1 full turn. Reinstall the drain plug bolt, being sure the copper drain plug washer is in good shape (I replace my drain plug washer with every 2nd or 3rd oil change). Tighten to the torque specification indicated in the owner's manual (I forget what that spec is so be sure to look it up!). Then, move topside to put in the new oil. The oil capacity of my 2008 EX35 Journey is 5-1/8 US quarts. So, I start off by putting in about 4.75 quarts, reinstall the oil filler cap, and start the engine and let it idle for 2-3 minutes. While it is idling, I check for leaks around the oil filter and drain plug (be careful under the car when the motor is running!!!!!!!). Then I shut off the motor and move back under the car to reinstall the splash pan....
5) Position the splash pan in place under the car and reinstall the very center push-pin fastener! VOILA! A perfectly balanced pan that you don't have to hold up while you are trying to install the bolts and other push-pin fasteners! VERY clever design by Infiniti!! I set my battery drill/driver to the screw drive position and set the torque clutch so just driving right up until the driver clutch skips is a couple of foot pounds to hold them in place. I've never had one fall out and, again, you can reinstall the pan in mere minutes.
6) After checking that everything is out from under the car, I carefully back the EX35 off of the ramps into the garage so all four wheels are on a level surface. After the EX35 has sat with the motor off for about 5-10 minutes, I pull the oil dipstick, wipe clean, reinsert and check the oil level. With every change so far, I've had to add the last of that 5th quart of oil (making 5 quarts total). This brings the level on the dipstick up to just a little bit below the hole in the dipstick below the full mark. I could put in another eighth of a quart but I never bother to. The car doesn't burn enough oil between 3,000 mile changes to even register the difference on the dipstick.
The long description above might make it seem like the oil change on the EX35 is difficult. It isn't! In fact, I've owned MANY cars that were far far more difficult. Don't let that splash pan removal slow you down! It is incredibly easy and quick to remove the splash pan with a battery-operated drill/driver! And, best of all, once the splash pan is removed, the drain plug and filter are "right there", conveniently located for easy removal!
Lastly, I use regular dino oil in all of my cars! I experimented with synthetic oil (Mobile 1) in a couple of my cars and they both started having minor oil seeps around the gaskets once I'd been running synthetic for awhile. Switching back to dinosaur oil eliminated the seeps. And, if you change every 3,000 miles, the dino oil offers PLENTY of protection.
Mark
P.S. My thanks to my friend Tom for the recommendation on placing the ramps in the driveway so the car will remain level.
Modified by Mark Booth at 10:37 AM 8/7/2009
Re: Anyone change their own oil yet??? (Mark Booth)
that is a very well description of how to change oil for our ex35. I would like to commend on the whole leveling thing. I just drive up the ramp and drain the old oil, change the filter and put 5 quarts of oil back in. I noticed that my oil level is the same place on the dipstick as you mention. maybe it isn't too critical to have it level. If you want to get rid most of the old oil, some of my friend use compress gas to force the oil out through the oil filler end.
Re: Anyone change their own oil yet???
To follow up on the DIY oil changes. Can anyone else verify that EX being completely level for oil change is not needed? I'd like to do the next oil change myself, but if driving up on ramps is not recommended due to the placing of the valve, I'll have to keep going to the dealer.
On a second question, am I correct that once empty, EX needs 5.125 quarts of new oil?
On a second question, am I correct that once empty, EX needs 5.125 quarts of new oil?
-
EX-KAT-35

- Posts: 151
- Joined: Sat Jan 29, 2011 2:05 am
- Car: EX35, V70R, Civic
- Location: California, USA
Re: Anyone change their own oil yet???
I think the whole ramps-or-no-ramps thing is rather obsessive.
My boyfriend has changed the oil on my EX a total of 4 times. Each time using the ramps on a slightly sloping driveway. When we fill the old oil into the empty oil containers its always right at 5 qt or slightly above to where one container is overfull.
So what is left in the motor like 1 or 2 cups; 1/2 a cup?
Big deal, the motor has a whole 5qts new oil along with a new oil filter to deal with that.
The money we save goes into quality synthetic oil and the comfort of knowing it was done right.
The left over money (unlike the oil) goes in my purse for shopping.
-
EXceptional

- Posts: 1385
- Joined: Sun Apr 06, 2008 7:54 pm
- Car: 2008 Aspen Pearl EX35 Freakin Loaded!
Re: Anyone change their own oil yet???
I call bull-s*** on this.Mark Booth wrote:The oil sump on the EX35 runs perpendicular to the motor. Meaning, the sump runs east/west while the motor and transmission run north/south. Also, the sump is located near the very front of the engine (completely hidden under the bottom pan). Because of the location of the sump, the EX35 must be level when you drain the oil (or be slightly pointed downhill -- nose slightly lower than the tail). This means you can't drive the EX35's front wheels up onto ramps on level ground to drain the oil. The rear of the engine could end up being lower than sump and, thus, you might not drain all of the old oil.
I ran my EX35 up some Ramps nose first so the front Bumper was the highest point off the floor... and after removing the Engine-tray, I noticed the Drain-plug is at the rear of the lowest part of the Sump.
Once I pulled the plug, after eight hours of dripping, I drained out more than 5 Litres of dirty Oil. How do I know it was 5 Litres?
I poured the dirty Oil back into the Jug and the level reached the point of where the new Oil once was when I bought it. The Jug was labelled 5 Liters or 5.28 Quarts.
This along with what was left in the Oil Filter and what little might have burnt up in the engine over 7500 Kilometers (yes, I was overdue) (we recently drove to Las Vegas and back) I think I dumped out the entire quantity and probably left no Oil behind.
Check out this thread for additional info >>> any-ex35-owners-who-diy-t544544.html
This is what I used for Oil... it cost me $29.99 a Jug.
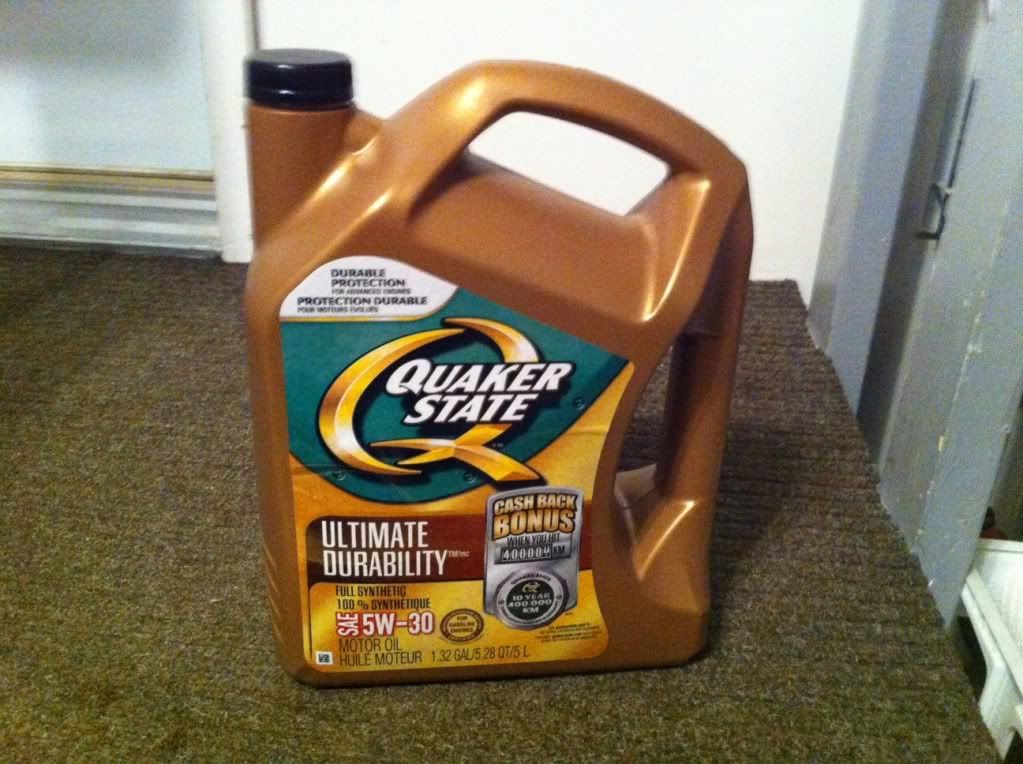
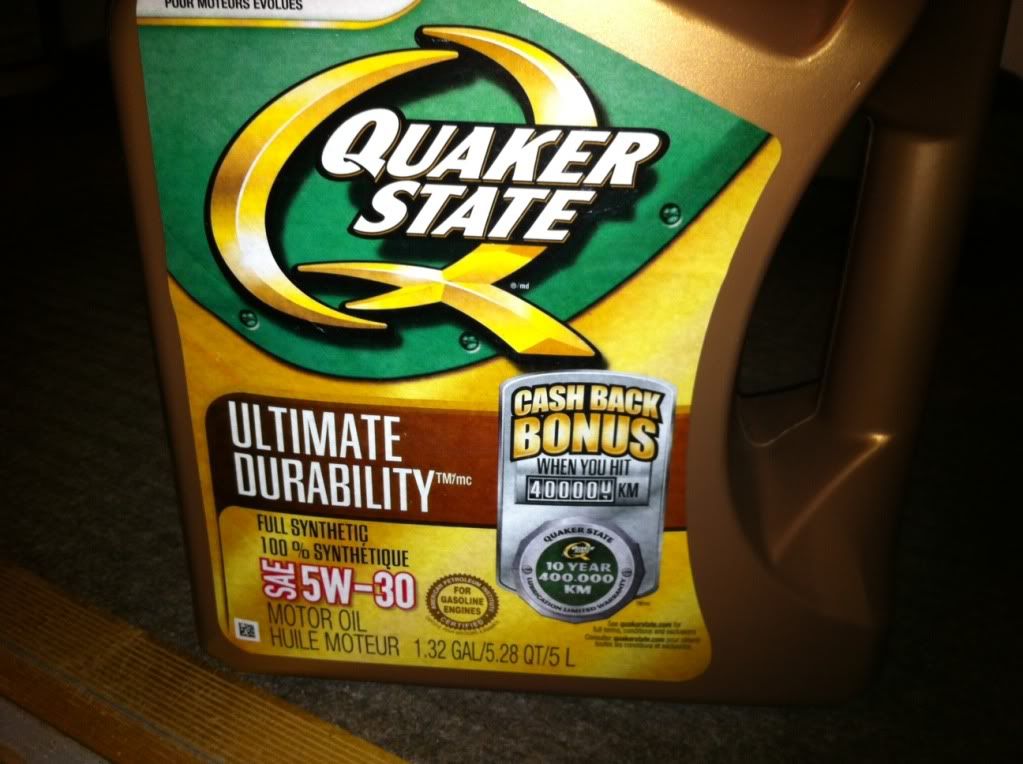
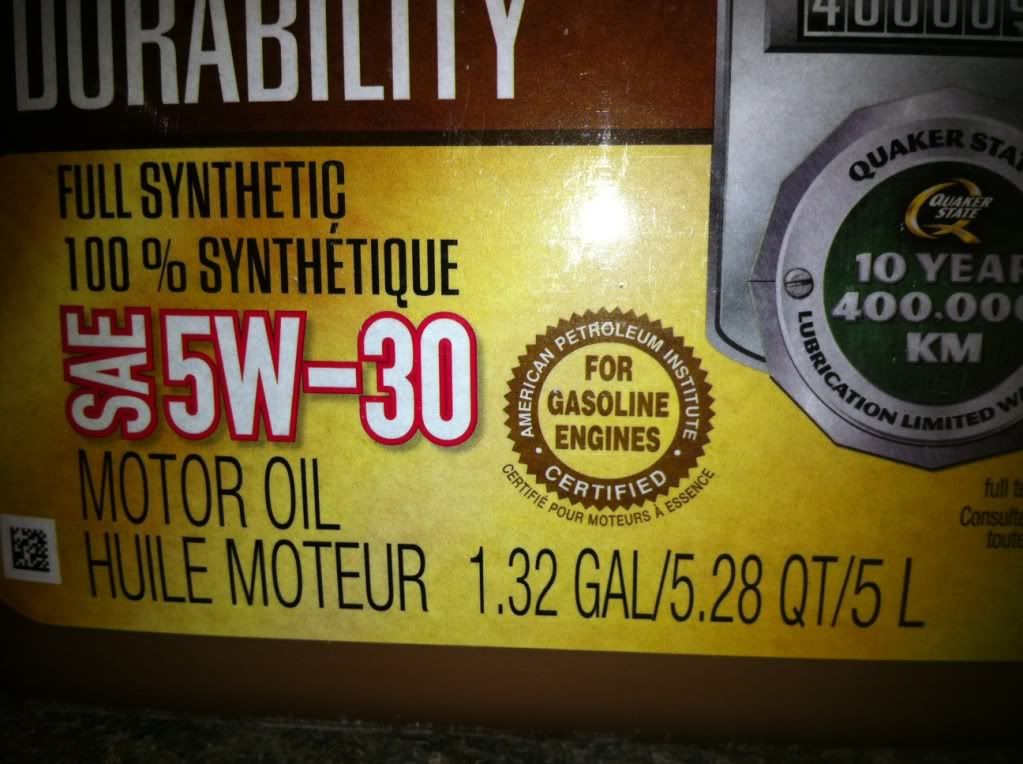
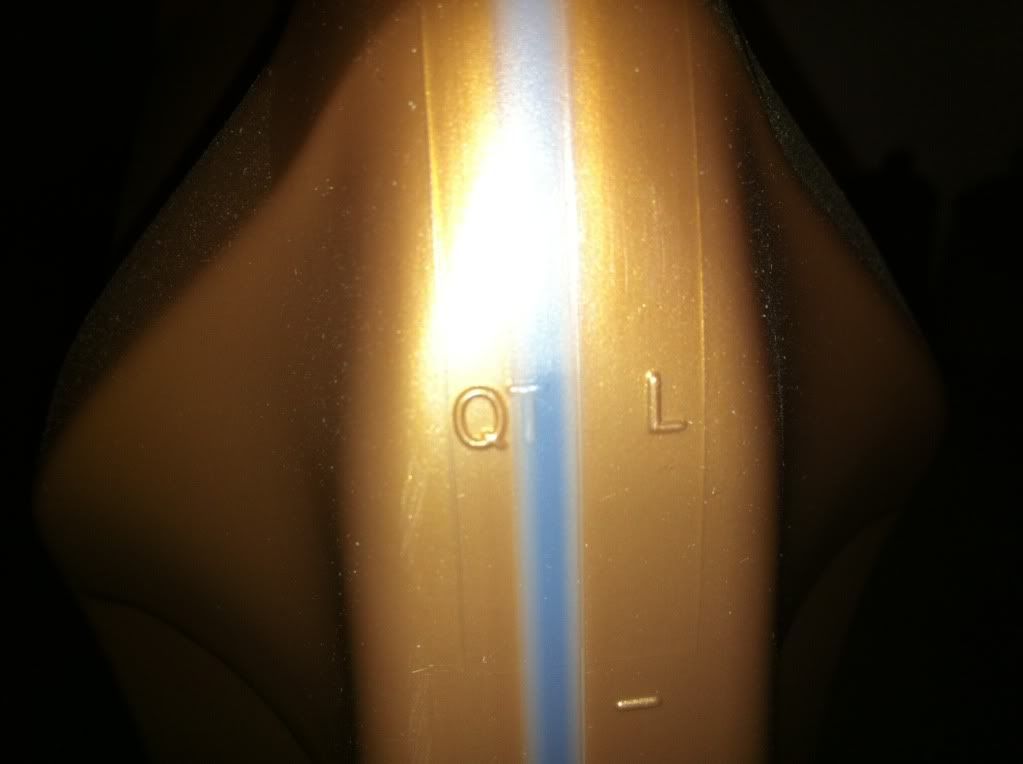
Top mark of the Jug, almost what I poured in...
Re: Anyone change their own oil yet???
That is good to know. I am going to get a good set of ramps and an oil change kit this weekend.EXceptional wrote:
I call bull-s*** on this.
I ran my EX35 up some Ramps nose first so the front Bumper was the highest point off the floor... and after removing the Engine-tray, I noticed the Drain-plug is at the rear of the lowest part of the Sump.
...
-
raijin978

- Posts: 28
- Joined: Fri Dec 07, 2012 7:46 pm
- Car: 08 Liquid Platinium Silver EX35
- Location: Massachusetts
Re: Anyone change their own oil yet???
Did it today 1/15/13 with Pennzoil Ultra 5W-30 and K&N oil filter. Good thing I did cuz when I took out the oil filter it was a unknown name " SURE Filter" I googled it and it still didn't give me any more infos the previous owner probably when to a quicky lubes place anyways atleast i can sleep better now. 
-
EXceptional
- Posts: 1385
- Joined: Sun Apr 06, 2008 7:54 pm
- Car: 2008 Aspen Pearl EX35 Freakin Loaded!
Re: Anyone change their own oil yet???
How much did you drain out? What did you use for a crush washer? How did you deal with the under-tray?raijin978 wrote:Did it today 1/15/13 with Pennzoil Ultra 5W-30 and K&N oil filter. Good thing I did, cuz when I took out the oil filter, it was an unknown name " SURE Filter" I googled it and it still didn't give me any more info. the previous owner probably went to a quicky lube place. anyways at least i can sleep better now.
-
raijin978
- Posts: 28
- Joined: Fri Dec 07, 2012 7:46 pm
- Car: 08 Liquid Platinium Silver EX35
- Location: Massachusetts
Re: Anyone change their own oil yet???
about 5 qts then put lil more than 5 qts back and reused the crush washer I forgot to get one about the tray I just took all those x16 10mm one by one didn't have time time to set up the power drill. what i've noticed the drain plug was facing east if you're standing in front of the car so that mean u can ramp up just the passenger side for quick drain...learning something new everyday. I'm happy for nowEXceptional wrote:How much did you drain out? What did you use for a crush washer? How did you deal with the under-tray?raijin978 wrote:Did it today 1/15/13 with Pennzoil Ultra 5W-30 and K&N oil filter. Good thing I did, cuz when I took out the oil filter, it was an unknown name " SURE Filter" I googled it and it still didn't give me any more info. the previous owner probably went to a quicky lube place. anyways at least i can sleep better now.
Re: Anyone change their own oil yet???
From what I gather reading the posts, ramps are easier and better for oil change than a floor jack. Is that accurate? Costco has a decent floor jack for sale and I am in between buying that versus the Rhino ramps. Granted, the floor jacks are much more versatile and can be used for tire rotation, etc, but having the jack point under the splash guard limits their practical use for me.
Re: Anyone change their own oil yet???
Yes, you are correct; it depends on the kind of work you plan on doing. For strictly oil changes, ramps are much easier and save time. If you ever plan on doing work that requires removal of the wheels, get the jack and some stands. The front central jack point on my EX is not actually covered by the splash guard; rather it is a few inches behind it (towards the rear of the vehicle).googleman wrote:From what I gather reading the posts, ramps are easier and better for oil change than a floor jack. Is that accurate? Costco has a decent floor jack for sale and I am in between buying that versus the Rhino ramps. Granted, the floor jacks are much more versatile and can be used for tire rotation, etc, but having the jack point under the splash guard limits their practical use for me.
I actually went with ramps first, and then the jack. This is because I prioritized oil changes first, and I could use the factory jack and temporary spare for tire rotations. But if I had to get them now and had to choose, I'd likely get the jack & stands first. This is because the work I do now is not limited to only oil & ATF changes.
By the way, when using plastic ramps, you need to be careful with them. The plastic ramps tend to slip when trying to ascend them, so you need to find a way to get them to keep from sliding on the surface under them.
Re: Anyone change their own oil yet???
Thanks. It is great if the front jack point is not covered by the splash guard. Someone else claimed that it is in this tread. It makes the jack the clear winner then. I already have a set of stands.NJGuy wrote:Yes, you are correct; it depends on the kind of work you plan on doing. For strictly oil changes, ramps are much easier and save time. If you ever plan on doing work that requires removal of the wheels, get the jack and some stands. The front central jack point on my EX is not actually covered by the splash guard; rather it is a few inches behind it (towards the rear of the vehicle).googleman wrote:From what I gather reading the posts, ramps are easier and better for oil change than a floor jack. Is that accurate? Costco has a decent floor jack for sale and I am in between buying that versus the Rhino ramps. Granted, the floor jacks are much more versatile and can be used for tire rotation, etc, but having the jack point under the splash guard limits their practical use for me.
I actually went with ramps first, and then the jack. This is because I prioritized oil changes first, and I could use the factory jack and temporary spare for tire rotations. But if I had to get them now and had to choose, I'd likely get the jack & stands first. This is because the work I do now is not limited to only oil & ATF changes.
By the way, when using plastic ramps, you need to be careful with them. The plastic ramps tend to slip when trying to ascend them, so you need to find a way to get them to keep from sliding on the surface under them.
Re: Anyone change their own oil yet???
I found some information in the (2008) factory service manual that slightly conflicts with the photo in that thread. On page 29 (page 30 of the pdf file) in the General Information (GI) file, it shows the front central lifting point directly rear of the plastic splash shield.googleman wrote:Here is the discussion I am referring to about the front jack point:
floor-jack-point-t567434.html
Also, I saw on my EX there is a short 'button' shaped protrusion, maybe about 2 inches wide, in the metal on the bottom of the front frame/sub-frame. It's a little bit to the rear of the splash shield, but slightly in front of and between what appears to be two mounts. I thought it was the ideal place to jack from, and the button shape seemed to be a good fit for my jack's saddle. I've jacked up my EX from that spot several times with no issues.
Whether or not the jacking point is covered by the splash shield, you would still want to put the car on some stands before getting under it. Aside from the safety aspect, the jack will get in the way; so you need to lower and remove it to get the splash shield off or to have a good amount of space to work with.
Re: Anyone change their own oil yet???
Thanks for the reference to the factory service manual. Looks like you are right. Now that I think about it, it would have been a very stupid design on Infiniti's part if they'd put the support point under the cover!NJGuy wrote:I found some information in the (2008) factory service manual that slightly conflicts with the photo in that thread. On page 29 (page 30 of the pdf file) in the General Information (GI) file, it shows the front central lifting point directly rear of the plastic splash shield.googleman wrote:Here is the discussion I am referring to about the front jack point:
floor-jack-point-t567434.html
Also, I saw on my EX there is a short 'button' shaped protrusion, maybe about 2 inches wide, in the metal on the bottom of the front frame/sub-frame. It's a little bit to the rear of the splash shield, but slightly in front of and between what appears to be two mounts. I thought it was the ideal place to jack from, and the button shape seemed to be a good fit for my jack's saddle. I've jacked up my EX from that spot several times with no issues.
Whether or not the jacking point is covered by the splash shield, you would still want to put the car on some stands before getting under it. Aside from the safety aspect, the jack will get in the way; so you need to lower and remove it to get the splash shield off or to have a good amount of space to work with.
On jack stands, I'\ plan to still keep the floor jack there as a precaution in case the stands fail. I can probably reorient it to open up working space. I can't really trust $40/pair jacks alone when a 2-ton monster is hanging on top of me
Find Your Forum!