Hey wassup all. I'm going to be doing a howto/ write up for stereo installs on Z32s. It very easy for me to do this and I couldn't find this on the forum aside from some color codes. I hope it will help others out there who get a little squeamish when it comes to wiring.. so they dont have to pay someone else to do it.
Part 1: Removing the BezelBigTDogg (MA) wrote:
I'd suggest anyone attempting installs of speakers and head units pick up a set of these:
http://www.crutchfield.com/p_126CR3NGL/ ... 5802862185

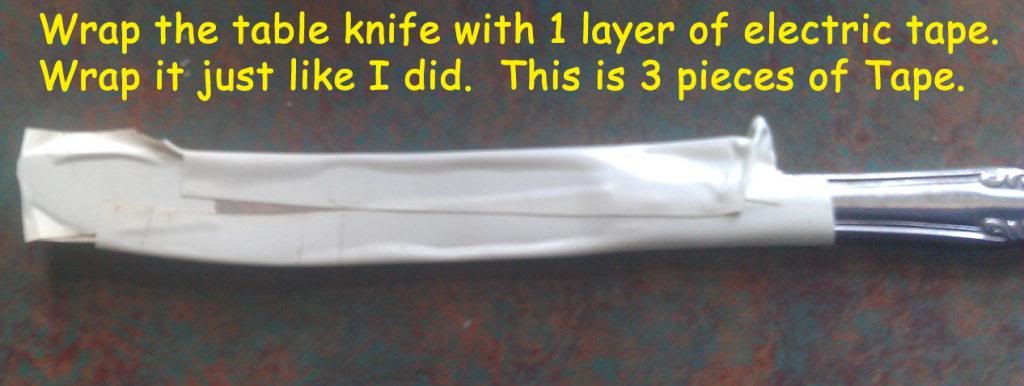
Tools: Philips head screw Driver, Table knife, Electrical Tape.
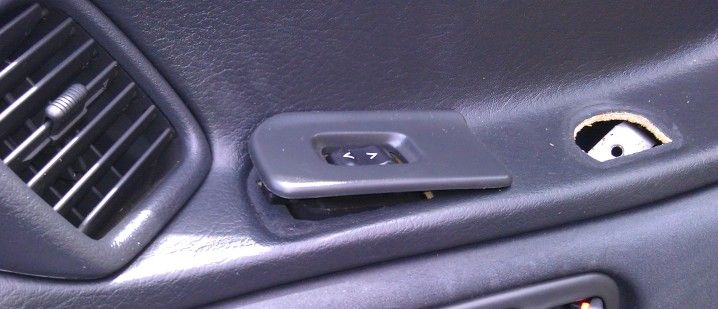
Taking the bezel off is really easy. Its also really easy to do it wrong and break the plastic.
There are 2 screws hidden by two plastic tabs at the top on either side of the vent.
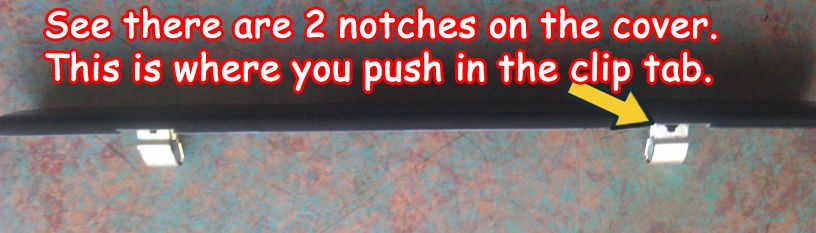
2 screws in the middle hidden by a plastic strip. The plastic strip has 2 metal clips that hold it in the bezel.
Lastly there are 2 metal clips at the bottom that hold the bottom of the bezel to the dash these will break easy if the bezel is pulled out wrong.
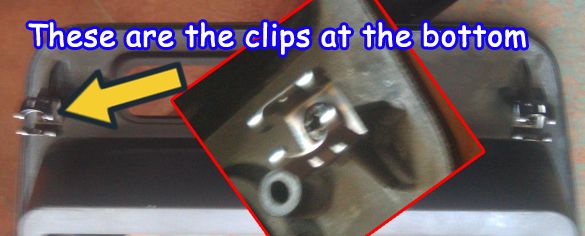
This is for reference. This is what is under the bezel.
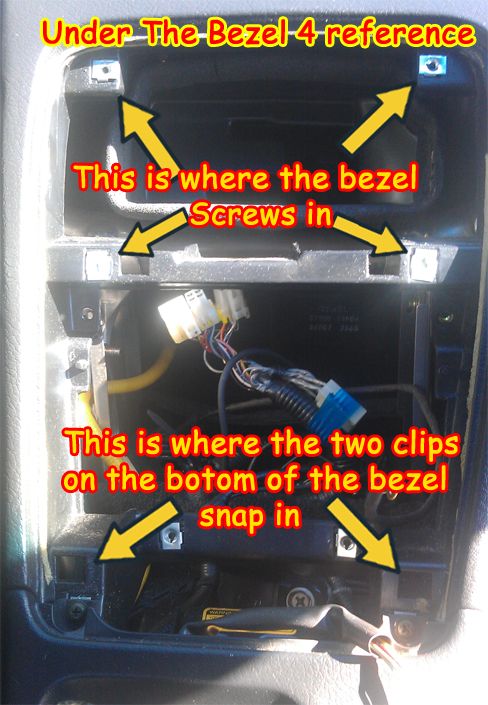
There are 2 clips at the bottom. These are the only clips the other 4 mounting spots have screws covered by plastic covers.
1st pop the covers out and unscrew the top two screws.
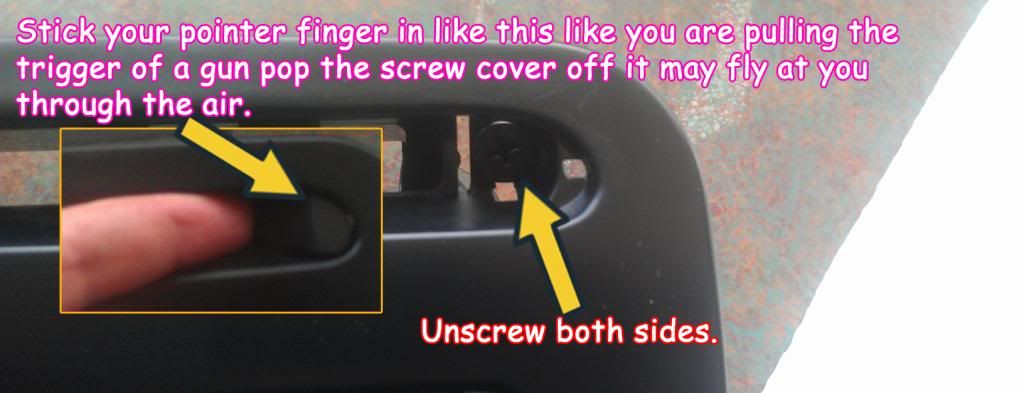
2nd. This part is tricky. Get a table knife and wrap it with electric tape so you do not scratch anything.
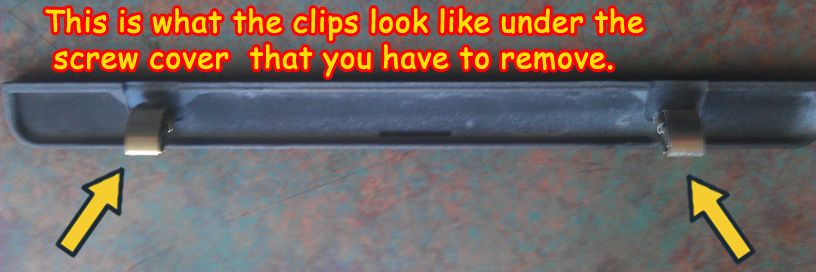
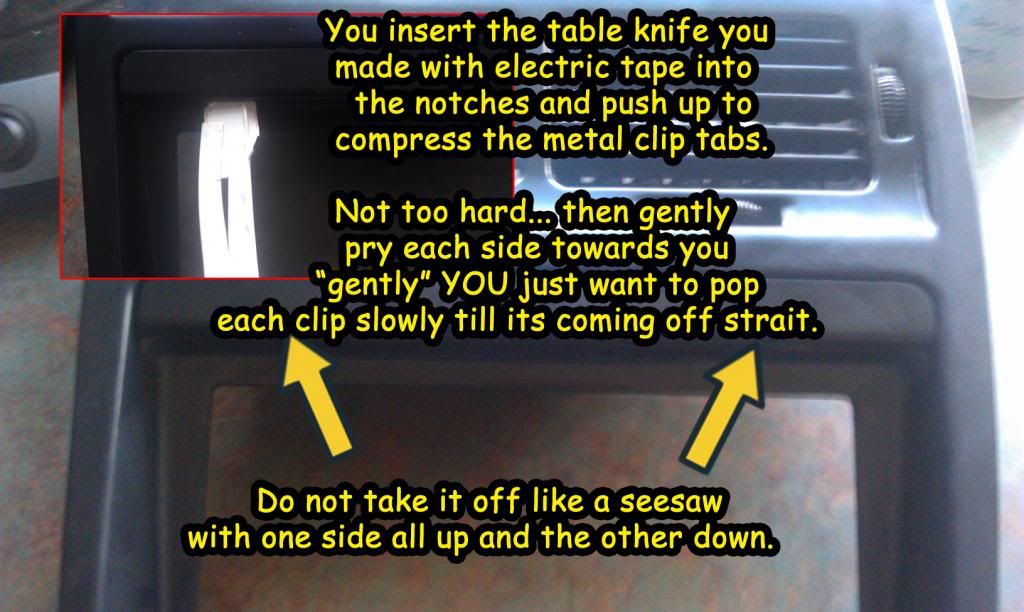
After you have the 4 screws out the only thing holding the bezel in are the two clips at the bottom.
Pull the bezel out strait so the clips pop in a even fashion. Do no teeter totter the bezel out or the clips will break.
BigTDogg (MA) wrote:I'll dig up some pics from my install.
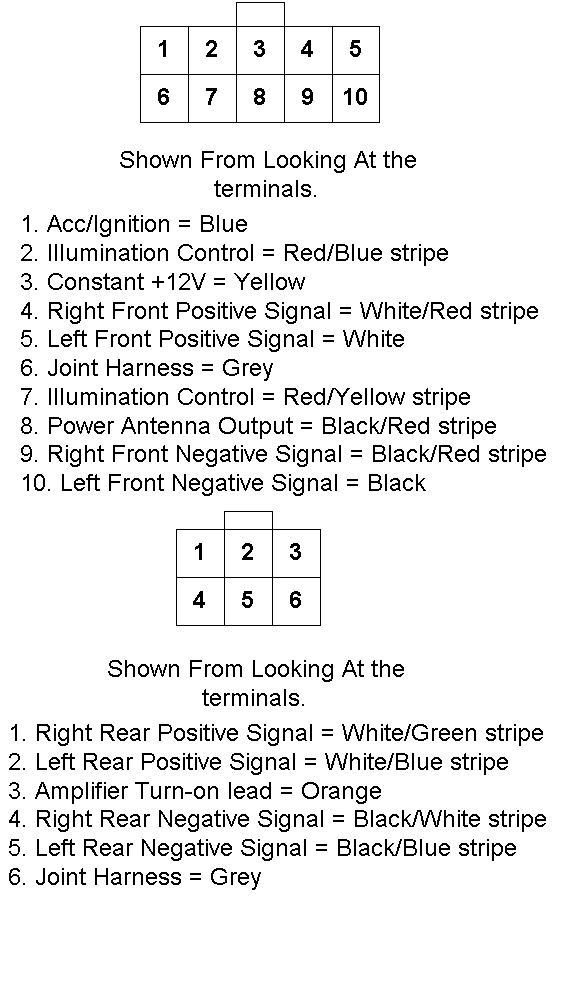
Here's the pinout for the head unit up to 1995
BigTDogg (MA) wrote:
In case anyone was curious about the OEM Bose center channel used in 1990 Z32s, I've posted some pictures and info below:
The pinout goes like this from the top:
Ground (chassis ground)
B+ (battery +)
S+ (speaker out +)
S- (speaker out -)
Com (common for the audio signal, not chassis ground)
In 2 (audio in right)
In 1 (audio in left)
Bose Center Channel album link below:
https://plus.google.com/photos/10564757 ... p6gxeyl1wE
You would need to desolder the wires and remove the hot-melt to repop the board. The driver is 4 ohm, so the amp is compatible with most aftermarket drivers. I'm not sure what input level the amp is expecting, but I would assume 500mv would be about right.
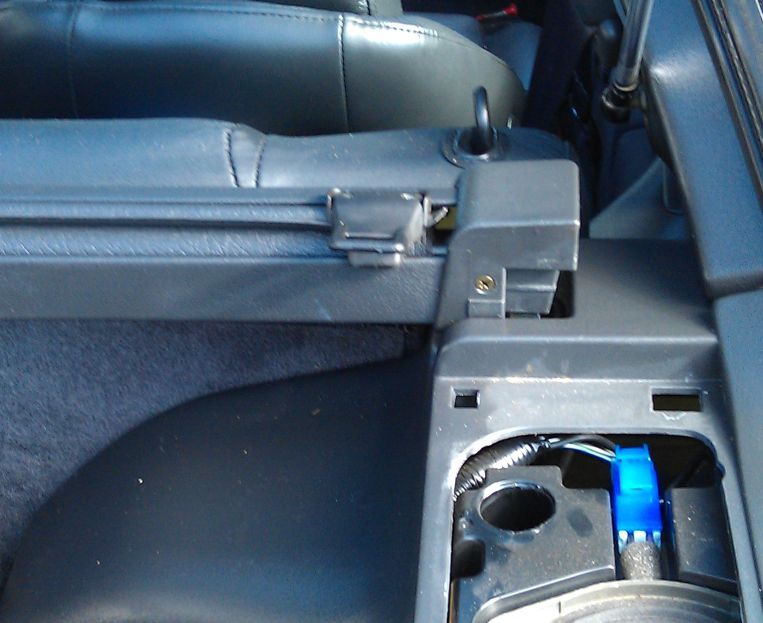
Part 2: Running amp cables from the engine bay to the cabin.
How to properly run amp wires from the battery through the firewall into the cabin.
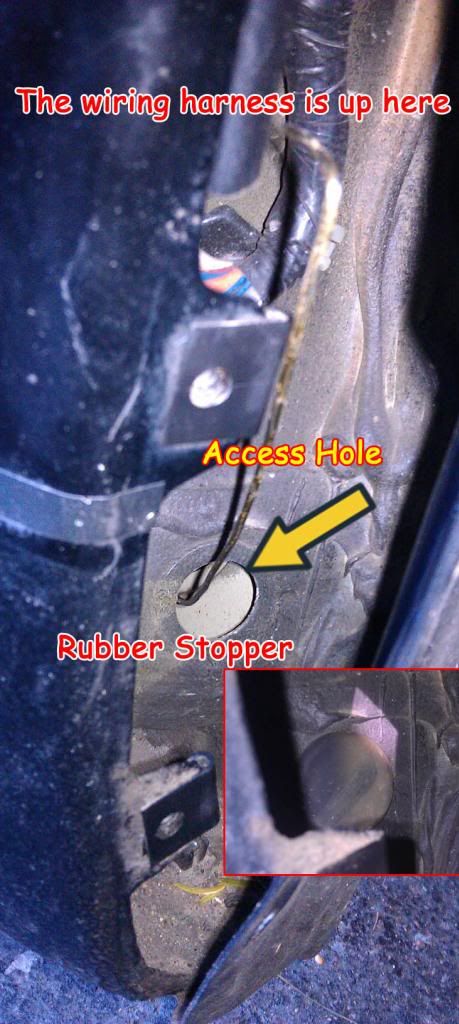
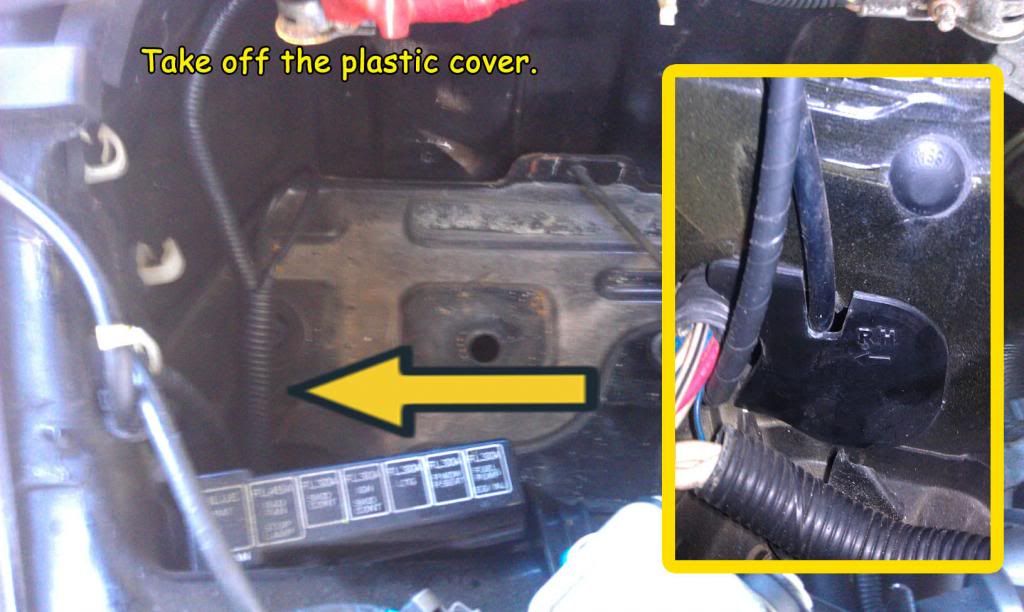
Its not hard to pull a cables from the engine bay to the cabin in a Z32. In fact Nissan thought of this for you. Nissan made an access hole behind the passenger side front wheel splash guard. The hole is below the wiring harness. There are no wires running through this hole and it is covered by a rubber stopper. It is about 8 inches from the empty access hole to two empty access holes inside the cabin. The two empty access holes are covered by round tape. Both are located behind the plastic cover that is below the dash to the right of the ECU and behind the step plate.
There is no reason to drill holes, there is also no reason to poke a hole in the wiring harness weather boot as I have seen. You do not need to do this in fact its harder.
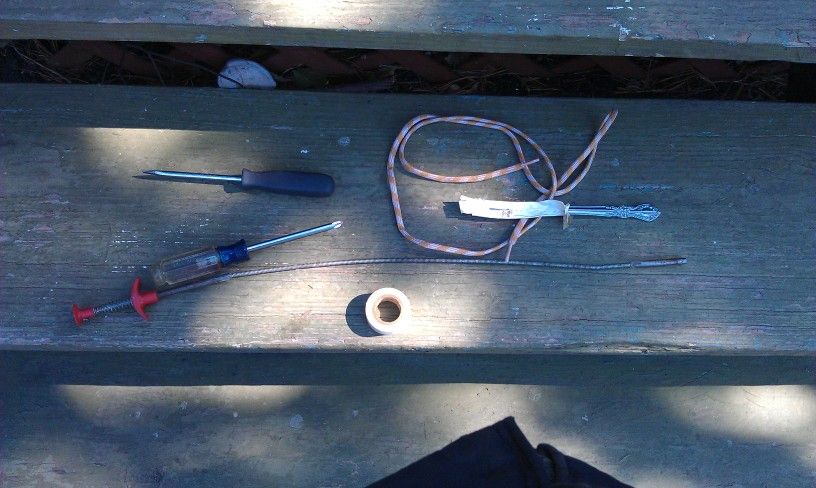
Tools needed: Flash light, Coat Hanger, Shoe string, Grabber, Needle Nose pliers, Philips head screw driver, electrical tape, table knife “same one you made and wrapped in tape in part 1” 10mm socket wrench.
Step one: Turn on the car, and turn the steering wheel all the way to the right turn off the car.
Step two: Pop the hood and remove the battery.
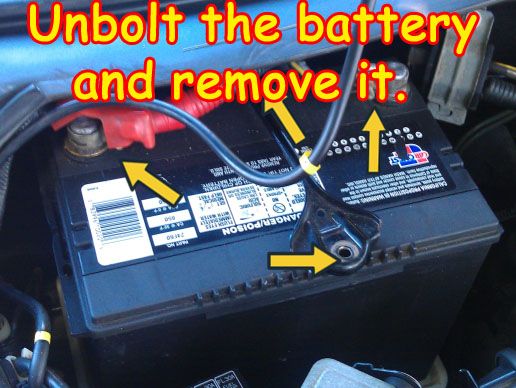
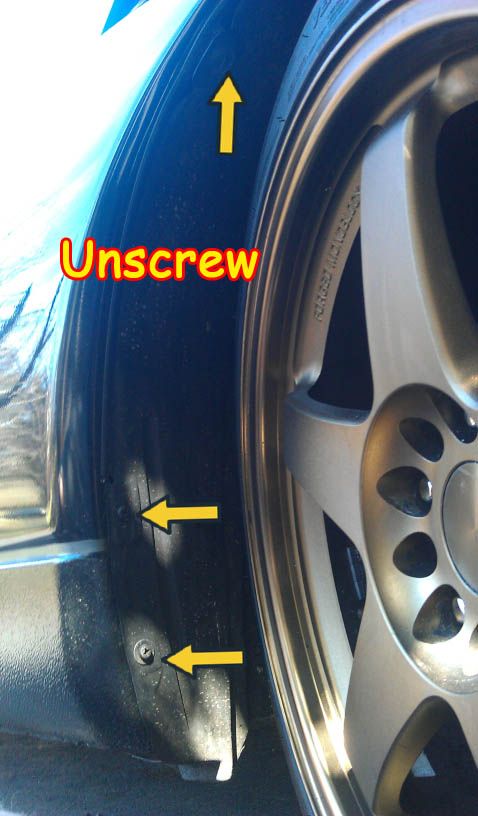
Step three: unscrew 3 screws in order to be able to bend back the splash guard behind the right front wheel. You dont need to take it off. Once you get the 3 screws out you can fit your hands in easily and have access to the access hole.
Step 4: pop out the rubber stopper of the access hole.
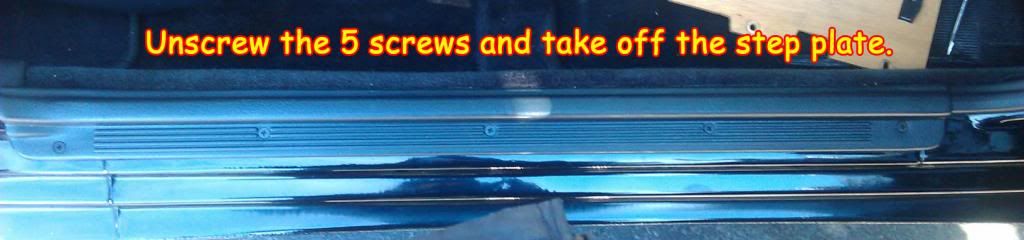
Step 5: open the passenger door. And unscrew the step plate it is 5 screws.
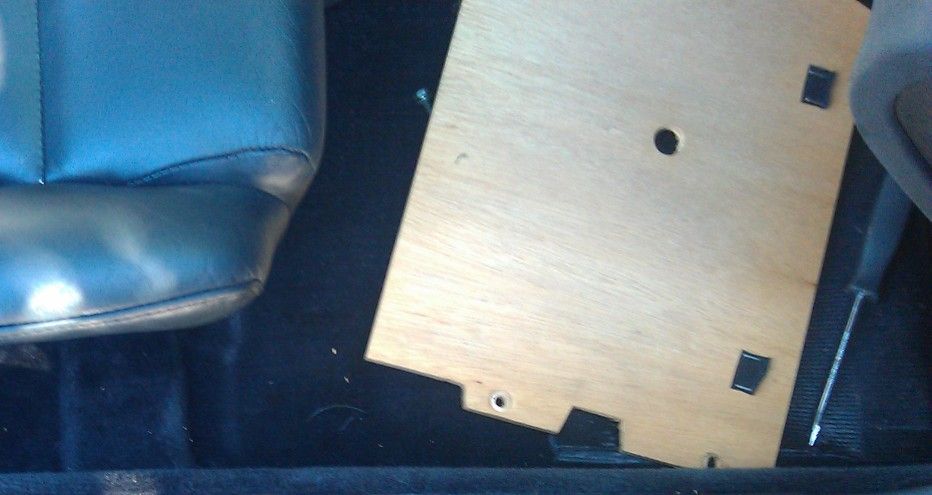
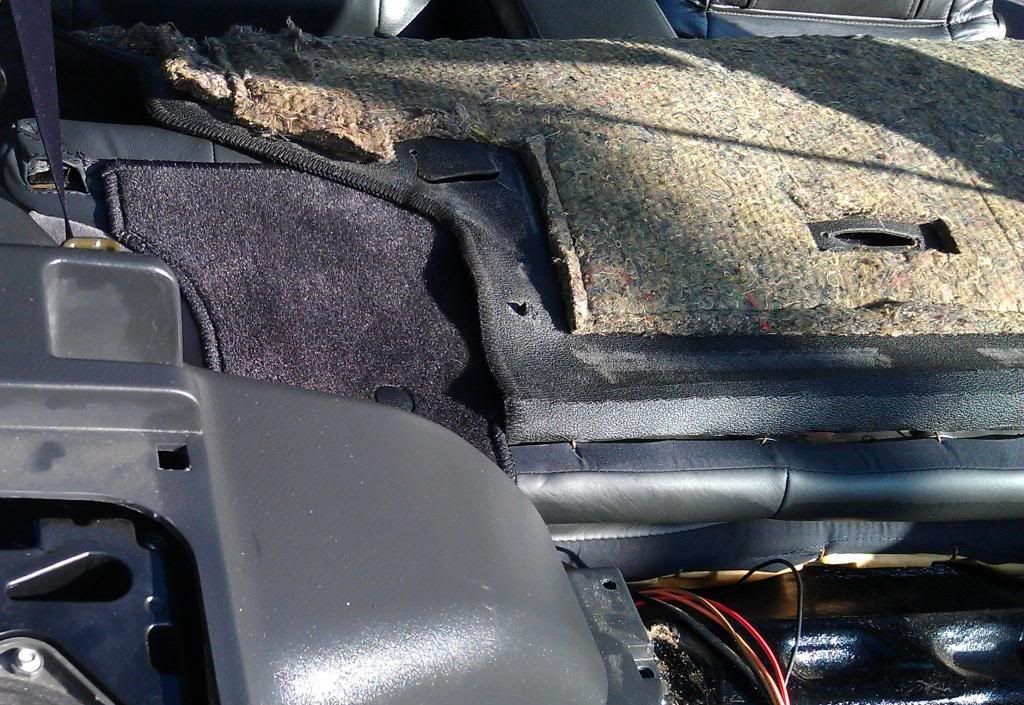
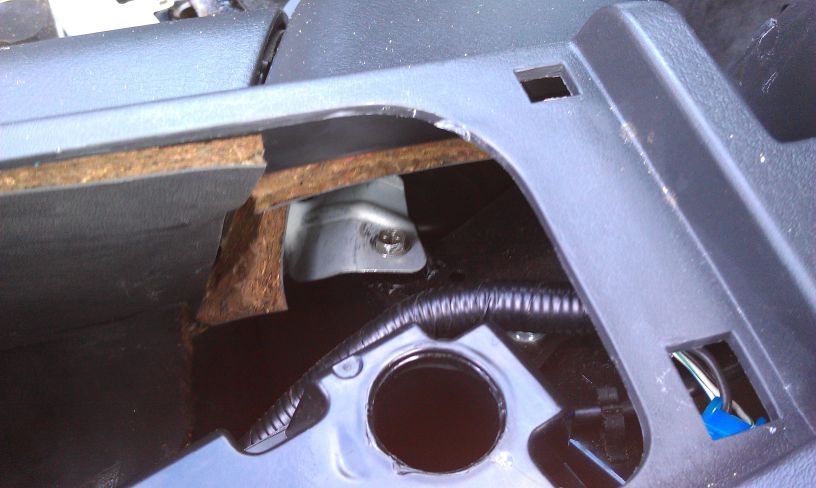
Step 6. pull the carpet back from under the dash on the passenger side under the dash. There is a wooden board under there with 4 screws holding it in. Under the board is the ECU. Unscrew the screws. And remove the board.
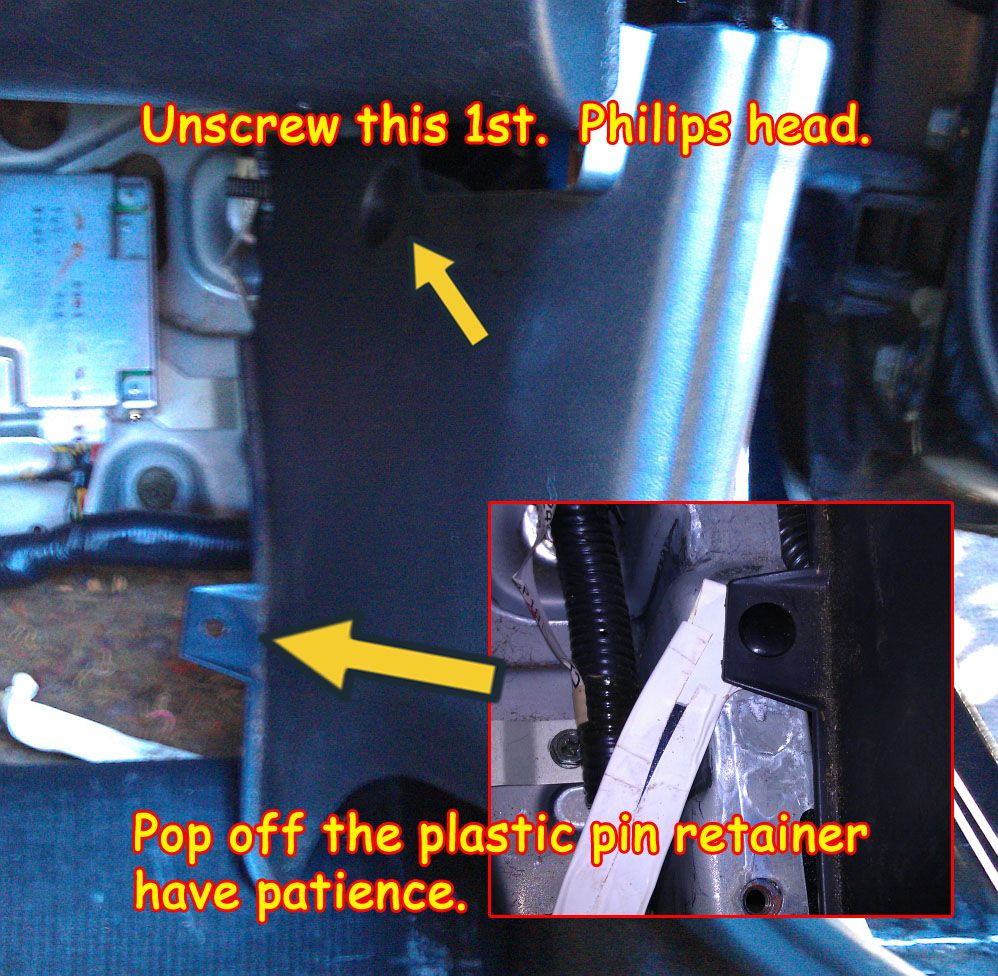
Step 7: Unscrew the plastic cover and pop out the plastic pin. Have patience the plastic pin doesn't come out easy but once it does the panel with slide right off. Slide the panel in a downward fashion it comes right off.
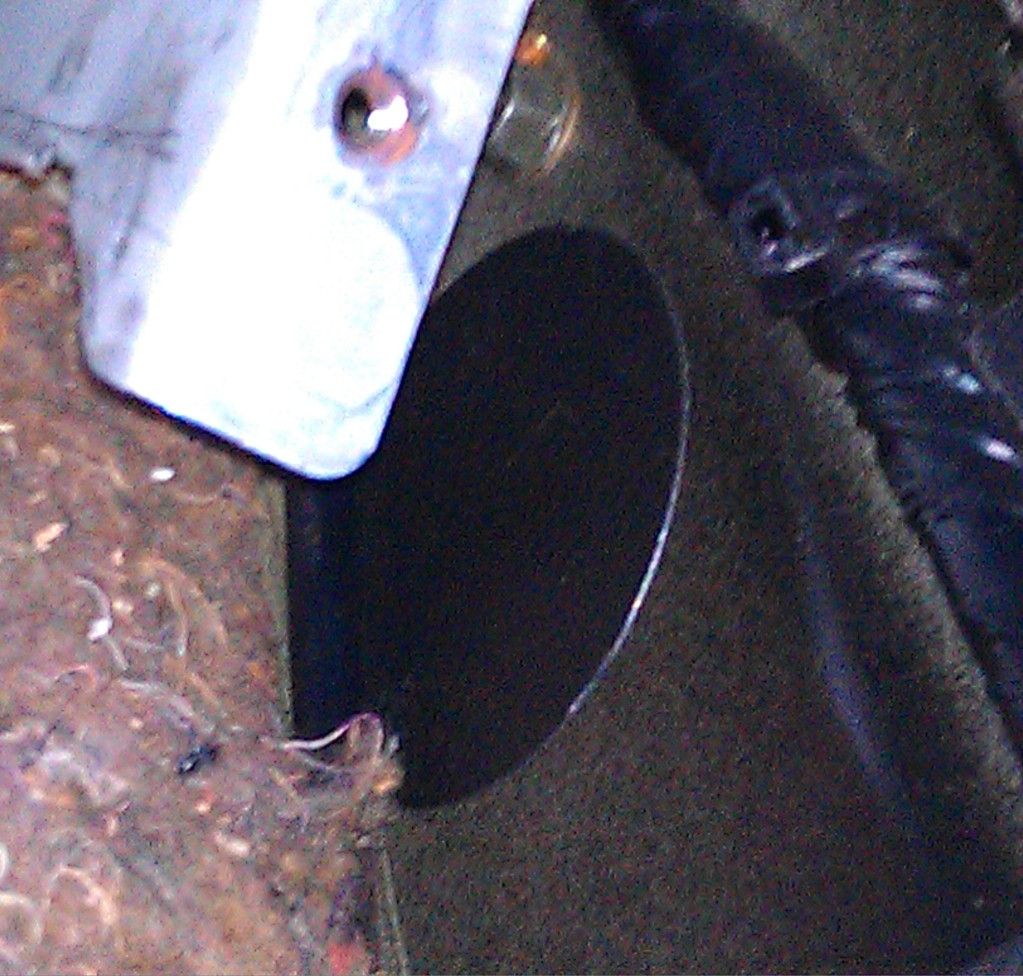
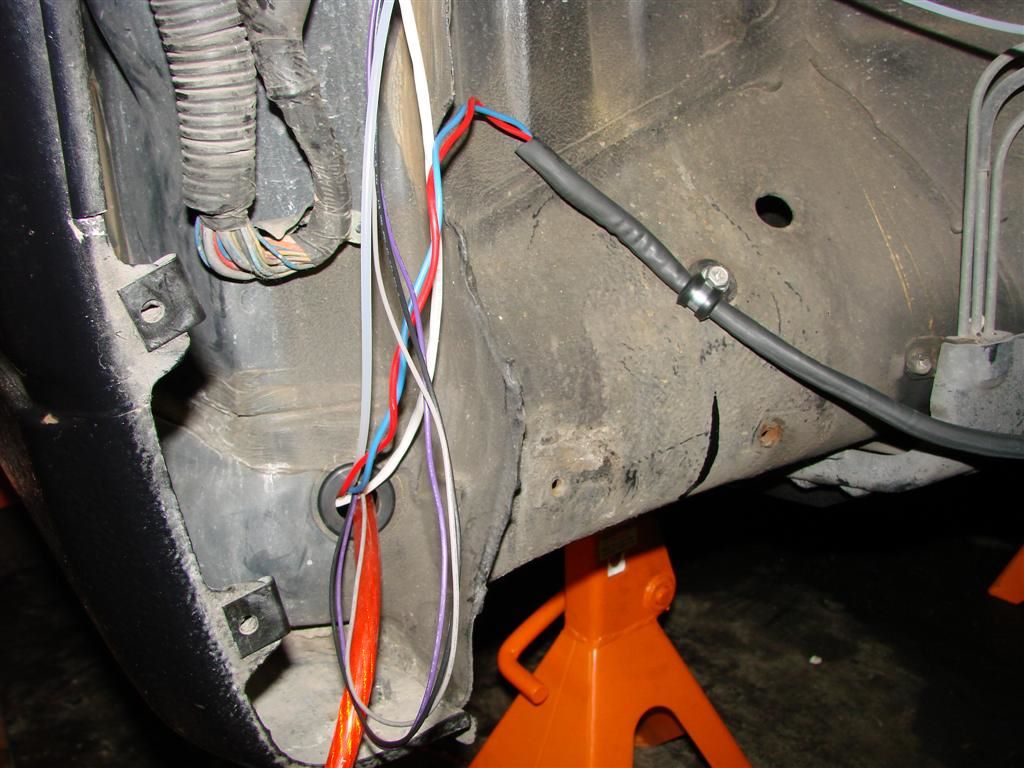
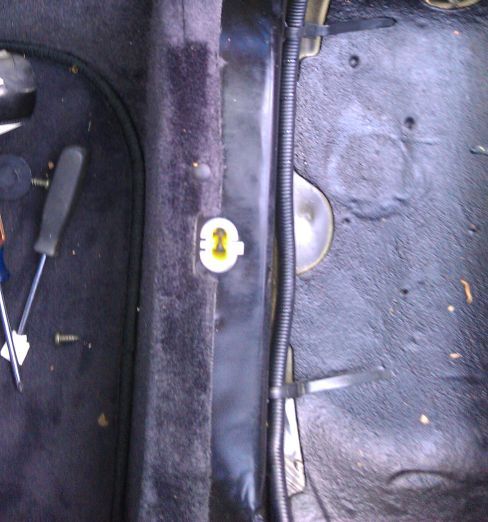
Step 8: there are two unused access holes here one is right near the floor " its to the right and below the right bottom hole the wooden board crews into. Both of these holes are behind the plastic cover you remove in step 7. The other hole is just is above this hole. The other hole is horizontal. This hole is vertical. You could pull two amp wires through here and the other one. Plus a ton of other wires. There is plenty of space between the two holes. The other hole looks just like this one its above this one. I suspect the other hole is bigger than this one. Once you finish up pulling the string through you can always tear off the tape on the other hole and daisy chain another string though the other hole.
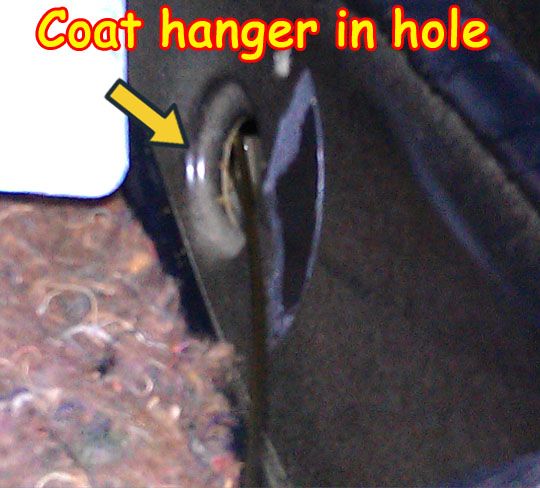
Step 9: take your screw driver and push a hole through the tape and remove it.
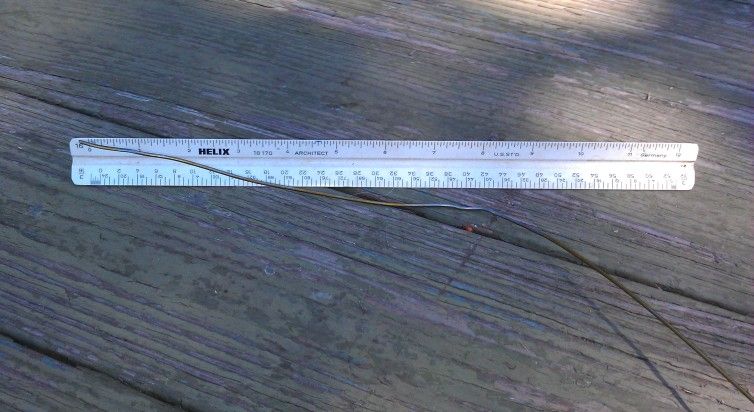
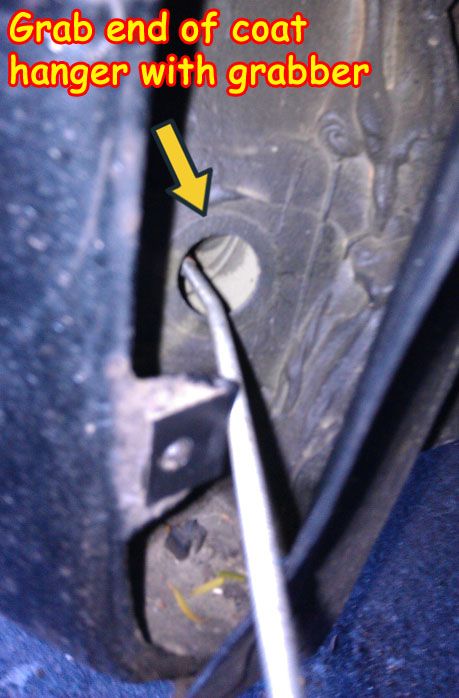
Step 10: Get a coat hanger and bend it so its strait. You want to cut one of the ends of the hanger off or bend it over and over till it snaps and its strait. Now you want to measure about 7-8 inches and make a slight bend in the hanger. Stick the hanger in the hole. You must have patience.
Step 11: take your flash light and bend back the splash guard and shine your flash light in the hole. You should see the coat hanger. If not go back to step 10 and manipulate it over and over till you can shine a flash light in the hole in the other end and see it. This took me some time but it wasn’t hard. If you have a helper I think this wold take about 5 mins or less.
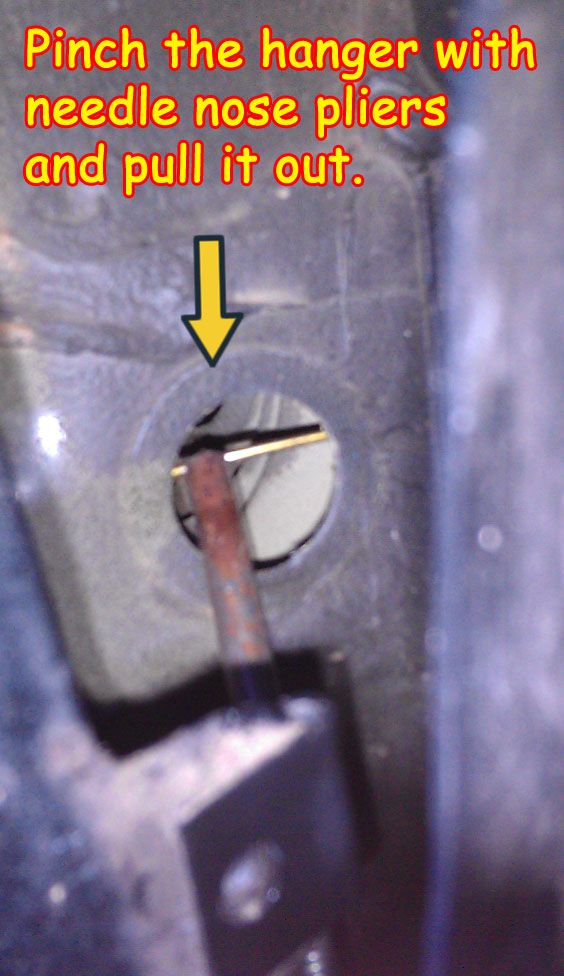
Step 12: Take your grabber and grab the end of the coat hanger and pull it towards the hole so that you can take the needle nose pliers and stick them in the hole and grab the end of the coat hanger. Again this took me some time to get it just right. If you have a helper this will be easy. Grab the coat hanger with the pliers and pull it out. I didn't have anyone to help me so I had to pull hard bending the coat hanger to force/rip it out of the hole.

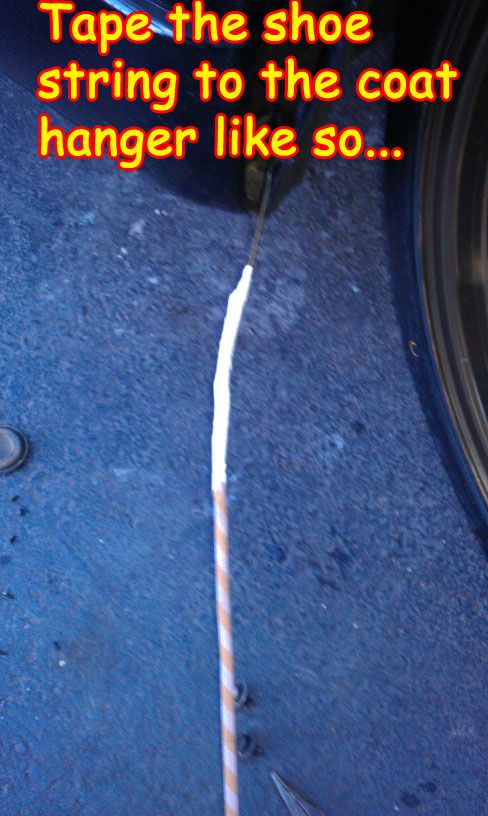
Step 13: straiten the coat hanger you pulled out and tape the shoe string on the end with some electric tape. You want to wrap it up good like I did in the pic. Don't use too much tape that its all fat but tape it so that it will slide easily but not come undone.
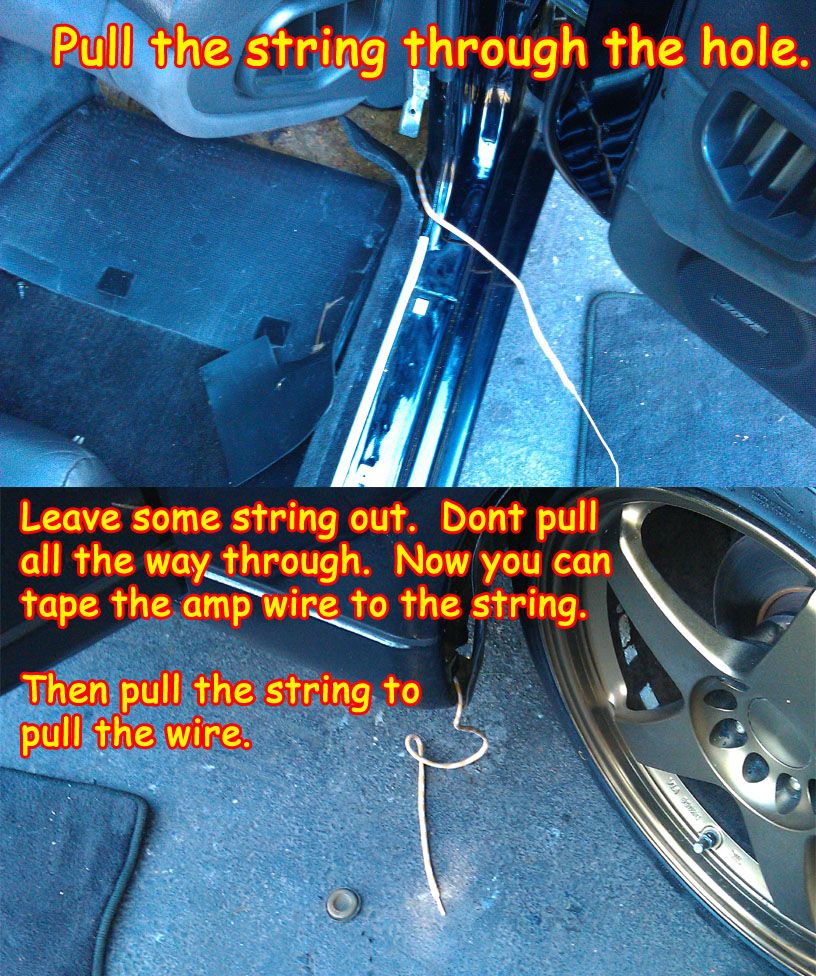
Step 14: go back into the cabin and pull the coat hanger out it will pull the string along with it. Dont pull the string out. We are leaving the string in there. We are going to tie the amp cable to the string and pull it through the holes.
Step 15: To the left of the battery spot where the battery goes. There is a plastic cover that the windshield wiper fluid hose goes through. Unsnap that plastic cover and now you have a strait shot from the access hole up to the battery.
Notes.
[/quote] I recommend that in the process of puling any wires through these holes from either of the inner holes that i mentioned you tape a service string to the wire to pull along with the wire. So a wire + a string...tied to the string... leave the string inside You can tie each end of the service string off and just leave it in there. That way if you want to pull wires again you already have a string in.BigTDogg (MA) wrote: Second, when you fish the wire through the hole in the fender, I'd suggest placing a rubber grommet around the sheet metal to prevent wire fraying. I believe it's a 1.25" OD grommet, but just bring the cap with you to a hardware store to find the exact size.
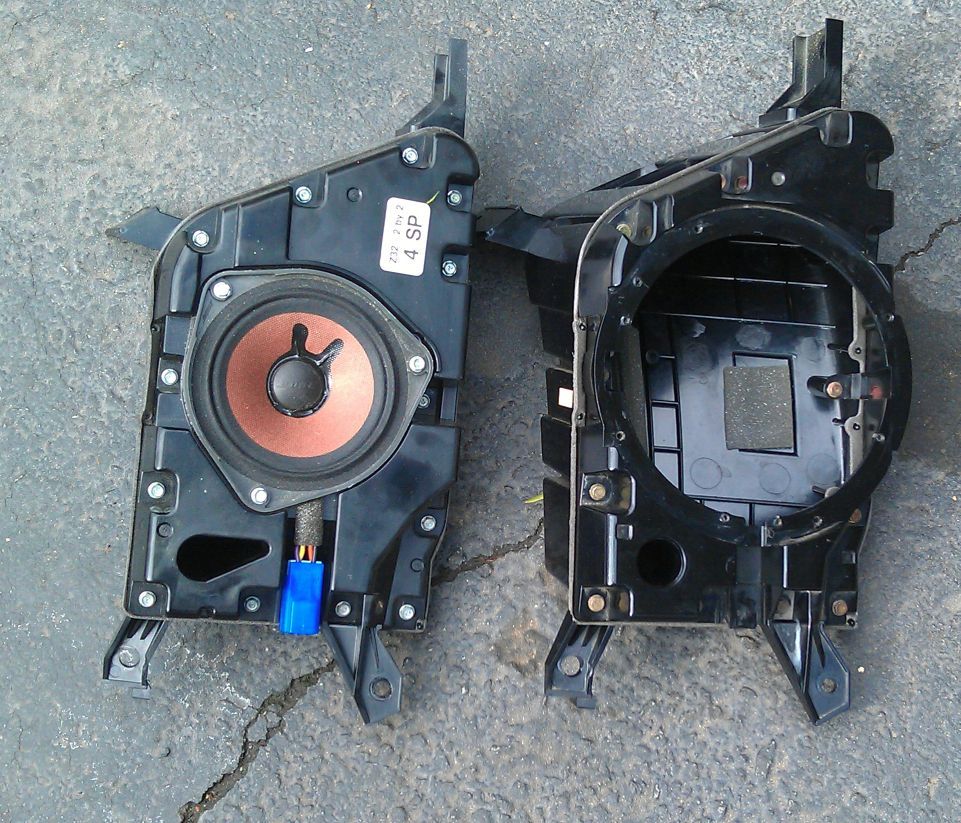
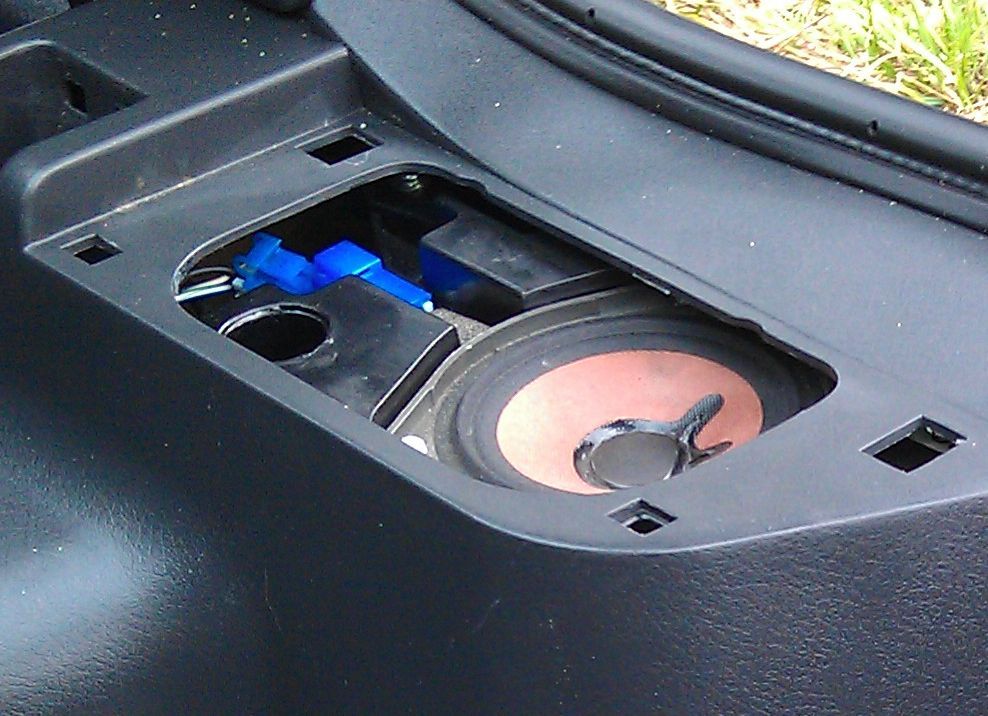
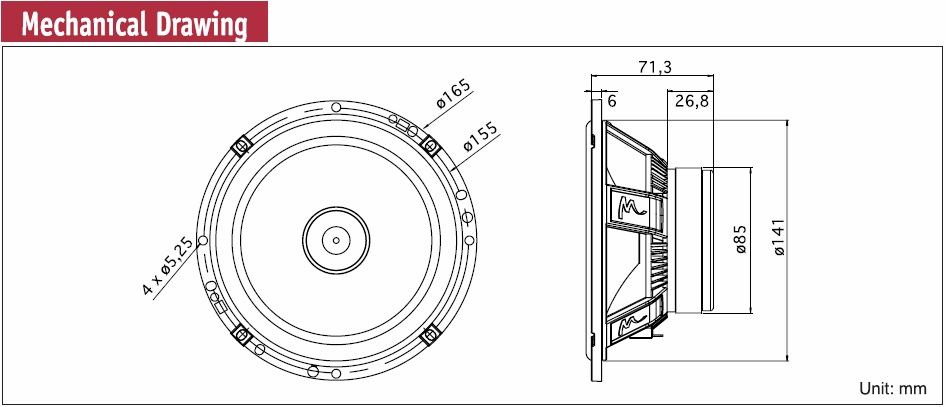
Part 3: Speaker brackets.
Rear 6.5 Speaker brackets. Needed to have best sound.
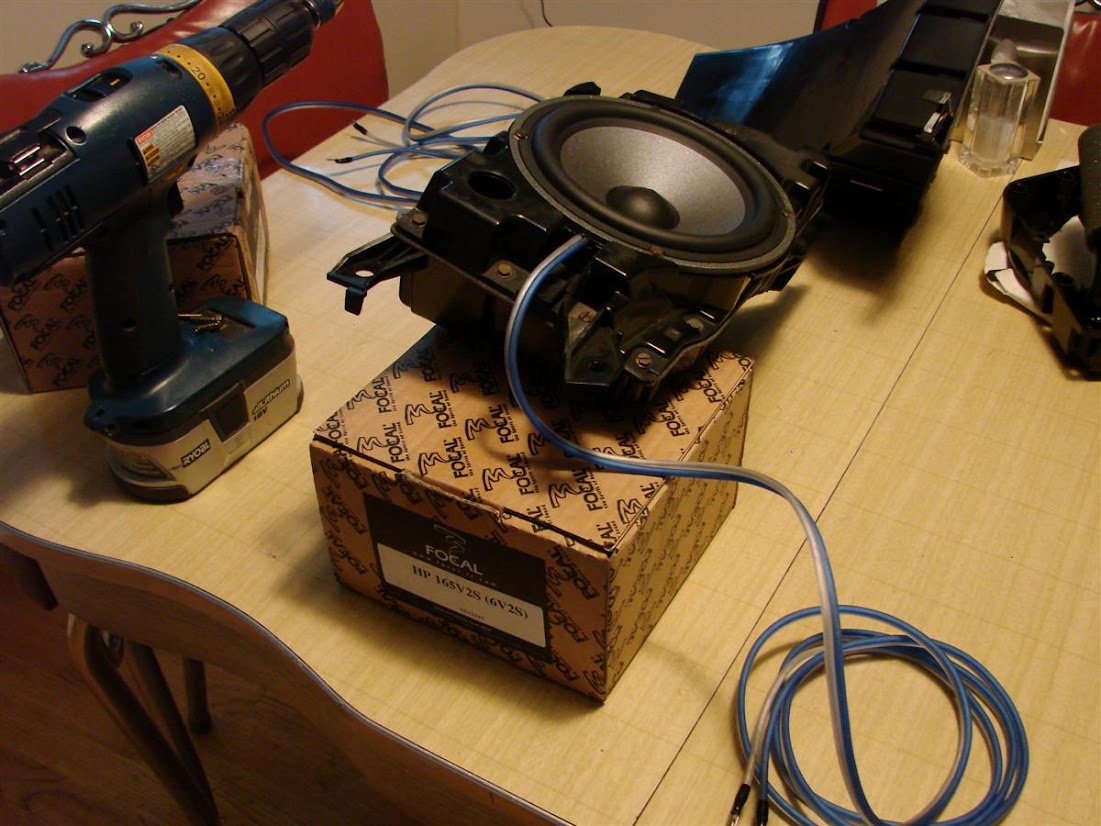
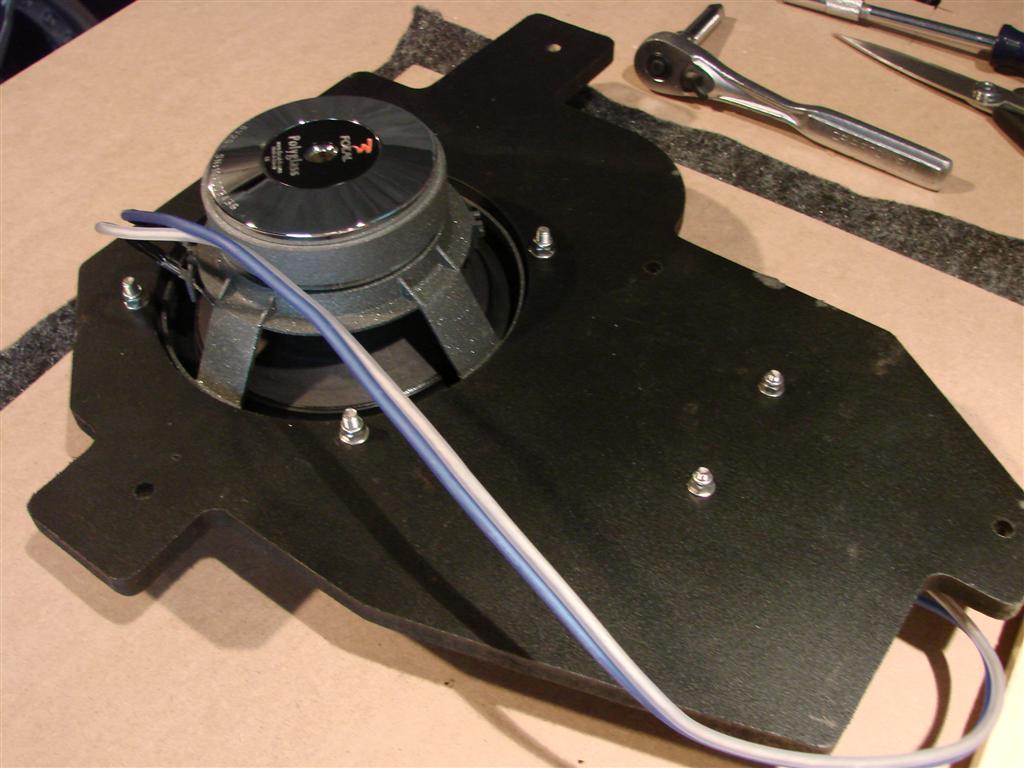
If you have a bose system and want 6.5 speakers in the back. This is what you need. I recommend getting the OEM brackets if you can for the rears. Someone locally sold me these off a parts car. Reason why I recommend the oem brackets is because they will make an air tight seal over your existing enclosures. They are also ported.
The 6.5 brackets screw directly over the bose enclosures. with a gasket between them.
-------------------------------------------------------
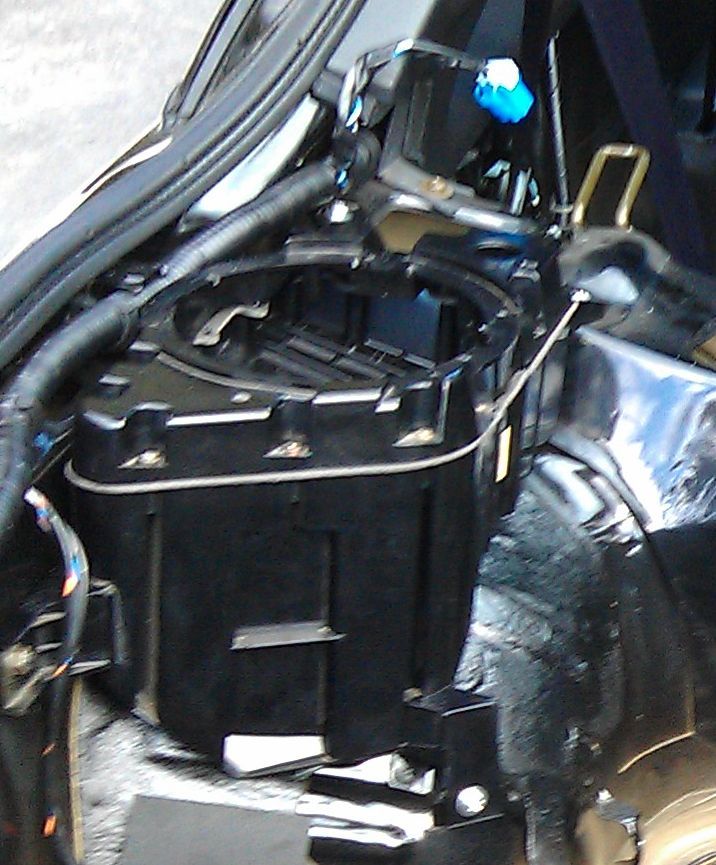
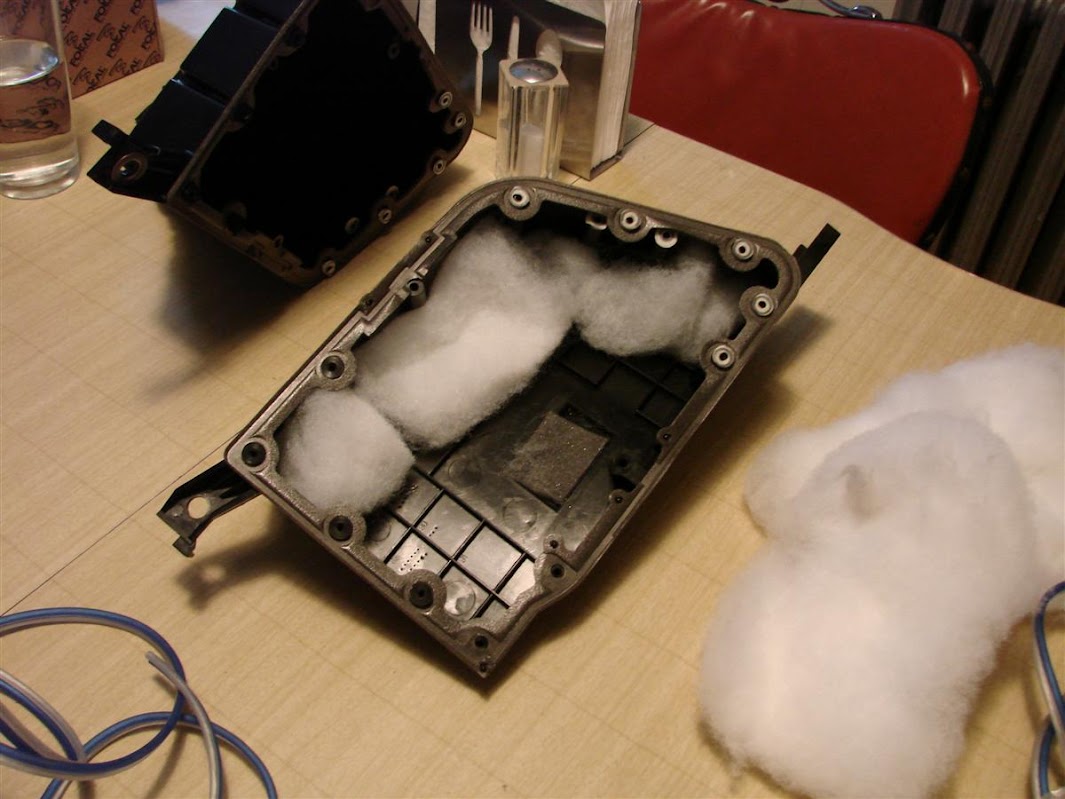
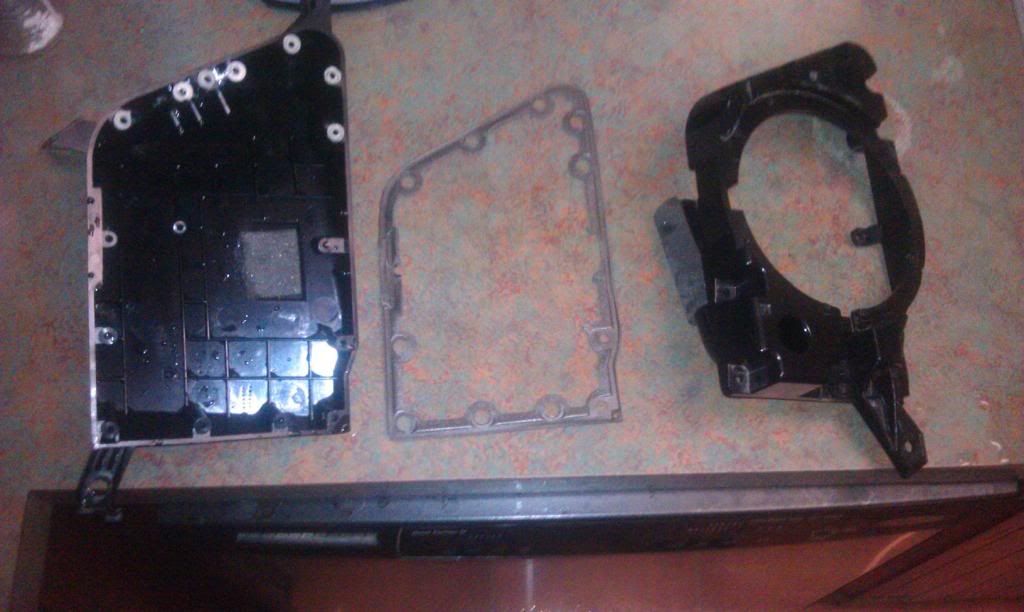
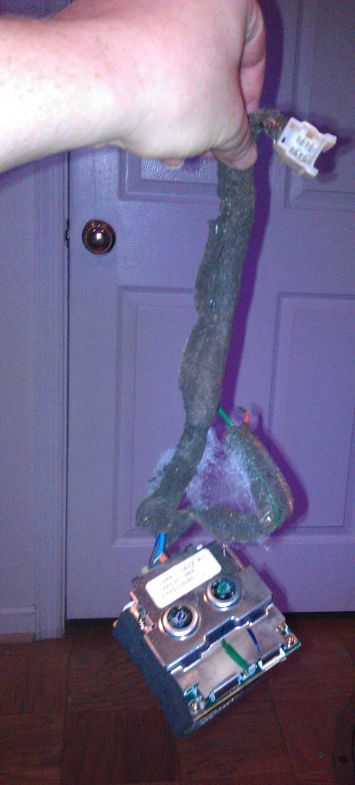
How to remove the bose amps from the rear enclosures. Its came to my attention that later bose systems had 6.5 rears powered with bose amps. So this how to covers both the 4.5 REV1 and 6.5 REV2.
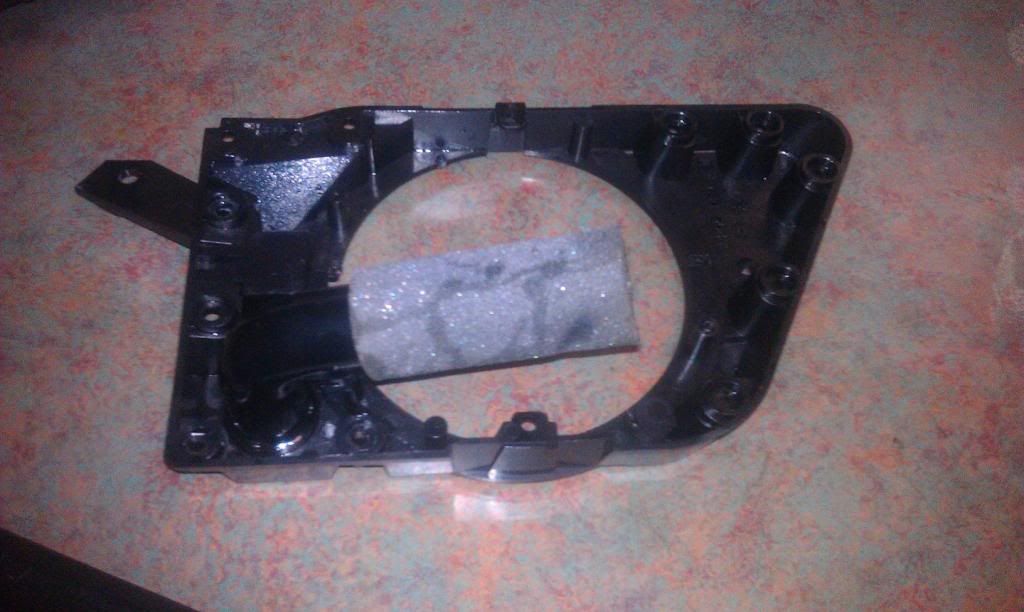
The amps are just screwed into the box. But the connecter plug for the wires is snapeded into the bracket. The design is not modular nissan didn't intend for it to be removed.
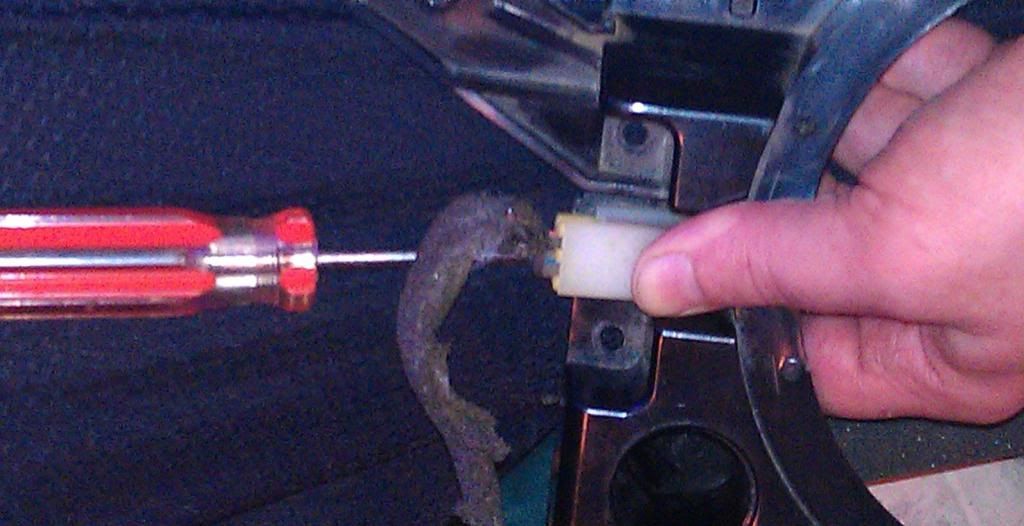
Tools: Heat gun, flat head screw driver.
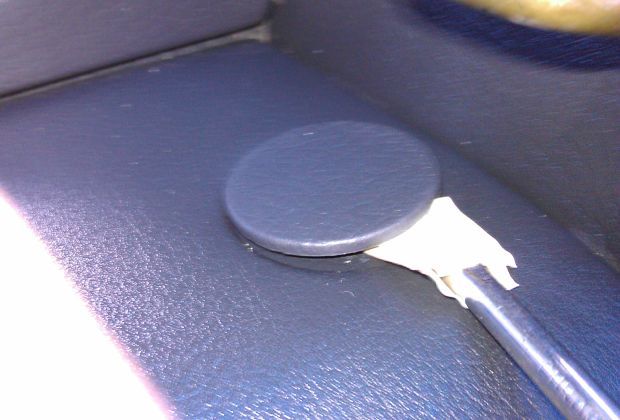
Heat the connecter up with the heat gun. This is for demonstration purposes dont perform this operation like you see in the pic that would be dangerous.
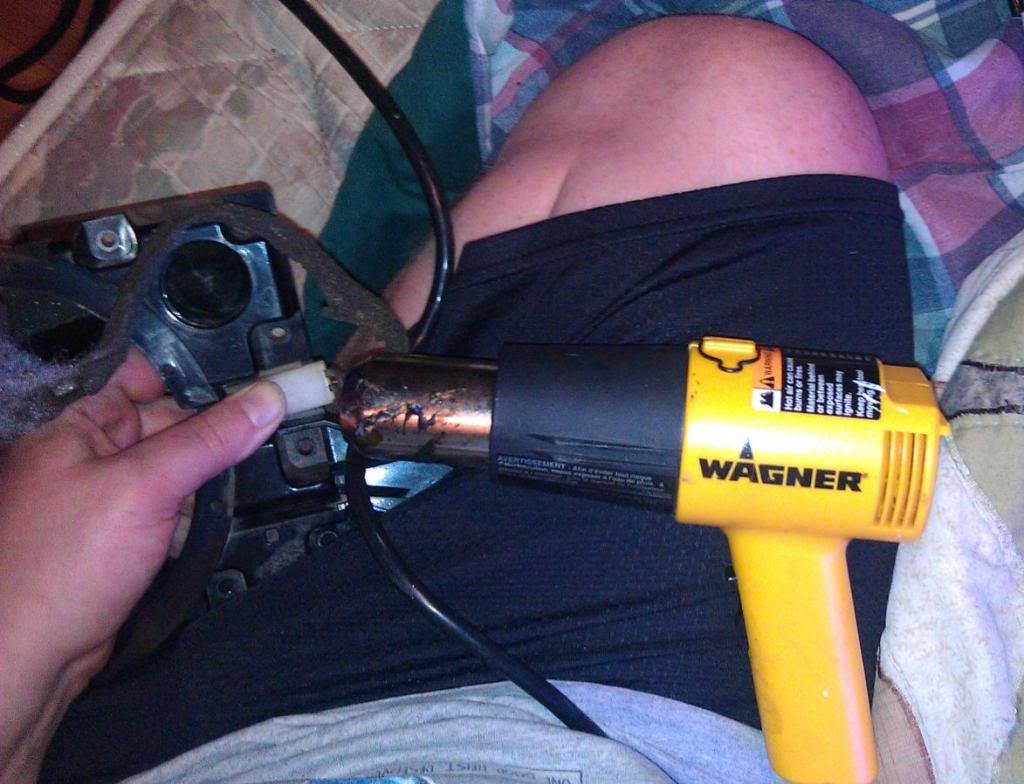
Once the connecter is nice and hot stick at flat head screw driver between the bracket and the connector like in the pic and pry it off.
This is what the crappy amp looks like. I chucked mine in the trash.
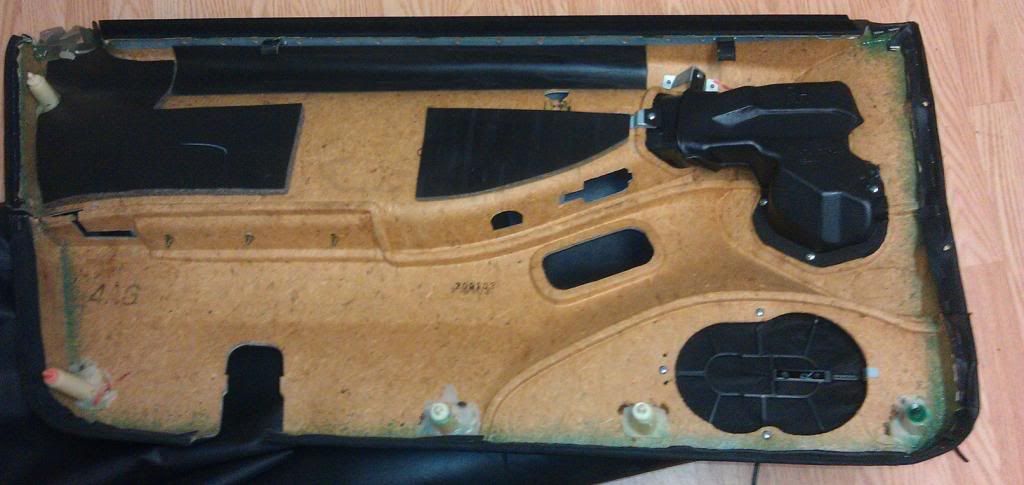
Part 4: Disassemble rear panels and seat in 300zx 2+2 to install speakers and this goes for coil overs as well.
This is insane you need to know this right now before proceeding the speakers are buried.
tools 10mm socket wrench, 10mm open end wrench, philips head screw driver. table knife wrapped in electric tape.
To give you an idea before you get started you have to remove everything just about in the trunk as well as the back seat to change the speakers out. there are other instructions else where that say you can do this without removing it all I found that to be impossible without breaking something.
1) remove sun shade .
2. Pull edges of carpet up. Remove two plastic twist screws
3. put back seat down.
4. flip carpet over back seat.
5. unbolt the hinges from back seat pull the back rest out.
remove back seat unbolt two bolts one on each side then. (pull up) this is what the cushion is inserted in you have to pull up.
6. remove side panels. on both side of back seat.
7. remove jack.
8. remove center plastic panel between the tail lights.
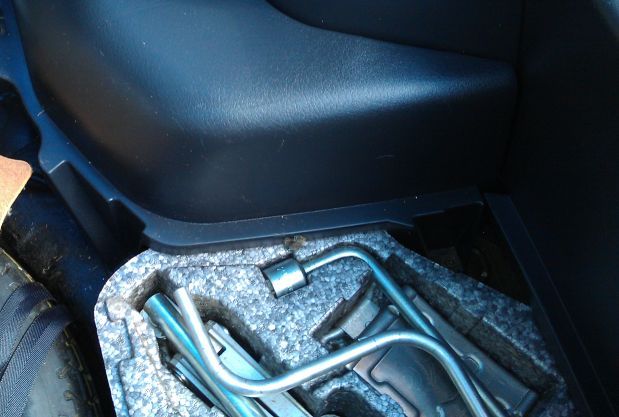
9. remove spare tire while ur at it lol
10. remove plastic covers behind both sides of wheel well covers "the right side you have to unscrew the trunk light before you can pull that panel off.
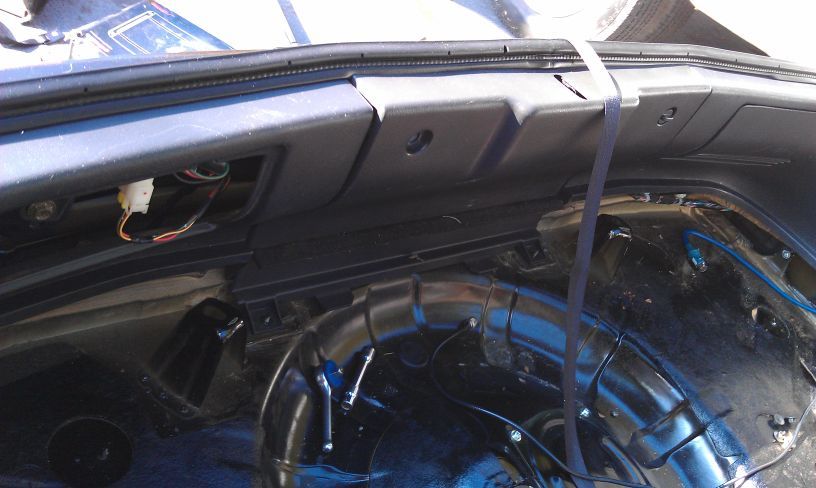
11. remove all of the bolts and screws holding the left rear wheel well cover panel that is surrounding the speaker enclosure and the tower strut. slide the panel off forward this is why you had to remove the seat.
12. the last one is tricky the right rear is different than the left. it looks like 2 panels surrounding the speaker enclosure and the tower strut but its not.. The smaller one is riveted to the larger one and it doesn't come off. If you try to force it off it will break and you will be sad.... it comes off with the bigger one but there is a catch. there is a hidden bolt... once you have the wheel whell cover unbolted in every visible place look inside to the left of the speaker; use a open end 10mm wrench to un bolt this hidden bolt.
----------------------------------------
Part 5 removing the Door panel. This is for the passenger side the driver side is exactly the same except instead of removing two screws under the handle, the handle on the drivers side you lift up the carpet inside the handle and unscrew 2 screws there.
Ive seen other instructions on the net. While they helped they if you follow them to the T your going to run into problems.
Tools: Big Philips head, normal Philips head. big flat head with some tape wrapped around it so it doesn't scratch or puncture your door. 14mm socket wrench.
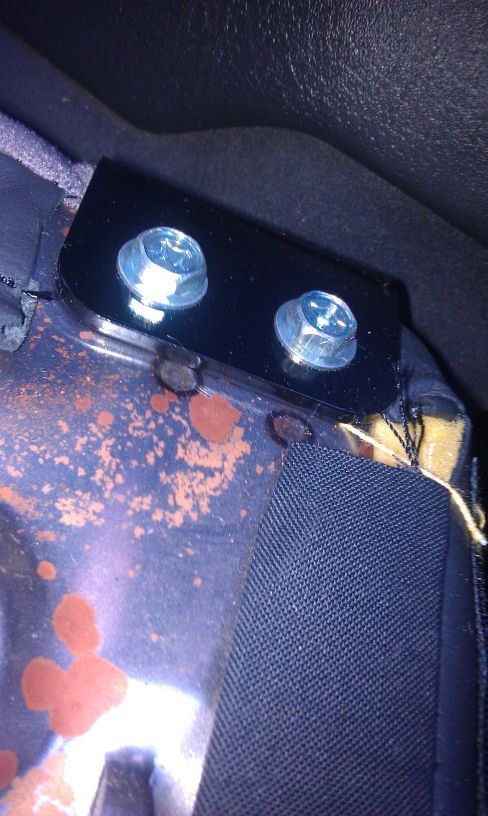
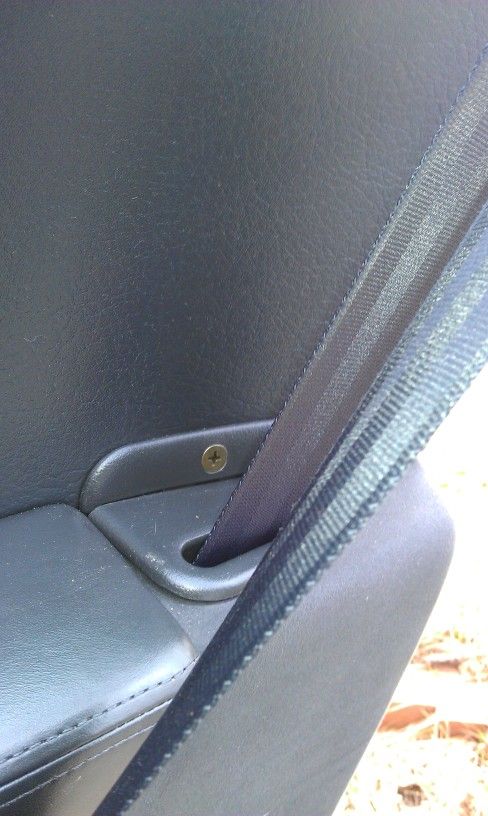
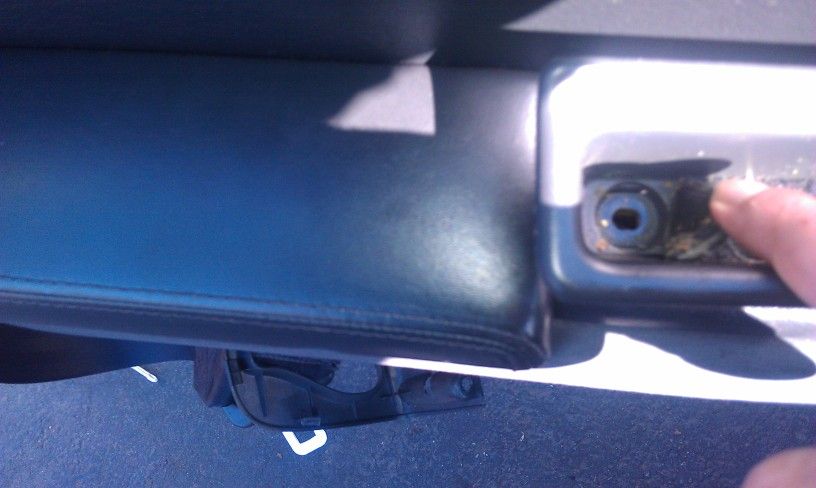
1. Roll the window down half way. outside side of the door on the seat belt pillar pop the black cap. Unbolt the bolt inside with a 14mm. Careful not to drop the bolt inside...I dropped mine inside and tomorrow im going to have to fish it out the door.
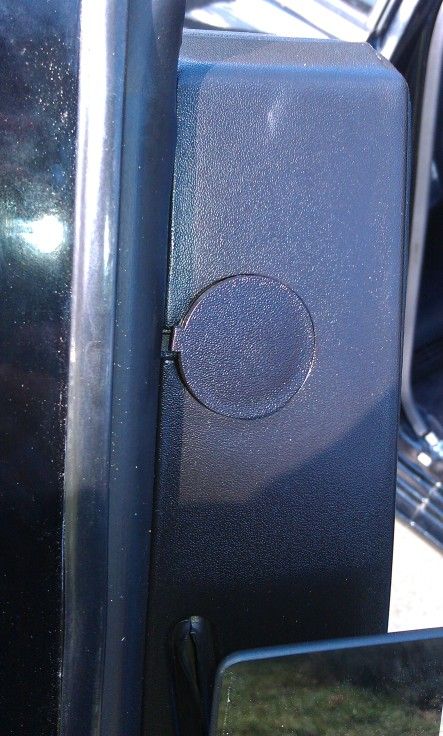
2. On the inside pop the plastic cover off the top of the seat belt mount and pull bolt you just unbolted. Be careful that all of the little washers and stuff on that bolt don't come off.
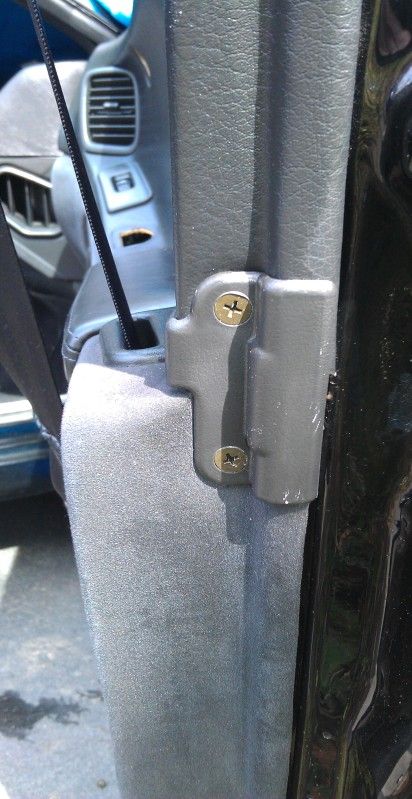
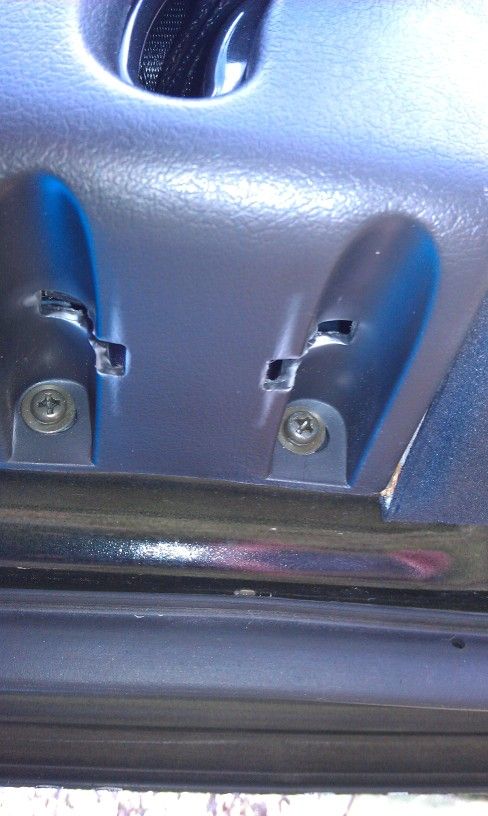
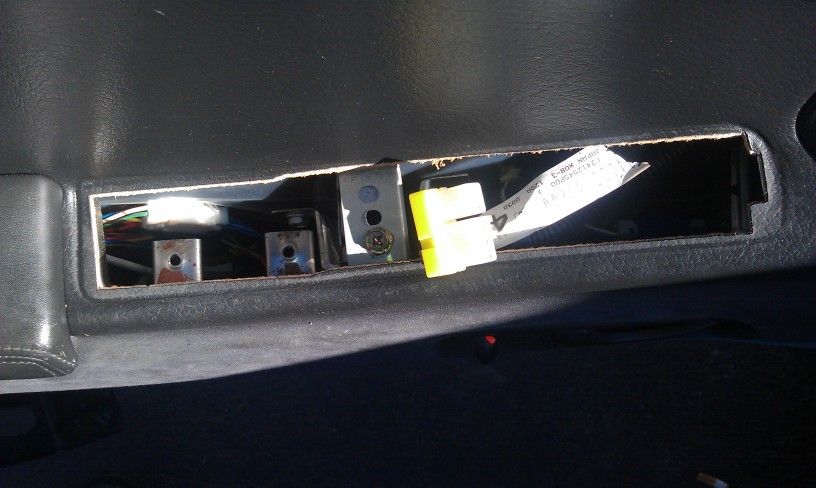
3. take off that plastic panel now and unscrew the 2 screws under there.
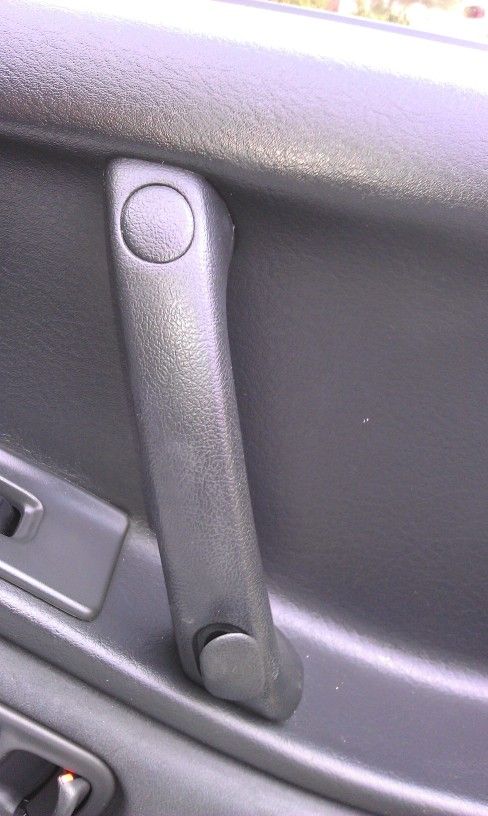
4. pry the two rubber/plastic covers out of the inner door handle, this is the big screw driver screws in here. and unscrew them.
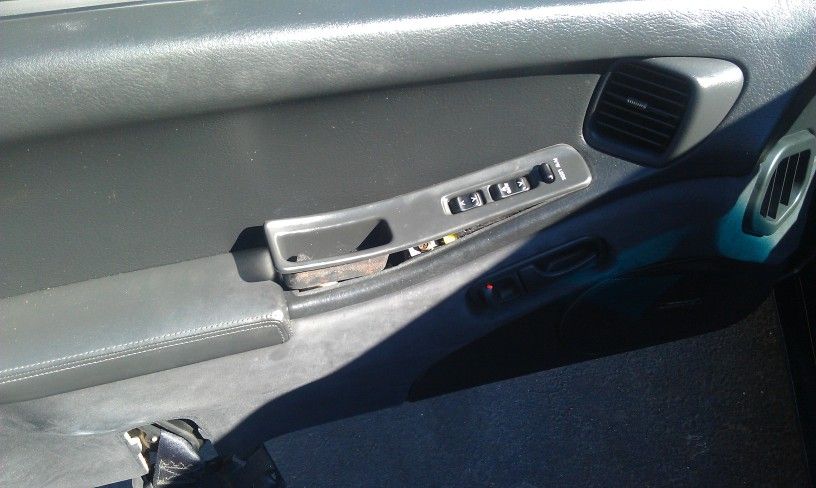
5. grab the front of the window control cover. the front is the part facing the windshield. slide it back and gently pry it up from the front side. and disconnect it. one thing to remember is the widow controls are wired in a circuit so if the switch isn't plugged in you cant roll up the window from the drivers side.
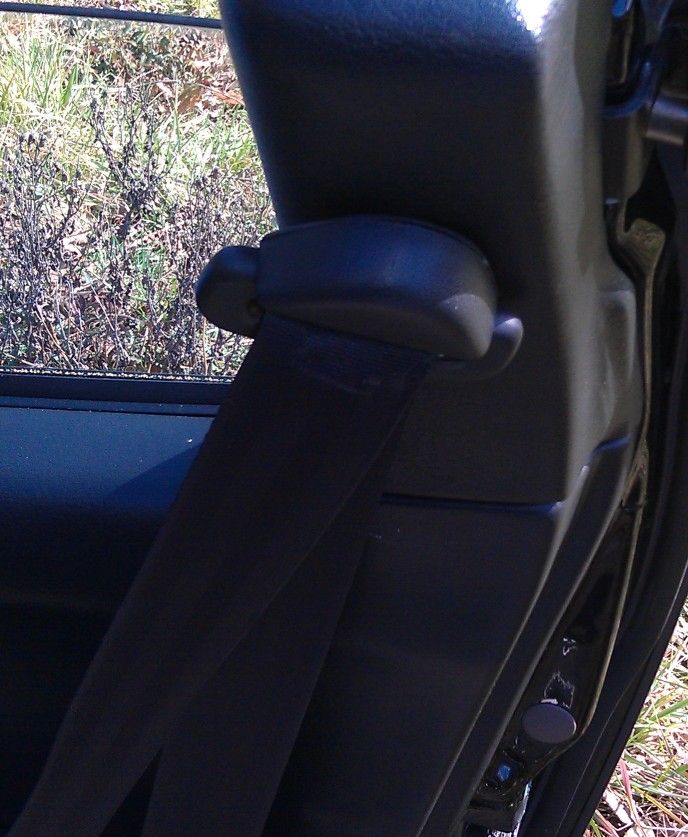
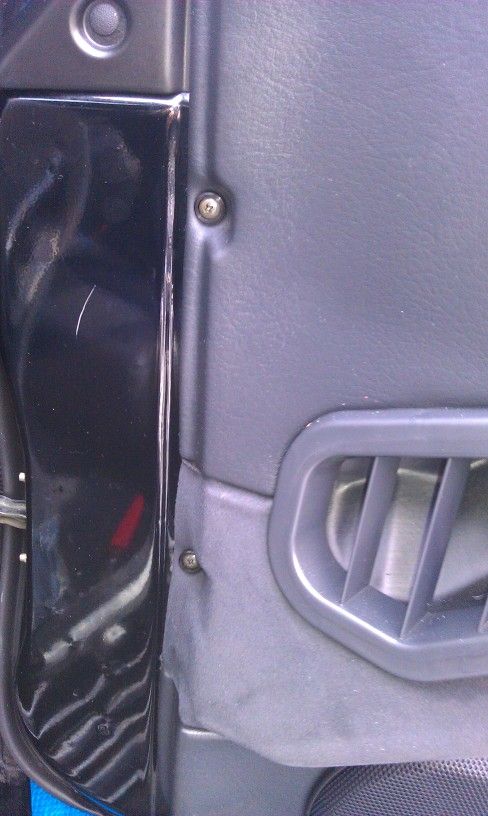
6. unscrew the cover where the seat belt goes into the armrest in 3 places.
7. where the seat belt goes into the door unscrew the screws under it. gently pry off the cover.
8. unscrew the screws around the left side of the door panel.
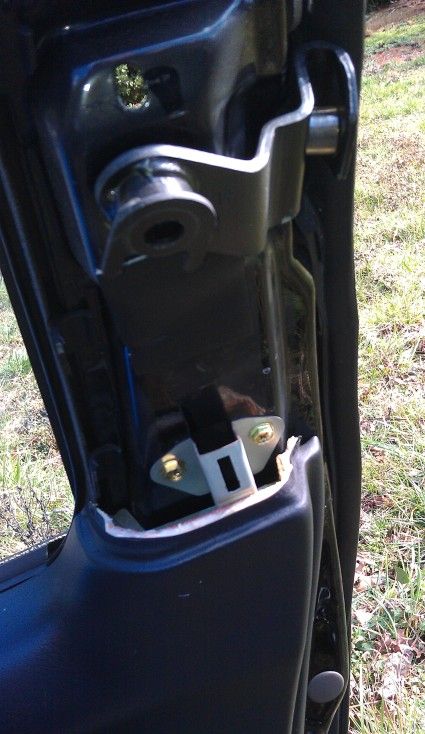
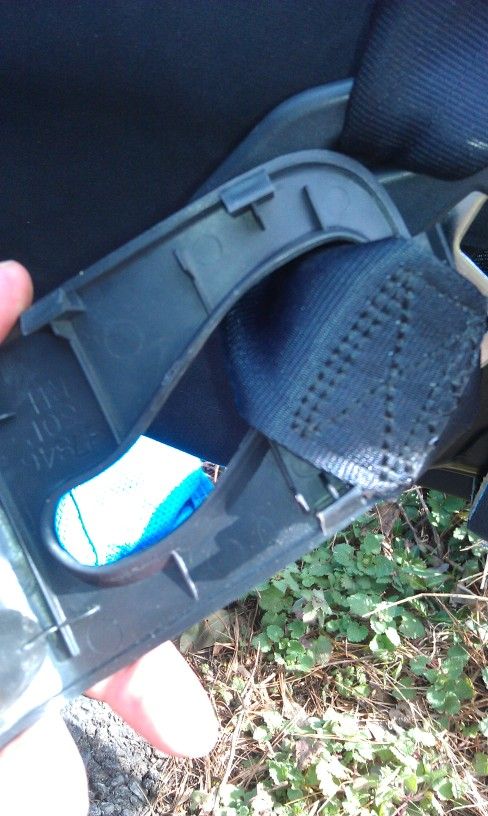
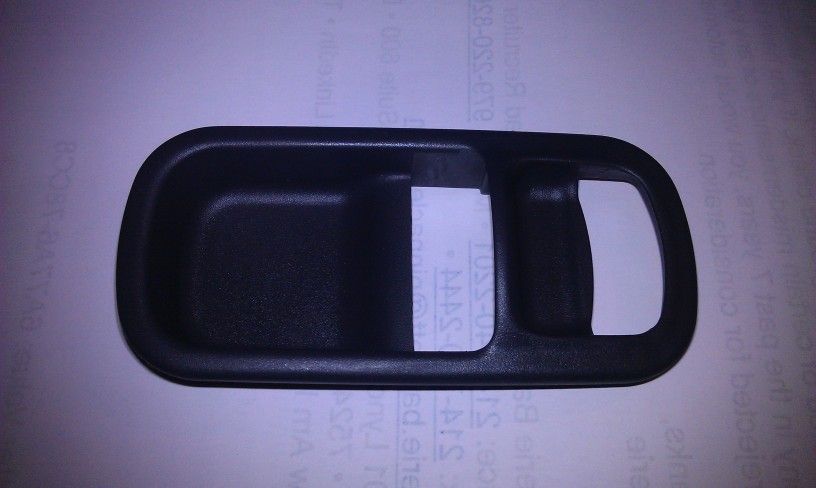
9. this part was the hardest for me... Becasue it didn't come off easy and I was worried I would break something. You have to take the inner door switch cover off. Here is a picture of the actual piece you have to pry out for reference so you know what you are dealing with. Other instructions I found said you can just wiggle it out Bull... You have carefully and gently stick a flat and fat width wise prying tool in and pry it out. I recommend examining the picture I provide and using that as information as to how and to best get the piece off and again be careful at what you are doing.... Do not he man it.
Its snapped into those rectangular holes inside the door. There is no way you can unsnap them from the inside.
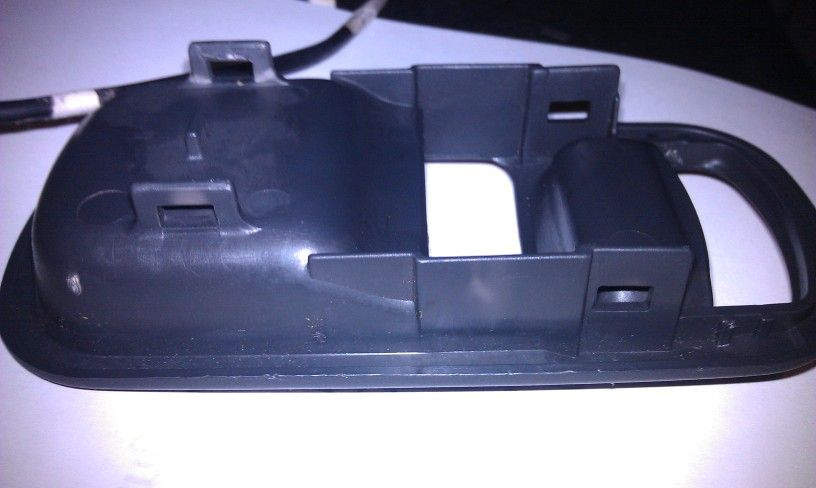
10. Last part I read some other instructions that said just pull to unsnap the snaps I advise from doing this. The snaps are glued to the fiber composite door and will tear your door, and then you will have to repair the door panel and glue the snap arms back on.. Not a big deal but the damage could be big or small.
What I recommend you doing is look at the picture I took it shows the location of the snaps pull the panel in those places if it doesn't unsnap easy. Look inside while your pulling the door find the snap then wedge a flat head screw driver between the snap and the metal door and pry the snap loose do this for the 5 snaps.
11. now unless you didn't follow these instructions the door panel should come right off pull out and lift up to lift the top out of the widow seal.
--------------------------------
Drivers side door instructions. Same as the passenger side except 3 differences.
1. pry up carpet inside handle unscrew 2 screws 1 each side.
2. From the rear side the side normally facing the rear of the car. Push towards the front like this --------->
then pry up.
3. unscrew hidden screw.
4. follow passenger side instructions.
What will be covered.
Wiring and best practices.
Proper disassembly on panels.
where to run cables through the firewall,
How best to run wires through the car.
Removal of the Bose System and swapping for speaker brackets.
Using the Hatch Glass Antenna.
Best place to put amps.
etc etc etc... There will be more things to add as I think of them.
Reserved********