

Overview:
I'm sure every 240sx owner has considered upgrading their brakes to the much popular z32 and q45 brakes.
However, another option are the brakes from the 1993-1997 Infiniti J30. The J30 and Q45 rotors share the same part number and the J30 calipers are just slightly smaller than the Q45's.
Difficulty: ***
Time: 2-4 hours
Cost: less than 300sx brake upgrade in most cases
Tools:
- 10mm, 12mm, 14mm, 19mm, and 5/8 wrenches- 12'' channel locks- 21mm socket with socket wrench or breaker bar- 1/2'' metal drill bit - drill with 1/2" chuck
Materials:
- J30 brake calipers, brackets, and rotors- (3) 1/2" x 1" bolts with nuts - Bottle of brake fluid- Bottle of brake parts cleaner - Bottle of rust treatment- Oil pan or something to catch brake fluid- WD40
Procedure:
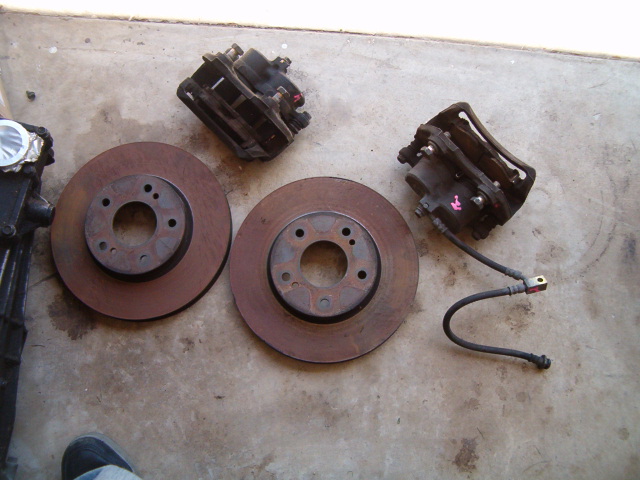
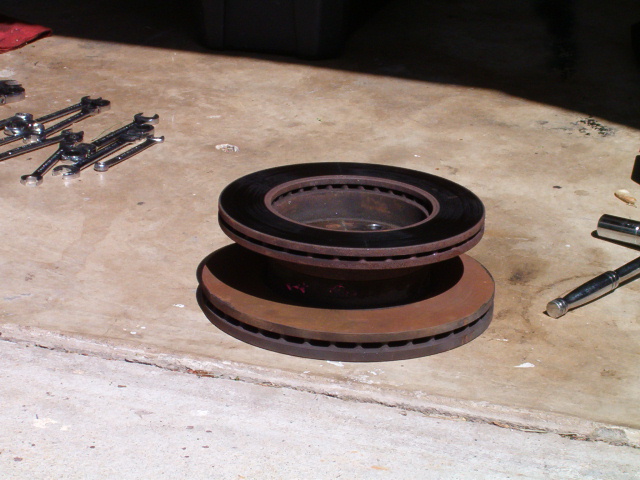
Pic of the J30 rotors and calipers:
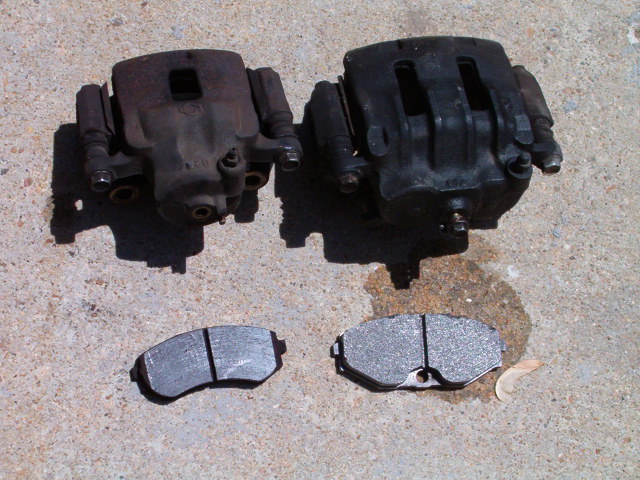
Check out the s13 calipers on the left and the J30's on the right. HUGE difference.
First off of course jack up the car on whatever side you wanted to do first. Use the 21mm socket and remove the wheel.
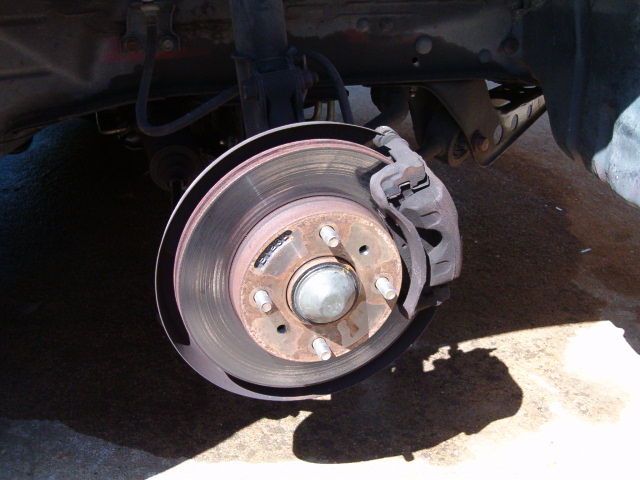
Here a pic of the stock s13 brake setup.
Make sure your brake fluid is full. Now use the 12m wrench and remove the banjo bolt from the back of the caliper. Brake fluid will spill out so use something to catch it. The fluid will continue to spill out at a slow pace so check on it throughout the install.

Now using the 19mm wrench remove the 2 bolts top and bottom from the back of the caliper bracket. Remove the whole brake assembly and rotor.
With everything removed you come across the splash guard. The J30 rotors are too big for the splash guards. You can either remove the whole thing by taking off the hub, or take a hammer to it. I opted to use a set of metal cutting shears and cut off the 90 degree lip on the splash guard. After that just use your hands and bend the thing inwards towards the engine bay. I'm paranoid about rust so I sprayed the cut edges with some rust treatment.
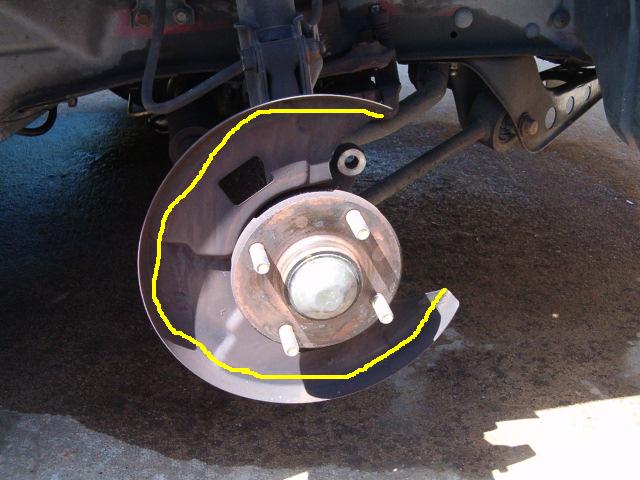
pic of the splash guard after cutting it:
Next are the rotors. The problem is that the s13 rotors are 4 lug and the J30's are 5 lug. Those of you who are not able or uncomfortable re-drilling the holes can take it to a machine shop, should only take a day. I decided to do it myself. Take the 2 rotors and place them on top of each other, 5 lug on bottom.
The rotors are hub-centric so the center hole will line up. Now just rotate the rotor"4 lug" until one set of the stud holes line up and the 3 others have a solid surface to drill through. Take 1 of the 1/2'' x 1" bolts and bolt the 2 rotors together through the hole thats lined up. Using your finger run it around the lip of the center hole and make sure that they are flush.
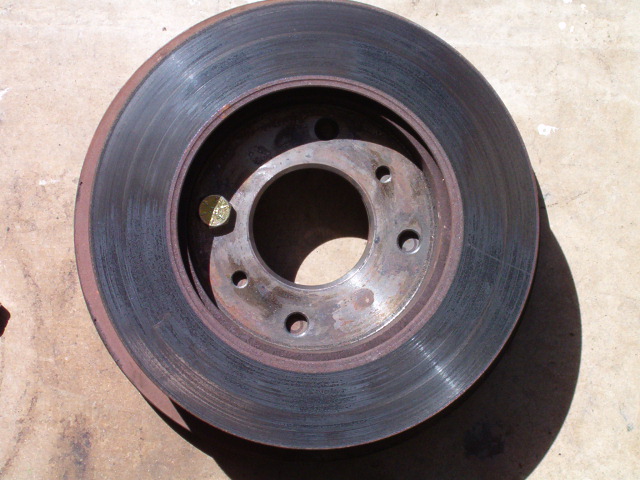
Pick a hole to start at and spray some wd40 on it, it'll help the drilling process. Using the drill and the 1/2" metal bit drill through the J30 rotor using the top hole as a guide. To help stabilize the the rotors and make sure they didn't move I stood on top of them while drilling. After the drilling the hole wipe away the metal flakes and use another 1/2" bolt and tighten it down. Check to make sure the rotors are still flush and repeat this process until all the holes are drilled.
The end of the stud by the hub is slightly bigger than the threaded part. If you look on the inside of the s13 rotor that the holes are tapered. I actually had a 35/64 bit and used it to to step down the new holes a little bit. You can also just use the 1/2" bit or Dremel and ream it out a bit too. Then spray hole with some rust treatment and go test fit. If it doesn't fit like it should in any way time for the machine shop. If it does bolt the rotor on using 2 lug nuts and spin it. If it grinds against the splash guard then just take off the rotor and bend the splash guard in some more.
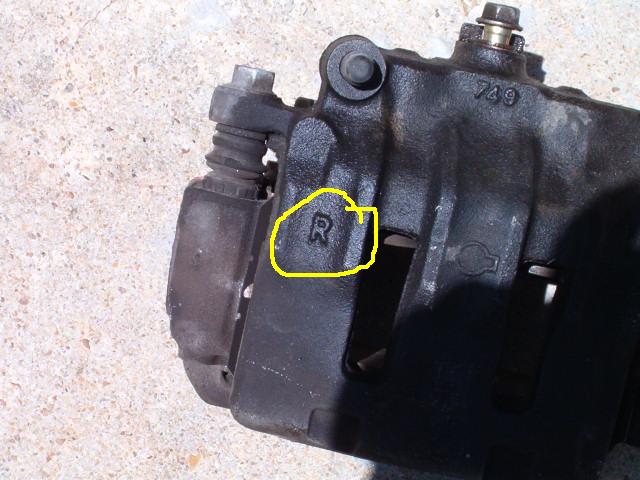
Now look at your j30 calipers and you'll noticed on the top of them they have marks on them "L and R". Obviously L is the driver's side and R is the passenger side. Use the according caliper to whatever side you're working on.
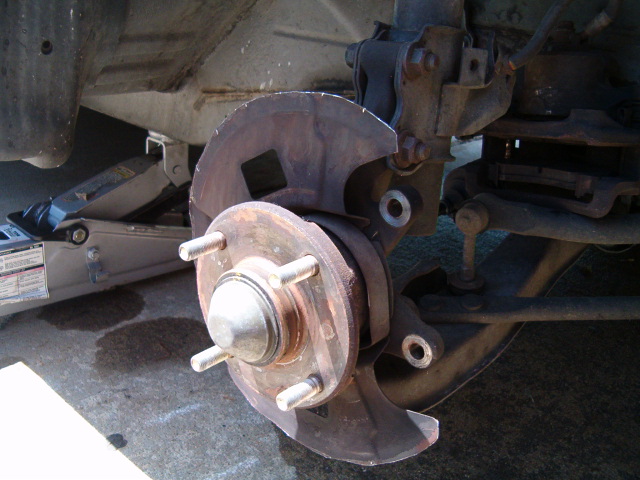
Mount the j30 assembly on the car using the 19mm bolts. And reinstall the brake line using the 12mm banjo bolt (don't forget the washers) to the new caliper. Now using the 14mm wrench remove the lower caliper bolt.
Loosen the bleeder valve swing the caliper up and using the channel locks and squeeze the pistons down as far as they go - watch out for the brake fluid shooting out. Install the new brake pads, swing the caliper back down, retighten the bleeder valve, and reinstall the lower caliper bolt.
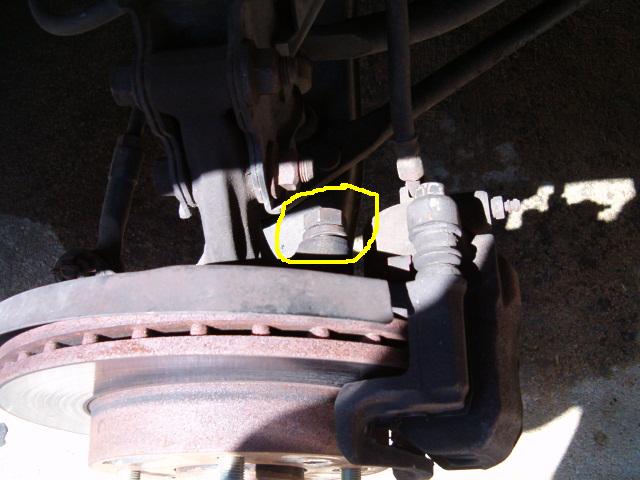
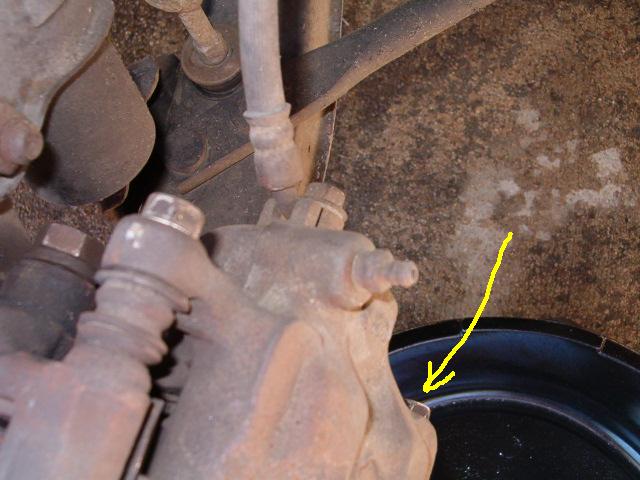
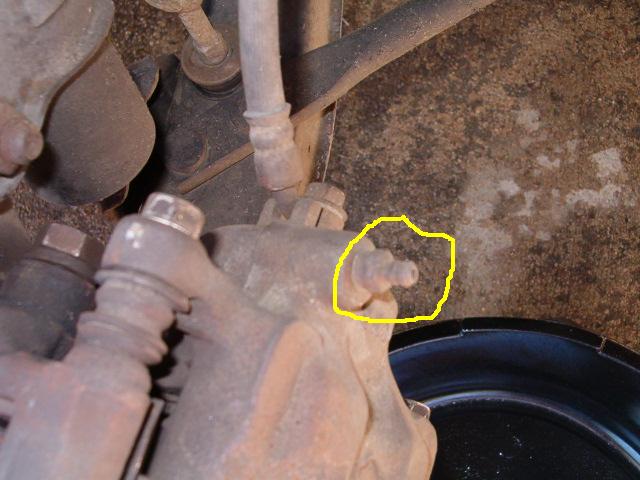
pic of the bleeder valve
Now get a friend, family member, whoever to help you bleed the brakes. Here's a pic of the new setup. Notice that since this is the passenger side that the caliper says R on it. If for some reason it doesn't say anything on it the bleeder valve should be on top.

Put the tire back on and repeat the process on the other side. To break in the new brake pads I did about 30 or so 30 mph stops with intervals between each stop.
Now go enjoy your new j30 brakes!