Hey gang! It's time I dip into the Sentra forums a bit. I'm building a ride I think you guys might like (or hate...depends on how hard core sentra you are).
I picked this little 4 door 1994 B13 Sentra up from another technician at my shop. At first, the alure of good gas mileage was all I wanted. Then, after looking at the MPG from the 1.8L and what I get with a VQ in my 240SX, I figured the 2 MPG difference between the two was well worth the 200 more HP I'll gain!!! The same rules apply to the Sentra that applied to my 240SX. The 3.5L weighs less than the 1.8L, but the transmission weighs about 25 lbs more. Custom things will need to be made, but the reliability will go through the roof. So a week or so ago I started on it. Money and a full time job keep me from getting it all done in a hurry, but here's what I've gotten so far.
Here she is. Ugly faded gold paint, peeling off like they all do.
Oh yeah, its not just a grocery getter....but a Grandma grocery getter!!!!
This is the front of a modified VQ30DE maxima cross member. It was from the 1995-2001 Maxima. It was too long in the front and back, when I first aquired it. I cut several inches off the front, and cut out the lower section where the cuts are visible. This was to remove a hump that was in the member and allow me to install a new piece of sheet steel. That piece is not in yet, but this is just a test fit. The second layer of steel will be welded in and drilled where the bolts are visible.
This is the rear of the member prior to welding. I cut about 3" out of it, reshaped the rear mounting portion and grinded the edges so it could be welded back to the member.
Here's the part that the rear bolts actually pass through. Doesn't look like much now, but if you plan to build one of these cars, this is the cheapest way to go.
Here it is welded and in the car. This is from the top, showing the welds across and some of them down.
Not exactly a row of nickels.....more like a knocked over pile of p0ker chips....but the penetration is good and the welds are clean (no slag or bubbles). I welded the underside of the two pieces too for added stiffness. It will all get painted once the motor is ready to finaly rest in the vehicle.
This is a shot of the test fit from the passenger side. The motor is a little high as the crossmember bushings are not installed...which will bring it down about 1". Once the bushings are in, the axles will have a better angle to the wheels and the shifter clearance will be better.
A shot from where the transmission will sit. This will be running a manual transmission so ignore flex plate on the engine now. I already have an 03 Sentra SE-R V-Spec 6 speed. I just need to get the VQ bellhousing for it.
A shot of the rear motor mount and bracket. The power steering pressure lines will get routed a bit farther back so no noise is transfered from the engine to the steering wheel.
This is the front motor mount and bracket. Is it really in the way of the radiator.....No, but it is VERY close. This will get straightened out when that time comes. The ides for now is to move the condensor and radiator forward about 2" allowing room for the fans. I will be making headers for this, so that frees up a lot of room. In FWD cars (as you guys know) there has to be adequate heat shielding in place between the exhaust and the radiator to keep things cool.
Here's an undershot. Things are tight, but not really posing any problems right now.
A shot from the rear. Oil pan clearance is good and shouldn't get any worse if the crossmember is lowered 1".
A shot from the front.
On the ground now. That's enough for today.
One other thing. This engine will torque, big time. So some stiff motor mounts and good mounting points are very important. The radiator support in this car is NOT suitable for this engine. I'm sure it would hold for a little while, but eventually it will bend, and create all sorts of problems. I am reinforcing the lower radiator support by welding tubes in the holes that I drilled for the front crossmember bolts. This will keep the support square which wil reduce its ability to crumple and flex. The nuts on top will get welded into place for the bolts to thread into (easier).
So that's about it for now. I do plan to run the 350Z ECM and wirring harness. It just makes more power. This means I will be installing drive by wire to this car. I'm more worried about getting the clutch pedal to fit right! I've seen some cool Sentra's built on here, so I don't think this one will be any special thing, but I bet it will be fun to drive!!!!
Till there's more to post.....later gang!
1994 B13 Sentra with VQ35DE (350Z motor)
-
SpecDRacing
- Posts: 351
- Joined: Mon Apr 25, 2005 3:36 pm

-
gadget1382

- Posts: 57
- Joined: Sat Jul 05, 2008 11:57 pm
- Car: 2x S12 Gazelle, 1. CA18det daily 2. Building VQ30det+t track car
- Contact:

-
SpecDRacing
- Posts: 351
- Joined: Mon Apr 25, 2005 3:36 pm
Re: (RED_DET)
Sure have......The drivers side axle will be this: (follow me here)
Outter shaft and joint from the passenger side of a Maxima (VQ30 is what I checked). Where that shaft meets the joint that is splined into the bearing (supported at the motor), the joint will be removed. The inner joint from another VQ axle will be used here. This gives the correct drivers side axle using an origional passenger side maxima axle. The passenger side will probably be another derivative of this setup.
That is all in theory and quick measurements, but looks like it will work. As for the hubs, yes, I'm going to use B15 hubs. Hopefully I'll have the parts in a few weeks. Then we can see if I'm right or not. In any case, whatever it takes, I'll get it figured out.
-
SpecDRacing
- Posts: 351
- Joined: Mon Apr 25, 2005 3:36 pm
Re: (SpecDRacing)
A tiny bit of good news. The maxima axle (95-01 VQ30DE model) fits the sentra six speed transmission. So axles are not limited to 03 and newer as I first suspected. I did do some research on the hub side of things and I see that the altima used a similar hub side spline all the way up to 2001. This is available in the service manuals under "service data and specifications" for the axles. Down side.....none of those vehicles ever came with a limited slip differential.
Difference inside the transmission when a LSD is present is a complete open passageway from one side of the diff to another. If you're ever unsure of your FWD differential, just remove the axles from the transaxle and look through the diff. If there is a pipe in the middle, that will be the pinion for an open diff, if its a clear shot through, with no pinion, its an LSD. Thats for Nissan anyway, I can't speak for other makes, but I am sure Toyota is this way too.
Difference inside the transmission when a LSD is present is a complete open passageway from one side of the diff to another. If you're ever unsure of your FWD differential, just remove the axles from the transaxle and look through the diff. If there is a pipe in the middle, that will be the pinion for an open diff, if its a clear shot through, with no pinion, its an LSD. Thats for Nissan anyway, I can't speak for other makes, but I am sure Toyota is this way too.
-
gregfarz78
- Posts: 735
- Joined: Thu Jan 10, 2008 5:28 am
- Car: 04 Honda S2000
97 Nissan Hardbody King Cab 4x4
09 Nissan Altima Coupe 3.5L
-
CentralFLSentraSE-R

- Posts: 61
- Joined: Tue Mar 11, 2008 1:50 am
- Car: 2005 Nissan Sentra SE-r
Re: 1994 B13 Sentra with VQ35DE (SpecDRacing)
WTF! Thats bad. I have been thinking about something like this for my b15. Can't wait to see more progress.
-
hbpignosePA
- Posts: 3481
- Joined: Fri Dec 01, 2006 6:07 pm
- Car: 90 240sx hatch (Jackstand Queen)
78 Datsun 280Z (RIP)
89 Toyota Cressida (Sold)
86 Nissan 200SX hatch (sold)
83 Nissan 280ZX turbo (parts car)
90 Volvo 240 (sold)
80 Toyota Cressida MX32 (new daily) - Location: Amish Country Pa
Re: 1994 B13 Sentra with VQ35DE (CentralFLSentraSE-R)
thats hella gangster dude
-
SpecDRacing
- Posts: 351
- Joined: Mon Apr 25, 2005 3:36 pm
Re: 1994 B13 Sentra with VQ35DE (SpecDRacing)
So, the 6 speed has been cracked open to prepare for the clutch housing installation. Plus, this was a used transmission and the outside looked horrible (surface rust and salt). Inside it looked very good. The syncros were nice and straight. No gouges, rough spots or missing teeth. The oil even looked clean. I don't know how many miles were on it, but I know they weren't hard miles. For $250, I think I did ok on the transmission. The clutch housing was ordered Friday at a cost of almost $300.00 (including axle seals and the side plug). I expect to have about $600.00 in this transmission when I'm done....but that beats even the best price on a locking 6 speed from the junkyards....cheapest I found there was $800.00 plus shipping.
So here's a few more pics.
This is the transaxle housing. It was way nasty when I got it. I scrubbed it with a steel brush and hosed it in acid. After that didn't get it clean, I used a cookie and a grinder (green cookie). That got it pretty clean, but made it look like a poor attempt to polish it. I can't have that, so I went with the good 'ol engine paint. Used "engine alluminum" for the color and sealed it up with a few layers of clear. Now I will have to paint the new clutch housing as well, or it will just look bad.
Here's the inside of the transaxle housing. Like I said, it was pretty clean. Basically, soap and water cleaned this up.
This is the QR clutch housing. I can't use this anymore, but I will need to get the differential side bearing race out and remove the main shaft bearing to install into the VQ clutch housing. To anyone doing this swap....be EASY getting the speed sensor out. All of nissans FWD's are horrible to remove the speed sensor if there is any sign of rust on the trans. This one was so bad I had to push it out from the inside to keep from breaking it.
Box'o'gears'n'stuff. Thats the guts of a 6 speed stuck in a Matic D box. I'll have to install these to the new clutch housing and measure all the heights. Cross that with the measurements taken from the case halves and calclulate the correct shims for the main shaft, input shaft and reverse shaft end plays.
Here's the helical diff.
So that's it for now. Like I mentioned, the clutch housing should be in Tuesday. Hopefully I can make a video of the reassembly and post it for all of you. It sounds hard to do this, and the end play part scares people. Hopefully I can make it look less difficult and give you guys one of the secrets to doing this swap. Later gang.
-
SpecDRacing
- Posts: 351
- Joined: Mon Apr 25, 2005 3:36 pm
Re: 1994 B13 Sentra with VQ35DE (SpecDRacing)
More developements! I'm stoked. My clutch cover housing came today. I didn't get to mess with the transmission much though. I started a timing chain/tensioners job on an 04 Maxima at 10:00 this morning, and if anyone on here has ever done one of those, you know how much of a pain that is. In any case, I was done by 5:00 and still had a little in me to play with the sentra. (which kinda lets me know, even though Im only 28, thats a long shot from 18, when t-chains only took 4 hours to do!).
So, here's where I'm at. I bolted the transaxle housing to the clutch cover housing with no internals in it to check fitment into the car. Two things amazed me. One, that my paint job of the transaxle housing matched the stock alluminum color of the clutch cover housing, and two, that the transmission will fit without modification to the frame rails. The down side is the drivers axle is going to be short, very short, so we will have to see about a combination...and if needed, I will have custom axles made.
The differences in housings are this:
This is the stock QR25DE clutch cover housing for any Sentra SE-R Vspec. It is very similar to the Altima clutch cover housing, but it has one more detent than the 5 speed (obviously) so this is Vspec ONLY.
This is the clutch cover housing for the VQ35DE engine from an 03 Maxima with locking differential. I dont think it mattered if it was locking or not when I ordered it. I will post the part number in the future, for anyone who needs it. This one was about $260.00 my cost, which will cost the average joe about $360.00 unless you have a business account or work for Nissan. It is not available through Infiniti. I can say that it comes with the differential side seal and the input shaft seal. I wish I had known that because I ordered those as well, and could have saved myself a few bucks.
Two bolts are holding the two halves together, but all of the bolt holes line up. Im happy the paint matched the metal, so that's one less thing to work out.
We installed this to the engine, and found that I was correct in assuming the engine would need to come down about 2". The crossmemeber is bolted directly to the car, without bushings or spacers, at this time. When the spacers and bushings are installed, I should get between 1.5" and 2" of drop, which will sit this transmission just under the arch in the drivers side frame rail (already there for the previous transmission).
So cool, a little more done, a lot learned! I did pick up an A/C compressor, P/S pump and the clutch/brake pedals this weekend ($75.00 at Pull-A-Part). That will get installed later one.
More to come.....
-
SpecDRacing
- Posts: 351
- Joined: Mon Apr 25, 2005 3:36 pm
Re: 1994 B13 Sentra with VQ35DE (SpecDRacing)
The PART NUMBER for the correct clutch cover housing (bellhousing) is this:
30400-8H810
This is from an 02-03 Maxima.
30400-8H810
This is from an 02-03 Maxima.
-
SpecDRacing
- Posts: 351
- Joined: Mon Apr 25, 2005 3:36 pm
Re: 1994 B13 Sentra with VQ35DE (SpecDRacing)
I started measuring for shims today. The endplay needs to be checked and corrected whenever any housing....well, any part for that matter.....is replaced. I only got to the reverse idler gear shaft. The shim on the shaft was 2.14mm, while my difference between the gears and the case was only 1.97mm. If I were to just bolt this together, with everything in it, I would be applying pressure to both sides of the housing where the reverse idler gear is. This is bad. 1) things get hot under pressure, and 2) no room for heat expansion. This means within a few thousand miles I would expect to hear a whining noise or worse, a crack in the case. I will have to order a thinner shim to correct this. Basically, with end play, the thinner the shim the greater the end play. The thicker the shim, the lesser the end play. I need to get another tool to get the correct measurements for the main shaft and input shaft, as they are too long for the one I already have (it was designed for auto transmissions). I guess that's all tonight. Later!
-
Sechsterlo
- Posts: 54
- Joined: Sun Apr 15, 2007 12:01 pm
- Car: 02 Nissan SE-R w/ Nismo Header w/out cat, Magnaflow catback, Nismo CAI & shift knob
Re: 1994 B13 Sentra with VQ35DE (SpecDRacing)
Whoa, this project looks awesome!
Queen City...as in Charlotte? If thats the case I hope to see this car rolling around sometime .
Queen City...as in Charlotte? If thats the case I hope to see this car rolling around sometime .
-
SpecDRacing
- Posts: 351
- Joined: Mon Apr 25, 2005 3:36 pm
Re: 1994 B13 Sentra with VQ35DE (Sechsterlo)
Sechsterlo---
You probably will, but won't notice it. Such a granny car could roll through a license check without being noticed. LOL I have been debating having it completely repainted white, to match my S13, and of course, doing the same color scheme on the engine as well (purple and chrome).
GOOD NEWS!!!!! The speed gear from the origional trans (in this case, automatic) fit perfectly into the 6 Speed transmission. Its the same length, depth and gear ratio (meaning, same number of teeth and diameter). I installed the speed gear to the transmission and set the differential in the case. I gave the diff a spin and measured the A/C current from the speed sensor, all was good, and well within specification....so, no worries getting a functioning speedo in this swap (unlike my 240sx!).
I am searching for a set of NX manual gauge cluster set if anyone has one.
-
Sechsterlo
- Posts: 54
- Joined: Sun Apr 15, 2007 12:01 pm
- Car: 02 Nissan SE-R w/ Nismo Header w/out cat, Magnaflow catback, Nismo CAI & shift knob
Re: 1994 B13 Sentra with VQ35DE (SpecDRacing)
LOL, Ill have to see the final product and keep my eyes open. Maybe listen for a giveaway in the exhaust note. Or if the granny car just plain takes off, that would be pretty noticeable.
-
SpecDRacing
- Posts: 351
- Joined: Mon Apr 25, 2005 3:36 pm
Re: 1994 B13 Sentra with VQ35DE (Sechsterlo)
LOL....that, I am sure it will do. LOL Just look for the 5 oclock shadow surrounding an ear to ear grin.
So I ordered my shims on Monday, and today they were supposed to be here. Bad news, one of them is on BACK ORDER with no release date as of yet. What a bummer. Im going to see if we can't "customer care" them (nissans way of getting things done a bit quicker). So once those are here, I will be making the video of the trans build up.
So I ordered my shims on Monday, and today they were supposed to be here. Bad news, one of them is on BACK ORDER with no release date as of yet. What a bummer. Im going to see if we can't "customer care" them (nissans way of getting things done a bit quicker). So once those are here, I will be making the video of the trans build up.
-
SpecDRacing
- Posts: 351
- Joined: Mon Apr 25, 2005 3:36 pm
Re: 1994 B13 Sentra with VQ35DE (SpecDRacing)
So more info on the swap. It's taking longer than I'd like, money is tight here lately. I did manage to get the transmission put together. If you are planning on doing this swap, be sure to allow time for obtaining the correct shims. One of the shims I needed to put this together was on back order for over a month! I didn't make the video I wanted to, I just wanted to get the trans put together. So it's finaly all together and ready to be installed into the car.
Few new tips:
The speed sensor from the old trans will fit, will give a signal, BUT does have a slightly smaller diameter than the newer speed sensor. I believe this will not last long, but we will see once it's running. If not, the newer speed sensor is of the same pulse generating type, so it will give the correct signal to my speedo, but the plug will just have to be changed on the wiring harness.
The service manual states, to select the correct shim for the input shaft, main shaft and reverse idler shaft, to subtract the height of the gears from the deptch of the case, then ADD endplay. This is assuming that by adding the endplay, it is written as a negative number. So basically, measure how far into the housing the gears will go (at the bearing, without the shim), and how deep the housing is from its mating surface, subtract the first measurement from the later, then SUBTRACT end play from that. Order the correct shim closest to the middle of the end play range. Example.
D = Distance D1 = hieght of bearing with shaft installed into clutch cover
D2 = depth of transaxle case to where the bearing sits (and shim rides)
Lets say D2 is 86 mm meaning the depth from where the transaxle case bolts to the clutch cover housing, to where the shim will ride is 86 mm.
Lets say that D1 is 84mm and this is measured from where the clutch cover housing bolts to the transaxle housing and measured to the top of the bearing on any given shaft.
D2 - D1 = 2mm That is the gap between the transaxle case and the bearing on that particular shaft.
Now, end play is 0.02mm - 0.09mm. To find the correct shim, you must subtract this from measurement "D" which was 2mm. So to find range you will need to be in, in order to get one shim, you subtract 0.02 from 2.0 giving you 1.98mm and again with 0.09 from 2.0 giving you 1.91mm. Now your shim list gives you shim sizes of 1.90mm, 1.94mm, 1.98mm and so on. You would select either 1.94mm shim or 1.98mm shim. 1.98 will be tighter, but as the trans wears out, this gap will increase slightly. I would use a 1.98 and sand 0.01mm off of it to get just on the tighter side of the middle.
So, thats it for now. I will be putting this in soon and hopefully getting more goodies to install.
The best part of this build is, there arent even that many people on NICO following it, so that means, there won't be many people on the street expecting it!!!!
-
Sechsterlo
- Posts: 54
- Joined: Sun Apr 15, 2007 12:01 pm
- Car: 02 Nissan SE-R w/ Nismo Header w/out cat, Magnaflow catback, Nismo CAI & shift knob
Re: 1994 B13 Sentra with VQ35DE (SpecDRacing)
Imagine the looks on the faces of all the local ricer kids when this ride effortlessly just walks away.
-
tristatesentra

- Posts: 168
- Joined: Wed Sep 05, 2007 9:39 pm
- Car: 2006 nissan sentra
- Contact:
Re: 1994 B13 Sentra with VQ35DE (Sechsterlo)
that sick man!!! vq on the b3 you gotta post up videos of that whip
-
s14derrick
- Posts: 1322
- Joined: Thu Jun 19, 2008 12:09 pm
- Car: 1995 nissan 240sx
- Contact:
Re: 1994 B13 Sentra with VQ35DE (SpecDRacing)
this looks like a monster sleeper waiting to happen

-
SpecDRacing
- Posts: 351
- Joined: Mon Apr 25, 2005 3:36 pm
Re: (magoo1)
Hey gang, back again....(finally)....
So its been slow enough at work that I could take some time to try and fit this transmission in. Well guess what???? IT FITS!!!!
Its a bit tight on the drivers side, so that will need some "massaging" with the BFH. The stock mounts for the transmission will be very close to bolting right in. The engine t-cover mount is going to be some work. Anyway, the passenger side axle will clear the rear most motor mount with no problem (as it should). The engine still needs to come down a bit, as I have not made the spacers for the crossmember yet. I'm just excited that I was able to get this in! I have pulled the dash to start work on the shifter cables, drilling and installing a clutch pedal, and cleaning out the heater core and evaporator cores as they have decades of grime in them. Remember, you breathe whatever goes through your heater core and evap core, so if you can, when rebuilding a car, clean those so you can be sure there isn't anything growing in there (and if a cars sits long enough, stuff can grow there!!!).
So here's a few pics!!
There it sits. Bolted up and ready for mount fabrication. There is no clutch in this. When that time comes, there is a real possiblity that I might have to pull the entire drivetrain to install the clutch.
From the side.
From the other side.
Dash pulled.
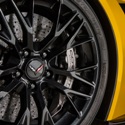
This pic is just because I'm happy how they turned out. This is a 350Z wheel on my 240SX that I painted today. I think it turned out pretty good. Not related, but I think this paint scheme would look just as well on some Sentra SE-R 17's.
So thats it for now.
Later gang!
So its been slow enough at work that I could take some time to try and fit this transmission in. Well guess what???? IT FITS!!!!
Its a bit tight on the drivers side, so that will need some "massaging" with the BFH. The stock mounts for the transmission will be very close to bolting right in. The engine t-cover mount is going to be some work. Anyway, the passenger side axle will clear the rear most motor mount with no problem (as it should). The engine still needs to come down a bit, as I have not made the spacers for the crossmember yet. I'm just excited that I was able to get this in! I have pulled the dash to start work on the shifter cables, drilling and installing a clutch pedal, and cleaning out the heater core and evaporator cores as they have decades of grime in them. Remember, you breathe whatever goes through your heater core and evap core, so if you can, when rebuilding a car, clean those so you can be sure there isn't anything growing in there (and if a cars sits long enough, stuff can grow there!!!).
So here's a few pics!!
There it sits. Bolted up and ready for mount fabrication. There is no clutch in this. When that time comes, there is a real possiblity that I might have to pull the entire drivetrain to install the clutch.
From the side.
From the other side.
Dash pulled.
This pic is just because I'm happy how they turned out. This is a 350Z wheel on my 240SX that I painted today. I think it turned out pretty good. Not related, but I think this paint scheme would look just as well on some Sentra SE-R 17's.
So thats it for now.
Later gang!
-
Sechsterlo
- Posts: 54
- Joined: Sun Apr 15, 2007 12:01 pm
- Car: 02 Nissan SE-R w/ Nismo Header w/out cat, Magnaflow catback, Nismo CAI & shift knob
Re: (SpecDRacing)
Awesome to see some progress.
The wheel paint looks sharp to. What kind of paint did you use for that?
The wheel paint looks sharp to. What kind of paint did you use for that?
-
VQpwrdSpeCV
- Posts: 3
- Joined: Wed Nov 12, 2008 5:35 am
- Car: 02 Nissan SpecV
-
SpecDRacing
- Posts: 351
- Joined: Mon Apr 25, 2005 3:36 pm
Re: (VQpwrdSpeCV)
The paint is run of the mill Rustoleum. Three coats primer, wet sanded, then 3 coats gloss white, then 3 coats clear....which will again need to be wetsanded (the entire wheel) and then clear coat the whole wheel twice and then....you guessed it, wetsand with 2000 grit.
The ECM will be from a 350Z as will the wiring. This should be good for an extra 20-25 HP over the Maxima ECM (non EGR). The wiring won't be a problem. I've installed VQ35's in many different vehicles. Just a week ago, I got one running in a Datsun 240Z. Also, I'm happy to install NATS, wouldn't want anyone taking this thing when I'm finished!!!
I just ordered the B15 clutch pedal, master cylander, shift assembly and control cables today. Hopefully I can start on that this weekend.
Re: (tachoek7)
Cool swap..
We've covered the B15, extensively, when it comes to this swap, but, I've never messed with the B13 or B14 chassis in terms of VQ development (yet).
Travis
We've covered the B15, extensively, when it comes to this swap, but, I've never messed with the B13 or B14 chassis in terms of VQ development (yet).
Travis
-
SpecDRacing
- Posts: 351
- Joined: Mon Apr 25, 2005 3:36 pm
Re: (Trav4011)
B15 swaps are cake. The wiring is already all there. The connectors are 99% the same. The evaporative emissions components are all there, the steering angle sensor is there, the ABS control unit and meter amps are all there. Its simple. Just re-pin a few connectors and you're up and running complete with emissions legal engine operation. The rest is fabrication of motor mounts to the engine. It's definately a process, and its more than most would tackle at home.
I will be installing NATS, BCM and the ECM to ths car. This requires the use of DTC's to stop the logic process of the ECM to determine what systems are functioning and which ones aren't. By using what's known as a normality code (having it stored) for any given system, I can use that to my advantage. This will cause the ECM to determine that any further testing of that system is irrelevant, therefore ignoring other items that pretain to that system. Basically, what I'm saying is that I use codes that normaly would be bad, as a tool to keep the vehicle out of fail safe.
The B15's are wicked with this swap! Glad to see them, just looking to get this B13 going.
Return to “Sentra Forum / Infiniti G20 Forum / Pulsar / NX Forum”